
Contrary to what some may believe, dinners around here are mostly decidedly unfancy.
A few nights ago, it amounted to Japanese fried rice (made from this packaged seasoning mix I became immediately addicted to while living there and now happily buy from nearby Arirang – an amazing resource for Korean and Japanese ingredients in the Beltline), some quick pickles I made from shaved slices of cucumber and, inevitably, a fistful of pickled ginger. Yes, somewhat shamefully, that nearly electric pink, aspartame-sweetened kind.
Gari, the Japanese word for pickled ginger, is part of the family of tsukemono (pickles) that pretty much only appears when served up alongside a plate of sushi. The slightly spicy, tangy thin slices of ginger are supposed to be eaten between the different types of nigiri or sashimi as a plate cleanser. (Not on a piece of sushi, please and thank you.)
The odd thing is that, for years, I hated pickled ginger. I’d ignore the lump of it sitting next to my sushi rolls when I’d go out with my friend Michelle. This actually worked out well for her because she loved the stuff and then would get to eat both of our portions.
And then, at some point, I must have tried it again. And discovered I loved it. And starting to find myself asking people if they are planning on eating any of the thin slices of puckery, hot, palate-cleansing gari. I take whatever they don’t want.
It has now become a full-fledged addiction.
While traditionally served with sushi to cleanse the palate, I basically now consider it a condiment when eating various things with rice.
When I make those Szechuan Green Beans, I add pickled ginger. That teriyaki trout with quick pickles? Yup, I add a nice pile of gari to that. When I get sushi takeout, I order extra. (Though, blissfully, Zipang believes in a healthy heap of it for their takeout orders; when I ordered extra from there once, it was too much even for me, though I stored the rest in the fridge and it was gone within a few days.)
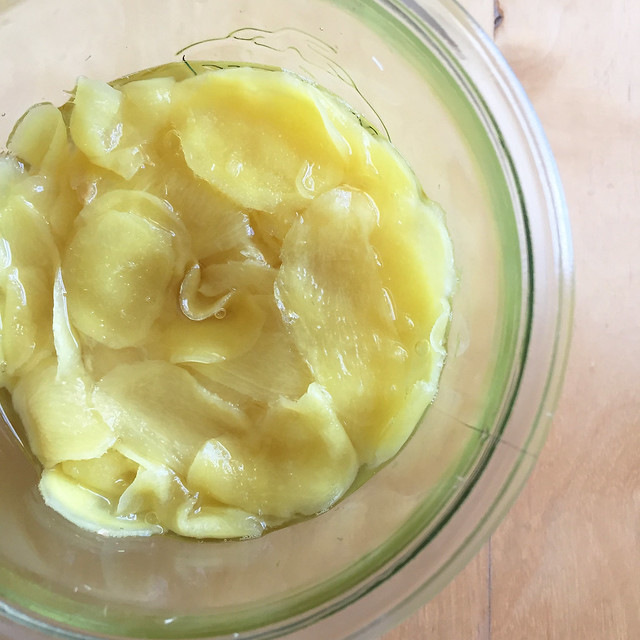
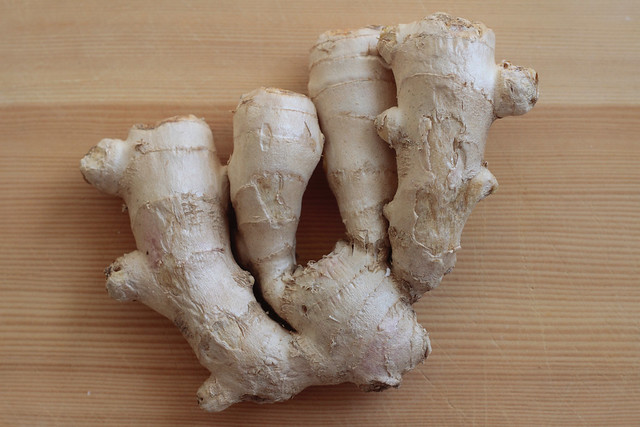
Ideally, gari is made with new ginger, which is milder in flavour, has a thinner, paler skin and is tipped with pink, giving it a blush tinge when pickled. (That’s what the dyes in the store-bought versions are trying to mimic.) The season for young ginger is short, though, so most of us have to make do with older ginger, which is spicier and makes for a yellow colour when pickled. If desired – I was too lazy and not all that bothered by the colour this time – throwing a sliced radish or a tiny bit of beet to the pickling liquid will lend it all a nice pink hue.
I looked over a number of recipes to try to find one that sounded like it would get me the right combination of slight heat and tang and sweetness, and was surprised to find so much variety in the methods and ingredients. Some called for salting and/or boiling the ginger to cut the vivid heat of older roots, others just suggested slicing and brining. Some had very low quantities of sugar, which would make the ginger much more acidicly pickled, others had so much it almost sounded like candy.
In the end, I cobbled together a couple of versions.
I’ve eaten half the jar already, so I think it’s safe to say I’m pretty happy with it.
Pickled Ginger
- 10 oz ginger
- 2 teaspoons salt, divided
- ¾ cup vinegar
- ½ cup sugar
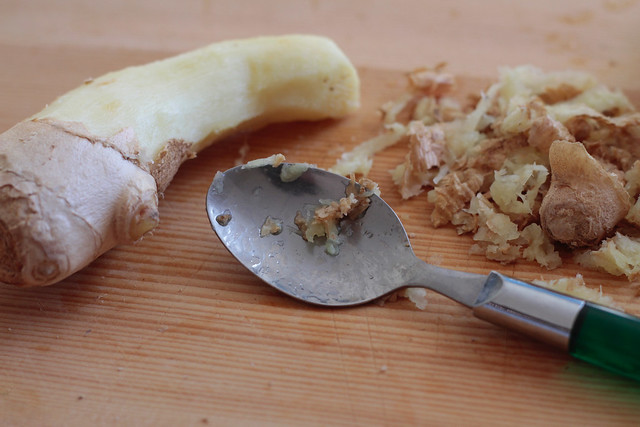
Using a spoon, scrape the skin off the ginger. A knife can be used to cut off any knots.
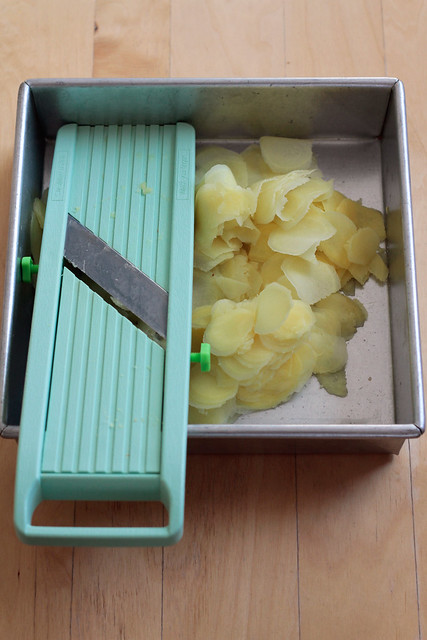
Set a mandolin on the thinnest setting – testing with a couple of slices of ginger to make sure you still actually get a slice of the root – and then position it in a baking pan or dish. This keeps the mandolin from moving around (safety first!) and also keeps all your ginger slices in one place.
Slice all the ginger as thinly as possible.
Spread it around the pan or baking dish so it’s mostly in one layer. Sprinkle over 1 teaspoon of the salt and give it all a bit of a toss so it’s fully mixed. Set aside for about 10 minutes.
While the ginger is curing in the salt, set a medium pot of water over the stove and bring to a boil.
Once the water is boiling, add the ginger slices to it and let them cook for a few minutes. This cuts down the spiciness of the ginger, so the cook time will depend on how spicy you want it. (I did 3 minutes and probably could have gone for 4.)
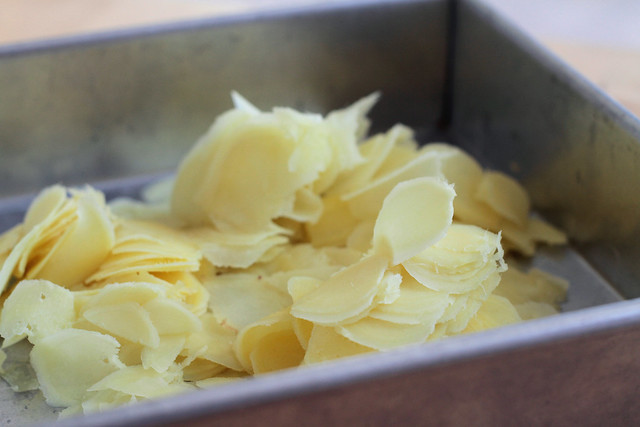
Drain the ginger slices through a fine-mesh sieve and spread them out, letting them drain completely.
In a small pot, add the vinegar, sugar and the remaining salt. Bring it all to a boil and let it cook for a few minutes until it has lost some of the really astringent vinegar smell.
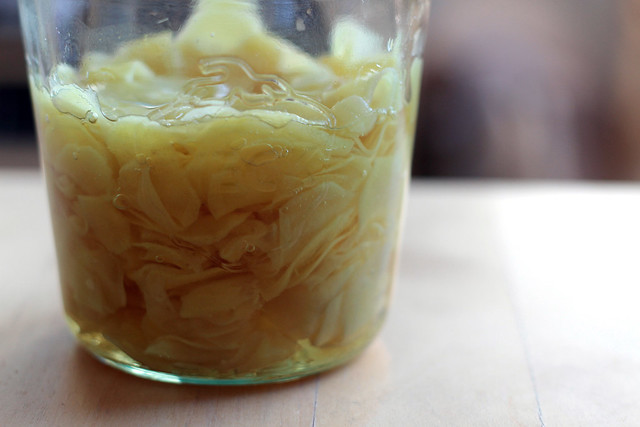
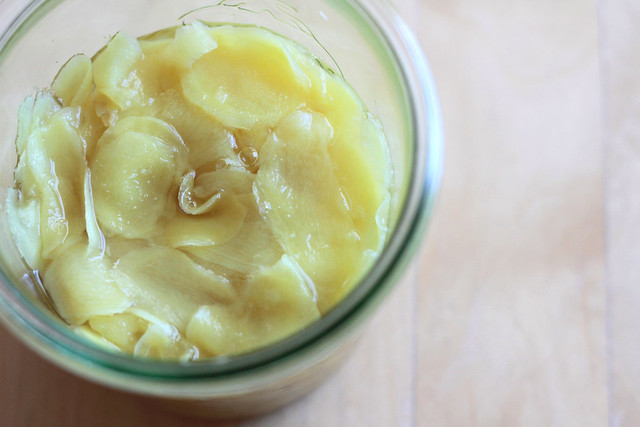
While it cooks, add the ginger to a clean jar with a lid.
Pour over the brine, tamping down the ginger to make sure it is submerged in the liquid. Place the lid on the jar and let cool for a little while before storing in the fridge.
Now the hard part: wait about 48 hours before cracking the jar open to enjoy the ginger. (You can eat it sooner than that, but the extra time will really infuse the ginger with the brine.)
As a pickle, it should last a while in the fridge without danger of going bad. That is, if it even lasts long.
Mine was half gone in just a couple of days.