Beef Bulgogi

I had never tried Korean food before I moved to Calgary.

There had been Thai and Vietnamese, Japanese and Chinese, of course. But in all my opportunities to eat Asian food, there had been no kimchee or bulgogi.

Beef Bulgogi II

And then a group of friends formed an ad hoc supper club where we would all go out for dinner on Thursday nights, typically for ethnic foods.

We dined on Indian and pho and then, finally, a Korean place where I had my first taste of beef bulgogi.

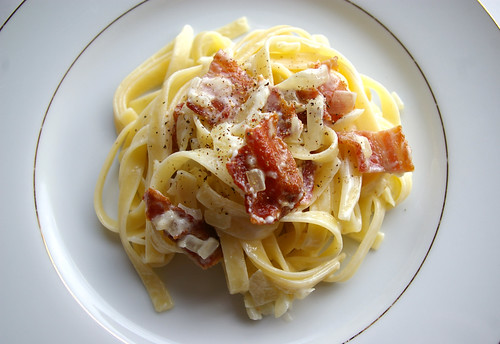
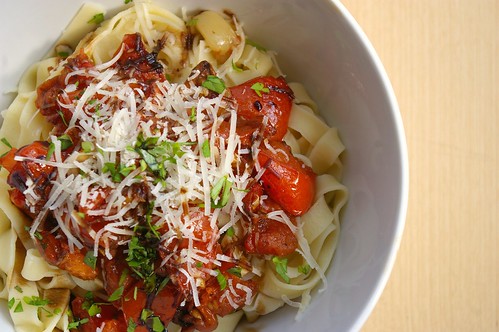
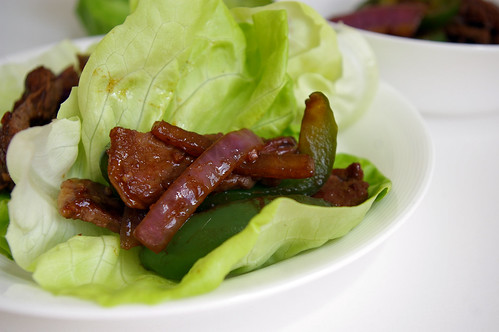
I didn’t know what to expect, but was in beef heaven by the time I took that first bite. The marinated short rib meat was almost as soft as butter, flavoured with ginger, garlic, soy and sesame. I wedged it into crisp, cold lettuce leaves and savoured each bite. (Or as much as I could, as it was so fantastic it was hard to remember to eat slowly.)

I went back a couple of months later and there was only one thing on the menu I wanted.

Later, I stumbled on a recipe in my oft-thumbed Everyday Food cookbook (Clarkson Potter, March 2007) for a version of beef bulgogi. Instead of the more traditional Korean short ribs, it called for thinly sliced rib-eye and it required no ingredients more exotic than sesame and chili oils and some staples found in most kitchens: brown sugar, soy, ginger, garlic.

Craving the taste again of that distinct mix of salty soy, garlic and the hint of sweet from the brown sugar, I thought it was worth a try.

The book now cracks open to that page, left slightly spattered by being set too close to the fry pan when cooking — the sign of a successful recipe.

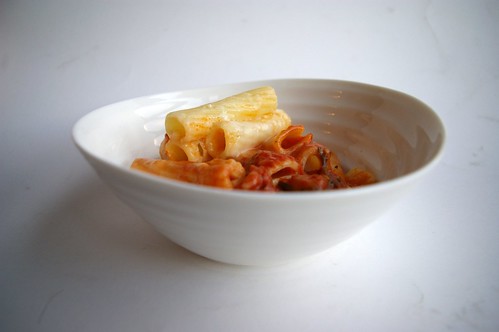
At home, the first time I tried this out, I couldn’t be bothered with the lettuce wraps; it seemed too fussy for eating in front of the TV. So, I just put a couple of scoops of it on cooked rice and ate it with chopsticks. The rice soaked up the extra sauce, making for a very satisfying and flavourful meal. (And the leftovers were a nice lunch at work the next day.)

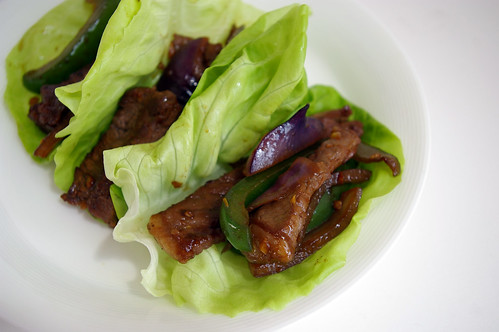
But I also like the idea of rolling up the beef and onions and peppers in soft butter lettuce, so this time around I did exactly that.

Beef Bulgogi I

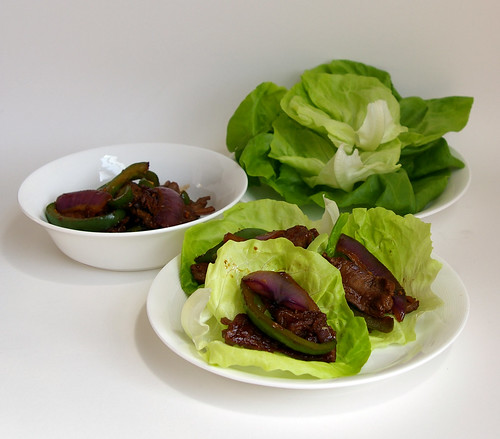
The leaves of butter lettuce (or Boston lettuce, as it is also known) are tender and pliable, making them a perfect container for the bulgogi mixture. The thin leaves also don’t interfere with the flavours and softness of the meat.

Either way, it’s a delicious and fast way to taste Korea.

And one I’ll come back to again and again.

Beef Bulgogi III

Beef Bulgogi

This recipe from Everyday Food calls for hot chili sesame oil, which I have never found in my grocery store travels. Instead, I use half sesame oil and half chili oil. In a pinch, you can use all sesame oil and a dash of red pepper flakes.

  • 1½lbs (750g) rib-eye steak, trimmed of excess fat
  • 1/4 cup (50 mL) soy sauce
  • 1½ tsp (7 mL) sesame oil
  • 1½ tsp (7 mL) chili oil
  • 2 tbsp (25 mL) dark brown sugar
  • 6 garlic cloves, minced
  • 1 tbsp (15 mL) finely grated, peeled fresh ginger
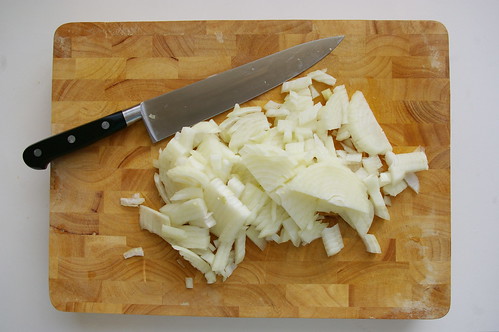
  • 2 medium red onions, halved and cut lengthwise into 1-inch (2.5-cm) wedges
  • 1 green bell pepper, seeds and ribs removed, sliced into ½-inch (1-cm) strips
  • 4 tsp (20 mL) vegetable oil, divided
  • 1 small head Boston (also known as butter) lettuce

Freeze the beef for 20 minutes; transfer to a clean work surface. Slice diagonally (across the grain) into 1/8-inch (3-mm) thick strips.

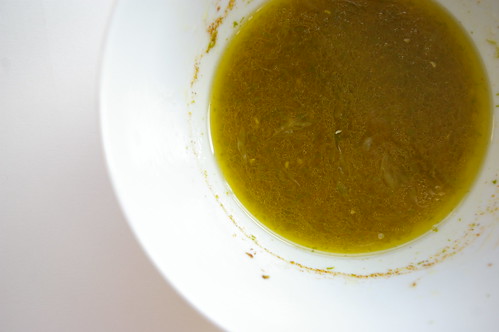
In a small bowl, whisk together the soy sauce, sesame and chili oils, brown sugar, garlic and ginger. Place the onions and peppers in a small bowl; toss with half the soy marinade. Toss the steak in the remaining marinade; let stand for 15 minutes

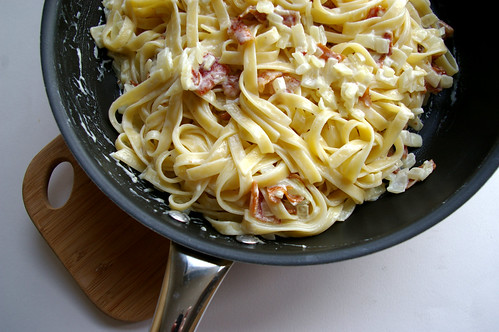
Heat 2 tsp (10 mL) of the vegetable oil in a large non-stick skillet over medium-high heat. Add the onions and peppers; cook until softened, about 5 minutes. Transfer to a plate. Wipe the skillet clean with a paper towel.

Heat the remaining 2 tsp (10 mL) vegetable oil over high heat. Cook half the meat, turning often, until browned, about 2 minutes. Transfer to a plate. Cook the remaining meat. Return the first batch and any accumulated juices to the pan; add the onion mixture. Cook, tossing, until heated through, about 1 minute.

To serve, roll up the beef mixture in lettuce leaves.

Serves 4.

This first ran in the Calgary Herald. For more recipes and food stories, check out www.CalgaryHerald.com/life.

Continue Reading

Pyrohy or Perogies

It started with an innocent tweet asking for suggestions on what to do with some leftover mashed potatoes. (A phenomenon I don’t think I’ve ever encountered. I’d just eat them straight-up with a little butter, but I digress.) I threw out the idea of fish cakes and a few others also had ideas.

And somehow from there Cheryl started talking about pyrhohy and the next thing I knew I had managed to scam an invite over for a lesson on how to make them at home. (Call them what you want, but I’m going to go with pyrohy here because that’s what Cheryl calls them and since she was kind — and patient — enough to teach me how to make them, I’m going to defer to her expertise.)

Pyrohy recipe

Anyway, I’ve long loved pyrohy though my only experience was the frozen kind from the grocery store. My first experience with homemade pyrohy was when my friend Colette had a group of us over for a Ukrainian dinner, serving up homemade cheese-and-potato dumplings and cabbage rolls made by her mom in Saskatchewan. They were fantastic and we all ate a lot that night. (There was kielbasa too and I provided a lemon tart, so we were all pretty stuffed at the end.)

Then an even larger group of us went to a fall supper at St. Stephen Protomartyr Ukrainian Cultural Centre where we supported the Knights of Columbus in their fundraiser by enjoying more homemade pyrohy, cabbage rolls, little meatballs in a dill and mushroom sauce and fried chicken. And then there was dessert . . . .

All this to say, it’s been a pretty pyrohy-filled fall. And that’s not a complaint.

So, a few Sundays ago, I drove over to Cheryl’s, met her two adorable kids and then got set up in the kitchen, along with Andree who had also been invited over for the lesson. There, in Cheryl’s beautifully lit kitchen (oh the photos I could take if I had that set up!), we became an odd little assembly line of workers. Cheryl showed us what to do and we tried to replicate it, occasionally with some success. And then we went home with two baking sheets full of pyrhohy ready to freeze or eat immediately.

So I did.

And they were delicious. (Due, I’m sure, in no small part to the onion I diced and gently fried in a generous dollop of butter.)

And, um, there are no photos of what they look like cooked because it was dark by then and the next time I ate them it was also dark and, well, now they’re all gone. Guess I’m going to have to make some more.

Pictures are after the recipe because they are a bit of a play-by-play of how to make pyrohy, so that made more sense.

Thank you again to Cheryl for the lesson!

Cheryl’s Pyrohy Dough

  • 5 cups flour
  • 1/2 teaspoon salt
  • 1 egg
  • 1/2 cup oil
  • 2 cups hot water

Mix together the flour and salt in a large boil. Whisk together the egg and oil, then add to the flour, mixing to combine. Add the hot water and mix again to form shaggy dough. Let rest for 15 minutes before using.

While letting the dough rest, begin forming the filling into small balls. This will make it much easier when it comes to filling the pyrohy.

To make the pyrohy, take a portion of dough and roll it into a log (like you did as a kid while using playdough), then cut into portions and roll those into balls. Using a rolling pin, lightly roll out the dough balls into ovals.

Place the filling in the centre of the dough oval and pull it over so the two halves meet each other. Gently pinch the dough sides together, trying to ensure no air is trapped inside. You can use your finger, curved slightly, to shape the pyrohy into their distinctive half-moons.

(I’m going to be honest here, I don’t think I’m explaining it well, but the pictures should help. Or you can check out Cheryl’s own post on making pyrohy here.)

We made straight-up mashed potato, mashed potato with bacon (put the bacon inside the mashed potato to keep it from perforating the pyrohy dough and causing a giant mess when you boil them) and sauerkraut. But, really, what you put inside is limited only (and forgive me for being this cheesy) by your imagination. Ricotta and a bit of fruit? Yes, that would be good. Mushrooms mixed in with potato? Of course. And so on.

Pyrohy dough

Pyrohy dough II

Bacon-potato filling

Shaping the filling

Filling

Preparing the dough

All the pyrohy bits and pieces

Shaping the dough

Ready to eat

Continue Reading

Peach, Prosciutto, Rosemary and Goat Cheese Flatbread

I bought a few peaches from the farmer’s market a few weeks ago, thinking they would be a great and simple addition to bagged lunches for work. And when they were perfectly ripe, they were fantastic. Sweet and juicy and just oh-so-peachy tasting. Then I got home from work one night and just wanted a salad. But, you know, not just a salad. And then a brainwave: what if I took the final sweet peach and combined it with some goat cheese, prosciutto and pecans.

Peach

Good god, that was a fine salad. Dressed in a light vinaigrette made with blood orange vinegar. I ate it with a few pieces of crusty baguette and it was a fantastic dinner.

It should come as no surprise that I made it again a week later when I had another group of peaches ripe and at hand.

But later, I thought I would like to try combining the bread and the salad by creating a flatbread that used the peach-prosciutto-goat cheese combination. This time with a little rosemary added in.

Is it cheating if I used some pizza dough I bought at the local Italian market? I’m going to say no. I can make dough, but when you’re at the market anyway and they have perfectly risen balls of dough for a little more than a toonie, I figure there’s no harm in taking shortcuts once in a while.

Got home, stretched it out on a baking sheet covered in a thin layer of olive oil and then just topped it with slices of peach, chopped rosemary, some ragged pieces of torn prosciutto and blobs of goat cheese. Into the oven and baked until golden, which took probably only 10 to 15 minutes, and it was good to eat.

It was delicious, though next time I may omit the goat cheese which, frankly, felt a bit like gilding the lily.

So this is less a recipe as much as a suggestion but one worth trying.

Flabread pre-oven

Peach, prosciutto, rosemary flatbread

Peach, Prosciutto, Rosemary and Goat Cheese Flatbread

  • ball of pizza dough or homemade focaccia/pizza dough, enough to cover a baking sheet
  • olive oil to lightly coat baking sheet – 1 to 2 tablespoons
  • one peach
  • 5 slices prosciutto, torn or cut into smaller pieces
  • 1 tablespoon rosemary, roughly chopped
  • 2 – 3 ounces goat cheese, crumbled OPTIONAL

Set oven to 500F. Stretch out dough on lightly oiled baking sheet. Top with sliced peaches, prosciutto, rosemary and goat cheese.

Bake until dough is golden, about 10 to 15 minutes.

Continue Reading

Quinoa Salad with Curry-Lime Vinaigrette

When Twitter first came on the scene, I wasn’t really sure what to do with it. I had Facebook and email and a blog already, so did I really need another way to connect with people? But I signed up anyway. And, as it has grown, I’ve come to see all sorts of benefits that I could not have previously imagined would come from this micro-blogging/communication/networking phenomenon. I’ve made new friends, found news stories and been given a few new recipe ideas.

This Quinoa Salad with Curry-Lime Vinaigrette is one of those recipes. A friend tweeted she had been thinking a lot about biryani-style quinoa dishes. I was curious and asked for links, which she happily sent along. I liked the idea of them, but neither of the recipes really grabbed me as a whole. Instead, I was more interested in picking and choosing the bits and pieces from each that were intriguing.

And I was more than motivated to try out something similar, having impulse bought a three-pound bag of quinoa from Costco. Seriously. Some people impulse buy gum; that makes a lot more sense.

Cooked quinoa

I’ve liked quinoa for some time, ever since trying it with veggies and a peanut sauce at the Coup. But the idea of cooking it was a bit intimidating. Various reports of it being bitter or improperly cooked were enough to make me shy away from it. And then I saw on the back of this bag that you could cook it in a rice cooker. Can I make a confession here? I don’t really know how to cook rice on the stove because a former boyfriend bought me a cooker when I came back from Japan (where I had fallen in love with the one in my little townhouse). Now that’s all I use. So, knowing I could make perfect quinoa in the rice cooker was enough for me to put the giant bag of the stuff in my equally giant Costco cart.

And then I got it home and didn’t really know what to do with it.

And here we are.

So, I made this salad with quinoa and carrots and zucchini, currants and pine nuts and sort of make-it-up-as-you-go-along dressing based on what I thought would be good with hints from the other two recipes I read. Tossed it all together and it was fantastic. So I ate some more. And then I tweeted it and people started asking for a recipe. So, I made it again last week and actually wrote down what went in this time.

I was at the farmer’s market and bought some oddly coloured carrots (because I also impulse buy strange vegetables) and used them in the salad because I thought they’d be pretty. They were. But the first time I made this I used straight up normal carrots and it was just as fantastic.

Funky white carrot

Purple Carrot

Oh, and here’s the best tip I’ve read in a while for julienning vegetables perfectly. First cut it in diagonal slices, then stack those and cut into sticks. So much easier and they always look fantastic.

Julienned Zucchini

This is great right away, even better if you can let it sit for a bit so everything has a chance to hang out.

Lastly, I’d say that the beauty of a salad is it is infinitely adaptable. Don’t like pine nuts? Use sliced almonds instead. Currants are great, but I bet diced apricots or a handful of dried cranberries would also be delicious. And so on.

Curry-lime vinaigrette

Quinoa salad with curry-lime vinaigrette

Quinoa Salad with Curry-Lime Vinaigrette

  • 2 cups cooked quinoa
  • 2 carrots
  • 1 small zucchini
  • 3 green onions
  • 1/2 cup currants
  • 1/4 cup pine nuts, toasted
  • 1 cup chickpeas, rinsed and drained
  • zest and juice of one lime
  • 1/2 teaspoon salt
  • 1/2 teaspoon curry powder
  • 1/4 teaspoon dried ginger
  • 1/4 teaspoon cinnamon
  • 1 tablespoon honey
  • 1/4 cup oil (I used olive because it’s what I had. Any veg oil will be great)

Cook quinoa according to package directions or using the “white rice” setting on a rice cooker. Set aside and let cool then place in large salad bowl.

Julienne carrots and zucchini, then slice green onions. Add to quinoa. Stir in chickpeas, toasted pine nuts and currants.

To make dressing, zest lime into a bowl, then add lime juice and honey. Whisk to dissolve honey, then add salt and spices. While whisking, slowly add oil to emulsify. Pour over salad and toss.

Continue Reading

Shaved Asparagus Pizza

I have a confession: I am incapable of kneading. I don’t know if it’s a character defect, a lack of practice or sheer laziness, but I cannot seem to take a mix of flour and water and yeast and make it into a smooth mass that balloons into a beautiful ball of dough. I end up with something shaggy and ragged and, well, downright ugly.

When it comes to pizza crusts, I have tried to persevere. There have been a few successes (and one colossal failure where I essentially made a giant, pizza-sized cracker), but I was typically undone by my less-than-stellar kneading skills.

And then, a revelation: no-knead pizza dough.

It was a circuitous route that brought me to a place where I realized I too could easily make homemade pizza dough.

It started with shaved asparagus pizza.

Shaved aspargus pizza IV

I stumbled onto the idea on Smitten Kitchen — a popular food blog written by the charming Deb Perelman — and was immediately enchanted. Warm chewy crust, melted cheese and thin shavings of asparagus that would roast on top? Yes, please.

But, as Perelman pointed out, she was not the only one to think this would be a fantastic combination. Indeed, Jim Lahey, who revolutionized bread baking with his no-knead concept, serves a high-end version at his restaurant.

Surely, Lahey must have a pizza dough recipe.

Yes, yes he does. And it doesn’t involve kneading.

Sold!

This time, the dough is intentionally shaggy and ugly. And, after a few stirs and some squishing together of the ingredients (I can’t even bring myself to call it kneading), it only wants to be left alone for two hours.

When finally baked, it has a pleasing crispness with just an appropriate amount of chew. Topped with a tangle of shaved asparagus that had roasted and intensified in flavour, along with the richness and slight salt of the cheese, this is something I could eat over and over.

Shaved aspargus pizza II

My first taste of asparagus came in Grade 10 when my boyfriend made me dinner one night and steamed some to go with steaks. I don’t remember much about that meal other than feeling overwhelmingly shy and excited to have a boy I liked cook for me.

Since then, I’ve grown to love the green-stalked vegetable and I’ll take it just about any way it can be prepared. Roasting, though, is my favourite because I like how it slightly caramelizes the tops and intensifies the flavour.

This pizza takes advantage of that, particularly because you shave the asparagus. None of the stalks shave perfectly, so you end up with varying thicknesses of asparagus strips, each of which cook slightly differently. Some will caramelize, while others will still retain a slight bite to them.

The beauty of pizza is that it is infinitely adaptable and this recipe is no exception.

While I used buffalo mozzarella cut into rounds and a sprinkle of Parmesan, I was tempted to throw on some bits of goat cheese as well and will probably try that next time. A squeeze of lemon would have been nice at the very end. Like it spicy? Toss on some red pepper flakes.

Lahey’s version uses some rather fancy cheese, quail eggs and shaved black truffles.

But even with slightly less-glamorous ingredients, this dish is delicious.

P.S. This crust was so good that I made another batch about four days later. Yes, I have a pizza problem.

Buffalo Mozzarella

Asparagus bunch

Shaved Asparagus

Asparagus shavings

Shaved aspargus pizza I

Shaved aspargus pizza III

Shaved Asparagus Pizza
Crust, from Jim Lahey’s My Bread

  • 3 ¾ cups (925 mL) bread flour
  • 2 ½ teaspoons (12 mL) instant yeast
  • ¾ teaspoon (3 mL) table salt
  • ¾ teaspoon (3 mL) plus a pinch sugar
  • 1 1/3 cups (325 mL) room temperature water (about 72F or 23C)
  • 1 to 2 teaspoons (5 to 10 mL) olive oil for pans

In a medium bowl, stir together the flour, yeast, salt and sugar. Add the water and, using a wooden spoon or your hand, mix until blended, at least 30 seconds. Cover the bowl and let sit at room temperature until the dough has more than doubled in volume, about two hours.
Using a bowl scraper or rubber spatula, remove the dough from the bowl onto a floured work surface. Gently form into a rough ball. Then divide the dough into two halves (to make his two 13×18 – 33×45 cm – pizzas or, do as I did, and divide into three parts for round pizzas) spacing them 4 inches (10 cm) apart, and cover with a moistened kitchen towel for 30 minutes.

Pizza, from Smitten Kitchen:

  • ½ pound (250 g) asparagus
  • ¼ cup (50 mL) grated Parmesan
  • ½ pound )250 g) mozzarella, cut into rounds, shredded or cubed
  • 2 teaspoons (10 mL) olive oil
  • ½ (2 mL) teaspoon coarse salt
  • black pepper to taste

Preheat oven to 500F (260C).
Using the rough end as a handle, hold the asparagus against a cutting board and use a vegetable peeler to make long strips. (I got anywhere between two to five shavings from each stalk depending on how thick they were or how easily the peeler went through the asparagus. They were also of varying thicknesses, which is fine.) After shaving, you should just be left holding the rough end, which can be discarded. Repeat with all of the asparagus.
In a bowl, toss together asparagus, olive oil, salt and pepper.

Roll out or stretch dough to create 12” (30 cm) round. (Lahey calls for it to be stretched by hand, but I used a rolling pin and did only a bit of hand stretching after getting the dough on the pan.) Brush olive oil on pan and transfer dough.
Sprinkle on Parmesan, then add mozzarella. Top with asparagus strands.
Bake for 10 to 15 minutes until crust is golden, cheese is melted and asparagus is roasted.

This story first appeared in the Real Life section in the Calgary Herald. For more delicious recipes, visit CalgaryHerald.com/life.

Continue Reading

Taste of Chicago

We have arrived for burgers — the kind that people talk about on the Internet long after having wiped the final crumbs from their lips. But we are distracted from the mouth-watering scent of smoke and beef by the hostess, standing with clipboard in hand and pen poised, telling us the wait will be about two hours.

Kuma’s Corner is a popular place. Glimpses at the burgers coming from the coffee-table-sized kitchen are enough to make me pause and then put my name down on the list.

After all, what’s waiting at one more restaurant?

Kuma's Corner - the burger

We’ve already lined up around the block for a hotdog, sipped drinks to pass time while hoping for space at the counter of a trendy hotspot, and waited on a ramp overlooking the dining area of another restaurant, mouths watering as another platter of chicken and waffles was carried by.

Chicagoans, it appears, know what is good, what they like and are willing to wait.

And so will we.

It begins at Hot Doug’s, a hotdog joint well outside of the downtown core, where the faithful begin to line up before the place opens at 10:30 a.m. When my friend, Suzi, and I arrive around 11, the queue snakes out the front door, around the corner of the building and along its brick facade. Inside, every seat is filled.

Hot Doug's

Hot Doug's - waiting

But the delay is productive. The man in front of us, a regular, gives us the low down on what dogs are worth the wait.

For him, the Linguica — a Portuguese pork sausage — will always be the first pick. It’s one of the myriad specials proprietor Doug Sohn has dreamed up for the restaurant featured on TV shows and numerous newspaper and magazine articles, including Bon Appetit and Saveur.

The Linguica is on the menu, along with a curry lamb sausage, a chicken one with cranberry and walnuts and the item I already knew we’d have to try: the foie gras and sauternes duck sausage with truffle aioli, foie gras mousse and fleur de sel.

This is no ordinary hotdog place.

Hot Doug's - menu I
Hot Doug's - menu II

A side of fries cooked in duck fat — Friday and Saturday only — to go alongside and we were ready to go.

The thick squiggle of saffron aioli and cubed chunks of Iberico cheese played against the spicy sausage flecked with red chili. It was the hands-down winner between the two, although the duck dog with the rich mousse was worth the excursion.

Hot Dogs at Hot Doug's

Sauternes - cross-section

Linguica - cross-section

We would have thanked our lineup buddy for the recommendation, but he vanished after gobbling down his two dogs and disappeared into the sunny afternoon.

Total wait time: 45 minutes

In the daze that often follows a decadent lunch, Suzi and I headed back downtown to wander Millennium Park and admire Cloud Gate — a.k.a. the Bean — the stainless steel sculpture designed by Anish Kapoor that reflects Chicago’s stellar architecture, sunny skies and tourists like a classy funhouse mirror.

The Bean II

The Bean III

The wait for Avec is estimated at an hour, but we’re allowed to give a phone number and we head next door to Meiji, a Japanese influenced restaurant, for a sushi roll appetizer and glass of wine.

Just as we finish up the phone rings and we wander back the 25 steps or so to squeeze into two seats at the counter that runs almost the length of the narrow restaurant.

Avec, a wine bar part of a series of successful restaurants in Paul Kahan’s stable, boasts a menu of homemade charcuterie, flatbreads cooked in the fire-burning oven, tender salads and other items all easily shared.

The decisions are tough, but we settle on the flatbread stuffed with tallegio cheese, a salad comprised mostly of prosciutto and apple, the signature dish of chorizo stuffed dates in a tomato sauce, and another dish or two.

From the counter, we watch the chefs bustle at the two wood-burning ovens and chat with the server who offers up a few nightlife recommendations, while pouring a glass of rose.

The prosciutto salad that mixes the salt of cured ham and sweet apples is a clear winner, but it is the crisp flatbread with its oozing cheese centre that I can’t stop eating.

Total wait time: 60 minutes

At Jam, we wait only 10 minutes for a free table for brunch. We have to chalk it up to good timing because after we sit down, the queue starts to stretch along the half-wall from cash register to front door.

Jam

The grey walls and concrete tables could feel industrial, but instead the air is cosy. From our table we have a clear view into the open concept kitchen — a tiny space that somehow fits at least three people co-ordinating plates and getting them out to patrons quickly and with style.

Amuse Bouche

The eggs benny with crisped pork belly and beet hollandaise is almost art with the black-salt-topped eggs and bright pink smear of sauce. The braised pork cheeks are not quite as attractive, but meaty and tender.

Eggs Benny at Jam

Steaming coffee

Total wait time: 10 minutes

The next morning, the waiting is a little more tedious as we join an almost two-hour line at Chicago’s Home of Chicken and Waffles. It is a Sunday, after church, and the view of gorgeous hats sprinkled among patrons at the tables is beautiful but not enough to take our minds off the time we have to kill.

Chicago's Home of Chicken and Waffles

Trays of hot waffles and crisp-skinned chicken passing almost under our noses seemed to only prolong the wait.

The first bite made it almost seem worthwhile. Apart, the fried chicken and waffles drizzled with maple syrup were good. Together they were a revelation. The hot, crisp chicken and the sweet tender waffles combined to become something better. Salt and sweet and crisp and soft. If I could have polished off the plate, I would have.

Chicken and Waffles

Total wait time: Two hours

We work it off by wandering the Art Institute of Chicago where I gaze, just as they did in Ferris Bueller’s Day Off, at Georges Seurat’s A Sunday on La Grande Jatte. I’m hypnotized by the pointillism, though that could be a soporific side-effect of breakfast.

A Sunday on La Grande Jatte

But by the last day, my patience for waiting has waned.

There is one final stop before the flight home: a burger joint that has received rave reviews online.

Kuma's Corner - Exterior

It’s a takes-no-guff place that has posted rules on its website, including no reservations, no music requests and “We will not ‘put on the game, bro.’ ”

When the hostess tells us the wait could be up to 2 ½ hours, we are prepared. And we’re learning. We put down our names and then head back out to hail a cab to take us to a nearby neighbourhood where we can window shop.

About 90 minutes later we’re back at the restaurant, hungrier than ever and only 20 minutes away from being seated at a tiny table near the equally tiny kitchen where staff are pumping out burgers like a machine.

Kuma's Corner Interior

Next to us, two young men are tackling the macaroni and cheese platter — a behemoth portion of pasta that can be topped with just about anything: prosciutto, caramelized onions, peas, sweet corn.

I, however, have eyes only for the burger and the two-hour wait has sharpened that craving, so I’m quick to decide on the “famous Kuma burger,” adorned with bacon, cheese and fried egg.

The patty alone is almost a softball of meat, slightly flattened. With the egg, cheese and bacon atop, this burger is a force to be reckoned with. When I attempt to cut it, the steak knife is buried to the hilt in the centre of the burger.

Kuma's Corner II

That first bite makes the wait dissolve into a distant memory.

The crisp waffle fries push it even further away.

Leftovers in hand — which will serve well as an inflight meal — we push out into the sunny afternoon.

There is nothing left to wait for, except the next trip back.

This article first appeared in the Calgary Herald’s Travel section. For more articles, visit CalgaryHerald.com/travel/index.html.

Continue Reading

Roasted Tomato Tart

(I am so proud of this post because it marks my first food article in the Herald’s revamped Sunday edition. My photo of my little roasted tomato tart was on the cover of the ‘mix’ section. For those that haven’t seen the new Sunday edition, that means the photo was the entire front of the ‘mix’ section. Yay! And a warning, this post is photo heavy! What can I say? I had a hard time paring it down.)

And now, back to the article.

I have an unabashed love of tomatoes. Meaty slices of them wedged between two pieces of buttered toast with a sprinkle of salt and pepper is my idea of comfort food. Roma tomatoes drizzled with a little balsamic vinegar and good olive oil make a simple side dish. And I love that burst of seeds and flavour that comes when biting into a plain cherry tomato.

Tomatoes II

I once bought a perfume called Tomato because it smelled like the aroma given off after brushing up against the green stalks of a tomato plant — that verdant scent of heat and summer. A few spritzes on my wrist could transport me back to being a kid and visiting my grandparents on one of the Gulf Islands where I sometimes helped in the garden.

Enclosed in chicken wire to protect it from ravenous deer, the garden produced sweet tiny carrots I ate straight from the ground after a quick rinse from the hose, grape vines that tangled their way along trellises, and rows of tomato plants.

I would use a plastic watering can to fill the coffee tins with water, from which my grandfather had removed the bottoms, nestled into the earth next to the plants — a trick that allowed the water to get right at the plant’s roots. And I would brush up against the stalks, filling the air with that distinct smell.

If any were ripe, I’d pull them sun-warmed from the dark green plants and eat them unadorned.

There is no taste like a vine-ripened tomato.

Tomatoes

But sometimes I like to roast them to intensify their essence and bring out more of their natural sweetness.

Baking halved Roma tomatoes in the oven with a few unpeeled garlic cloves is an excellent base for a good tomato soup.

Cherry tomatoes, when roasted, shrink and wrinkle to softish pouches of concentrated tomato flavour. I’ve made simple pasta sauces like this, topped only with shaved Parmesan and a sprinkle of basil or parsley if I have them lying around.

Roasted Tomato Tart-round

I thought recently — after seeing a clamshell package of multicoloured cherry tomatoes at the farmers market — that they would make a good savoury tart, particularly if paired with a hearty crust.

When I began imagining a roasted cherry tomato tart, I thought there was potential in adding a few handfuls of Parmesan cheese to the dough to bring out a nice nutty, rich taste when baked.

A little research led me to realize I wasn’t the first person to think of this, but I didn’t love any of the recipes I came across. I am by no means a pastry expert, but was willing to give myself a chance to experiment.

Using ideas from several different recipes, I decided to create a hybrid pastry that used cream instead of water and a cup of Parmesan cheese, finely grated and blitzed with the other ingredients in the food processor.

The dough was easy to work with and resulted in a golden crust that played nicely against the sweet, soft tomatoes.

(This would likely work just as well, though, with a regular pastry.)

Because cherry tomatoes are so juicy, there was a lot of liquid bubbling away as the tart was baking. (Truth be told, I was a bit nervous about just how much I could see as I peered through the oven door.) Some of it did cook off in the process, but there was definitely a thin layer of tomato liquor when I pulled the tart out. Some may call it soggy; I prefer to think of it as tomato-infused pastry. Either way, the base of the tart pastry was crisp and I liked the taste of it.

A sprinkle of basil gave it a nice fresh taste when added as the tart cooled slightly. (And yes, you’ll want to let it sit for a few minutes because cutting into the tomatoes will likely cause some to burst. Ouch.)

Chilled parmesan pastry

Pastry in tart dish

Tomatoes III

Tart pre-oven

Roasted Tomato Tart II

Tomato Tart and slice

Sliced Tomato Tart

Roasted Tomato Tart Sliced

Roasted Tomato Tart

  • 1½ cups (375 mL) flour
  • 7 tbsp (115 mL) butter, cold and cut into small cubes
  • ½ cup (125 mL) cream
  • 1 cup (250 mL) finely grated Parmesan
  • pinch salt
  • 1-1¼ lb. (500 to 625 grams) cherry or grape-sized tomatoes
  • 1 tbsp (15 mL) olive oil
  • 1 tsp (5 mL) salt
  • ½ tsp (2 mL) fresh ground pepper
  • 2 tbsp (25 mL) fresh basil, chiffonade (rolled like a cigar and cut into strips)

Add the flour and pinch of salt to the bowl of a food processor, then sprinkle the butter cubes on top. Pulse two or three times until the butter starts to break down, then add the Parmesan. Pulse until the mixture is crumbly and the butter is in pieces no larger than a pea.

Add the cream slowly while pulsing until the dough starts to come together. (It will bunch up and the food processor noise will change.)

Empty the contents onto a lightly floured surface and knead it a few times to pull the dough together.

Wrap in plastic and refrigerate for at least 30 minutes or as long as overnight.

Preheat oven to 325 F (160 C).

Toss the tomatoes in a bowl with the olive oil, 1 tsp salt and pepper. Set aside.

On a lightly floured surface, roll out the dough until it is about 1/3 inch to 1/4 inch (8 millimetres to 6 mm) thick. Press into tart tin (9 inch/23 cm round tin or a 14-inch/35 cm rectangular tin), stretching it as little as possible, and cut off excess. Arrange tomatoes in the tart tin.

Bake for an hour until tomatoes are soft and pastry is golden brown. Remove and let cool on a rack for 10 minutes. Roll basil leaves like a cigar and then slice them to make herb strips. Sprinkle over tart.

Serve while still warm.

Cook’s note: The amount of tomatoes will vary depending on how tall or fat they are and how well they fit together in the tart tin.

This story first appeared in the Real Life section in the Calgary Herald. For more delicious recipes, visit CalgaryHerald.com/life.

Continue Reading

Mac-Raff n’ Cheese

This is one of my favourite all-time childhood meals.

Mac-Raff n' Cheese I

I loved coming home to find a pot of Mac-Raff n’ Cheese bubbling away in the oven. My stepdad, Sean, would make it in our giant Corning Vision Ware pot (Do you guys remember those? The glass pots that came in a couple of colours? Ours was brown.), so if I peered through the oven door I could see the tomato sauce simmering up to mingle with the cheese-coated pasta.

For a long time I thought it was a creation of Sean’s, him being the head chef in our blended family. And what a chef he was! We were well-fed kids because that man knows his way around a kitchen. Lamb and mint sauce, chicken and rice with cream gravy, roast beef with all the fixings. There’s a reason I love to go home, even today. But when I was home a few months ago, my mum revealed that she was actually the mastermind behind the recipe.

She’s a Macdonald; he’s a Rafferty. So we were the Mac-Raff household. Hence the name of this dish.

It is a smart meal from a parent’s perspective. Quick, filling and can be assembled during the day and left at the ready to bake closer to dinner time when everyone is home and getting hungry. As an adult, I’ve also found it to be fantastic as a freezer meal. Since I generally make enough for a family of six (apparently, I am incapable of cooking for one or two like a normal singleton. But it’s OK because I love leftovers.) I have got into the habit of splitting the mac n’ cheese into two casserole dishes and jamming one into my freezer for later.

Mac-Raff n' Cheese III

I made it a couple of months ago when the days were still crisp and cold. Then it warmed up and I wondered if people’s appetites for hearty, homemade macaroni and cheese had waned, so I kind of put it on the back burner (nyuk nyuk). And then we had another, delayed, blast of winter. Oh! I thought, a second chance! And then, uh, well, let’s just say I lost track of time.

But I think this is a good recipe to have on hand. Although there is no official recipe. I, like my parents, kind of make it up as I go along each time depending on what I have lying around. But, fundamentally, it is macaroni and cheese with tomato sauce on the bottom that is all baked together in a casserole dish with a layer of cheese on top.

And it is far greater than the sum of its parts. Tomato sauce = good. Pasta doused in cheese sauce = good. That layer where the two mix = perfection.

I like to take a couple of big spoonfuls and top with some cracked black pepper, then eat it with a spoon.

But the real beauty of this is that it is infinitely adaptable. Don’t like the cheeses suggested? Use what you’ve got or what you like. Don’t have fresh herbs? Use a pinch of dried basil. Use your family’s own secret tomato sauce recipe for that matter. This is about using what you’ve got and experimenting with what you think it will taste good.

Tomato Sauce I

Tomato Sauce II

Grated Cheese

Pasta and Cheese

Oven ready

Hot from the oven

Mac-Raff n' Cheese II

Mac-Raff n’ Cheese

Tomato Sauce base:

  • 1 tablespoon olive oil
  • 1 onion, diced
  • 3 cloves garlic, minced
  • 1 28 oz. can whole tomatoes
  • 1 14 oz. can crushed tomatoes
  • 1 tablespoon balsamic vinegar
  • pinch sugar
  • 1/4 cup basil (or combination of mostly basil and some parsley), roughly chopped.
  • salt and pepper to taste

Heat oil in a pot over medium heat. When hot, add onion and saute until transluscent. Add garlic and stir for about a minute until fragrant. Using the can lid, drain the tomato liquid from the can of whole tomatoes into the pot. Let the liquid reduce by half and then add in the tomatoes. I dice them one by one in my palm using a basic dinner knife as I like small chunks of tomato. Another trick is to use kitchen scissors and just cut them up in the can. Add to the pot. Then add the crushed tomatoes. Stir in sugar and balsamic and let simmer until it has reduced and thickened. You don’t want it too thick because it will reduce further in the oven. Add salt and pepper to taste. Stir in herbs.

Macaroni and cheese:

  • 500 grams pasta (penne, macaroni or whatever tubular pasta you have sitting around)
  • 1/4 cup butter
  • 1/4 cup flour
  • 5 cups grated cheese, divided (I like a combination of asiago, cheddar, provolone and a bit of Parmesan; but I’m not afraid to use what’s already in the fridge.)
  • 3 cups milk
  • salt and pepper to taste

Cook pasta according to package directions. As the pasta boils, start on the cheese sauce. Melt butter over medium-low heat in a pot. When frothy and bubbling, add flour and mix with a whisk until well blended. Continue cooking for a couple of  minutes to cook out the raw flour taste. Slowly add milk, whisking constantly to prevent lumps. After it has thickened slightly, add 4 cups of the grated cheese. (I usually switch to a wooden or plastic spoon at this point.) Stir until melted, then add salt and pepper to taste. (If it is too thick, splash in a bit more milk.) Remove from heat.

Drain cooked pasta and return to pot. Top with cheese sauce and mix together.

Assembly:

Preheat oven to 425F.

Put tomato sauce in base of casserole dish. Top with macaroni and cheese and then sprinkle over remaining one cup of cheese. Bake covered for 45 minutes to an hour (depending on the size of your casserole dish). Remove lid and bake another 10 to 20 minutes until cheese is bubbling on top.

This is fantastic with a nice green salad.

Note: To make ahead, assemble the entire dish but stop just before baking it. Wrapped in plastic wrap and aluminum foil, this can be stored in the freezer. To cook later, let thaw and then bake as directed.

Continue Reading

Sautéed Chard over Polenta with Fried Eggs

I came into a plethora of eggs over the weekend.

Farm fresh eggs

I was at work on Sunday when a colleague came up to me.

Him: You like X, right?

Me: Oh yes, that’s how I get through the day sometimes. (In my best, most sarcastic and slightly confused voice.)

Him: Uh, OK. Well, I have some and I wondered if you wanted to buy some.

Pause.

Me: Wait, did you say eggs?

Him: What did you think I said?

Me: Um…..

Anyway, he had a few dozen from this totally organic, self-sustaining farm outside of Calgary called Thompson Small Farm. I’ve been searching for really good eggs since I moved here from Vancouver. I’ve found the ones here, even from area farms, to be pretty anemic looking and I’ve craved those with those golden-orange yolks that are so beautiful. So, the thought of finding those was enough to tempt me to buy two dozen. Plus, well, he said one of them was blue-green and that was just a bonus.

So, for the next two days I dreamed up things to make with these pretty eggs in their multicoloured shells. And I realized I wanted to do something that would really showcase the egg itself. Somewhere in my food-related Internet travels, I came across a post where someone had topped polenta with cooked greens and a poached egg. Since I have come to love chard mostly owing to this, I thought it would be cool to do a riff on that idea.

Polenta and chard with egg

For the most part, I made this up as I went along, taking inspiration from the chickpeas and chard entry. But I did a lot of research on poaching eggs (vinegar, no vinegar, swirl, boiling water, stainless steel etc. Who knew there were so many variations?), so that I would be fully prepared when it came time to make them. On the drive home, though, I realized I just wanted to do something fast and, in all honesty, I really didn’t want to dirty another dish. I figured frying the egg in the pan where I had just sautéed the chard would add even more flavour.

I have about three different grinds of cornmeal as I keep thinking I have the wrong one for polenta. In the end, I used the instant stuff. What? It was in my cupboard already and I’m desperately trying to clear space. Plus, that stuff is INSTANT and that makes for a very, very quick dinner. I followed the instructions and then just doctored it up with a bit of cream (er, yes, well, it was already in the fridge . . . .) and some butter and a nice pinch of flaked salt.

This was quick, easy and delicious. I loved the soft polenta, garlicky chard and the ever-so-slightly oozing egg yolk all combined into one. Maybe next time I will try poaching the eggs, but, in a pinch, this was just fine.

Chard

Egg

Blue eggshell

Chopped chard stems

Polenta and chard with egg II

I’d call these more guidelines than a recipe, so adjust as you see fit.

Sautéed Chard over Polenta with Fried Eggs

  • 1 bunch chard
  • 2 cloves garlic, minced
  • 1 tablespoon olive oil
  • 1/4 cup white wine (or water or chicken stock)
  • 2 eggs
  • butter
  • cooked polenta
  • salt and pepper to taste

Cook polenta according to directions, adding some butter/cream/salt/pepper/cheese or whatever else you desire.

Remove the stems from the chard, then dice finely. Chop leaves into thin strips and set aside. In a large frying pan, heat up olive oil over medium heat. Add stems and a pinch of salt. Saute until they start to soften, about five minutes. Add the garlic and cook for about a minute, until it gets fragrant. Add wine (or water or chicken stock) and then the strips of chard leaves. Stir, then top with a lid and cook for about five minutes until the leaves are wilted. Scrape out pan and add a small knob of butter to melt. When bubbling add eggs and fry to desired doneness.

Dollop polenta onto plate, top with chard and fried egg.

Continue Reading

Pasta with Shaved Brussels Sprouts and Pancetta

I eat one brussels sprout a year.

At Christmas.

Under duress.

Brussels Sprouts

It’s a family rule, though it punishes only me — the sole holdout in a family of sprout fanatics. With enough gravy to dunk the sprout in, I can power through the yearly ordeal.

This year, however, no one seemed to notice that my plate remained sprout-free. But it made me think: was there a way I could learn to love my vegetable nemesis? The short answer is yes.

The longer answer is yes, and it involves spaghetti and bacon’s Italian cousin.

Behold, Pasta with Shaved Brussels Sprouts and Pancetta.

Pasta with Brussels Sprouts and Pancetta I

Once I made the decision to try this recipe out, I made a shopping list. Somehow sprouts failed to make it onto the scrap of paper: it seems my subconscious couldn’t believe I really did want them.

At the Italian deli where I bought my pancetta, I wasn’t paying enough attention either. I think the idea was to use a couple of thickish slices of the cured meat that could then be sliced into matchsticks. My slices were thinner than regular bacon, so I just chopped it into small pieces. Considering thinner slices meant better pancetta distribution, I didn’t really see a problem.

Pancetta

I also didn’t notice the clerk was slicing up “hot” pancetta. But I kind of liked the kick of heat to this dish. If you like a little spice and can find hot pancetta, I say go for it. Otherwise, if you still want some heat, you can probably add a pinch or two of red pepper flakes.

The original recipe suggests using the slicing blade of a food processor to thinly slice the sprouts. The photo on the web-site shows lovely green pieces of sprout. I ended up with vegetable confetti. If you’re looking for pretty, I’d suggest trying the mandoline route. Otherwise, the food processor is fine.

While waiting for the spaghetti to finish cooking, I took a test bite of the sprout mix and couldn’t stop myself from eating more. Sure, any vegetable cooked with pancetta, pasta and pine nuts is probably going to be fantastic, but I really did enjoy the flavour of the sprouts.

Sauteed sprouts and pancetta

A quick saute with garlic and shallots, rounded out with just salt and pepper, brought a nice simplicity to the dish. And because the sprouts don’t cook for long, they were tender, not mushy.

Perhaps this is the start of a whole new, sprout-loving me.

Pasta with Brussels Sprouts and Pancetta II

Pasta with Brussels Sprouts and Pancetta IV

Pasta with Shaved Brussels Sprouts and Pancetta

From The Kitchn

  • 1 lb (500 g) brussels sprouts
  • 1 tbsp (15 mL) olive oil
  • 6oz (170g)pancetta, diced or cut into strips
  • 2 shallots, thinly sliced
  • 2 cloves garlic, minced
  • 1/4 cup (50 mL) chicken broth
  • 1/2lb (250g)spaghetti
  • 1/3 cup (75 mL) pine nuts, toasted
  • salt and pepper

Bring a large pot of water to boil. Season generously with salt. Trim the ends off of the brussels sprouts and remove the toughest outer leaves. Shred them in a food processor, using the slicing attachment, or slice them carefully on a mandoline or as thinly as possible with a knife.

Heat a large skillet over medium-high heat and add the olive oil. Add the pancetta and cook for about 5 to 6 minutes, until fairly crispy and cooked through. Clear some space in the middle of the pan and add the shallots. (If you don’t have enough room in your pan to create space, you can remove the pancetta with a slotted spoon and add it back in when you add the sprouts.) Cook for about 5 minutes, until the shallots are soft. Add the garlic and cook until fragrant, about 1 minute or so.

While the shallots are cooking, add the pasta to the boiling water and cook until al dente.

Add the brussels sprouts and the chicken broth to the large skillet, season with salt and pepper, and toss all of the ingredients together. (Go easy on the salt initially because pancetta can be quite salty.) Cook, tossing occasionally, until the brussels sprouts are tender but not too soft, about 5 minutes.

When the pasta is finished cooking, drain and add it to the skillet. You can add a splash of the pasta water (or more broth) if the mixture seems dry. Add pine nuts, toss everything together, season to taste and serve. Serves 3 to 4.

Continue Reading

Pasta Carbonara

I have had great need of comfort food lately.

And for me that often means cheese and cream and pasta. Emphasis on cream. Sure, throw bacon in there too. So, no, this is not going to be low-fat or healthy or in any way, shape or form good for you, unless you have a severe bacon deficiency. (And wouldn’t that be wonderful?)

This is a totally bastardized version of Pasta Carbonara. Yes, I sometimes make the real stuff. No, this isn’t it. Yes, it’s still good.

Pasta Carbonara

I’ve loved pasta carbonara since I was a kid when my grandfather would make it for me.

I like the contrast of the salty bacon and the slightly sweet onions and the smooth creaminess bundled with the slight chew of a wide, flat pasta. (Why do I always delay so long in writing blog posts. I’m killing myself right now, having eaten the last of this for lunch.)

You may notice that I put a pound of bacon in the ingredient list. I cook up a pound but can guarantee nothing near that actually makes it into the dish. A lot of bacon snacking goes on. I consider it part of the cooking process.

Oh, and I cook it in the oven. This may seem like a weird extra step, but it means I’m not standing around watching it cook in the pan (read: I can go mess around on the computer) and it makes relatively quick work when doing an entire package of the stuff.

Since I make enough for a family of six, I typically have a lot of leftovers. Let me offer you one tip when it comes to reheating: add a bit of milk or cream to the bowl/tupperware container. It will help steam and revitalize the noodles and sauce instead of frying it.

So, now that I’m drooling, I’m not going to keep waxing poetic on how good this is. Trust me. Make it. And don’t feel guilty about it. Sometimes life needs a bit of cream and bacon and pasta.

Diced onion

Bacon

Cream and Onions

In the pan

Pasta Carbonara

  • 500 gram package of pasta (linguine, spaghetti, fettucine)
  • 1 pound bacon
  • 1 tablespoon olive oil
  • 1 yellow onion, diced
  • 1 cup whipping cream
  • 1/4 cup Parmesan cheese (plus more for sprinkling)
  • salt
  • pepper

Feel free to cook the bacon as you prefer. Though, seriously, give this method a try.

Preheat oven to 400. Place bacon on cookie sheet/on rack over cookie sheet/on broiler pan (heck, I’ve even used a casserole dish; it just takes extra draining after). Cook bacon for 15 to 20 minutes or until crisp. (Err on the side of crisp because it will soften in the cream sauce later. Limp bacon will get limper. *Shudder*) Set on paper towels to drain, then set aside to cool. When cool enough to handle, cut into smaller pieces. I usually do them a centimetre or two wide.

Heat olive oil in a pan over medium heat, add onion and a pinch of salt. Saute onion until transluscent, but not brown. Add whipping cream and cook until it has reduced by about a third. It should be super thick and rich. (I usually have a little extra cream or half-and-half around just in case it reduces too much.)

While the cream is reducing, cook pasta according to the packages directions. Drain.

Mix together the cream sauce and the pasta, adding in the Parmesan cheese and tossing until mixed. Add bacon and toss again. Season to taste. (Wait until the end to season because the bacon and cheese are salty and you don’t want to oversalt it.) Serve with fresh cracked pepper and more Parmesan, if desired.

Continue Reading

Vichyssoise

What do you get when you bring together four food bloggers and the idea to all cook something from Julia Child’s Mastering the Art of French Cooking? A helluva lot of delicious food and many full bellies. Not that any of us were complaining, that’s for sure.

It was all Julie’s idea. In honour of the move Julie & Julia coming out, she invited over myself, Cheryl of Backseat Gourmet, Pierre of Kitchenscraps and Gail of The Pink Peppercorn, along with everyone’s significant others. Our only task was to bring one dish out of Child’s cookbook. Since I had to work that day, there seemed to be only one logical choice: a chilled soup. That way I could make it the day before and just let it sit in the fridge at work without doing any harm and no need to reheat. The fact that it turned out to be about -29C that day made my choice seem to be a bit ridiculous. After all, who wants to eat cold soup when it’s stupidly freezing out? But, after a first course of delicious French cheeses and Julie’s homemade Raincoast Crisps (along with a glass or two of bubbly), we had all warmed up enough that it didn’t seem so bad.

Soup on the table

There is something a bit daunting too about cooking for other food lovers, particularly two who have cookbooks out and are serious players on the local (and beyond) food scene. But, I’m happy to say, this soup is stupidly good.

“Potato milkshake!” Pierre declared.

Leek and Potato

Vichyssoise

And he’s not wrong. It was a rich, thick, creamy soup (I’m sure in no small part to the 3/4 cup of whipping cream that went into it!) that was intensely flavoured. I definitely could have eaten more the bowl I had, but I’m glad I didn’t because there was more courses to come.

The other thing that happens when you bring together four food bloggers is that the actual eating doesn’t take place until after all the photographing. We were all jammed into Julie’s kitchen snapping away for a good 15 minutes or so; what the significant others were doing during that time, I know not.

Bloggers

(For the record, yes, I shot the soup earlier in the day at work because the light was better. I really need to get better at flash photography.)

And it was a fine spread that needed to be documented. Boeuf Bourguignon with mashed potatoes, ratatouille, Pommes Parisien (read: cooked in delicous oil and butter) and a work-of-art Moussaka that had us all holding our breath as it was unmolded.

Unmolding

Moussaka

Potatoes

The Spread

And that was just dinner. For dessert, Cheryl outdid herself with Reine de Saba (a chocolate cake, though that is an understatement) and a Grand Marnier Souffle that I sous-chefed with her (thanks Cheryl!)

Grand Marnier Souffle

The food was fantastic; I stuffed myself silly and felt like I needed to roll myself out to the car after. The next time we do one of these, I’m wearing stretchy pants.

All done

Most of all, though, it was great to meet some great new people and hang out with some old (as in known for longer, for the record) friends.

Conversation

This is the original recipe from Julia Child’s Mastering the Art of French Cooking.

Vichyssoise
[Cold Leek and Potato Soup]

  • 3 cups peeled, sliced potatoes
  • 3 cups sliced white of leek
  • 1 1/2 quarts of white stock, chicken stock or canned chicken broth
  • salt, to taste
  • 1/2 to 1 cup whipping cream
  • 2 to 3 tablespoons minced chives

Simmer the vegetables in stock for about 40 to 50 minutes until tender. Puree in a blender or through a food mill. Stir in the cream. Season to taste, oversalting very slightly as the salt loses savor in a cold dish. Chill. Serve in chilled soup cups and decorated wtih minced chives.

The recipe says it serves 6 to 8. We stretched it to nine with no great effect. But, then again, we had about 10 other things to eat….

Continue Reading

Roasted Chickpeas with Chard

I can’t say I’ve ever gone out of my way to buy/cook/eat chard. But there was something about Julie’s entry during her year-long, post-a-day, blog-a-thon involving roasted chickpeas and chard that, for some unknown reason, really appealed to me. I filed it away, figuratively, for a future date and carried on with things.

Chard II

So, when a friend at work was extolling the virtues of her chard crop, I was immediately reminded of my plan to try out this dish. And, very fortuitously, she was happy to provide me with a large bunch of chard to use in my attempt.

Bundled Chard

Oh chard! Why have I foresaken thee for so many years? You are quick to prepare and delicious! And I’m pretty sure you’re good for me too!

Chard I

I’m just sad now that the chard season (at least in my friend’s garden) is over for another year. Most of the generous bunch she gave me went into the dish with the roasted chickpeas. But I held back a few stalks that I sauteed quickly with garlic and topped with a fried egg for breakfast one day.

The original recipe just calls for the leaves from what I can tell. But I liked the rainbow stalks so much that I diced them finely and fried them for a few minutes before adding the leaves to the mixture.

I can only hope that next year my friend’s chard crop is even bigger and she is as giving as this time around with it….

This recipe has been adapted ever so slightly from the original, as seen here. Mostly because I didn’t have enough garlic to do it properly and, as mentioned before, because I used up the stalks too.

Chickpeas, garlic, shallots and bay leaves

Chard III

Chopped chard stalks

Roasted chickpeas with garlic and bay leaves

Roasted Chickpeas with Chard

Roasted Chickpeas with Chard

For the chickpeas
1 19 oz.  can chick peas, rinsed and drained
3 cloves garlic, peeled (original calls for entire head; will try this next time)
2 shallots, roughly chopped
2 bay leaves
1/3 cup olive oil

For the chard:
2 tablespoons olive oil
1 large bunch Swiss chard, center stems removed and chopped finely, and leaves coarsely torn
2 garlic cloves, crushed
1/2 cup vegetable, chicken or beef broth

Preheat oven to 400. In a baking dish, combine chickpeas, garlic, shallots, bay leaves and oil. Roast for about 45 minutes, shaking the pan at least once (twice is probably even better) until everything is golden. Remove from oven and set aside.

In a frying pan on the stove, add olive oil and heat until hot. Saute garlic for about 30 seconds until it is fragrant, add chard stems and saute for a minute or two until tender. Add chard and continue cooking until it has wilted — about five minutes. Pour over stock, cover and cook for another 10 minutes. Remove lid and drain excess liquid. Add chickpea mixture, season with salt and pepper and mix until heated through. Add a little more olive oil if desired.

Continue Reading

In search of the perfect burger

In the moments that followed the first bite, as the flavour of beef and bacon and cheese filled our mouths, we knew this was one of our more brilliant plans.

Mmmmm

Of course, it didn’t start out that way.

It started out as a tongue-in-cheek joke, a nod to our mutual love of burgers. But as my sister’s trip from the coast to Cowtown neared, it morphed into a serious scheme.

The burger tour of southern Alberta was born.

You see, a truly great burger is more than the sum of its parts.

A solid, but not too filling, bun provides the backbone. It needs to hold the burger together, soak up the juices from beef and sauce, but not be too tall, too bread-y or so flimsy it becomes an annoyance.

Sauces–relish, mustard, ketchup, special or otherwise– should add to the flavour and not overpower the patty taste.

Lettuce and tomato are optional. Onion is not.

The burger should just fit into your hands and be bitten through without feeling you have to dislocate your jaw.

It should be messy. Bonus points for burgers that cause juices to trickle down your hands.

(The trick, I would come to learn, is to turn your plate so the burger drippings fall onto your french fries.)

Establishing a plan took several e-mail exchanges and thorough research.

A cruise through the Chowhound online forums, suggestions from friends and even a photo posted on Flickr  — a photo-sharing website — gave us our plan of attack: five burger joints in four days.

There were tentative discussions about beef detox after that point.

And so, to the journey. From Calgary International Airport, we made our way to the first tour stop: Boogie’s Burgers on Edmonton Trail.

The little sister was off to the races with a double patty burger, adorned with cheese, bacon and pickles. (And a bacon, banana, peanut butter milkshake to wash it all down; if I hadn’t been around when she was born, I would swear she was adopted.)I wanted a slower pace and went with a single with bacon and cheese.

The burgers were the size of my outstretched hand, with a tangy red sauce. The buns were fresh-tasting, with a slightly crisp crust that gave nicely when bitten into. Thick slices of bacon and melted cheddar cheese rounded out the burgers. And they passed the requisite messy test with me having to go through several paper napkins.

Boogie's Burger

The aftermath

We were off to a good start. Day 2 took us down Highway 22 to Turner Valley for a stop at the Chuckwagon Cafe. Charmed by the red barn exterior and the slightly kitschy decor inside, we were eager to see what this little restaurant had to offer.

Chuckwagon Cafe

We both ordered the House Burger, minus the mushrooms, featuring a six-ounce patty of beef raised on a Longview farm with no hormones or steroids, topped with fried onions, bacon and marble cheese.

Chuckwagon Cafe's House Burger

Chuckwagon Cafe Burger

After the plates were set down, the first five minutes were punctuated solely with the sounds of beef contentment, echoed by little more than groans of acknowledgment.

Mmmm. Uh-huh. Mmmm. Seriously.

The thick patty was juicy and flavourful, had nice charred bits and was well-spiced and complemented by the homemade relish.

Charred bits

For the next hour as we drove further south on Cowboy Trail–she marvelled at the expansive Prairie sky while we sang along with bubble gum pop songs –there were moments when we stopped to talk about those burgers again.

In High River, we pulled up to a little red-roofed burger shack whose reputation is well known. The Hitchin’ Post is a local favourite and the steady line of traffic in and out of the dirt parking lot surrounding the tiny takeout restaurant spoke volumes.

Hitchin' Post

Cheeseburgers topped with a full slice of onion and sitting atop yellow mustard and relish were ordered up and washed down with orange soda. The burgers were about the size of my palm and tasty, but more akin to a burger from a fair. It filled the burger need, but not in the way that would keep us talking about them for days after.

Hitchin' Post cheeseburger

By 11 a. m. the next morning, we were ready for round four: Rocky’s Burger Bus –literally, an old red bus jammed into the city’s southeast industrial area just off Blackfoot Trail, with a few picnic tables in behind.

Rocky's Burger Bus

The cheeseburgers were adorned with little more than a generous helping of mustard and relish and a piece of processed cheese. But the thick wedge of beef was the star attraction of this meat-centric burger. It was juicy and tender, likely because the patties are shaped by hand. And it was hot off the grill, which was deliciously unexpected.

Burger Bus I

Rocky's fries

The final stop on the tour was at downtown steak house Saltlik, where friends joined us to try the double-fisted bacon cheeseburger. This was not just a turn of phrase. A thick patty topped with bacon, cheddar, a healthy tomato slice, lettuce and red onion, all jammed into a tall bun–two hands were definitely necessary.

But, as we entered a virtual beef coma at the end of day four, there was no debate about who served the best burger. Even now, weeks later, I think about the Chuckwagon Cafe and how easy it would be to climb into my car and head south.

The sister has already marked it as a must-do for the next tour.

This story first appeared in the Real Life section in the Calgary Herald. For more delicious recipes, visit CalgaryHerald.com/life.


Continue Reading

Fettucine with Roasted Tomato Sauce

The actual title of this blog post would have been far too long:

Fettucine with Roasted Tomato Sauce and Balsamic Reduction, as well as testing out the new KitchenAid pasta attachment.

Roasted tomato sauce on fresh fettucine

It’s a bit of a double barreled post, really. Call it multi-tasking.

Actually, that’s a bit of a lie too. The actual, actual title of this post should have been:

Fettuccine with Roasted Eggplant and Tomato Sauce and Balsamic Reduction, as well as testing out the new KitchenAid pasta attachment.

But I’ve realized I really don’t like eggplant when I cook it and, in the end, did not end up eating any of it. You will notice its absence in the final photos, but had to include a photo of the palm-sized eggplants because they were just so darn cute.

Baby Eggplants

Which pretty much illustrates the fact that I make the worst impulse food buys known to man.

At any rate, a couple of months ago I was approached by a marketing company asking if I’d be interested in reviewing the KitchenAid pasta kit on my blog. As a huge pasta fan, I was definitely intrigued.

I’ve typically shied away from making it homemade, even though the boxed stuff pales in comparison to the tender noodles that come from real pasta.

The real issue here is my inability to knead properly. Unsure if that’s because I’m impatient, don’t have a feel for it, or just generally have no idea what I’m doing. But whether one of these reasons or a combination of all three, it basically adds up to me never quite reaching the smooth, elastic stage needed to make bread or pasta.

Full disclosure: I was sent the KitchenAid pasta kit, as well as the mixer required to run the attachments, by the marketing firm in order to review them. This is my unbiased review of the kit. I am not required to return the items (which, really, makes sense. I mean, what are they going to do with a used mixer, pasta roller and cutter?).

The mixer and kit arrived a few weeks after some back-and-forth emailing and I set aside an afternoon to give it a whirl.

The kit itself includes two boxes of pasta dough mix (just add water), a pasta roller, fettucine cutter, cleaning brush and cooking utensils. The roller and cutter attach to the front of the stand mixer and are powered by the appliance.

Pasta Mixes

Roller and Cutter

Roller and Cutter

Cleaning brush

Making the dough was pretty simple. Add water, mix, produce crumbly dough and mush it together.

As always, I was nervous from the get-go that I had done something wrong. But I divided the dough into about eight pieces and then gave them each a quick knead before powering up the roller attachment and letting the dough slide through.

On its widest setting, the roller can actually be used to knead the dough. I sent one chunk through, then folded it in half and let it run through the rollers again. I did this about five or six times until the dough was shiny and elastic and stretched out into a long rectangle. Then I started on the next chunk of dough.

Pasta first run

Once that was all done. I then put the roller onto a thinner setting and ran them all through again. And then again on a thinner setting. And so on.

When it was thin enough, I exchanged the roller attachment for the fettucine cutter and watched as the flat sheets of pasta were cut into perfect (albeit extremely long) ribbons.

Fresh Fettucine

It was, all in all, astonishingly easy. And a bit hypnotic.

I liked that I could forego all the annoying kneading and with relative ease make a batch of homemade pasta. I liked the chew of the noodles I made and how quickly it cooked.

The next test, of course, will be to make my own actual dough.

While I loved the roller and cutter, I was initially not 100 per cent sure I would have been tempted to buy the entire kit. Most food lovers are already going to have their own slotted spoon and pasta server and probably would enjoy the challenge of making their own dough rather than using a boxed mix, I reasoned.

I would, however, definitely be tempted to buy the roller and cutter separately.

Roller

Fettucine cutter

Then after a bit of research, I found the kit is not a bad deal considering a pasta roller, motorized drive and a fettucine cutter is going to cost roughly the same as the KitchenAid’s kit, which comes with the utensils, dough mix and cleaning brush. If you already have the stand mixer, it’s not a bad way to go.

The pasta kit retails for about $180.

And here’s what I did with the noodles. The recipe is not so much a recipe as much as me just fiddling around, but, since it turned out so well, I’m going to recommend it anyway.

Roasted tomato sauce on fresh fettucine II

Fettucine with Roasted Tomato Sauce

  • 1 pound tomatoes, cut into 1 or 1/2″ chunks
  • 3 cloves garlic, whole, unpeeled
  • olive oil
  • balsamic vinegar
  • salt
  • pepper
  • pasta
  • parmesan
  • balsamic reduction

Set oven to 375. Chop tomatoes into roughly 1/2″ to 1″ pieces (depending on how chunky you want the sauce to be), place in baking dish, scatter in unpeeled garlic cloves, then drizzle with olive oil, balsamic and sprinkle on kosher or sea salt and pepper. Bake for about 30 to 45 minutes until tomatoes are starting to carmelize and break down.

Cook pasta according to directions or, if using fresh, cook in boiling, salted water for just a few minutes until al dente. (Depending on the thickness of noodle, this can take anywhere from about three minutes and up.)

Slip cloves of garlic out of their peels and then mush with fork into tomatoes. Scoop sauce onto cooked pasta, sprinkle with grated parmesan and fresh chopped parsley (if you have any). Drizzle lightly with extra virgin olive oil and balsamic reduction.

Continue Reading

Potato Pizza with Rosemary

I love the French word for potato: pomme de terre.

Apple of the earth.

It’s so evocative. It speaks of wholesomeness and simplicity. The dusty rows in farmer’s fields, the pockmarked tubers hidden under clumps of dirt and the round potatoes that tumble out when finally unearthed.
Also, it’s a damn tasty vegetable.

Potato Pizza with Rosemary I

My love of potatoes goes back to childhood. At one time I even had a potato scrapbook. I’m not kidding.

In the ’80s, the potato farmers in the U.S. had a big ad campaign to try to convince Americans that potatoes were vegetables. One was a photo of a big baker potato with a big daub of green paint on it, next to a jar of paint and dripping brush. Underneath was a caption that read something like, “What do we have to do to show it’s a vegetable?”

And, while the scrapbook has disappeared from my life, my love of potatoes remains.

I was so excited a couple of weeks ago to spy a massive (read: too big for a single person) bag of multi-coloured baby potatoes at Costco. I rooted through to find one that had a high proportion of purple potatoes. These things rock. I love their vibrant colour! Am tempted to boil and squash up the next batch for a little violet-coloured mash….

Purple Potato

So, I knew they would be perfect for this potato pizza. This recipe would have Atkins rolling over in his grave. A carb base, topped with carbs. Mmmm!

But, damn it, sometimes a girl just needs her potatoes.

Pizza dough rising

Sliced potatoes

Pizza for the oven

Potato Pizza with Rosemary II

Potato Pizza with Rosemary III

I apologize. I have no idea where this recipe came from originally. Something I found years ago, cut and paste into a plain document and then printed…. Even then, it’s been slightly adapted, of course.

Potato Pizza with Rosemary

  • 1 1/2 cups all-purpose flour
  • 1/2 teaspoon salt
  • 1/2 teaspoon sugar
  • 1/2 cup cold water
  • 1/2 teaspoon instant dry yeast
  • Olive oil for bowl and pan
  • thinly sliced potatoes (2 or 3 large potatoes, 10 or more baby potatoes)
  • 1/4 onion, cut in half and thinly sliced
  • 4 tablespoons extra virgin olive oil
  • 2 tablespoons fresh rosemary, chopped
  • sea salt for sprinkling

Combine flour, salt, sugar and yeast in a bowl, then slowly add water. Mix with spoon until ingredients start to come together, then using dough hook on a mixer, knead/mix for another 10 minutes until the dough is smooth and elastic.

Place in oiled bowl and let rise for two or more hours. (Note: mine didn’t rise quite as much. Unsure why, but ended up with pretty thin crust as a result.)

Using a mandoline or a knife, thinly slice potatoes. (The recipe then calls for the potatoes to be soaked in several changes of water. I didn’t do this because I was worried what would happen to the purple potatoes. Still tasted fine to me, so….?) Combine potatoes with pinch or two of salt, rosemary and 1 tablespoon of extra virgin olive oil.

Preheat the oven to 425. Spread thin layer of olive oil on rimmed baking sheet. Stretch dough out on pan until it reaches the edges. Evenly layer potatoes over dough, then drizzle on three tablespoons olive oil, along with sea salt and chopped rosemary.

Bake about 20 minutes until bottom is golden. Let cool slightly before cutting, then serve. Also good at room temperature.

Continue Reading

Penne alla Vodka

I don’t cook much with alcohol.

Vodka

Sure, there’s been the odd wine reduction sauce, a shot or two of brandy to a roasted tomato soup to round out the taste or a splash of sherry in my chicken tetrazzini. But the goal in these recipes is to add that hint of flavour, to enhance the other ingredients, not to dominate the dish.

So, I was a bit intrigued the first time I heard about Penne alla Vodka. There was no way the liquor was taking a back seat in this recipe; it’s in the name, after all. But how would the drink I associate with martinis and Caesars work over a plate of steaming pasta?

Vodka II

Let me be frank: it worked like a charm. So charming, in fact, I made it twice in one week–the sign of any good recipe, as far as I’m concerned.

I was a bit worried at first, because the instructions call for the vodka to be poured over the hot drained pasta instead of letting the alcohol cook out in the tomato part of the sauce. I feared it would be like eating a Bloody Mary for dinner with a scraping of Parmesan over it.

The tomato sauce

But a strange sort of alchemy happens once the butter starts to melt over the hot pasta and mingle with the boozy vodka.The flavours smooth together. (Because, yes, for experimentation purposes I did try a piece of penne with just the butter and vodka. You know, for scientific reasons and certainly not because I was getting hungry and curious.)

Adding the butter

Dumping in the tomato mixture, delicately perfumed with garlic and scattered with bits of soft, slightly caramelized onions, transformed some very basic pantry ingredients into a rich, guilty-pleasure type dish.

It should be said here that I like it saucy–as in, the pieces of penne should merely act as sauce conveyors. Spiked on the end of my fork, the pasta is swept around the bowl to pick up the last bits of onion and tomato, the last dribble of rich sauce.

And this sauce is dangerously good — enough to make you want to lick the bowl when no one else is looking. Ahem, not that I’m condoning that. So, I’ve adjusted the recipe slightly to al-low for my preference for more sauce. Feel free to add more pasta if desired.

Before the mixing

Unexpectedly, this is fantastic cold the next day. Perhaps it’s be-cause vodka is best when straight from the freezer? I ended up eating most of the leftovers straight from the fridge rather than waiting for the workplace microwave to be freed up. After all, with a dish like this, who would want to delay taking a bite?

Penne alla Vodka

The original Nigella Lawson recipe calls for garlic-flavoured olive oil. I don’t tend to keep that around, so I’ve adjusted accordingly. Of course, if you do have it, just go ahead and use it and skip the part about sauteing garlic in the first step.

Penne alla Vodka

  • 1 large onion, diced
  • 2 tablespoons (25 ml) olive oil
  • 2 garlic cloves, roughly chopped
  • Salt
  • 2 tablespoons (25 ml) whipping cream
  • 1 28-oz (796-ml) can diced tomatoes
  • 1 lb (500 g) penne
  • ½ cup (125 ml) vodka
  • 4 tablespoons (60 ml) unsalted butter
  • Parmesan

Add olive oil to large frying pan and bring up to medium-low heat. add garlic and saute for one or two minutes to flavour the oil. don’t let the garlic burn.

Remove the garlic and add the onion, along with a pinch or two of salt. Cook the onion, stirring occasionally until soft and just starting to caramelize. add the can of tomatoes and let simmer so the liquid has reduced. (this took about 10 minutes when i made it, so i put the pasta on to boil as the sauce was cooking.) when the sauce has thickened, remove from heat and stir in whipping cream.

Add pasta to salted, boiling water and cook as instructed until the noodles are al dente. drain and return the pasta to the pot. pour vodka over pasta and add butter and another pinch or two of salt. stir until the butter has melted, then add the tomato mixture. toss all together until coated evenly, then check for seasonings. add more salt if necessary.

Serve with fresh parmesan serves 5.

This story first appeared in the Real Life section in the Calgary Herald. For more delicious recipes, visit CalgaryHerald.com/life.

Continue Reading

Pasta Bolognese

I grew up in a family of six (four kids, two parents). I like to think this is why I’m completely incapable of making meals for just one or two people. It just never really occurs to me to halve a recipe. Or when I’m just creating something, it never looks to me like I’m making too much. Mostly, it’s not a problem. I, unlike most, like leftovers. I like them for breakfast or lunch or dinner. (There is nothing like pasta for breakfast. Mmmmm.) And, since I tend to cook big, I can usually feed myself for all three of those meals based on whatever I made for dinner the night before.

In the last year or so, though, I’ve finally come to appreciate my freezer. Sure, it was always a happy home to ice cream and the odd frozen pizza. Now I tend to freeze some leftovers for those crazy times when work is insane and there is a strange absence of groceries and I’m contemplating a dinner of peanut butter on crackers. And this Bolognese sauce is the perfect thing to have stashed away for dinner emergencies.

Ready to eat

I got it out of Real Simple magazine; the only magazine I’ve subscribed to since Chickadee and Owl when I was a kid.

So, I used to make this with fettuccine and then one time when I went to buy pasta there was no De Cecco fettuccine. But there was fettuccelle. Sure, that’ll do. But it was so much better than that. It’s now my pasta of choice. It’s flat like fettuccine, but better. Thicker, I think. Or something. Sigh. Just better; let’s leave it at that.

Pasta

There is nothing more comforting than a big bowl of hot noodles (al dente, please!) with thick, rich sauce all chock full of tomatoes and beef that’s been simmering for an hour or so. So, I’m happy to make the whole batch of this, freeze half in ziplock bags and then eat the rest for a handful of meals. Then, the next time a craving comes, I still have my freezer stash.

And let me offer this handy ‘recycling’ tip. Don’t throw away the heels of your parmesan wedges. Throw them in as the sauce simmers; they will add a nice richness. (When I’m down to the heel of the cheese, I throw them in a ziplock and into the freezer so they are ready to go when I make the sauce.)

As usual, this is with my adaptations. (These are, for the most part, another carrot — yeah for more vegetables — and no pancetta. I have nothing against pancetta — mmmm bacon-y goodness — but I don’t typically have it on hand and can’t be bothered to go get some for this recipe as I generally have all the other ingredients. Oh, and I add the garlic later than they suggest. There is nothing worse than burnt garlic, so adding it with the celery and carrot seems a bit premature.)

Carrots, onions, celery and garlic

Parmesan heels

mirepoix

Beef, carrots, garlic, onions and celery

A good use for parmesan "heels"

Pasta Bolognese

Pasta Bolognese

  • 1  tablespoon  olive oil
  • 1 large yellow onion, diced
  • 2 stalks celery, diceed
  • 2 carrots, diced
  • 4 cloves garlic, minced
  • 1 1/2  pounds  lean ground beef
  • 1  cup  dry white wine
  • 1  cup  milk (I use 1 per cent)
  • 1 6-ounce can tomato paste
  • 1 14-ounce (398 mL) can diced tomatoes, undrained
  • 1/4  teaspoon  red pepper flakes
  • 1 tablespoon dried oregano
  • 2 1/2  teaspoons  kosher salt
  • 1/4  teaspoon  black pepper
  • 1/4  teaspoon  ground nutmeg
  • Parmesan heels (if you’ve got them)

In a Dutch oven or large, solid frying pan (I use one with straight sides), heat the oil. Add the onion and saute until they start to go transluscent, about three minutes. Add the celery and carrot and cook for five minutes more until they too start to soften. Add garlic and saute until you can smell it, about a minute. Add beef and cook until browned. Add wine, milk and the rest of the ingredients. (Don’t fret, the milk is going to look like it’s curdling a bit. It’s not.) Add the cheese heels and simmer for 45 minutes, stirring occasionally. Serve over hot, drained pasta with fresh Parmesan.

Continue Reading

Butternut Squash in Coconut Milk

Are you ever shopping and see something you think you need only to find when you get home that you already have, say, five of those already? No? Well, you’re smarter than me then.

A couple of months ago I saw coconut milk on sale, so I picked up a few cans. I like my curries and Thai Seafood Chowder and this great peanut sauce (which I should do a blog entry on; note to self) and so coconut milk is a good staple for me to have around. Unfortunately, I got home to find that I already had about four cans of it in the cupboard. Huh. Now I had eight cans.

On the upside, it means that I have the goods on hand when I see recipes like this one and want to give it a shot.

I’ve been on a butternut squash kick lately. Having never really eating squash for most of my life, I’ve found myself embracing it. It began with an acorn squash I randomly bought a few months ago. (It was so cute, and then it dawned on me that I’d actually have to do something with it.) I simply roasted it and then had it with a roasted chicken breast. Simple perfection. And there are apparently a lot of things you can do with squash. So goes my continuing education.

Butternut Squash

I liked the idea of this recipe. Soft, comforting squash with the exoticism of Thai flavours. And it was good, but if I can make one recommendation, I would suggest using this as a side dish. I’m sure this is the original intent of the recipe, but I made it on a whim and helped myself to a big bowlful. It was a bit rich to just eat on its own.

(I also should have reduced the sauce a bit more. Next time.)

Pre-simmering

Butternut Squash in Coconut Milk

This recipe comes from Closet Cooking, but has, as usual, been slightly adapted.

Butternut Squash in Coconut Milk

  • 1 tablespoon vegetable oil
  • 1 teaspoon garlic, minced
  • 1 teaspoon ginger, grated
  • 2 cups butternut squash, peeled and cut into 1″ cubes)
  • 1/2 cup coconut milk
  • 1 tablespoon sugar
  • 1 tablespoon fish sauce
  • 1/2 teaspoon chili sauce (such as sambal olek)

Heat oil in a pan. Add garlic and ginger and saute for about a minute until fragrant. Add chili sauce and saute for another 30 seconds, then add coconut milk, sugar, lime juice, fish sauce and squash. Cover and simmer until squash is tender, about 30 minutes. Remove squash and let coconut milk mixture continue to cook until it is reduced. Pour over cooked squash.

Continue Reading

Thai Seafood Chowder

Holy overdue blog update, Batman. Where have the last four weeks gone?

Oh yeah, into the fog that was subzero December, followed by a crazy flight home for the holidays and then nesting at the parents’ house as the snow never stopped falling and then back at work for a brutal one-week crime wave.

Phew.

I barely even know what I’ve been eating lately, but just before the haze set in, I made this lovely Thai Seafood Chowder. I’ve made this a few times now and have kept adjusting the recipe so that I’m really happy with it. This time, however, I had no luck finding ingredients. Lemongrass? Nowhere to be found. A fresh red chili? Vanished from the produce aisles. But I was so determined to make this, I picked up one of those squeeze tubes of lemongrass paste as a last resort and figured it wouldn’t hurt to use a few of the chili flakes from my seemingly never-ending supply. (As a person with a low heat tolerance, it is a bit baffling that I have one of those Costco-sized spice containers of dried chili flakes. I mean, really, I think I add those to my pasta bolognese and the occasional Thai or Vietnamese recipe. What was I thinking?) (Also, I’m sure my family wonders if I was switched at birth as the rest of the clan love spicy food. Strange. That said, I look a lot like my mum, so that’s very unlikely.)

I’m now devoted to the idea of the lemongrass squeeze tube. I love the flavour of lemongrass, but just find it much too woody for my liking (even if I only use the inner stalk and cut it quite fine). I usually just ended up picking it out while eating, which was rather indelicate and a bit annoying. But this paste is so, well, paste-like. It just blended in with the rest of the ingredients, offering up all the lovely flavour and none of the inconvenience.

So, I throw some rice into my lovely rice cooker just before I start making this because it really is best served over a scoop of rice (any kind will do). (What is my obsession with brackets in this post?) I love my rice cooker; I have no idea how to make rice on the stove. Pity, really, as I’m sure it’s a useful skill. But I really got addicted to them when I lived in Japan. The teachers’ housing I stayed in had one and it just became part of my routine most nights to throw some rice in and let the cooker get to it while I made whatever else to go with it. Mine is a Zojirushi (which I like to say), mostly because I wanted a *Japanese* rice cooker. I think I was still having some separation anxiety from that country when I got back. It took me at least a week to stop bowing to people.

This works really well as a weekday dinner because it takes almost no time at all.

(I should add here that, by definition, this isn’t exactly a chowder as it doesn’t contain traditional ingredients, such as bacon or flour. However, it’s too thin to be called a stew, as far as I’m concerned. And it just doesn’t feel like a soup to me.)

Snapper and Prawns

Shallots, chili flakes and garlic

Thai Seafood Chowder

Thai Seafood Chowder

  • 1 tablespoon vegetable oil
  • 2 shallots, thinly sliced
  • 2 cloves garlic, minced
  • 1 lemongrass stalk, finely chopped (or 1 tablespoon lemongrass paste — this stuff rocks, by the way)
  • 2 cups chicken stock
  • 1 can (398mL) coconut milk
  • 1/4 teaspoon chili flakes (or a minced fresh chili if you can find one)
  • 2 tablespoons rice vinegar
  • 1 tablespoon fish sauce
  • 1 tablespoon brown sugar
  • zest and juice of one lime
  • 3/4 pound snapper or other firm fish, cut into 1″ chunks
  • 1/2 pound prawns
  • 2 tablespoons basil, chiffonade

Heat oil in a pot over medium heat. Add shallots and saute until slightly transluscent, add garlic and chili flakes (or fresh, diced chili) and saute for another minute. Add stock, coconut milk, lemongrass, vinegar, fish sauce, sugar and lime zest and juice. Simmer for 10 minutes.

Add seafood and cook two to three minutes until prawns have turned pink and fish is cooked through. (This really takes almost no time at all, so I caution you against overcooking.) Add basil and serve.

Continue Reading