Julia Child’s White Bread

It was a bit hilarious, in retrospect, to be all, “Hey everyone! I’m blogging again!” and then disappear for six weeks.

There have been a few adventures in the time in between that I will be posting here, but the truth of the matter is that this has been an odd time with lots of rampant emotions, perplexing reactions and reflections. I will also get to that at some point. I’m just not quite ready.

And, frankly, I haven’t really been cooking much.

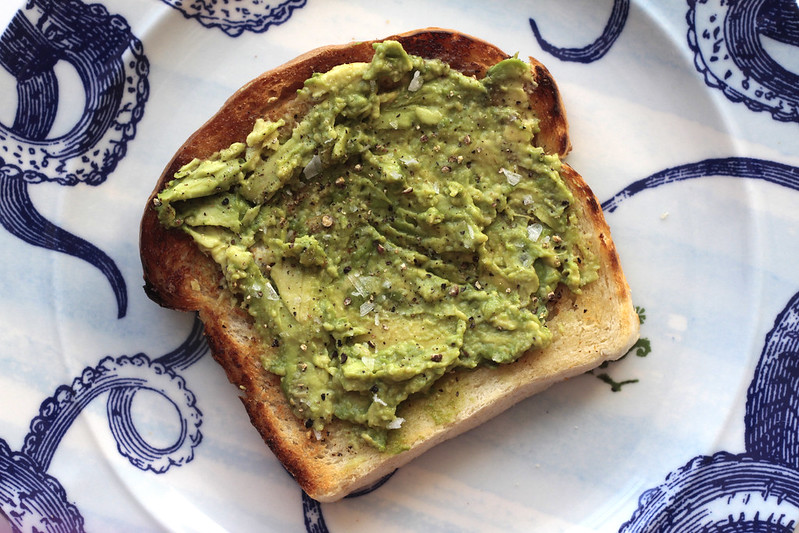
I’ve been eating a lot of sandwiches, though, and copious amounts of toast. Toast with mashed avocado, flaked sea salt and freshly ground pepper; toast with peanut butter, sambel olek, lime and roughly chopped cilantro — it’s kind of like peanut sauce on toast and it is absolutely addictive; toast with thin slices of tomato and a sprinkle of Crazy Jane’s Mixed-up Salt, which has salt and spices all mixed together and is a family favourite that I believe we can only buy in the US now. (It’s also fantastic on avocado.)
Avocado Toast

Sandwiches made from salami and razor-thin slices of cucumber stacked high; havarti and turkey and lettuce with a slathering of grainy mustard; cheddar and homemade basil pesto.

So, yeah, #carblife.

At some point in the last several days, it occurred to me that maybe I should just make my own damn bread. For one, so I could avoid going to the grocery store where I was likely to do some completely unnecessary impulse shopping. (On my list of things to do, near the top, is a kitchen cupboard purge because, good lord, I have way too much food in here.) For two, I needed something to do and getting my hands dirty — so to speak — seemed like it could be therapeutic. It was either that or deep clean the bathroom and one of those had the fringe benefit of resulting in an apartment smelling like fresh baked bread that I could slice while still slightly warm and swipe over with butter before eating it over the sink. The bathroom could wait.

Julie had recently posted a recipe for Hy’s cheese toast that I had mentally bookmarked and in it she linked to her own post from a few years ago on Julia Child’s White Bread, which sounded just about perfect for what I needed.

I love fancy sourdoughs and rustic loaves of no-knead bread but sometimes I just want a good, old loaf of white bread. The bread of my childhood when I would be sent to the neighbourhood bakery to pick up six loaves — thinly sliced — to get our family of six through the week.

Bread, as baking projects go, is barely any work. Exactly the kind of project I also needed.

Mix, knead, take a two hour break, punch, fold, take another break, bake, cool, eat.

Since I’m utterly useless at kneading and since I have a KitchenAid mixer, I didn’t even have to worry about trying to manipulate a shaggy dough into a smooth ball. Though I do love the tactile nature of kneading, so even after the machine had its way with the dough, forming it into a smooth lump, I still took it over to my counter to get my hands into it and knead a few turns.

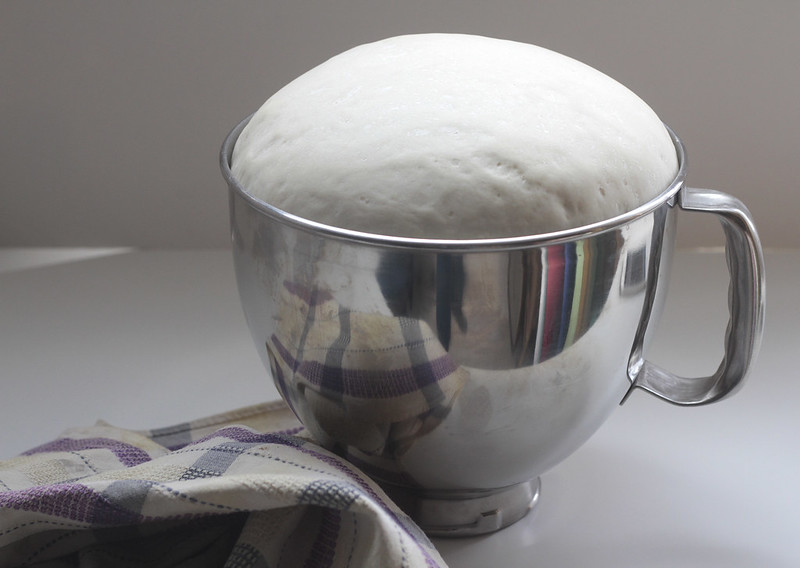
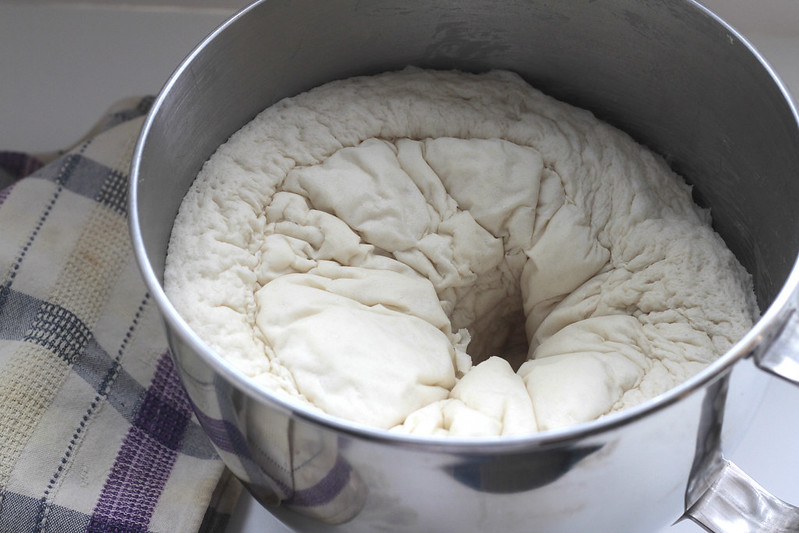
It is also one of those things that is so damn satisfying. Checking on the dough and seeing how beautifully it has risen always makes me feel so accomplished and pulling it from the oven all lightly golden makes me proud. Plus, there are other delights along the way, like the way it makes the apartment smells and the satisfaction of punching down the dough after that first rise, hearing the hiss of air escaping.

This recipe, unsurprisingly, given Julia Child certainly knew her way around a kitchen, is easy and the bread comes out like a champ. I felt almost guilty feeling proud for how well they came out because there was almost no effort.

Almost guilty.

And then I ate that first slice, still slightly warm, and any guilt disappeared in the joy of eating freshly baked bread.  

Risen dough

Punched doughLoaves about to rise

Risen loaves

Baked bread


Julia Child’s White Bread

  • 2 1/2 cups warm water, divided
  • 1 tablespoon active dry yeast
  • 1 tablespoon sugar
  • 6 to 6 1/2 cups all-purpose flour
  • 2 teaspoons salt
  • 1/4 cup butter, softened

Pour 1/2 cup of the water into the bowl of a standmixer affixed with a dough hook (or, if kneading by hand, a large mixing bowl) and stir in the yeast and sugar. Let sit for 5 minutes, until creamy. (If the yeast doesn’t do anything, toss it and start again after buying new yeast.)

Add the rest of the water and 3 cups of the flour. With the mixer on low, mix until well blended. Add the remaining flour and the salt and let the mixer continue to go on low until it’s combined. With the mixer still going, add in the butter, a couple of blobs at a time until completely blended. Turn the mixer up to medium speed and let it knead the dough until it is smooth and elastic, about 8 minutes or so, checking occasionally to ensure it’s not crawling up the hook.

If desired, knead for a few turns on a clean counter, form back into a ball and return to the bowl.

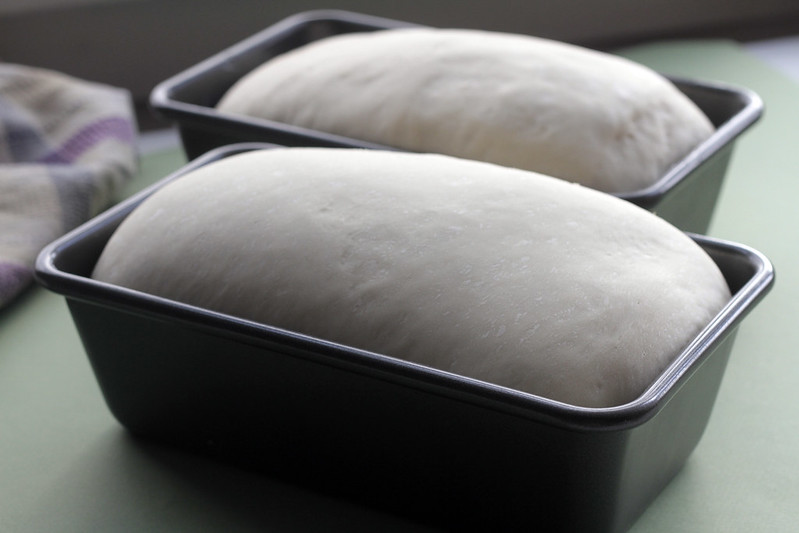
Cover the bowl with a clean towel and let rise until it’s doubled in size, about 1 to 1 1/2 hours.

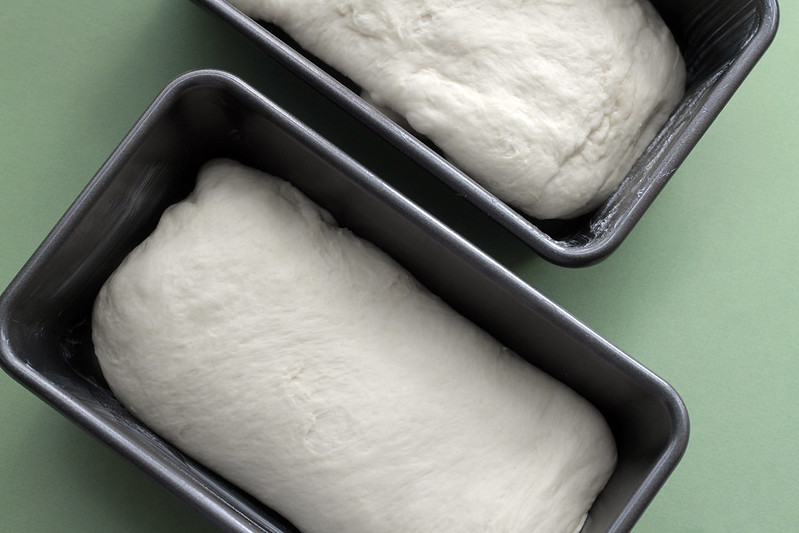
Butter two 4-inch x 8-inch loaf pans. Punch the dough down and divide in two. Pat each piece into a rectangle a little bit bigger than a regular piece of paper — about 9 inches by 12 inches. Fold it in thirds, using the shorter side of the dough, like a letter. Place in the prepared pans, seam side down and kind of tucking under the ends. Cover again and let them rise until they’re, well, shaped like loaves of bread, about an hour.

Preheat the oven to 375F and set the rack in the centre of the oven. When the loaves have risen, bake for about 30 to 35 minutes, until they are a nice golden brown.

Remove from their pans and let cool on a rack.

Try to resist waiting to slice, or your bread will squish. I managed 45 minutes and it was still warm enough to melt butter, but not so warm that the loaf couldn’t resist slicing.

Makes 2 loaves.

Continue Reading

Turning the page

Excuse me, just let me dust off the cobwebs a bit.

There. Much better.

Hello!

Yes, it’s been awhile since I posted on these pages. That will be changing now, though. As some of you may know, I was laid off from my job as the food writer at the Calgary Herald in mid-January as part of the Postmedia-wide cuts. It was a shock, yes. And I am, admittedly, still reeling a bit. But there is one constant in life — for me, at least — and that is eating. And cooking and baking things so that I can eat them.

So, here I am.

There’s a somewhat poetic symmetry in returning to this blog to share recipes and eating adventures. After all, it was because of Patent and the Pantry that I was offered the position as the food writer at the paper in the first place. And now, as I turn the page on that chapter, it feels good to go back to where it all started.

It’s a return to posting recipes and photos, but I’ll also be doing a little more around restaurants and culinary happenings, product reviews, dining out and, my favourite thing, eating while traveling.

Come join me as I turn this page.

Looking to get in touch? You can get me at gwendolyn_richards (at) hotmail (dot) com.

And now, for some cake p0rn.

 
_MG_9369

_MG_9378

Continue Reading

Braised Sweet Peppers and a Memorial to My Grandfather

Chocolate Heart.

That’s my grandfather’s nickname for me.

He bestowed it on me the first day I drew breath, after opening the first window on an advent calendar and finding a little heart-shaped chocolate behind the perforated cardboard. He didn’t use it often, though always on my birthday, scrawling it in his deeply slanted handwriting on cards, exclaiming it lovingly when I called to thank him.

It’s a special nickname, a personal story between the two of us; other family members rarely use it.

We are not a family for rituals, but hearing him call me Chocolate Heart each year was one I looked forward to. As was the phone call I made to him each Remembrance Day when I would thank him for coming home from the war. It started back in 1996 when I was working a co-op term for the Peace River Block Daily News in Dawson Creek. There, Remembrance Day took on an importance I hadn’t seen in the cities I lived in. Each year, the newspaper put together a special section dedicated to sharing stories of the veterans who called the northern B.C. town home. That winter, we wrote the stories of war brides who had married Canadian soldiers and returned with them after the war to Canada, settling in the then-small community with no sidewalks and dirt roads. Touched by their stories and recognizing how important the act of remembering those who did not make their way home was for those who lived there, I went to the Remembrance Day ceremonies. And when I got back home that afternoon, I called Papa.

If he had not come home, I would not be here.

This day last year was the last time I heard his voice. This year, there is no phone call.

Two weeks after we chatted, he passed away unexpectedly in his little cabin on the parcel of land overlooking the waters of Active Pass and the stand of soaring Fir trees he refused to chop down, despite them blocking much of the view. It was two days before my birthday and among all the things I mourned about losing him was the fact I wouldn’t hear him call me Chocolate Heart one more time.

This is the man who nurtured in me a passion for good food and wine, who introduced me to prosciutto and Riesling, who shared his love for cooking with a little girl who loved to be in the kitchen with him. Somewhere there’s a photo of the two of us leaning over a pasta rack, fresh noodles dangling from the sticks as we grin behind them, proud of our efforts and patiently waiting until we could eat them.

JASMacdonald. Untitled, year unknown.

An artist and former art instructor at UBC, he showed me the beauty of art and how to appreciate it, even though his skills and talents didn’t travel through the mess of genes to me. He taught me how to catch fish by jigging over the side of a row boat bobbing in the waves from the BC Ferries as they slid through the pass between Galiano Island and Mayne. In his studio’s makeshift kitchen, at a counter made of a length of plywood on sawhorses, he showed me how to make pesto from the basil he grew in his greenhouse. We’d eat it on bread with cheese, looking out through the Fir trees to the blue water, listening to jazz.

He dreaded Remembrance Day, refused to go the legion for any ceremony, choosing instead to stay at home and drink tumblers of wine while watching the birds flit around the feeders he kept filled and past them down the steep grassy slope to the ocean. It was a reminder of friends he lost during the war and those he had served with who had died in the intervening years. But he liked the phone call. And so did I.

Sometimes I could persuade him to share stories of his time overseas. He didn’t linger on the atrocities of war, of those fellow soldiers he lost. Instead, with his trademark chuckle, he’d weave tales about his misadventures and mishaps as a navigator. Like how he convinced his superior officers that he didn’t know how to swim — a key skill when one is threatened with the chance of being shot down over water — and was ordered to learn, which meant he spent afternoons in a heated pool learning the basics of front crawl (“Which is the easiest to learn?” he’d asked before demanding he only learn that one stroke.) while the other soldiers ran drills outside.

From the time I was young, I heard the stories of how he was shot down while on a bombing mission to Stuttgart. Hearing the tales before I was old enough to fully understand the dangers he was in made his funny anecdotes more amusing than scary. Half the crew was killed when the plane went down. He had parachuted to safety and spent three days wandering the French countryside, hiding in barns and haystacks, eating raw eggs and mulled wine before he was connected to the French underground and smuggled into Switzerland. The northeastern corner of France was occupied at the time and it was only by chance he was not discovered. He never focused on that part of it, instead spinning stories about how his cover was that he was ‘Jacques’ a deaf-dumb gardener because he had no aptitude for language and if he spoke, he would immediately be identified as a Canadian. “Which was dumb,” he would later say, “because if anyone made a loud noise near me, I’d turn around.”

He broke the rules of internment in Switzerland, reaching out to his wife back in Vancouver with their baby daughter to say he was alright, even as she was receiving telegrams to report he was missing in action. And when boredom in Bern reached a fever pitch, he and a few other soldiers smuggled themselves back into France and down to the coast to try to get back to England.

The upside of all those boring days was he wrote everything down; I have one of those journals, his words written out in his signature slanted handwriting, as well as a typed version of his story. So those stories won’t be lost, at least. It’s the stories I didn’t get to hear that make me wish for one more day at his side with a tumbler of wine and the sound of his voice.

He leaves a legacy, though. It is in the food I make and the skills I learned at his side. It’s in my love of Italian food and a good Gewurztraminer.

I miss him dearly.

In the days just after he passed, I wanted to make something that would connect us in some way. I can’t make Fettuccine con Piselli e Prosciutto without thinking of him. (That post is also about him.) Nor Pasta Carbonara. But I remembered all the times we also made Sweet Braised Peppers from his favourite cookbook by Umberto Menghi and I knew that was the perfect way to honour his memory. It’s one of the first things I remember making with him. It’s also the first time I learned you can’t touch your eyes after touching a hot pepper — a lesson that had my grandfather making me lay on the couch with a cold, wet facecloth over my eyes. Why he was using hot peppers, which the recipe doesn’t call for, remains a mystery to me.

So, in my grief, I chopped peppers and made a tomato sauce and ate it all with crusty, buttered bread that I used to swipe the last of the sauce from my bowl. And I know he would have been nodding his head in enjoyment and telling me I should just eat a little more.

Peperonata (Braised Sweet Peppers)

From The Umberto Menghi Cookbook.

  • 1 tablespoon olive oil
  • 1 medium red pepper, quartered
  • 1 medium green pepper, quartered
  • 1 small onion, diced large
  • Salt (to taste)
  • Freshly ground pepper (to taste)
  • 1 clove garlic, finely chopped
  • 1/3 cup tomato sauce
  • 1/4 cup Parmesan cheese, coarsely grated

Preheat oven to 400F.

Saute peppers and onion sin oil in a skillet on medium heat for 4 to 5 minutes.

Season with salt and pepper.

Put peppers and onion in a casserole dish. Sprinkle garlic on top of peppers and onion. Pour tomato sauce over peppers, onion and garlic. Sprinkle Parmesan cheese on top of peppers, on, garlic and tomato sauce. Put casserole dish, uncovered, in oven and bake at 400F for 15 minutes.

Serves 2.

Continue Reading

A Pucker update and sneak peek recipe

One afternoon, about 12 years ago, I was with a friend at the UBC Bookstore when we found ourselves in front of the massive bookshelves jammed with all the various books for sale. I looked at them all and thought, How on earth does one write a book and get it published and get it noticed amongst all these others. My friend looked at all of those same books and thought, How great is it that there are so many people who have penned novels and works of nonfiction and have them published.

The anecdote illustrates how differently we think. And it illustrates that my friend knew better than me.

Because, in one month, I will have a book on store shelves.

Pucker officially goes on sale on November 10th. But you can already pre-order it! On Amazon and on Chapters.

Here’s a little look at what it looked like when I was shooting the cover.

And here is what it looks like. (Small squeal of excitement!)

In the last several months, I’ve often repeated I had no idea what I was getting myself into when I came up with the idea of writing a cookbook. The phrase ‘labour of love’ is used a lot, but it’s accurate when it comes to Pucker. I’m not sure anyone saw much of me in November or December last year when the manuscript deadline was nearing, nor in February and early March as the clock ticked down on when the photos had to be handed in.

But as the weeks and months have slipped past since those deadlines, the frustration over muffin recipes that never seemed quite right or the lemon bars that needed constant tweaking, the constant questioning of whether the recipe really tastes as good as I think it does, and taking some 1,000 photographs for what will be about 100 or so in the book — I’m a proponent of having too much choice — has faded.

And, guys, I’m SO PROUD.

A couple of weeks ago, I got the third round of pages — a PDF document of how the book will look once printed — and I got really excited. All that recipe testing, all those photos have been transformed into this thing that looks like a real book. I’ve been told that actually having it in hand is the best feeling of the process, but we’re still a month away from that point.

Since that’s still a ways to go, how about a sneak peek?

I had a hard time picking which recipe to share here. (Yes, this Meyer Lemon Bourbon Sour recipe is in it.) The burger (Oh yes, you knew there was going to be at least one of those in there) that my friend who tested the recipe now can’t stop making? The Thai soup featured on the current, unofficial, holder-place cover? Or maybe the Chewy Lemon Cookies that Anna Olson made with Karl Lohnes and posted on Twitter after reading over the manuscript to write the foreword?

Or, let’s start with a classic. Like Spaghetti Al Limone.

Sure, it’s not the fanciest recipe in the book, but it’s a great recipe to have in your back pocket on busy nights or when groceries are running low since it doesn’t take much time nor uses ingredients most of us don’t regularly have lying around the house. And, of course, it’s got a nice Pucker to it.

Spaghetti al Limone

It sounds much more exotic and interesting than lemon spaghetti—more authentic too—but the truth is that a straightforward name probably better reflects the simplicity of this pasta dish. I found versions of it that required cooking the cream first or called for other extra steps. In this one, whisk a few ingredients, pour over hot pasta and toss, toss, toss. That’s the sum total of it. At the end, it’s a creamy tangle of pasta, each strand coated in a rich, lemony sauce. Add some freshly ground pepper for a bit of heat and parsley for freshness at the end for a well-rounded pasta dish.

1 pound (500 g) spaghetti (or another long noodle, like linguine)
2 lemons, zested, juiced and strained, divided
1 egg yolk
1/3 cup (80 mL) whipping cream
3 tablespoons (45 mL) extra virgin olive oil
1 cup (250 mL) grated Parmesan, divided
freshly ground pepper
salt (optional)
2 to 3 tablespoons (30 to 45 mL) parsley, coarsely chopped

Bring a large pot of water to a boil over high heat, salt heavily and add the pasta, cooking until al dente. (Start checking the pasta a minute or two before the package instructions suggest it will be cooked.)
In a small bowl, whisk together the lemon zest, egg yolk, cream, olive oil and 3/4 cup (185 mL) Parmesan. Add a few grinds of pepper and make sure it’s all well mixed. Pour in about 1/4 cup (60 mL) of the lemon juice and mix again.
When the pasta is cooked just al dente—there should still be a bit of chewiness to it—scoop out 1 cup (250 mL) of the cooking liquid before draining the pasta. Return the pasta to the pot and add about 1/4 cup (60 mL) of the reserved pasta water. Toss the pasta (I find tongs are best for this part) so it’s coated with the cooking liquid, adding more if the noodles still seem dry. Pour the cream–lemon juice mixture over the pasta and toss and stir, getting it well mixed. The heat of the pasta will cook the egg yolk and melt the cheese to create a creamy sauce. Add more pasta water if it seems a bit dry or the sauce isn’t coating all the noodles.
Taste for seasonings, splashing on more lemon juice, if desired, or salt, if needed.
Serve sprinkled with the remaining grated Parmesan, chopped parsley and more pepper.
SERVES 4


Continue Reading

Coronation Grape Focaccia with Rosemary

A friend of mine has diagnosed me with a case of the ‘overwhelms’ and that’s a pretty accurate summary of where things are at right now. I’ll have book news (OMG!) in a blog post later this week, work is hectic and the last few months have been filled with lots of amazing and lots of truly heartbreaking things. For each of those there are drafts of blog posts that I haven’t been able to bring myself to finish writing and post.

But one bright spot has been that my Writer Girls — a collection of my closest friends from my early days at the University of Victoria — were in town a couple of weeks ago for a visit and we spent three glorious days eating, drinking, laughing and catching up. There is no better way to recharge than to spend time with people who know you almost better than you know yourself. And, better than that, have far better memory-retention skills and can recall, at a moment’s notice, all the hilariously dumb things you’ve done or said in the last 20 years. And trust me, there are a lot of them.

On the final day, between ferrying the girls back to the airport to catch their flights back home, we decided an afternoon snack was in order and my friend Julie wandered off to the local grocery store in search of cheese and crackers. She returned with those, along with a huge box of dusky dark purple Coronation grapes. Beyond their stunning colour, they have this beautiful slightly sweet, slightly pungent taste. They were perfect with cheese.

And then all of my girls were gone and I was left with the remainder of the grapes.

And for some unknown reason, I remembered seeing a recipe for a focaccia topped with Concord grapes and sprigs of rosemary and that’s all I could think about. Salty-sweet, with the grapes roasted and warm and all that lovely woodsy rosemary strewn over the whole thing.

In Italian, it’s known as Schiacciata con L’uva and it’s a truly autumnal bit of baking linked to the grape harvest in Tuscany. So, Concord or Coronation grapes are perfect for this focaccia since this is exactly when they are in season. Mostly you read about this being made with Concords. (The Coronation was developed here in Canada and seems more popular on this side of the border.) The benefit of using Coronations, though, is that they are seedless (yay!) and, judging from some of the recipes I found online, not having to de-seed grapes saves a lot of time and mess. Since I’m generally prone to getting food all over what I’m wearing, having an option to at least reduce the chance of staining myself purple is a good thing.

These grapes are delicious on their own — especially cold from the fridge and most definitely when served with some nice crackers and cheese. But roasting them into a focaccia that has been sprinkled with raw sugar, flaked salt and rosemary tranforms them to something so much more. They get a bit jammy, their skins wrinkle and their dark purple juice stains the bread around them. Their complex flavour plays well with the herbal hit of rosemary and, well, it’s all on focaccia, so what more could one ask for? Other than having my Writer Girls here for one more weekend to eat some with me.

Since we’re planning on next meeting up in Italy next fall, though, there’s a very good chance I’ll be able to make it for them then.

Coronation Grape and Rosemary Focaccia

I adapted this from a few different sources, mostly amping up the amount of grapes and rosemary — you know, the good parts.

  • 1 cup warm water (between 105 and 110F)
  • 2 tablespoons milk
  • 1 1/2 teaspoons sugar
  • 1 1/2 teaspoons active dry yeast
  • 2 3/4 cups all-purpose flour
  • 1 teaspoon salt
  • 5 to 6 tablespoons olive oil, divided
  • 1 1/2 cups Coronation grapes
  • 1 tablespoon rosemary leaves
  • 1 tablespoon raw sugar
  • 2 big pinches flaked sea salt

In the bowl of a stand mixer fitted with a dough hook, combine the water, milk, sugar and yeast and let sit until the yeast has bloomed and is creamy looking. Add the flour, salt and 2 tablespoons of the olive oil and mix on low speed until combined and then turn the speed up to medium and knead the dough until it forms a smooth ball, about 8 minutes.

Add 1 tablespoon of oil to a large bowl and use your fingers to spread the oil around the bowl. Transfer the ball of dough to the oiled bowl and turn to coat the dough all over. Cover and let rise in a warm place until doubled in size, about 1 to 1 1/2 hours.

Line a baking sheet with a piece of parchment paper that hangs over the edges. (I’ve found this is the best way to make sure the focaccia doesn’t stick to the pan or the parchment.) Pour on 1 tablespoon of olive oil and spread all over the parchment that covers the pan. (There’s no need to oil the overhang.) Tip the risen dough onto the prepared baking sheet and, using the tips of your fingers, stretch the dough to fill it, dimpling the surface as you go. If the dough resists, wait a few minutes and then continue. It will fill the baking sheet with a little patience. Drizzle another tablespoon or two of olive oil over the dough, letting it fill the dimples. Cover loosely with plastic wrap and let it rise again for about 30 minutes.

As it rises, preheat the oven to 450F.

Just before baking, scatter over the grapes, rosemary, raw sugar and flaked salt, pressing them in to the dough slightly. Bake until golden and cooked through, about 15 minutes.

Serve warm or at room temperature (if it lasts long enough to cool to room temperature).


Continue Reading

Kitchen Sink Cookies

Most of the time when I make cookies, I’ll eat one or two and then completely lose interest, taking the rest into work for my colleagues to enjoy. (Of which, I am sure, they have no complaints.)

Last year, over at my day job, I reviewed a cookbook called The Flying Brownie (The Harvard Common Press) by Shirley Fan that was all about sending edible care packages to people in the mail. I decided to try her recipe for so-called Kitchen Sink Cookies, which are similar to the more famous Compost Cookies from Momofuku in that, essentially, they’re about throwing in lots of different bits and bobs that may be lurking around the kitchen and in the baking cupboard. We all have those mostly empty bags of chocolate chips, nuts or dried fruit, perhaps a few random squares of chocolate for that recipe that didn’t require all of them in a box. I have amalgamated all my odds and ends — butterscotch chips, Skor bits, different types of chocolate chips — into a container, which is organized, at least, but doesn’t actually go very far when it comes to using them up. So, I was intrigued at the idea of making a cookie whose purpose was to do just that. (And, while I love Compost Cookies, I think we can agree they’re a lot more involved than what some of us want to tackle on a weekend afternoon when a cookie craving strikes.)

And, man, they did not disappoint. Rich, chewy, and salty-sweet, I could not resist their siren call.

As I said for my review of The Flying Brownie:

Since making them, however, I have eaten no fewer than a half-dozen cookies (over a 24-hour period) before bringing them to the office just to get them out of the house. They were snapped up immediately (as most baked goods in the newsroom are, for what it’s worth), but the reaction from colleagues was different: resounding compliments and requests for the recipe followed.

The cookies came out chewy and soft, with specks of chocolate and a slight crunch from the potato chips. Perfection.

I made more just a few nights later.

What I didn’t admit then is that I even held back a few because I knew I’d want a few more and didn’t want to give them all away.

I had a cookie craving the other day and they immediately came to mind.

The first time around I used up what was left in a bag of dark chocolate chips and some semi-sweet mini ones, as well as crushed ripple chips and some rolled oats.

Those who know me know well how much I love salty-sweet combinations, so the ripple chips (which I like for the texture as well) were a given. The fact that I had to buy some specifically to add them to the cookies maybe goes against this cookie recipe’s concept, but I’m OK with that.

Among the things buried in my baking cupboard, which I cleaned out and organized over the Labour Day weekend, was a bag of Valrhona Caramelia chocolates I bought several months ago from Duchess in Edmonton when I was up visiting friends. They are these little disks of chocolate that taste like a cross between milk chocolate and caramel. It’s tempting to eat them straight up, and I did do that with a few of them, no lie, and then I put them away so I didn’t eat the entire bag and then, of course, promptly forgot they were there until a much more recent trip to Edmonton (and the requisite visit to Duchess) when I remembered I still had them. Roughly chopped, I knew they’d be a great addition.

I decided to also throw in some semi-sweet chocolate chips, a handful of butterscotch chips, some roughly chopped pecans and those ripple chips.

Since making them that first time, I have adapted the recipe slightly. Since I decided I wanted the chocolate chips to be an option instead of a requirement, this adaption allows for a little more flexibility with the add-ins. However, I do recommend using a combination of sweet (like chocolate chips) and salty or crunchy or things with texture (coconut, nuts, potato chips, pretzels etc.). I use softened butter instead of melting it because I always have butter softening for one baking project or another and I am lazy enough that I don’t want to dirty a pot or pan just to melt it. I’m also so lazy that I don’t generally bother mixing the flour, baking soda and salt together in a separate bowl. I figure if I add the flour, then scatter the salt and baking soda evenly over it, it will all get mixed in well enough. Fan calls for golden sugar, but I’ve changed it to brown since that’s what most of us have around (and I think it totally contributes to that luscious, rich, caramel flavour).

Lastly, I found that while Fan’s recipe said it would make about 48 cookies, I got about half that. Not sure if that was bad math because I’m not convinced my cookies are much larger than what she calls for. I can say with some assurance there’s no way I ate that much dough. Though, yes, I ate dough. And it was damn good.

Kitchen Sink Cookies

Mildly adapted from Shirley Fan’s The Flying Brownie.

  • 3/4 cup (180 mL) unsalted butter, softened
  • 1 cup (250 mL) packed brown sugar
  • 1/4 cup (60 mL) granulated sugar
  • 1 large egg, at room temperature
  • 1 large egg yolk, at room temperature
  • 1 tsp (5 mL) pure vanilla extract
  • 2 cups (500 mL) all-purpose flour
  • 1/2 tsp (2 mL) baking soda
  • 1/2 tsp (2 mL) salt
  • 1 1/2 cups (375 mL) add-ins (such as chocolate chips, chopped chocolate, old-fashioned rolled oats, crushed potato chips, pretzels, raisins, nuts or unsweetened shredded coconut)

Preheat the oven to 350F (180C). Line two baking sheets with parchment paper or silicone baking liners; set aside.

In the bowl of an electric mixer, beat the butter and both sugars on medium speed until light and fluffy. Add the egg, egg yolk and vanilla and mix until well combined, scraping down the sides of the bowl if necessary. Add the flour, baking soda and salt and mix on low speed until blended. Fold in the add-ins. (If time permits, refrigerating the dough for at least 12 hours before baking will improve the flavour of these cookies.) Using your hands or a cookie dough scoop, form 1-inch (2.5-cm) balls with the dough. Place the dough balls on the prepared baking sheets, about two inches (5 cm) apart. Bake until the edges are lightly browned, 9 to 10 minutes. They will look slightly underdone in the centre.

Cool the cookies on the pans for five minutes before transferring to a rack to cool completely. Repeat with the remaining dough. Pack in zippertop plastic bags, pressing out any air, or in airtight containers, separating the layers with waxed or parchment paper.

Makes about 24 cookies.


Continue Reading

Strawberry Scones with Strawberry-Black Pepper Butter

It’s hard to be creative when it’s this hot and my laptop is cooking my thighs.

It’s probably even too hot to be turning on the oven, but I did it today anyway. The idea of fresh scones overpowered my hatred for the heat. Especially the idea of scones studded with fresh and sweet strawberries.

I had bought the strawberries yesterday for no reason other than I wanted that taste of summer. As I lay in bed last night, I was thinking Strawberry Shortcakes would be the perfect vehicle. And then I started to think about some scones where the strawberries are actually baked into them instead of being served on the side. Cream scones, I thought. Playing with the whole idea of strawberries and cream. And also, not dealing with trying to keep cold butter actually cold on a hot day.

The idea isn’t original; there are a lot of recipes out there on the web for Strawberry Scones. But I also thought of putting a twist on them by serving alongside some compound butter made from strawberries and a bit of freshly cracked black pepper.

It was tempting enough to turn on the oven.

The beauty of cream scones is how quickly they come together and how little forethought is needed. The dangers of cream scones are exactly the same.

But when you don’t want to put in the kitchen for very long, they are ideal. Stir together flour, baking powder, sugar and salt. Add cream. Stir. Pat together. Cut and bake. Done.

Compound butter is just about as easy. Mix softened butter with herbs, zest, bits of fruit, spices or whatever else and then refrigerate.

So, as baking projects go, this one couldn’t be much more straightforward.

When I started trying to figure out what to say about these recipes, I joked on twitter that I should just write, “Makes these, they’re tasty.”

But, really, make these, they’re tasty.

Strawberry Cream Scones

Adapted slightly from Joy the Baker who, in turn, adapted them slightly from King Arthur Flour.

  • 3 cups all-purpose flour
  • 1 tablespoon baking powder
  • 1 teaspoon salt
  • 1/3 cup granulated sugar, plus more for sprinkling
  • 1 1/2 cups whipping cream (approximately), plus more for the egg wash
  • 1 teaspoon vanilla
  • 1 cup strawberries, cored and chopped
  • 1 egg

Preheat the oven to 425F and line a baking sheet with parchment paper.

In a medium bowl, whisk the flour, baking powder, salt and sugar. Add the chopped strawberries. Pour over the whipping cream and then drizzle in the vanilla before gently stirring it all together. If there are a lot of dry patches, add another tablespoon or two of cream — just enough to create a dough. Scrape the dough out onto a clean surface and gather it together, kneading slightly until it all comes together. Pat into a circle about 1 inch thick and cut into eight wedges. (Or, alternatively, use a biscuit cutter to cut out circles of the dough.)

Place the wedges on the baking sheet.

In a small bowl, whisk together the egg and a splash of whipping cream. Brush over the top of the dough wedges and sprinkle with sugar.

Bake until golden and cooked through, about 14 to 18 minutes.

Serve as is or with the Strawberry-Black Pepper Butter (recipe below).

Strawberry-Black Pepper Butter

  • 1/4 cup butter, softened
  • 1 large strawberry, minced (approximately 2 tablespoons)
  • 1/8 teaspoon freshly ground black pepper
  • Pinch sea salt
  • Pinch or two of sugar

In a small bowl, mix together the butter, strawberry pieces, black pepper, salt and sugar. While stirring, press bits of the strawberries against the side of the bowl to squish them and release some of their juice. Taste for seasonings, adding more sugar, pepper or salt.

Refrigerate until ready to serve.

Continue Reading

Norwegian Rhubarb Cake

Around this time every year, I wait for them to appear, those ruby red or speckled green-and-pink stalks of rhubarb.

More than any other fruit or vegetable, rhubarb to me is a sign of the changing season. It is the signal that summer is arriving in bundles of tart stalks to be baked into pies and cakes, stewed to make a bright pink syrup for cocktails.

I snap up what I can when I see it at the farmers’ markets and I’m not above begging friends with healthy supplies to share their wealth. I take all I can and more, slicing and freezing the excess for rhubarb cravings that come later in the season.

Year-round, I save rhubarb recipes as I wait, imagining the hand pies, scones and fools I will make once I get my hands on the first stalks of the season.

A few weeks ago, tweets began appearing in my timeline that the time for rhubarb was finally here. But I was going to be away for the following two weekends and didn’t want to buy any without having the proper time to dedicate to making all the things I had been craving over the past several months. I would have to wait.

On the final day of being away, as I played fetch with my friend’s dog in the backyard of their Victoria, B.C., home, I spied in the corner of their garden a mass of rhubarb.

Sure, he only has three legs but I tired of playing fetch long before he did.

The giant, lushly green leaves created a canopy over the bed, hiding away a forest of ruby stalks that had visions of baking filling my head. Could I please, I asked, take just a little bit of it home with me?

“Take as much as you’d like,” I was instructed. “We probably won’t use much of it.”

With knife in hand, I culled a huge bundle of the stuff (trying to still show some restraint, though tempted to take it all), rolled it into a plastic shopping bag and packed it in my luggage for the flight back to Calgary. I was glad I hadn’t bothered to take much out to the coast, giving me that much more room for this care package of rhubarb.

It was the best souvenir of the trip.

A few days later, I finally had enough time to get into the kitchen and put that souvenir to use.

In the past, I’ve fallen in love with crumb cakes and little cobblers. I have serious plans for pie. And no summer is complete without a rhubarb cocktail from a recipe my grandmother gave me several years ago.

But for the first rhubarb of the season, I wanted to start simply. A recipe for Norwegian Rhubarb Cake seemed like the right place.

A very straightforward cake, there’s no need to cream butter and sugar, no fussing over letting the rhubarb macerate in sugar. There’s not even a need to break out the mixer.

So, in the space of less than 45 minutes, I had cake — and the first bite of rhubarb this year.

Still warm from the oven, it was the perfect afternoon snack. Not overly sweet, it’s punctuated with tart pieces of rhubarb that played nicely against the tender cake.

Thankfully, too, it only put a small dent in my rhubarb supply, leaving me plenty more for the next project. I just need to decide which one.

Norwegian Rhubarb Cake

I found the recipe on a blog called Outside Oslo and adapted it only slightly, upping the amount of rhubarb and omitting a dusting of icing sugar, which people should still feel free to do just before serving. A dollop of sweetened whipped cream would be nice, as well, but is not necessary.

  • 1/4 cup (60 mL) butter
  • 1/3 cup (80 mL) milk
  • 2 eggs
  • 1 cup (250 mL) sugar
  • 1 1/4 cup (310 mL) flour
  • 1 1/2 tsp (7 mL) baking powder
  • Pinch salt
  • 1/4 to 1/3 lb (125 to 170 g) rhubarb, sliced into 1/2-inch (1-cm) coins

Preheat the oven to 350F (180C).

Butter an 8- or 9-inch springform pan.

In a small saucepan set over medium heat, melt the butter, then stir in the milk. Remove from the heat and set aside to cool slightly.

In a large bowl, beat the eggs and sugar until pale and well mixed. While still mixing, slowly pour in the butter and milk. Add the flour, baking powder and salt and stir until just combined, then pour into the prepared springform pan. Sprinkle over the rhubarb slices.

Bake until lightly golden and a toothpick inserted in the middle comes out clean, about 35 minutes. (Cakes baked in a smaller springform pan will take a bit longer because the cake is deeper.)

Let cool for 5 to 10 minutes, then run a knife around the edge of the cake, if necessary, before removing the springform side.

Serve warm.

Makes 1 cake.

Continue Reading

Katharine Hepburn Brownies

There is deep, dark and dangerous knowledge that comes from knowing how easy it is to make brownies.

A few standard ingredients, a pot and spatula, a bit of time and you are rewarded with deep, dark, chocolate goodness.

Late-night cravings for something a little bit sweet and decadent no longer need go unanswered. At least not in my house. Nor mid-afternoon cravings. Or even morning ones. (Don’t tell me you’ve never craved something deliciously chocolate in the middle of the morning.)

The trick, though, is to find the right brownie recipe.

By and large, they’re all easy — though the grades of difficulty increase when adding things like peanut butter or cheesecake swirls — because it’s a simple matter of melting butter with chocolate, adding sugar, eggs and flour, then baking the entire thing. No forethought is required because there’s not even a need to wait for the butter to soften.

Depending on the ratios of eggs, flour and butter, though, some brownies will come out cakey, while others dense and fudgy.

My ideal brownie is on the fudgy end of the spectrum, with that crackle-like top that hides the rich, dark bar below.

In my search for just such a brownie, I stumbled onto numerous posts extolling the virtues of the recipe from famed film actress Katharine Hepburn.

She may be better known for her film roles and assertive, unapologetic personality, but among baking circles, the woman who starred in The Philadelphia Story and the African Queen is also known for her brownies.

How the recipe first came to be part of the public realm varies as widely as the number of brownie recipes found on the Internet.

Some say she was persuaded to give it up to gossip columnist Liz Smith; others report a neighbour secured the recipe after bringing over a batch of brownies to the actress who declared they had too much flour and had been overbaked before she listed off her own recipe.

The story, though, is far less important than the recipe results; gooey and rich, fudgy with the requisite crackled top, these are the decadent brownies that do prompt cravings.

A scant amount of flour keeps them dense and chewy, the richness cut only by the chunks of toasted walnuts littered throughout.

Although easy enough, I wanted to simplify the recipe even further. With all due respect to Ms. Hepburn, if I can avoid washing additional dishes, I will. So, I skipped the step of using a double boiler to melt the butter and chocolate in favour of a one-pot method that doubles as a mixing bowl. Within just a few minutes, and with very little effort on my part, I was pouring the finished batter into the pan and putting the whole thing in the oven. The hardest part, truthfully, was waiting for the brownies to cool before slicing. (It’s possible I didn’t actually wait as long as I should have.)

With the craving answered — and a new favourite brownie recipe in hand — life could go back to normal.

But I know that when it comes again, it won’t take much to appease it. And that is dangerous.

Katharine Hepburn’s Brownies

Take caution not to overbake these as that will cause them to dry out. Swap the walnuts for other nuts, or omit entirely, as desired.

  • 1/2 cup (125 mL) unsalted butter
  • 2 oz (60 g) unsweetened chocolate
  • 1 cup (250 mL) sugar
  • 2 eggs
  • 1 tsp (5 mL) vanilla
  • 1/4 tsp (1 mL) salt
  • 1 cup (250 mL) walnuts, chopped
  • 1/4 cup (60 mL) flour

Preheat oven to 325F (160C).

Butter an 8×8-inch (20×20-cm) pan and line with parchment paper, letting a few inches hang over each side, like a sling.

In a medium saucepan set over low heat, melt the butter and chocolate, stirring often, until smooth. Remove from the heat and whisk in the sugar, then eggs and vanilla. Switch to a spatula to fold in the salt, walnuts and then the flour, stirring until just combined. Pour the batter into the prepared pan and bake until a toothpick inserted in the centre comes out with only a few moist crumbs on it, about 40 to 50 minutes. Cool completely before using the sling to remove the brownies from the pan and cutting into squares.

Makes 1 8×8-inch pan of bars.

Continue Reading

Kale Salad with Hazelnuts and Apple

No one would ever describe me as trendy.

I rarely look good in fashionable clothes and can’t figure out how to wear any new style of makeup.

Even when it comes to food, I’m often behind the times.

So, it’s no surprise I’m falling for kale just as it’s falling out of popular favour.

Kale became a culinary darling a few years ago, starting with an obsession for kale chips that spread like wildfire on food blogs. The simple recipe of tossing ripped leaves with a bit of olive oil, salt and pepper, then baking them to a crisp, spawned thousands of blog posts. Hailed as the ultimate snack, food blogs were filled with increasingly creative versions.

There was something about them popping up everywhere that made me specifically not want to try kale chips and, as a consequence of not really knowing what else to do with the cruciferous vegetable, not bothering to try kale at all.

And then I was served a kale salad at a potluck.

The greens were dressed with a vinaigrette spiked with grainy mustard and sprinkled with paper-thin radishes. I asked for seconds.

Turns out, my disinterest in following a trend had meant I had been missing out.

Since then, I’ve started making my own versions of that salad — adding apple for some sweetness and hazelnuts for crunch — taking advantage of the fact it pays to work ahead with kale. Dressing it in advance, unlike other salads, actually improves the salad, as the vinaigrette helps soften the otherwise tough leaves. The dark green vegetable stands up to the dressing so well, it makes for a great work lunch because there’s no need to keep the salad and the dressing separate.

A nutritional powerhouse, full of beta carotene and calcium, as well as vitamins K and C, kale should transcend trends.

But, of course, like anything that becomes a widespread hit, there is bound to a point in time when people begin tiring of it and want to move on to the next hot ingredient.

As 2014 marches on, some in the food community are starting to declare kale has reached a saturation point on restaurant menus and in recipes. It’s time for that trend to move along, they say.

I’m not against the idea of another ingredient getting some time in the spotlight.

But, luckily, since I never really pay attention to trends, that means kale will be on my menu for a long time to come.

Kale Salad with Hazelnuts and Apple

Like all salads, this one is infinitely adaptable. Swap out different nuts, replace the apple with dried cranberries or cherries or add thin slices of radish for a peppery punch.

Dressing:

  •  Zest of 1 lemon
  • 1 tbsp (15 mL) lemon juice
  • 1 tbsp (15 mL) apple cider vinegar
  • 1 tsp (5 mL) grainy mustard
  • 2 tsp (10 mL) honey
  • 1/4 tsp (1 mL) salt
  • 1/4 tsp (1 mL) freshly ground pepper
  • 1/4 cup (60 mL) olive oil

Salad:

  • 2 bunches kale, cored and roughly chopped
  • 1 crisp apple, julienned
  • 1/4 cup (60 mL) hazelnuts, toasted and roughly chopped
  • 2 green onions, thinly sliced

In a jar or bowl, shake or mix together the first seven dressing ingredients — from the lemon zest to the pepper — to dissolve the salt and honey. Add the olive oil and shake or mix again until the dressing has emulsified.

Add the chopped kale to a large bowl, pour over the dressing and toss well. Refrigerate for at least an hour to let the dressing soften the leaves. When ready to serve, add the apple, hazelnuts and green onions, tossing everything together.

Serves 4 to 6.

Continue Reading

Khao Soi

As a general rule, I won’t complain about the weather. Snow happens. As does rain. As do those chinooks which bring a brief and welcome reprieve from the short days of winter.

But this year, for the first time, I’ve actually found myself daydreaming about a tropical holiday: aquamarine waters, warm beach, cold drink.

My bank balance, however, won’t allow it.

The next best thing is to eat like I’m somewhere exotic.

A spicy kick to warm the belly was the aim, a meal evocative of southwest Asia to cut through the grey afternoon with wind-whipped snow swirling outside. A little searching led me to Khao Soi, a Thai soup thickly spiced with red curry, but balanced with creamy coconut and spikes of lime. Chicken shredded after cooking in the broth and egg noodles add heartiness to this dish, which requires both fork and spoon to eat.

Pickled mustard greens or cabbage, crispy shallots and deep-fried noodles are traditionally added, but I craved a simpler soup that could be whipped up in less than hour without the need for all the pots in the cupboard. If I was going to pretend to be on a holiday, then coming up with something easily put together made sense.

As such, despite my recent vocal opposition to “recipes” that use cake mixes or jarred sauces – which I’m not against them as a general rule; I just expect when I click over to a food blog for a recipe that it will be how to make something, not just assemble it from pre-made parts – I admittedly came up with a version of Khao Soi that uses Thai red curry paste. I’d argue this falls more toward the practical end of the jarred sauce continuum since it’s comprised of numerous, and sometimes obscure, ingredients. But, since I could have technically made my own curry paste (recipes abound on the Internet), I’ll simply say there are times when shortcuts are warranted; this is one of those times.

I did enhance the curry paste with more garlic and ginger and a sprinkling of spices sautéed to enhance their flavour. The broth is rounded out with salty fish sauce and a bit of brown sugar then poured over bowls of chewy noodles and chicken cooked in the creamy, hot and spicy soup.

A bit of cilantro, lime wedges and bean sprouts added just before serving adds to the complexity.

The soup was all I had hoped for, hot and spicy enough – definitely at the upper end of my albeit low tolerance for heat – with the requisite sour, salty and sweet components that comprise a lot of southwest Asian cooking.

It wasn’t quite like sitting on a beach as aqua waters lap at the sandy shore, but it was at least a culinary escape from the dreary winter.

Khao Soi

I adapted this from a number of sources. I used chicken thighs which have more flavour, but boneless, skinless chicken breasts will work just as well in a pinch or if preferred. It can easily be made vegetarian by skipping out on the chicken and using vegetable broth. In that case, I’d add some fried tofu to round out the dish.

  • 2 tbsp (30 mL) vegetable oil
  • 2 cloves garlic, minced
  • 1 tbsp (15 mL) ginger, finely minced
  • 1 tsp (5 mL) curry powder
  • 1/2 tsp (2 mL) turmeric
  • 1/4 tsp (1 mL) cardamom
  • 3 tbsp (45 mL) red curry paste
  • 2 14-oz cans (796 mL) coconut milk
  • 2 cups (500 mL) chicken stock
  • 1 1/2 lbs. (750 g) chicken thighs, sliced in half lengthwise
  • 3 tbsp (45 mL) fish sauce
  • 2 tbsp (20 mL) brown sugar
  • 1 lb (500 g) fresh egg noodles (see note)
  • Lime wedges, cilantro, sliced shallots, bean sprouts for serving

In a large pot set over medium heat, warm the oil until it’s shimmering slightly. Add the garlic and sauté until fragrant, about 1 minute, then stir in the ginger. When the garlic and ginger are just cooked, but aren’t yet brown, add the curry powder, turmeric and cardamom. Sauté the spices until the form a paste with the oil and are fragrant, about 2 to 3 minutes. Add the red curry paste and stir with the spices, garlic and ginger. Work the paste and spices together and continue cooking, stirring nearly constantly and scraping it up off the bottom of the pot, until they are completely mixed and fragrant, another 2 to 3 minutes. Watch to ensure the spice mixture doesn’t burn. Scoop off the solidified coconut cream from the two cans of coconut milk and add to the pot. Mix well with the spice paste and cook, stirring often, until the red oil from the curry paste starts to separate, bubbling up to the surface, about 3 or 4 minutes. Add the rest of the coconut milk and the chicken stock. Bring to a boil. Add the chicken thighs, reduce the heat to a simmer and cover until the chicken has cooked, about 20 to 25 minutes. Remove the chicken to a dish and shred with two forks, setting aside until ready to serve.

Add the fish sauce and brown sugar and taste for seasonings, adding more of one or the other if desired.

Bring another pot of water to a rapid boil and cook the egg noodles until just tender with a slight chew. (Mine only needed about 45 seconds.) Drain and divide between 4 bowls.

Top with shredded chicken and ladle over the broth.

Serve with lime wedges, cilantro, sliced shallots and bean sprouts.

Serves 4.


Note: Find egg noodles at most grocery stores in the produce section or at Asian supermarkets.

Continue Reading

Eggs in Purgatory

Necessity is the mother of invention.

True in the world of technological advances. True also in the world of the kitchen.

Because, on those nights when there doesn’t appear to be anything in the cupboards and the fridge is down to just the basics, there are still meals to be made.

Such was the case the other night when I found myself hungry and with only the very basics in my cupboards and fridge. (Eclectic basics due to my bizarre impulse grocery shopping skills, but basics nevertheless.)

Among them, a can of diced tomatoes I’m sure I bought for a Bolognese that never ended up getting cooked, a chunk of Parmesan, part of a red onion, some rapidly wilting herbs and eggs.

In short, all the ingredients for a dish known as Eggs in Purgatory.

(It’s sometimes also known as Eggs in Hell, though I’d argue that’s for a spicier version than I can handle.)

Eggs in Purgatory II

There are millions of variations for this recipe, but they all start with the basic concept of cooking eggs in a tomato sauce. Beyond that, it can be as creative as one wants or dependent on what one has on hand: wilt in some greens like spinach or kale, add sausage, spicy chorizo or strips of prosciutto, sauté onions and garlic to give the sauce more flavour. Make a more “hellish” version by throwing in some chopped jalapenos or chilies while sautéing the onions. The options are limitless.

With my limited supplies, however, I kept it pretty basic. Thankfully, basic doesn’t mean boring.

With only 10 minutes and a very small amount of effort, I had a flavourful and filling dinner. The rich eggs with slightly runny yolks are a nice foil to the spicy tomato sauce. I mopped it all up with a crusty piece of bread slathered with some butter.

Using just one pan to make a meal means this dish is near perfection.

Next time, I probably won’t wait until necessity forces me to make this for dinner; I’ll make sure I have the ingredients for Eggs in Purgatory.

Eggs in Purgatory I

Eggs in Purgatory

For a spicier version, add more red pepper flakes or add some diced jalapeno. For some more green, wilt spinach or kale just as the onions have softened before adding the diced tomatoes.

  • 1 tbsp (15 mL) olive oil
  • 2 tbsp (30 mL) diced onion, about ¼ of a small onion
  • 1 clove garlic, diced
  • ¼ tsp (1 mL) red pepper flakes
  • 1 13.5-oz (398 mL) can diced tomatoes
  • ¼ tsp (1 mL) salt
  • freshly ground pepper
  • 2 eggs
  • ¼ cup grated Parmesan
  • ¼ cup chopped herbs

In a pan over medium heat, warm the oil and then add the onion, letting it sauté until softened and slightly transluscent. Add the garlic and red pepper flakes and sauté until fragrant, about a minute longer. Pour in the diced tomatoes and juice, stir and let come to a simmer. Add the salt and a few grinds from the pepper mill, then let the tomato sauce cook until the liquid reduces and the sauce thickens slightly. Taste for seasonings, adding more salt or pepper as needed.

Using the back of a spoon, make two divots in the sauce and crack the eggs into the spaces. Sprinkle the parmesan over the sauce and egg whites.

Cover with a lid and let the eggs cook until the whites are set and the yolk is slightly runny (or to your desired doneness).

Remove from the heat, then sprinkle with the chopped herbs.

Serve immediately.

Serves 1 to 2.

Continue Reading

Meyer Lemon Bourbon Sour and Oh My God, I’m Writing a Book

I’ve been driving around for the last few days with a 10-kilogram bag of sugar in my backseat.

Not even in the trunk — there isn’t enough room between all the flats of diet coke.

Lately, I’ve found myself in a position where I’m going through lots of sugar. Maybe not quite enough to justify purchasing a bag the weight of a small child, but it is a lot more cost effective this way.

It’s not that I suddenly have insatiable cravings for sweet stuff (I will almost always take savoury options over sweet ones when it comes to snacking, despite my love of baking), it’s that recipe testing comes with a lot of trial and error. And that means going through ingredients pretty quickly.

See, I’ve been keeping a small secret. At first because details had to be ironed out. And then because I just wasn’t even sure I believed it myself and finally because I didn’t really know how to even start that conversation.

But here it is: I’m writing a book. A cookbook.

Signed with Veuve Clicquot Rose

(I celebrated signing by drinking some Veuve Clicquot Rose. Sometimes a girl just has to splurge on herself.)

This time next year, people — friends, family, strangers — will be able to walk into a bookstore, or go online, and purchase something with my name on it, with my recipes inside, with my photos illustrating those cocktails, cookies, salads, main dishes and more.

The book contains all recipes that use lemons, limes and grapefruits and it’s called (and I do love this part) Pucker.

When I started this blog five years ago, it was a little side project, a hobby, something to counteract the gloom of covering crime and calamity in the city. These were the years at the height of the gang war and city police were handling upwards of 30 homicides a year. Those days when I worked night shifts, those weekends when I wasn’t listening to the police scanner, I was baking and cooking, photographing and writing, all for the pleasure of it.

Now I get to do all that as my job. And that led to me writing a book as a result.

Life is amazing sometimes.

Let’s have a drink to celebrate, shall we?

How about with a Meyer Lemon Bourbon Sour.

Meyer lemons are slightly sweeter, more fragrant versions of their regular cousins, which are more typical for sour drinks. They work just as well, as long as there is compensation on the simple syrup end of the equation. A sweeter citrus means less sugar is needed.

Meyer Lemon Bourbon Sour

I’ve gone old school with this sour, using egg white in the recipe to create a smooth and frothy cocktail. Those who don’t want to take chances by consuming raw egg can just leave it out. I make it both ways and both are equally good. (Though, admittedly, not using the egg white shaves off at least a minute. You know, if that drink needs to be made quickly. However, if you do use the egg white, may I suggest hanging on to the yolk and making some lemon curd?)

When I first started drinking sours, I made them with whiskey. (Good lord, this blog has come a long way since then. Yikes!) Over the last year, I’ve come to realize that I’m really much more of a bourbon girl. In particular, Buffalo Trace. So, that’s what I use in my cocktails, like this Old Fashioned. But, of course, use what you like, whether bourbon or whiskey.

And  yes, this will probably be in the book.

Meyer Lemon Bourbon Sour I

Meyer Lemon Bourbon Sour

  • 1 1/2 ounces bourbon or whiskey
  • 1 ounce Meyer lemon juice
  • 1/2 ounce simple syrup
  • 1 egg white

In a cocktail shaker filled with ice, combine all the ingredients. Shake well. Strain into a glass and enjoy.

Continue Reading

Fettuccine con Prosciutto e Piselli

The joke goes that my grandfather was born on the kitchen table and so his love affair with food began right from the start.

His passion for cooking fostered my own love of being in the kitchen and eating good food from the time I was a child.

My grandfather and me

My memories of him revolve around food: making fresh pasta, picking basil in his greenhouse and making little pots of pesto to be eaten on bread with cheddar, and eating plates and plates of pasta.

(The other joke is that my grandfather is secretly Italian.) I still feel that influence today.

When I cook the dishes he would make for me as a child, I am back in the kitchen with him. Comfort dishes are often those I associate with him: tomato and red onion salad, sweet peppers braised in tomato sauce and served with chunks of crusty bread, soft-boiled eggs with toast and, of course, pasta.

He makes a wicked carbonara, but the dish I have inextricably linked to him is Fettuccine con Prosciutto e Piselli – a much more romantic way of saying pasta with cream, peas and ham.

Piselli e Prosciutto

I’d sit at the dining room table and he would bring in heaping bowls of it, steaming hot and speckled with pink ham and green peas, dusted over with Parmesan and a sprig of parsley from the plant on his front deck.

There have been unusual and unexpected variations over the years, depending on what ingredients he had available. At one point, it was a truly bastardized version made from army green-coloured canned peas and canned flaked ham.

When I moved out on my own to go to university, my grandfather bought me a copy of The Umbergo Menghi cookbook containing the actual recipe which had spawned all his own versions. (And also the braised sweet peppers recipe.) Making it in the early ’90s on a student budget and without much experience finding specialty stores meant using more readily available types of ham since most grocery stores back then weren’t carrying prosciutto. Still, combining some version of ham with some cream and frozen peas and tossing it all with cooked pasta felt luxurious when competing against whatever food was being served in the cafeteria. (Lucky me to have had a boyfriend who lived off campus and, therefore, had a kitchen I could putter in occasionally.) Nowadays, prosciutto is easy to spot in the deli section, which means when I make this dish, it’s as Menghi intended.

Most of the time, though, I cook it from memory. Typically that also means adding more peas and prosciutto than called for. Partly because who doesn’t like all the good bits mixed with the pasta and also because that’s exactly how my grandfather does it.

A couple of years ago, while visiting my grandfather on the coast, we made some pesto together.

Then I let him sit at the dining room table sipping a glass of wine while I made Fettuccine con Prosciutto e Piselli for him, serving up a bowlful, sprinkled with Parmesan and a scattering of parsley from the plant on his front deck.

Piselli e Prosciutto

Fettuccine con Prosciutto e Piselli

While the measurements are quite specific, I won’t tell if a few extra peas and a slice or two of prosciutto find their way into the mix. I also like to let the cream reduce a little bit more than the recipe suggests. For reheating leftovers – if there are any – I find a touch more cream, or even milk in a pinch, helps. (ETA: if the mixture is too thick before serving — which happens when the cream reduces a bit too much — another splash of cream or some reserved pasta cooking water can thin it a bit.)

  • 1 lb (500 g) fettuccine
  • 2 tbsp (30 mL) butter
  • 2 tbsp (30 mL) dry white wine
  • 6 tbsp (90 mL) peas
  • 2 cups (500 mL) whipping cream
  • 2 oz (60 g) prosciutto, julienned
  • salt
  • pepper
  • 1 1/2 cups (375 mL) Parmesan cheese, divided
  • 2 tsp (10 mL) fresh parsley, finely chopped

Cook pasta in boiling, salted water until al dente, about 3 to 5 minutes for fresh pasta and 5 to 7 minutes for packaged fettuccine.

Sauté peas in butter and wine in a large skillet on medium heat for 2 to 3 minutes. Add cream to peas and cook on medium heat until cream begins to bubble. Add prosciutto to peas and cream and simmer on medium heat for 2 to 3 minutes. Season with salt and pepper, but use less salt than you would normally use. The prosciutto will give you some salt.

Add fettuccine to peas, cream and prosciutto. Gradually add 1 cup (250 mL) Parmesan cheese to fettuccine. Toss together and heat thoroughly until cheese has melted.

Put fettuccine into a warm serving bowl or on warm plates. Sprinkle with remaining 1/2 cup (125 mL) Parmesan and parsley and serve.

Serves 4 to 6.

Continue Reading

Blueberry Cornmeal Muffins

I was thinking about this recipe all day today now that blueberries are back at the markets and couldn’t figure out why I couldn’t find it on my own blog. Turns out I failed to post it after writing it last year (or even further ago). Making some of these tonight.

Blueberry Cornmeal Muffins I

My cupboards are stuffed with ingredients I’ve used for one recipe and then promptly forgotten about. Half empty packages of rice noodles, more Israeli cous cous than I know what to do with, cans of coconut milk and assorted pastas.

And amongst all those bags and packages are several of finely ground cornmeal, which I’ve bought to use in corn bread or polenta, then forgotten about and bought more. (I might be a candidate for some sort of kitchen-related hoarding intervention.)

I like polenta; I like corn bread. I even liked the bit of cornmeal added to the crust of a Rhubarb Crostata I made a couple of weeks ago. But none of these things has me getting through those bags of cornmeal quickly.

So, when I was looking for baking inspiration on Monday and stumbled across a Nigella Lawson recipe for Blueberry Cornmeal Muffins, I knew exactly what my next project would be. (To add to my eagerness, I had a large basket of blueberries in my fridge slowly wrinkling that needed to be dealt with immediately; clearly, it was a sign.)

Blueberry Cornmeal Muffins III

Like all muffins, this recipe is easy and comes together quickly.

But the addition of just a bit of cornmeal makes them more than just your average blueberry muffin. The top – which stays flattened – becomes a tasty golden crust, revealing beneath a tender and light muffin dotted with blueberries.

It’s neither overly sweet nor cakey, which seem to be more cupcake-like traits than muffin ones. And, while very soft, the cornmeal gives it a heartiness.

Having one more recipe in my arsenal that uses up my abundance of cornmeal – and such a tasty one to boot – pleases me.

And the fact that I got to use up some festive, polka dotted cupcake liners at the same time made this an even better way to clean out the cupboards.

Blueberry Cornmeal Muffins IV

Blueberry Cornmeal Muffins

This recipe comes from Nigella Lawson’s book Kitchen. I added a few more blueberries than called for and added a pinch of salt, which you can feel free to leave out, but I think rounds out the flavours in baked goods. The muffins were fully baked at the 15-minute mark, so consider checking a minute or two early.

Lawson suggests they are best eaten on the day they’re made, but can be stored in an airtight container, layered with parchment paper, then reheated in a warm oven for 5 to 8 minutes.

  • 1 cup (250 mL) flour
  • ½ cup + 1 tbsp (140 mL) cornmeal
  • 2 tsp (10 mL) baking powder
  • ½ tsp (2 mL) baking soda
  • 2/3 cup (150 mL) sugar
  • pinch salt
  • ½ cup (125 mL) vegetable oil
  • ½ cup (125 mL) buttermilk
  • 1 egg
  • ¾ cup (175 mL) blueberries

Preheat the oven to 400 F (200 C) and line a muffin tin with papers.

In a large bowl, mix the flour, cornmeal, baking powder, baking soda and sugar and salt. In a measuring jug or bowl, pour the oil and buttermilk and whisk or fork in the egg.

Stir the oil mixture into the bowl of dry ingredients – remembering that lumpiness is a good thing when making muffins – and fold half the blueberries into your thick golden batter.

Divide this batter between each muffin case (they will be about two-thirds full) and drop the remaining blueberries on top; you should have about 3 for the top of each muffin.

Cook in the oven for 15 to 20 minutes, till a cake tester comes out cleanish (obviously it will be stained if it hits a berry). Leave the muffins in the tin on a wire rack for 5 minutes, then remove the muffins, in their cases, to the wire rack to cool a little (not too much) before you serve or eat them.


Continue Reading

Berry Buttermilk Pancakes

I have a friend who delights in eating breakfast for dinner.

When she and her husband decide to have eggs and bacon, or maybe some pancakes, instead of more typical supper fare, it’s a treat.

She likes breakfast for breakfast just as much.

So, she was downright gleeful this weekend when she was able to order a full meal deal — eggs, sausage and a tall stack of fluffy pancakes — over the weekend after missing out for many months while living in France. (Coffee and a croissant is just not the same, understandably.)

Berry Buttermilk Pancakes II

I never order pancakes when out for breakfast because my tastes lean more toward savoury dishes in the morning. But there was something about that pile of pancakes, topped with melting butter and spilling over with syrup, that was oddly tempting.

When I got home from a weekend away and found my fridge devoid of groceries (as was expected), but, oddly, with a nearly full carton of buttermilk (which I had forgotten about), I knew exactly what I wanted to make.

Not just any Buttermilk Pancakes, but a stack of them speckled with fresh berries and then doused with real maple syrup. Tartness and sweetness packaged together. And maybe with a side of bacon, since I discovered an unopened package of that in my fridge too (a very pleasant surprise).

Berry Buttermilk Pancakes I

Although blueberries are the most common pancake addition, I wanted to use tart raspberries, which kind of squish and caramelize when flipped to cook against the hot pan.

They become these little pockets of bright berry colour and flavour, hidden in the golden-tinged fluffiness of the pancake. When right side up, the pancakes don’t reveal their hidden gems.

Also, it seemed a particularly summery addition, since they’re coming back into season.

Breakfast for dinner has many benefits, not the least of which is it’s pretty quick to prepare. Whisk together some flour and leaveners; do the same with buttermilk, eggs and melted butter for some added richness. Mix them together gently, fry and enjoy.

Even better, the trick with pancakes — much like muffins — is the batter shouldn’t be overmixed. It’s not only OK, it’s preferable that it be a bit lumpy.

Once done, the light pancakes spotted with juicy berries were just the right mix of rich and tart, soaked with the sweetness of syrup.

They were enough to make me think I need to adopt my friend’s breakfast-for-dinner plan a little more often.

Berry Buttermilk Pancakes III

Berry Buttermilk Pancakes IV

Berry Buttermilk Pancakes

I like tart raspberries in here, but blueberries would work just as well, or a mix of the two. I like smaller-sized versions rather than plate-sized pancakes — better for stacking — so I use a 1/3-cup measure to pour the batter. If you like a larger pancake, use a 1/2 cup measuring cup; those will fit about two to the pan, depending on its size.

  • 2 cups (500 mL) all-purpose flour
  • 3 tbsp (35 mL) sugar
  • 2 tsp (10 mL) baking powder
  • 1 tsp (5 mL) baking soda
  • 1/2 tsp (2 mL) salt
  • 2 1/2 cups (625 mL) buttermilk
  • 2 eggs, lightly beaten
  • 1/4 cup (60 mL) butter, melted and cooled, plus more for the pan
  • 1 cup (250 mL) raspberries

In a large bowl, whisk together the flour, sugar, baking powder, baking soda and salt. In a separate bowl, mix together buttermilk, eggs and melted butter. Add the wet ingredients to the dry and whisk together gently until just combined. There will be some lumps.

Heat a pan over medium-high heat until a bit of water added to the pan bounces and sizzles. Add butter and let melt, swishing around the pan to evenly coat the bottom. Using a 1/3-cup measuring cup or similar sized ladle, pour pancake batter into the pan. (Mine fit about 3 pancakes with some room for flipping.)

Drop four or five raspberries on each pancake and let cook until bubbles form and those at the edges don’t fill in when they pop — about 2 to 3 minutes. Flip the pancakes and let cook for another minute or so.

Remove to a plate and continue cooking the rest of the pancakes.

Makes about 16 pancakes.

Continue Reading

Candied Ginger Scones

I keep butter in my freezer at all times for scone baking emergencies.

They used to intimidate me; one bad batch – which would have been flattered to be called hockey pucks – had me thinking I would never make a successful scone.

Learning Nigella Lawson’s trick of grating frozen butter into the flour was a game changer and now I find them to be one of the easiest, and fastest, things to bake when suddenly craving something sweet to eat with a bit of jam or butter.

Candied Ginger Scones I

They are also one of the most adaptable things to bake: lemon zest and glaze for a spring scone, chocolate or spices for fall, cheese and herbs for a savoury version.

This also makes them perfect for bits and pieces one may find in their baking cupboard.

So, when I discovered a handful of candied ginger leftover from a cupcake project and an uncracked jar of Devonshire cream at the back of the fridge (who impulse buys Devonshire cream? Me, apparently.), it was clearly time to make some scones.

Even if it was 11 at night.

After quickly whisking together the dry ingredients, grate in the frozen butter. This creates the perfect little nuggets of butter easily incorporated in the rest of the dough. When they hit the heat of the oven, they melt, creating the flaky layers that make scones so tender and light.

Sometimes I will cut out my scones, in circles or squares, using biscuit cutters or an upended glass. But other times, I like to just pat the dough into a circle and cut it into wedges for something a bit more rustic . . . and fewer things to wash.

Candied Ginger Scones II

Candied Ginger Scones

  • 2 cups (500 mL) flour
  • 1/3 cup (80 mL) sugar
  • 1 tbsp (15 mL) baking powder
  • ¼ tsp (1 mL) salt
  • ¼ to ½ cup (60 to 125 mL) candied ginger, chopped
  • ½ cup (125 mL) butter, frozen
  • ¾ cup (180 mL) cream, plus more for brushing the scone tops.
  • 1 egg

 
Preheat oven to 400F (200C).

In a large bowl, mix together flour, sugar, baking powder, salt and chopped ginger. Using the large holes on a box grater, grate the frozen butter into the dry ingredients. With your fingertips, gently toss the flour and butter until thoroughly combined. In a small bowl, mix together egg and cream. Pour into the butter-flour mix and stir until just combined. (Sometimes an extra tablespoon or two of cream is necessary, but the mixture should not be very wet.)

Turn the dough out onto a clean surface and squish together, patting it into a circle about an inch (2.5-cm) thick.

Cut the circle into eight wedges and place on a parchment-lined baking sheet, leaving space between them to grow.

Brush lightly with cream.

Bake for 12 to 15 minutes until golden.


Continue Reading

Lemon Polenta Cookies

To glaze or not to glaze? That was, in the end, the question.

And, with apologies to Shakespeare, it was a far tastier one.

Lemon Polenta Cookies II

It started with some Lemon Polenta Cookies and an overachieving lemon that gave off copious amounts of juice – far more than necessary for the recipe. It developed when I remembered once seeing a recipe for a different lemon cookie featuring a glazed top — all smooth and pale white, just hinting at the lemon flavour. And it culminated with me mixing up just a bit of a glaze, enough to use up the last of the juice – waste not, want not, after all – and drizzle some of it over a handful of cookies to see which were tastier.

I was first attracted to this recipe after discovering, to my dismay, that I have three packages of finely ground cornmeal in my cupboard – the product of forgetting I have some, buying more and then forgetting again. I had been through a cornbread phase, followed by an actual made-from-scratch polenta phase. And then those bags were forgotten about until a fit of not-quite-spring cleaning.

(Truly, if there is a zombie apocalypse, please come to my apartment. My overly stocked cupboards should keep us fed for the first few months.)

The idea of adding cornmeal to a cookie was intriguing. The result didn’t disappoint.

The addition of cornmeal gives them a slight heartiness, a nuttiness and a nice texture, even though they’re still soft and chewy in the centre.

The zest and lemon juice add lots of bright flavour and the whole recipe comes together quickly.

Unadorned, they were lovely. But there was all that leftover, freshly squeezed and strained juice just asking to be made into a glaze.

So, a glaze I made, drizzling it thickly over the cookies and letting it coat the nubbly surface.

Friends were divided on which they preferred.

As one said, when there is a chance to glaze, the answer is always to glaze.

Another disagreed, noting the plain version of the cookie had a crunchier top, which was preferable.

I ate both – possibly a few times – and still remain completely divided.

Surely, the only solution is to try yourself and see which you prefer.

Lemon Polenta Cookies I

Lemon Polenta Cookies

  • ½ cup (125 mL) finely ground cornmeal
  • 1 ½ cups (375 mL) all-purpose flour
  • ½ t (2 mL) salt
  • ¾ cup (175 mL) butter, softened
  • 1 cup (250 mL) sugar
  • zest of 1 lemon
  • 2 tbsp (30 mL) lemon juice
  • 1 egg

Preheat oven to 350.

In a bowl, whisk together the cornmeal, flour and salt. Set aside.

Using a mixer, beat together the butter and sugar until light and fluffy. Add the lemon zest and juice, mixing until incorporated. Beat in the egg.

Add the cornmeal mixture and mix on low speed until just incorporated, about 1 minute or less.

Scoop tablespoon-sized balls of dough onto cookie sheets, allowing room for them to spread a bit.

Bake until just golden at the edges, between 14 and 18 minutes, depending on the size of the dough balls.

Makes 18 to 20 cookies.


Optional Glaze

  • ¼ cup (60 mL) icing sugar
  • 1 tbsp (15 mL) lemon juice

In a small bowl, mix together the sugar and lemon juice until completely incorporated. Drizzle over cookies.

This should be enough to glaze about half the cookies.


Continue Reading

Bourbon Old-Fashioned

Things have been roller coaster-ish in the last couple of weeks. Some pretty good highs, some devastating lows.

And, while I’m not one to advocate drinking away your sorrows, suffice to say that there were a couple of nights when I got home from work and really felt like I could use a cocktail.

Bourbon Old-Fashioned I

Lately, I’ve been loving the classic Bourbon Old-Fashioned. I had a couple at National back in December, raising a few eyebrows among the group I was with.

“That smells like my dad’s liquor cabinet,” said one friend after taking a sniff.

She may have a point, but I really love this cocktail. So, since then, I’ve kept ordering them. Like at Charcut a couple of weeks ago.

Later, out of curiousity, I looked up the recipe and saw how easy they are to make.

So when the cocktail urge struck, I bought a bag of ice, made some simple syrup and stirred myself a drink.

Bourbon Old-Fashioned III

Bourbon Old-Fashioned

Typically, the recipe calls for straight orange, but I happened to have a couple of blood oranges lying around, so I used slices of that. Of course, use what you have on hand. Although I usually have Maker’s Mark, I recently bought a bottle of Buffalo Trace, which I’m enjoying a lot.

  • 1 sugar cube
  • 3 dashes Angostura bitters
  • 1 orange slice
  • splash of soda water
  • ice cubes
  • 2 1/2 fl. oz. bourbon

In a double old-fashioned glass (or, in my case, whatever glass I have lying around that is clean), combine the sugar cube, bitters, orange slice and soda water and muddle together. Add a handful of ice cubes, then the bourbon. Stir well.

Makes 1 drink.


Continue Reading

Apple Muffins

I am not a breakfast person.

I mean, I love breakfast — or maybe more accurately, I love brunch. A plate of eggs and sausages and hash browns? Yes, please. Huevos Rancheros? Absolutely. Even classic eggs Benedict is a perfect way to start the day.

But during the week, I’ll grasp at any extra sleep I can get in the morning and if that means foregoing a sit-down breakfast, then that’s the sacrifice I will make.

That doesn’t mean, though, that I skip the meal entirely. There’s no way I could last until lunch and I recognize the importance of starting off the day right (while still hitting the snooze button at least once).

So, I like to have stuff around that I can grab and take with me. Fruit, small chunks of cheese, maybe even a sandwich. And, occasionally, I have fresh muffins.

Apple Muffins

Bran or blueberry are standard, but when I saw the small collection of apples on my counter (my go-to fruit for snacking) this week, I thought it might be nice to incorporate them into a muffin.

It would have to be spiced with some cinnamon and nutmeg and the chunks of apple should be big enough to notice, but small enough to get well distributed in the mix.

After digging around on the Internet, I found a recipe from Martha Stewart to use as a guide, but I made a few changes, including adding nutmeg (a warm flavour I think is perfect with apples) and reducing the butter; a little fat is fine in a muffin, but I think a half a cup is unnecessary.

I made it with Fujis and Galas because that’s what I had around the house. The original calls for a Granny Smith, which would give off a tarter flavour, but these sweeter apples were just as nice.

And I didn’t bother peeling the apple before dicing it because:

a) There are lots of great nutrients in the peel;

b) I can’t be bothered;

c) All of the above.

Plus, I like how the skins imparted a slightly pink hue to the baked muffins.

These turned out really well, warmly spiced and full of small chunks of apple. With a chunk of cheddar and a cup of tea, it’s a good way to start the day — right after hitting the snooze button.

Apple Muffins

Apple Muffins

  • 2 cups (500 mL) flour
  • 1 cup (250 mL) sugar
  • 2 tsp (10 mL) baking soda
  • ¾ tsp (3.5 mL) salt
  • ½ tsp (2 mL) cinnamon
  • ½ tsp (2 mL) nutmeg
  • 1 apple, cored and diced into ½-inch (1-cm) cubes
  • 1 cup (250 mL) buttermilk, at room temperature
  • 2 eggs
  • ¼ cup (60 mL) unsalted butter, melted and cooled


Preheat oven to 400F (200C). Line a muffin tin with liners or spray with vegetable oil.

In a large bowl, stir together flour, sugar, baking soda, salt and spices until thoroughly mixed. Stir in apples.

In a separate bowl, using a fork or whisk, mix buttermilk, eggs and butter.

Make a well in the dry ingredients and pour in the wet. Using a spatula or spoon, gently fold together the mixture until just combined. Do not over mix.

Divide batter between muffin cups, filling three-quarters full. Bake until the muffins are brown and a toothpick or tester comes out clean, about 16 to 18 minutes. Let cool slightly in the pan before removing to a rack.

Serve.

Makes 12 to 18 muffins.


Continue Reading