Bourbon Blondies

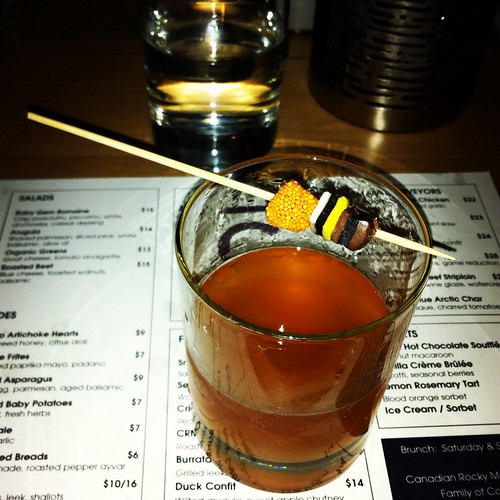
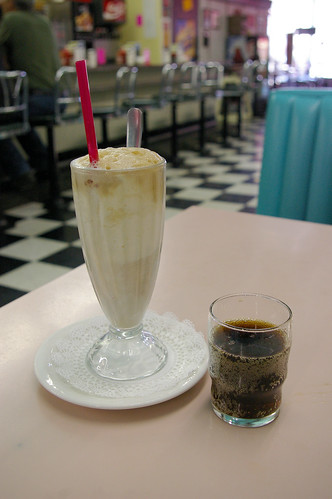
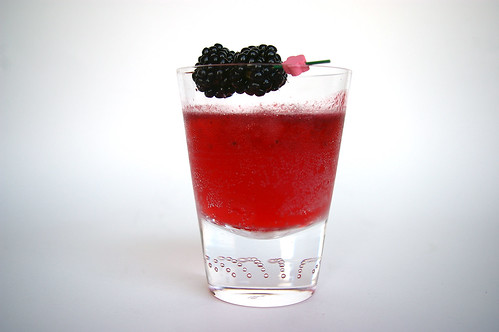
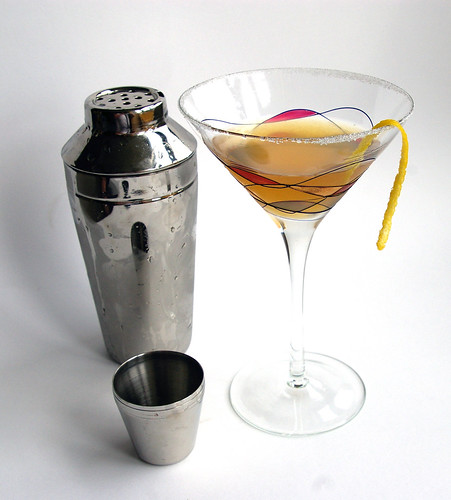
I like a good bourbon cocktail.

An Old Fashioned, a Sour, a Mint Julep.

But when I pull out my bottle of bourbon at home, more often than not it’s because I’m adding it to something I’m baking.

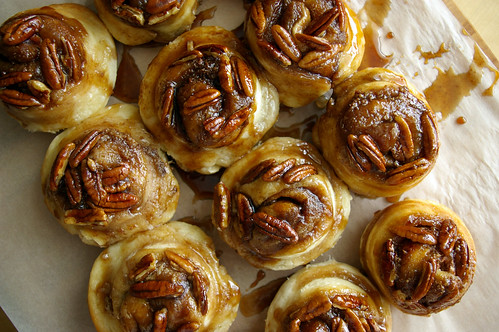
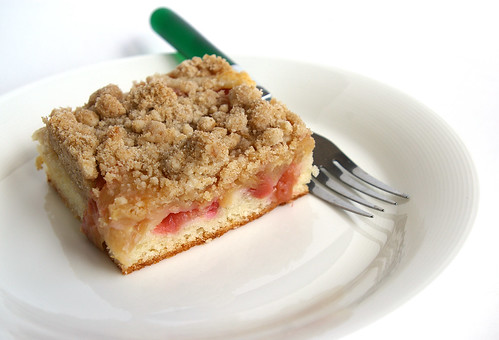
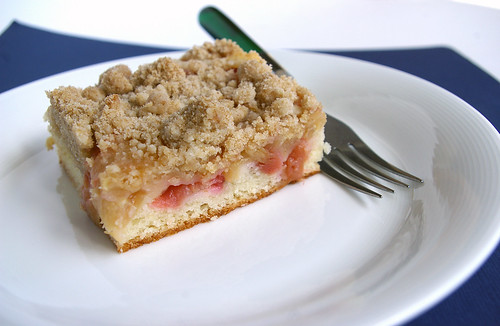
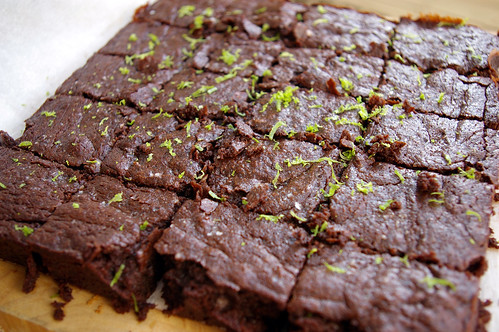
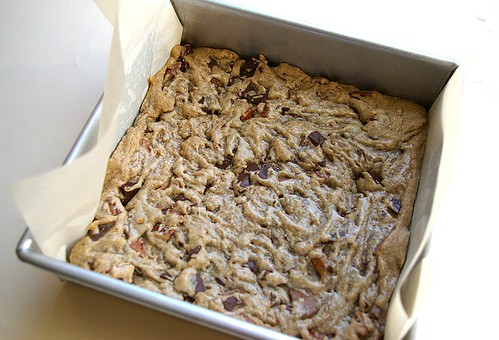
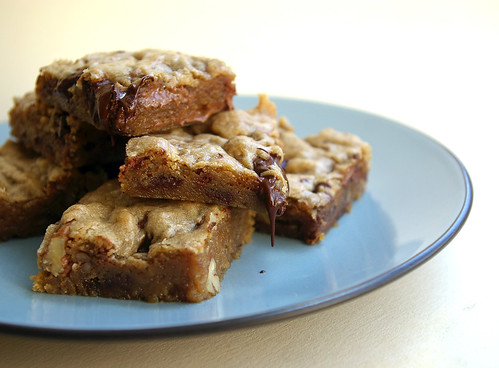
There are the Bourbon Pecan Pie Brownies, the Vanilla Cupcakes with Bourbon Buttercream and these, the Bourbon Blondies.

Bourbon Blondies II

Since first unveiling a plate of these boozy bars at a friend’s house a few summers ago, they have become my go-to dessert for potlucks and parties. They’ve been packed along to ski weekends and made an appearance at a party kicking off 2013. They remain one of my most requested baked goods within my circle of friends.

Though maybe not after I reveal just how easy they are to make and everyone just starts whipping up their own batches.

I don’t remember when or how I first stumbled upon a recipe for blondies. They don’t seem quite as well-known on this side of the border as they are south of it.

So, when I put out a plate of them, I’m often asked just what they are exactly. And the answer is they’re kind of like a brownie, but minus the cocoa, which makes a brownie, well, brown.

Perhaps a more accurate description is they’re kind of bar-like cookies.

The beauty of them lies in both how easy they are to make and their adaptability.

Like brownies, you melt the butter, which makes them great for impulse baking, as opposed to most cakes and cookies, which require room temperature butter.

The addition of bourbon puts a spin on things – no pun intended. The alcohol will mostly cook off – and the amount for the entire pan is a mere two ounces, or the equivalent of one of my favourite cocktails – but the flavour remains.

Bourbon Blondie batter

Bourbon Blondies baked

Bourbon Blondies out of the pan

Sliced

Bourbon Blondies I

Bourbon Blondies

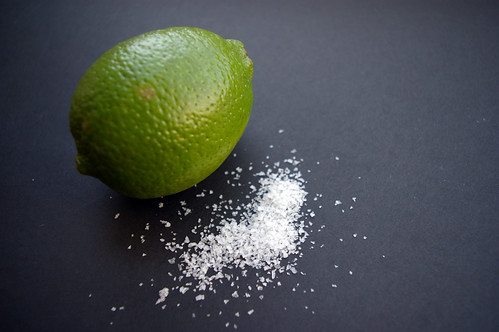
To keep these kid-friendly or if bourbon isn’t your thing, simply omit the alcohol and the additional 1 tablespoon of flour. Use whatever additions feel good; I typically use chocolate chips and pecans, but have tried other nuts and even dried fruits, such as cranberries. For the bourbon, I use whatever I have on hand or, occasionally, whiskey instead.

  • 1/2 cup (125 mL) butter, melted
  • 1 cup (250 mL) brown sugar
  • 1 egg
  • 1 tsp (5 mL) vanilla
  • 1/4 cup (60 mL) bourbon or whiskey
  • pinch salt
  • 1 cup plus 1 tbsp (250 plus 15 mL) all-purpose flour
  • 1/2 cup (125 mL) chocolate chips
  • 1/2 cup (125 mL) chopped pecans

Preheat oven to 350F (180C).

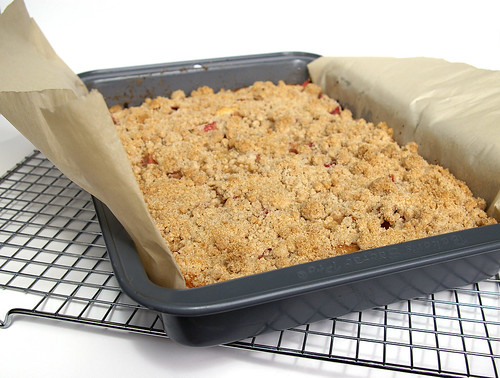
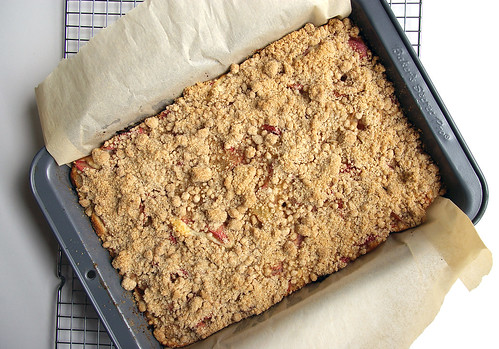
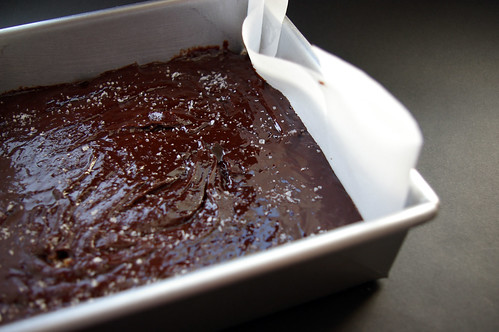
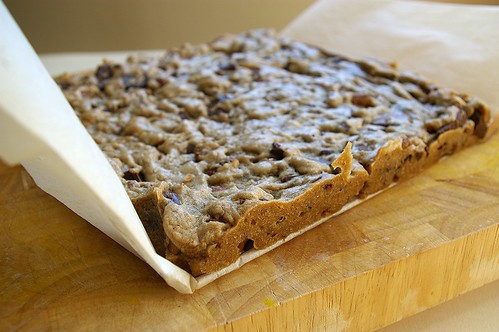
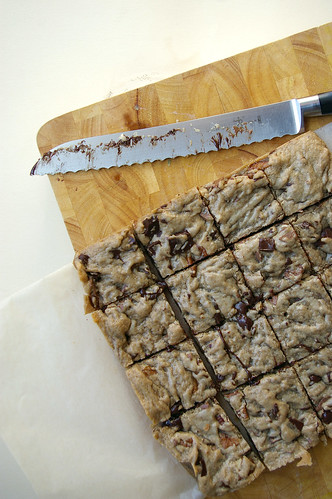
Butter an 8×8-inch (20x20cm) pan and line with parchment paper that has extra to hang over the sides like a sling. (This makes for easy removal and slicing.)

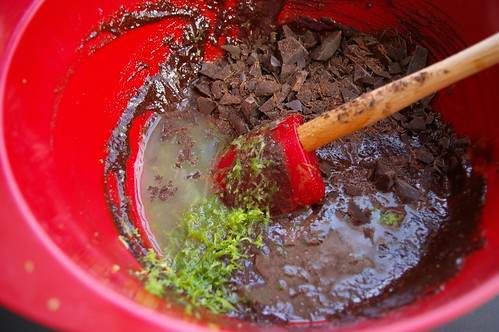
In a bowl, mix together the melted butter and sugar. Beat in the egg, then vanilla. Stir in the bourbon or whiskey and mix until combined. Add the salt and then gently stir in the flour. Add the chocolate chips and pecans and stir until just combined.

Scrape into the lined pan and pat down the rather thick batter so it creates a layer that reaches the edges of the pan.

Bake for 20 to 25 minutes or until the middle has set.

Remove and cool on a rack before removing from the pan and slicing.

Continue Reading

Roast Salmon and Potatoes with Mustard-Herb Butter

Some meals are made perfect simply by the company and the conversation.

There’s something about gathering together good friends and good food that makes a meal so much greater than the sum of its parts.

The first time I had this Roast Salmon and Potatoes with Mustard-Herb Butter was in Edmonton while visiting friends. For the last day of the weekend, we decided to have some fun in the kitchen and, after flipping through Martha Stewart’s Dinner at Home, we settled on it.

A trip to the farmers’ market netted us the fingerling potatoes and herbs, a stop at the fishmonger, the salmon, and the final stop was at the wine store for some rose. (I drink what I like and do not profess to know anything about pairings; but I did like this match.)

The recipe comes together so quickly that there was more time to chat and set the table for the early afternoon meal.

And when the coral pink salmon and lightly browned potatoes came out of the oven and we smothered on the green-flecked butter, we knew it was going to be good.

Roasted salmon and potatoes with mustard-herb butter

But it was the combination of the rich salmon, crisp-edged potatoes and fresh herbs, along with the crisp rose and the inevitable laughs and conversation that made the the meal so memorable. That said, when I made it again Monday night, alone in my apartment, and ate it with a now-requisite glass of rose, it was still incredibly tasty.

The Dijon is not overwhelming and the rich fish is brightened by the slight mustard tang and fresh herbs.

And I love the idea of a one-pan dish, particularly since I’m the one doing the dishes.

Maybe that’s another great reason why this should be enjoyed with friends.

Roasted salmon and potatoes with mustard-herb butter

Roast Salmon and Potatoes with Mustard-Herb Butter

I’ve had this with fingerling potatoes, which are great, but this time around I used the more readily available Yukon Golds.

  • 1 tbsp plus 2 tsp (25 mL) extra-virgin olive oil, plus more for the pan
  • 1 lb (500 g) fingerling potatoes, halved lengthwise
  • coarse salt and freshly ground pepper
  • 2 lb (1 kg) fillet salmon, skin on
  • Mustard-Herb butter (see below)
  • fresh herbs, plus more leaves for garnish

Preheat oven to 400°F (200°C). Brush the bottom of a roasting pan with oil. Place potatoes in pan; season with 3/4 tsp (3 mL) salt and a pinch of pepper, and drizzle with 1 tbsp (15 mL) oil. Toss to coat, and spread in a single layer.

Roast 30 minutes, turning with a spatula after potatoes begin to turn golden underneath (about 20 minutes). Season salmon on both sides with salt and pepper. Push potatoes to edges of pan, and place salmon, skin side down, in centre of pan. Brush with remaining 2 tsp (10 mL) oil, and roast until salmon barely flakes on the edges when pressed, 25 to 28 minutes for medium-rare (it will still be pink in the centre). Brush salmon and potatoes with herb butter while still hot.

Serve, garnished with herbs. Serves 4.

Mustard-Herb Butter

While the original recipe calls for chervil, thyme and parsley, I used dill, tarragon and parsley.

Use what you like or what you have on hand. I didn’t use all of the butter, so don’t feel you need to put it all on. Stewart suggests it goes well with roasted, grilled or broiled fish, chicken or pork.

I’m thinking of roasting the rest of my potatoes and tossing it with them.

  • 1/2 cup (125 mL) unsalted butter, room temperature
  • 1 tbsp (15 mL) Dijon mustard
  • 1/4 cup (50 mL) tightly packed small herb leaves, such as parsley, thyme and chervil, plus more for garnish
  • coarse salt and freshly ground pepper

Stir butter and mustard together in a small bowl until smooth. Stir in the herbs and season with 1/4 tsp (1 mL) salt and 1/8 tsp (0.5 mL) pepper, or to taste.

(The compound butter can be made ahead, rolled tightly in parchment paper to form a log, and then wrapped in plastic; store in the refrigerator up to 1 week, or in the freezer up to 1 month.)

This article first appeared in the Calgary Herald. For more recipes and meal ideas, check out CalgaryHerald.com/food.

Continue Reading

Leftovers III

One of the awesome things I got to do this summer was appear on Breakfast Television and judge some of the city’s food trucks. For three mornings (four, if you include the day when I announced the winner), I got up extra early and — before most people had their first coffee — chowed down on smoked meat sandwiches, burgers, donuts, French Fries and gelato.

Yes, sometimes my life is pretty amazing.
I mean, this is my kind of breakfast.
One tall burger

I had the pleasure of judging with John Gilchrist and Calgary Farmers’ Market’s Amanda Bonner. (The Best Of segment tied in with the Sundown Chowdown event at the market that weekend. I judged some of those dishes too. Oooof.)
Here we are preparing to try the Whole Truck Burgers and Poutines from Alley Burger.
Judging Alley Burger for BTV

This is The Special from Red Wagon Diner. Although not a huge smoked meat fan, I really loved this sandwich.
Red Wagon Diner's The Special

There were even ice cream sandwiches from Fiasco Gelato.
Fiasco Gelato ice cream sandwich

In the end, the winner was the Naaco Truck. But I have to give shout outs to Cheezy Bizness, which does fantastic grilled cheese sandwiches. I particularly loved The Big Cheese, which has a mix of cheddar and gruyere, pimento cheese, dill pickles and shaved red onion. And one of these days I am going to try a Mac Melt, which is grilled cheese with mac and cheese. Oh, yes! (I also love that owner Nicole is a huge proponent of local and runs her truck as close to waste-free as possible.) And another shout out to Los Compadres. They dished up some truly Mexican fare and the best mole sauce I’ve ever tried.

The folks from Teatro opened a new spot on Stephen Avenue this fall. Cucina is rustic and charming in decor, but the food is impeccably done.
Cucina place setting

Chef John Michael MacNeil has created a menu of bistro-style dishes with a Teatro influence. Rosemary roasted porchetta is tender and deeply flavoured. On the sandwich, the rich meat is contrasted with an apple-celery slaw.
Behold:
Porchetta sandwich from Cucina

The Chicken Liver Parfait is also fantastic.
Chicken liver parfait from Cucina

A couple of weeks after having lunch there, I was back having brunch. Loved that instead of hashbrowns, you can get servings of pan-fried gnocchi hash. I was glad to get back because I really wanted to try the BBT (Bacon Basil Tomato) sandwich, which isn’t on the lunch menu.
BBT sandwich from Cucina

We may have had eyes bigger than our stomachs.
Breakfast at Cucina
But it was worth it.

CRMR has added to its stable by opening Bar C on 17th Avenue. May I recommend the Sazerac? Because I do.
Sazerac from Bar C

Continue Reading

Chicken and Pistachio Terrine

Give me a plate of pate or terrine, some good bread and maybe something pickled on the side and I’m a happy girl.

Chicken and Pistachio Terrine II

The same can be said with a plate of cured meats, but I’m not about to make salami at home – not yet anyway.

Terrine, though, is essentially dressed-up meat loaf with a few extra steps (and a fancier name). And that is something I’m more than willing to take on in my kitchen – as dangerous as that might be.

It didn’t dawn on me to try this at home until I stumbled onto five terrine recipes in Donna Hay’s A Cook’s Guide – a book aimed at teaching home cooks some solid basic recipes with variations. When I reviewed the book for my column, I took on a baked risotto recipe, but I kept flipping back to this one for Chicken and Pistachio Terrine.

The combination of sweet and tart cranberries, nutty pistachios and a bit of tarragon mixed in to a chicken and pork terrine was very appealing.

It didn’t disappoint. Which is good. Because this recipe makes a lot of terrine.

As in, I’m pretty sure it could serve more than the recommended 10 to 12, depending on what else was being offered.

But that makes it a great dish for entertaining, especially as we head into the holiday season. (And yes, the green pistachios and red cranberries do make it seem even more festive.)

The fact that it’s incredibly easy to put together, not to mention that you make it the day before serving, also appeals.

It takes little more effort than putting all the ingredients into a bowl, mixing and dividing it between two loaf pans to bake in a water bath. Setting them in the fridge over night, covered with some foil, a piece of cardboard and something heavy produces a nice flat top , which makes them look more refined than rustic.

I ate a few slices on some baguette and ciabatta with some wee gherkin pickles and a couple of pickled cipollini onions.

And I was a very happy girl.

Chicken and Pistachio Terrine I

Chicken and Pistachio Terrine

The only changes to this recipe from Donna Hay are in the instructions. The original calls for a long, thin tin to bake the terrine in, but I’ve adapted it here to make two loaves baked in loaf pans lined with parchment paper for easy removal. It makes a lot of terrine, so if you’re making this for a smaller group, consider halving the recipe.

  • 1 ¾ lb (800g) ground chicken
  • 1 ¾ lb (800g) ground pork
  • 3 slices bacon, finely chopped
  • 3 cloves garlic, minced
  • 2 tbsp (30 mL) chopped tarragon leaves
  • 1 ½ cups (375 mL) dried cranberries
  • ½ cup (125 mL) shelled unsalted pistachios
  • 1 tbsp (15 mL) sea salt flakes
  • 2 tsp (10 mL) cracked black pepper
  • ½ cup (125 mL) port
  • 3 eggs

Preheat oven to 350F (180C). Place the chicken and pork, bacon, garlic, tarragon, cranberries, pistachios, salt, pepper, port and eggs in a large bowl and mix well to combine.

Lightly grease two loaf pans and line with parchment paper. Divide the mix evenly between the two, pressing the mixture down lightly.

Cover with aluminum foil, place in a deep baking dish and pour in enough hot water to come halfway up the sides of the pan. (I used two baking dishes, putting one loaf pan in each dish.)

Cook for 1 ½ hours or until firm. Remove tins from the hot water.

Cut two pieces of cardboard to fit over the terrine.

Fit over the aluminum foil and weigh down with a heavy object. (Canned vegetables are good here.)

Refrigerate overnight. Remove the terrine from the pan and slice to serve.

Serves 12 to 24. Note: There was some excess fat that resulted from baking the terrines. I gently poured it off before refrigerating them.

This article first appeared in the Calgary Herald. For more recipes and ideas, check out CalgaryHerald.com/Food.

Continue Reading

Leftovers Part II

So much eating lately.

Oof.

And lots of eating while traveling, but I’m going to do separate posts for those. Soon. I promise.

Until then, here are some shots from the last couple of months.

Bon Appetit.

First up, I have to say that I highly recommend the burgers at National. No surprise considering they were created by Justin Leboe, who is the chef behind the ones at Clive Burger and the one at Model Milk. This chef knows his burgers.

Order this one with fries and then take this tip from my little sister, turn your plate so the delicious burger juices drip on to the fries. Oh yes, that’s good stuff.

Oh, and order a beer.
Afternoon Beers

Don’t tell me this doesn’t look fantastic.
Burger from National

Drippings on fries. Mmmmmmm.
Fries and burger drippings

His fried chicken over at Model Milk is pretty damn good. Not the best photo, but it was a great night on the patio with the girls. The cup off to the right contains creamy grits and a fried egg.
Fried Chicken from Model Milk

And, speaking of Clive Burger. . . .
Love the decor.
Clive Burger decor

And the burgers.
Clive Burger

A burger from Clive was the first thing I ate after returning to Calgary from almost a month away in Italy, France and Morocco. It satisfied my burger craving in a big way.

In the summer I did a story about Village Ice Cream and am now absolutely addicted to their salted caramel. (Though cardamom is a close second.)
This is exactly how it should be eaten.
Salted Caramel Ice Cream from Village

I finally made it to Las Tortillas (warning link goes to site with autoplay music) up in Marlborough. This little store/taqueria is located in a strip mall and is one of those great secrets that Karen Anderson of Calgary Food Tours shared with me. I went back later with another friend and we had some tacos, which were very tasty.

Tacos from Las Tortillas in the northeast

On a night out at Catch with an old friend from high school, chef Kyle Groves gave us a little sampling of white salmon. I had no idea such a thing existed. But I’m glad I do know. This was incredibly tasty, especially with the lightly cooked peas and mushrooms.
White salmon from Catch

Over at Sidewalk Citizen Bakery, they’ve started offering pickles. They are spice and mouth puckeringly delicious. If you spy them when you stop by, I definitely recommend picking some up.
Sidewalk Citizen Bakery pickles

I did cook at home this summer, I swear.

My favourite cold remedy is homemade hot and sour soup. I like mine jammed with carrots, wood ear, shiitakes and green onions.
Hot and Sour Soup


I have my friend Suzi to thank for teaching me a bastardized version of the Zuni Roast Chicken Bread Salad, which is now one of my favourite indulgences. Don’t think of it like a salad; it’s more like stuffing with a bit of vinegary dressing.
Salting the chicken pieces and leaving it to air dry for a day or two gives it a super crisp skin, but the meat stays incredibly tender. The roast chicken goes on top of toasted chunks of raggedly ripped bread, with some cranberries and pine nuts and a few greens.
Zuni roasted chicken and bread salad
One day I hope to post Suzi’s version. Future weekend project.
Until then, Smitten Kitchen has her own version.

Continue Reading

Ricotta

I’ve bought my fair share of ricotta in my time from my local grocery store.

It’s good enough, especially since most of the time I’m simply folding it into lemon ricotta pancakes for Sunday breakfast.

The first time I had really good ricotta was at Corso 32 in Edmonton. House-made from goat milk, it had been slathered thickly onto slabs of toasted bread, then drizzled with oil and sprinkled with crunchy flakes of salt.

It was the perfect start to dinner with a group of friends I don’t get to see often enough.

On my next trip to Edmonton, I had barely walked through the front door of my friend’s house before she announced that our project for that afternoon – in advance of friends coming for dinner – was to make homemade ricotta.

The recipe was laughably easy: heat milk, add lemon juice, watch it curdle and then strain.

And yet it was unexpectedly exciting to watch the curds and whey separate with just a bit of acid thrown into the mix. Even more pleasing to unfold the cheesecloth after the whey had drained away from the curds and see the mound of thick, creamy ricotta.

(Check out the post Katherine did over here, complete with action photos.)

That recipe was good – we ate pretty much all of it that night, on toasted baguette with glasses of wine in hand, some olives and slices of prosciutto – but I’ve since found one that is made even more decadent with the addition of a full cup of whipping cream.

Technically, this may not be considered real ricotta, which in Italian means “twice cooked” and is made from whey – the byproduct of making other cheeses. But, when searching for ricotta recipes, almost all now use this method of adding an acid – lemon juice or vinegar – to heated milk (or a combination of milk and cream) and then straining off the curds.

(There are also a million variations, using more or less milk and cream, using different ratios of acid or using vinegar instead of lemon juice.)

Simple science, but it’s kind of like food magic.

The taste is also like food magic: rich and creamy, smooth and luxurious – a recipe that’s end belies how little effort went in.

Serve this on slices of toasted bread drizzled with honey or some extra virgin olive oil. Grind on cracked pepper or stir in herbs.

Use in recipes that call for ricotta. Or simply eat it plain.
Ricotta draining

Ricotta and baguette

Ricotta

This comes from Smitten Kitchen, which suggest a ½ cup of whipping cream if a full cup is too much, just be sure to make up the difference with whole milk.

  • 3 cups ( 750 mL) whole milk (3.25 per cent)
  • 1 cup (250 mL) whipping cream
  • ½ tsp (2 mL) coarse sea salt
  • 3 tbsp (50 mL) freshly squeezed lemon juice

In a large pot, mix together milk, cream and salt. Heat until the mixture reaches 190 F, stirring every so often to keep it from burning. Remove from the heat and add the lemon juice. Stir, gently, once or twice and then let sit for 5 minutes to let the curds and whey separate.

Line a large sieve or colander with two or three layers of cheesecloth and place over a bowl. Pour the mixture into the sieve and let it strain for at least an hour or more, depending on how firm you like it. (I stopped draining mine around 1 hour and 15 minutes.) It will also firm up more once refrigerated.

Eat immediately or put in an airtight container and refrigerate. Makes little more than one cup (250 mL).

Continue Reading

Looking for the Butter, Onion and Tomato Sauce?

If you’re looking for the Butter, Onion, Tomato Sauce after seeing it on Global Calgary this morning, it’s right over here.

Thanks for watching!
Spaghetti and sauce II

Continue Reading

Off to see Montana’s Mermaids — a road trip to Great Falls

Oh my, I am way behind on blogging. I’m truly sorry. But, wow, what a whirlwind few months: busy summer, wedding in San Francisco (um, not mine, in case you were wondering) and then almost a month traveling through Italy, France and Morocco. Watch for posts on that soon — I promise. Until then, here’s a trip I took in the spring.


Jesus bought a round of shots as one of the mermaids swam by, her slightly diaphanous tail rippling in the aquamarine water. And that moment solidifies the oddness of the trip we’re on.

We have come to Great Falls partly for a chance to get out of town and do a little shopping. But mostly we have come for the Sip n’ Dip Lounge at the O’Haire Motor Inn – a tiki-themed bar where mermaids swim most nights as patrons sip their themed drinks.

Almost a decade ago, GQ named the Sip n’ Dip it’s top pick for bars worth flying for. It’s a distinction the bar remains proud of, noting it on its website.

I can’t remember who told me about the mermaids or when.

Mostly, I have associated Great Falls with a Target and being the site of one-time Lethbridge alderman Dar Heatherington’s faked disappearance from the Montana city, which grabbed international headlines. But somewhere along the way, the idea of seeing the mermaids swim at the Sip n’ Dip took root and was at the back of my mind when I’ve thought about heading stateside for a road trip and cross-border shopping. My friend, Kirsten, who flew out from Victoria for an extra long weekend, was game. So we booked our hotel online, made a six-hour playlist for the iPod (a key factor for song choice were ones we could belt out as we made the trip) and, passports in hand, headed for the border.

Any expectations I have are challenged as we get out of the taxi at the O’Haire Motor Inn on a rooftop parking lot in front of a non-descript door, surrounded by a handful of smokers.

The bored-looking bouncer checks our ID and wraps our wrists in bright yellow bands with Sip & Dip Lounge, Great Falls, MT, written on them. And then we push our way in.

Sip n' dip Lounge wristband

The ceiling is a faux thatched roof; pleather banquettes ring the edge of the small establishment filled with fake flowers and Christmas lights, mermaid-inspired plaques and statues. It all looks as if it hasn’t changed since the 1960s.

Sip n' Dip Lounge

It’s packed with patrons, sipping American beer and blue cocktails. Many have gathered around the pleather-padded seating area that encloses Piano Pat Spoonheim and her key-boards. She is as vintage as the decor.

We can barely spot her – her tiny stature, combined with the tall bar (and even taller guests) make it nearly impossible – but her voice carries through the bar.

Her rendition of Sweet Caroline gets the entire bar singing.

We push past the crowd and settle into two turquoise seats right at the main bar – prime seating in front of the two windows that look into the pool where a goggled mermaid finally swims by, long hair and colour-coordinated tail floating behind her.

She surfaces quickly for a catch of breath, then slips down again to wave and smile in the few seconds she has before needing more air. At last, a second one appears and for a minute or two they co-ordinate their appearances – one for each window.

Mermaids at the Sip n' Dip

A flutter of dollar bills, tips taped to the window in exchange for a smile and wave, obscures part of the view, but we are two of only a few actually watching the underwater act.

Mermaid at the Sip n' Dip

We order some drinks and I marvel briefly at the $3 price tag for a highball before moving onto one of the nautical-themed drinks, some of which are available in giant, keepsake fishbowls.

At the bartender’s suggestion, I pick the Marvellous Mai Tai: a four-shot, three-rum concoction with a hint of citrus. It leaves me feeling like the mermaids are not the only ones swimming.

And then Jesus strikes up a conversation, eventually offering to buy a round of shots.

Jesus, who goes more simply by the name Jay, moved to Great Falls from Texas, taking on odd jobs at a nearby ranch. He barely looks at the mermaids, but I watch the windows carefully for their brief but steady appearances, waving back when they wave, echoing their smiles.

I’m delighted when one finally swims through a hula hoop set up in the middle of the pool.

And, as we watch, the crowd thins and Jesus calls it a night.

The mermaids disappear from the swimming pool, taking their glowing balls and hoop. They reappear in human form in the bar, wet hair and all, to gently peel the dollar bills from the window and head home.

The next day we fulfil our second mission: shopping.

We hit the stores along the main drag: Target, the Ross and JC Penney at the Holiday Village mall, and the independent boutiques inside.

But we also head down-town where brick buildings house antique stores and other shops, including Candy Masterpiece, where we stop for chocolates, gummies and other candies. Their vanilla caramels are so good we stop again the next day as we are heading back. But not before lunch at the retro 5th Street Diner. The burger is average, but the milkshakes and soda floats are stellar.

Coke float

Burger and fries

Stools at the counter II

And then, with the iPod on and the sunroof open, we make the drive home.

Me and Kirsten at the Sip n' Dip

Kirsten and me at the Sip n’ Dip at closing time.

Continue Reading

Blackberry Gin & Tonic

It is unclear to me when I realized I liked gin.

I remember having some in high school – and we’re well past the statute of limitations on that incident, I’m sure – and not being entirely enamoured with the juniper flavour.

At some point between then and now, however, it’s become my preferred liquor. (Though, admittedly, the brand has changed in the intervening years.) Gin and tonics are now my preferred highball.

Although lime is traditional, I like mine with a squeeze of fresh lemon. Sometimes I add in some rhubarb bitters I found at a small shop in Portland, Ore. But even with these minor tweaks, the recipe is essentially the same.

Every favourite can benefit once in a while from a little change, however, so when I stumbled on this recipe for a Blackberry Gin and Tonic while cruising Serious Eats – an excellent online resource for recipes, cooking tips and, perhaps most important to me, reviews of hamburgers all over the U.S. – I bookmarked it immediately.

Blackberry Gin & Tonic I

The scorching heat over the past weekend that had me wilting in my apartment seemed like the perfect time to give it a try. Gin and tonics are a good way to beat the heat, in my opinion, and adding the juicy, sweet and tart summer flavour of blackberry only adds to that.

With my ice and wee clamshell case of some of the juiciest blackberries I’ve ever seen in the grocery store, I set to work.

While I do have a cocktail shaker and set, I don’t have a muddler – a long-handled, often wooden pestle used by bartenders to pound at fruit and herbs to release their flavours. I’m sure a real bartender would balk, but let me assure you that the back of a large spoon pressed against the inside of the cocktail shaker seemed to do a very nice job squeezing out that deep purple juice from the ripe berries.

A little squeeze of lime, some tonic and a large handful of ice then get all shaken up. (I love watching the shaker fog over from the cold as it’s shaken.)

The resulting liquid is berry bright in the glass, even after the tonic is added.

Blackberry Gin & Tonic IV
(P.S. How sweet are these glasses? My little sister has very good taste.)

It tastes of summer and refreshment and of a welcome change to my old favourite.

Blackberry Gin & Tonic III

Blackberry Gin and Tonic

This recipe comes from Serious Eats.

  • 6 ripe blackberries, plus 2 more for garnish
  • 1/2 oz fresh lime juice
  • 1 oz simple syrup (see Cook’s Note)
  • 1 1/2 oz gin
  • 2 to 3 oz tonic water

In a cocktail shaker, muddle the blackberries and lime juice. Fill with ice and add simple syrup and gin. Shake vigorously for about 10 seconds.

Fill a Collins glass with ice. Double strain into serving glass using a cocktail strainer and its strainer or a mini fine-mesh strainer to prevent the blackberry seeds from going into the glass. Add tonic water and stir gently. Garnish with a few blackberries on a skewer.

Cook’s Note: To make simple syrup, combine equal parts water and sugar in a small saucepan and heat over medium heat, stirring, until all the sugar is dissolved. Cool before using. It will keep in a sealed container in the fridge for up to five days.

Edited to add: At a friend’s request, I made these again the weekend this story first appeared in the Calgary Herald. It would be an understatement to say they went over well. This is, hands down, my new favourite summer drink.)

Continue Reading

Easy Butterscotch Sauce

When it comes to ice cream sundaes, there has never been any waffling for me. You can keep your hot fudge, I’ll take butterscotch (or caramel – since there doesn’t seem to be a difference in the ice cream world), please and thank you.

Butterscotch Sauce II

It’s not that I don’t like chocolate at other times. But there’s something about the combination of vanilla ice cream and the buttery richness of a warm butterscotch sauce that pleases me immensely.

It was a good thing I didn’t have a recipe for making it at home.

And then I did.

And that was a good and bad thing.

I stumbled onto a recipe for “Ridiculously Easy Butterscotch Sauce” on Smitten Kitchen one day and gave it a shot.

It’s nothing more complicated than melting some butter and then boiling it with cream and brown sugar and then rounding it out with a bit of vanilla and a pinch or two of flaky salt – which has a milder flavour to emphasize the salty-sweet flavours of a tasty butterscotch without being overtly salty.

It comes together frighteningly – I may even dare to say, dangerously – quickly. Even if you give it several minutes to cool down so it’s thicker and doesn’t melt your ice cream on contact.

And in 10 minutes, I was doing just that.

I did get a bit frustrated the first few times I made this, as mine never looked quite as thick as it did in Smitten Kitchen’s photos. But after scrolling down through the comments one day, I noticed a discussion about having it reach a certain temperature.

I’ve since learned (through trial, error and a bit of impatience) that it’s the 220 F (104 C) mark that seems to make the difference. And also that it has to boil for a lot longer than I would have guessed.

Some other things I’ve learned: don’t be like me and absent-mindedly use your finger to get that little drop off the end of the whisk or thermometer. And don’t be afraid to double the batch; you will thank yourself later.

It should last in the fridge for several days. But, to be honest, mine never sticks around that long.

Butterscotch Sauce


Easy Butterscotch Sauce

Adapted from Smitten Kitchen

  • 1/4 cup (50 mL) butter
  • 1/2 cup (125 mL) packed brown sugar
  • 1/2 cup (125 mL) whipping cream pinch flaky salt, plus more to taste
  • 1 tsp (5 mL) vanilla extract, or more to taste

In a pot over medium heat, melt the butter. Add the sugar, cream and salt and whisk until blended. Bring to a boil and cook for several minutes, whisking often. It will boil up, so watch carefully. Cook until it reaches a temperature of about 220°F (104°C), give or take a degree or two. Remove from heat and stir in 1 tsp of vanilla.

Let it cool slightly and taste, adding more vanilla or another pinch of salt to suit your tastes.

Store in the refrigerator. Reheat gently on the stove or in the microwave to make it pourable.

Makes about 3/4 cup.

This article first appeared in the Calgary Herald. For more recipe ideas, check out CalgaryHerald.com/food.

Continue Reading

Meanwhile, over at my day job

Recipes galore!

(But, full disclosure before we get any further, you’ll have to click through to read more and get the recipes. Think of it kind of like keeping church and state separate.)

Over at my day job, I’m a few months into a new column that has me keeping busy, but very happy.

It involves tackling some of the hundreds of cookbooks that come across my desk by reviewing them, cooking from them and photographing the results. My favourite part is the column name: Cooking the Books. (OK, reality check, my favourite part is getting paid to cook from cookbooks and take photos and eat the results. My life is pretty charmed these days.)

So far, I’ve made some pretty easy stuff and had some adventures with others, like Martha Stewart’s sticky buns, which made so much dough that I had no idea what to do with it all.

But good lord, were these tasty.
Sticky Buns II

Sticky Buns

Read the whole story and get the recipe over here.

Something A LOT easier were these refrigerator pickles from Ted Allen’s cookbook. You know him from Queer Eye for the Straight Guy and Chopped.

I’ve come to realize that I really love a good pickle. (Especially these ones that I make with my Teriyaki Trout.)
Refrigerator Pickles

Feel like getting in a pickle? You can get the story and recipe by clicking through.

Love her or hate her, I have to admit that I appreciate Rachael Ray’s love for burgers.

From her latest, The Book of Burger, I tried out a Satay Slider, topped with a cucumber-mint relish. It was good enough that I ignored the fact that I hate how she calls sandwiches, “sammies.”
Satay Slider

Check out my story and the recipe.

I completely fell in love with Nigel Slater’s Ripe: A Cook in the Orchard when it landed on my desk. It is just . . . gorgeous. The photographs, the writing, the fonts. Oh man, I love a beautiful font.

Beautiful Ts in this font

And the cover. Dreamy.

Nigel Slater's Ripe

I made his Blackberry Focaccia and it was heavenly.

Blackberry Focaccia

I have a not-so-secret love of southern food. Biscuits and gravy? Yes, please. Chicken and waffles? Order it up. And this, chicken-fried steak.
Chicken-fried Steak

Oh yes.

It didn’t look exactly like the photo in the cookbook, but I did not care.

Find the story and recipe here.

Probably one of the most hilarious ones so far (other than the dough fiasco of the sticky buns) was this one for Champagne-Strawberry Jell-O. Mostly because I was thinking to myself, “How on earth will the bubbles stay bubbly?” And then, I didn’t quite follow the instructions and they got over bubbled. Live and learn.
Strawberry Champagne Jell-O

Want to put some wiggle in your dessert? Head on over to check out the story.

Lastly, for the summer issue of HERS magazine, I blitzed up some Gazpacho. This is like salad in a soup bowl and as soon as it actually gets hot here, I’ll be whipping up another batch.
Gazpacho

As part of the Gazpacho package, you can watch me make it by clicking through. Warning, it will autoplay.

(And, if you really want to, you can check out videos of me making Lemon Bars and, *gasp*, a Souffle.)

I’ve got a few other posts in my back pocket, including some Szechuan Green Beans, Butterscotch Sauce and an easy, one-pan Roast Salmon. I promise to get them up in the next two weeks or so.

Promise.

Continue Reading

Rhubarb Snacking Cake

Oh blergh.

I’ll spare the apologies for not being a good blogger lately. Mostly, I really should be apologizing to my blog because I’ve been careless, letting our anniversary slip by (four years!) with not even a cheap greeting card or cake (which I usually make to celebrate this little milestone) to mark the occasion. (Actually, I think the real loser here is me since it also meant that I didn’t get to *eat* cake for my blog’s anniversary either. Fails all around.) As these things go, I suspect these means I’ll have to do something absolutely stupendous to make up for it. What that will be, I know not.

Until then, though, I’ve got a Rhubarb Snacking Cake for you all. (And, ahem, for myself, as I have certainly enjoyed a slice or two.)

Rhubarb Snacking Cake III

My back went out a couple of weeks ago. Annoying as hell, but I’m on the mend. I had to take a handful of days away from the office since being flat out on my front was about the only comfortable position I could find and I returned to find a massive bundle of rhubarb on my desk. As in, the stalks — some a good 5 centimetres or so in diameter — were at least two feet long and the entire bundle had been wrapped up using two plastic bags end-to-end and a good binding of tape. I was amused at how I had to hobble out to my car at the end of the day with this bundle, but mostly I was grateful because I do love rhubarb. (Pudding cakes, large crumb coffee cake, upside-down cake, anyone? Or, perhaps my favourite, how about a rhubarb-based cocktail? Yes, click through; they’re named after my grandmother!)

Fortuitously, I had just come across Smitten Kitchen’s latest, a so-called Rhubarb Snacking Cake that she had put together, loosely based on a Martha Stewart recipe, so I knew exactly what I was going to do with at least part of the rhubarb bundle.

It was my first baking project in a number of weeks and it felt great to be back in the kitchen, even if it meant stopping to take breaks to lay down on the floor in between.

This cake has a fabulous crumb and I like how it’s not very tall, which does make it very easy to eat by hand, which my friends and I did that afternoon while sitting out on a back deck drinking Gewurztraminer and soaking up some sun.

(And later, a glass or two of Pinot Noir.)

Pinot Noir afternoon

While I normally follow a recipe exactly the first time I make it, I did make a couple of changes this time around. Namely, I omitted the cinnamon in the crumb topping (although a fan of cinnamon, I don’t love it with rhubarb, I’ve decided) and adding a bit more butter since the crumb wasn’t exactly “crumb-ing” with the four tablespoons called for. Next time (and there will be a next time), I think I’ll cut back on the flour a bit as the crumbs still seemed a bit dry. I know our Canadian flour is a bit stronger than that of our southern neighbours, so that may be why it wasn’t quite dead on. (If you click over and look at Deb’s photos on her post, you’ll see her topping looks different.)

But, really, minor quibble in the great scheme of things.

It should also be no surprise, but I upped the amount of lemon zest and maybe splashed a bit more of the juice in with the chopped rhubarb. The recipe below reflects that, but if you’re not as much of a fan of lemon as I am, feel free to rein things back in.

Lastly, as going through the recipe again, I just realized I mucked it up, putting only 1/3 cup sugar in the topping and a full cup in the batter. I actually thought it was quite tasty this way since then the rhubarb layer more tart (but not alarmingly so). Below is the recipe as it should be, but feel free to do it the wrong (and yet still super delicious) way that I did it.

Sliced rhubarb

All Scraped Out

Rhubarb Snacking Cake from the Oven I

Rhubarb Snacking Cake from the Oven II

Rhubarb Snacking Cake II

Rhubarb Snacking Cake I

Rhubarb Snacking Cake

From Smitten Kitchen, as inspired by Martha Stewart Living.

Cake:

  • 1 1/4 pound rhubarb, trimmed and cut into 1/2-inch lengths on the diagonal
  • 1 1/3 cup  granulated sugar, divided
  • 1 1/2 tablespoons lemon juice
  • 1/2 cup unsalted butter, softened
  • 2 teaspoons finely grated lemon zest
  • 2 large eggs
  • 1 1/3 cups all-purpose flour
  • 1 teaspoon baking powder
  • 3/4 teaspoon table salt
  • 1/4 teaspoon ground ginger
  • 1/3 cup sour cream

Crumb:

  • 1 cup all-purpose flour (though I might do a tablespoon or two less next time)
  • 1/4 cup brown sugar
  • 1/8 teaspoon table salt
  • 5 tablespoons unsalted butter, melted

Preheat your oven to 350°F.

Grease the bottom and sides of a 9×13-inch baking pan with butter or cooking spray, then line with parchment paper, extending it up two sides to make a sling.

Stir together rhubarb, lemon juice and 2/3 cup sugar, then set aside.

Beat the butter, remaining sugar and lemon zest until light and fluffy. Add eggs, one at a time, making sure to scrape down the sides of the bowl each time. In a separate bowl, whisk together the dry ingredients. Add one-third of the flour mixture to the batter, mixing on low until just combined. Add half of the sour cream and continue mixing on low, then add another third of the flour mixture, then the rest of the sour cream and finish with the rest of the flour. (I mixed the last addition until just barely combined, finishing it off with the spatula.

Scoop the batter into the pan and spread evenly. (Deb suggests using an offset spatula. I agree; it made it much easier to make the layer even and get it into the corners.) Top with rhubarb, spreading evenly.

For the crumb mixture, whisk together flour, brown sugar and salt, then mix in the melted butter with a fork. Scatter over the rhubarb.

Bake for 50 to 60 minutes until a tester comes out clean of cake batter. Cool in the pan on a rack.

To serve, use the sling to lift the cake free from the pan and cut into squares.

Continue Reading

Sidecar

I love a good retro cocktail.

Sidecar III

Though, truth be told, some times I like just about any kind of cocktail. At Milk Tiger Lounge — where, let me tell you, they make a mean cocktail — I’m particularly prone to ordering the Champs-Élysées. Or, uh, several.

Ahem.

And sometimes I’ll order a Sidecar.

Sidecar IV

But, where the Champs-Élysées is made with ingredients I’m unlikely to ever have in my liquor cabinet — yellow chartreuse is a good example — those in the Sidecar are pretty standard: Cointreau, Cognac and lemon juice.

The thing I don’t usually have is, strangely, ice. My freezer sucks all the moisture out of it and leaves tiny, misshapen cubes with a disgusting aftertaste. So, I rarely make shaken cocktails at home, since it seems a bit silly to buy a giant bag of ice for a drink or two and then have it take up valuable space in my freezer. But I had friends over for dinner last weekend and I knew that gin and tonics would be in order and that would mean ice. And that meant some leftover ice. And that meant it was cocktail time.

Enter the Sidecar.

It’s tart, yet sweet, citrusy and smooth.

And it goes down dangerously easy. Please consider yourself warned.

Sidecar I

Sidecar II

Sidecar

  • 3/4 ounce Cointreau
  • 1 1/4 ounces Cognac
  • 3/4 ounce lemon juice
  • sugar and additional lemon juice for sugaring the rim

Rub the rim of the glass with lemon juice and then dip in sugar.

In a cocktail shaker filled with ice, add the Cointreau, Cognac and lemon juice. Shake well and strain into prepared glass.


Continue Reading

Looking for the Lemon Ricotta Pancakes?

For anyone who may have caught me on Global Calgary this morning, first, thanks for watching. Second, if you’re looking for the Lemon Ricotta Pancakes recipe, just click here and enjoy!

Lemon Ricotta Pancakes I

Continue Reading

Vietnamese Chicken and Mint Salad

I love my cookbook collection. And I enjoy lazy weekend afternoons flipping through these books, searching for cooking projects and ideas.

Some I have flagged with Post-it Notes already – markers of past inspiration. Others I remember from past cooking adventures (successful and otherwise). And still more are like bumping into old friends.

It’s an instant reconnection to recipes I have loved, forgotten about and am instantly stumped as to why I don’t make them more often.

This salad falls into that last category.
Vietnamese Chicken and Mint Salad II

The fact that it’s a salad speaks volumes.

But there’s something about this combination of cooling cabbage and mint with heat from the chili, sour of lime and salty fish sauce – with slices of chicken to make it all a bit more robust – that has me making this each time I rediscover it in Nigella Lawson’s Nigella Bites.

Bonus: It’s easy to put together.

Double bonus: Cabbage is really, really cheap.

Although Lawson calls for white cabbage, I like to mix purple and green because the colours – against the bright orange carrot, the wisps of dark green mint and flecks of red chili – make it a dish that’s also tasty to the eyes.

Vietnamese Chicken and Mint Salad IV

The onions get soft and lose some of their bite by marinating in the dressing – a trick of Lawson’s that she also uses in her very fine recipe for Greek salad. They mellow as they sit in the lime juice and rice wine vinegar, taking on some of the slight sweetness of the bit of sugar as well.

As they sit, it’s quick to pull the rest of the salad together.

Some quick slicing of the cabbage, grating or julienning the carrot, as well as chopping up the chicken and you just about have enough time to tidy up before the onions are ready.

It’s a great way to use up leftover cooked chicken, though I have been known to cook some just to make this salad.

And, with all due respect to Lawson who says this will serve two to four people, I have been known to eat the entire thing. (Though, arguably, there are worse things to fill up on.)

I look forward to bumping into this recipe again.

Maybe I should flag it, so it won’t take quite as long.

Cabbage

Vietnamese Chicken and Mint Salad Dressing

Vietnamese Chicken and Mint Salad I

Vietnamese Chicken and Mint Salad III

Vietnamese Chicken and Mint Salad

Fish sauce is quite salty, so resist the urge to add any salt before the salad has been tossed well. The dressing doesn’t always look like it will coat all that cabbage and chicken, but it will.

  • 1 chili, preferably a hot Thai one, seeded and minced
  • 1 fat garlic clove, peeled and minced
  • 1 tbsp (15 mL) sugar
  • 1 1/2 tsp (7 mL) rice vinegar
  • 1 1/2 tbsp (22 mL) lime juice
  • 1 1/2 tbsp (22 mL) fish sauce
  • 1 1/2 tbsp (22 mL) vegetable oil
  • 1/2 medium onion, finely sliced black pepper
  • 7 oz (200 g) cabbage, shredded
  • 1 medium carrot, shredded, julienned or grated
  • 7 oz (200 g) cooked chicken breast, shredded or cut into fine strips
  • 1 bunch mint, about 1 oz/30 g

In a bowl, combine the chili, garlic, sugar, vinegar, lime juice, fish sauce, oil, onion and black pepper to taste.

Put to one side for half an hour. Then, in a big plate or bowl, mix the cabbage, carrot, chicken and mint. Pour over the onion-soused, chili-flecked dressing and toss very well – slowly and patiently – so that everything is combined and covered thinly. Taste to see if you need salt or pepper.

Serve on a flat plate with maybe a bit more mint chopped on top.

Serves 2 to 4.

Continue Reading

Spring Green Risotto

Last Saturday, I had drinks on a patio. Sunglasses were a necessity, as was a tall glass of something cold, and good conversation with friends.

All along 17th Avenue, patios were cracked open for the first warm weekend day in March. Tables were jammed with people laughing, drinking and turning their faces skyward to bask in the warm sun.

It’s as sure a sign of the changing seasons as the fact we had to put our clocks forward that night. (Though one is very much preferable to the other.)

It’s nearly spring.

But we’re not quite there yet.

After all, there are still patches of snow and, it being Calgary, we can be assured of one last blast of winter before spring truly arrives.

As I wait for those first green buds to appear, I find myself drawn to eating something that can at least remind me of spring. This Spring Green Risotto from the Barefoot Contessa is a good fit.

Spring Green Risotto I

The bright green of asparagus and peas, the bright flavour of lemon zest and juice are the tastes and sights of spring. The mascarpone (or, in my case, cream cheese as mascarpone was not to be found) brings a rich creaminess that’s a good last comfort-food hurrah as winter fades away.

Risotto is a bit fussier than other dishes because of the continual stirring, but I think it’s worth the effort. In my experience, you don’t have to be chained to the pot, constantly moving the grains of rice about. You just need to be nearby for frequent stirring.

(I’m sure someone is mentally scolding me right now for that statement, but if the thought of cooking a risotto has put you off because you believe it will be a major arm workout from stirring for 30 minutes non-stop, this is me suggesting you reconsider. No, you can’t walk away; yes, you can do light kitchen tidying at the same time. Or that’s what I did.)

The patience and frequent stirring is worth it. Especially with this recipe.

Spring Green Risotto III

Those little green peas popped with flavour, while the lemon juice made it bright and the cream cheese (see the recipe notes) added a smooth, creamy flavour without too much richness.

It’s enough to tide me over until spring finally does break through. Or at least until the next day warm enough for patio drinks.

Leeks and Arborio Rice

Spring Green Risotto II

Spring Green Risotto IV

Spring Green Risotto V

Spring Green Risotto

Adapted from Barefoot Contessa Back to Basics. I omitted the 1 cup (250 mL) of chopped fennel, since I don’t like the flavour. Add it in with the leeks if you’re more of a fan. If you can’t find mascarpone (which I couldn’t – and didn’t want to go searching for in another store), spreadable cream cheese is a decent substitute. It’s less authentic, but was creamy and tangy enough. Using light cream cheese will also cut some of the calories.

  • 1 1/2 tbsp (22 mL) olive oil
  • 1 1/2 tbsp (22 mL) unsalted butter
  • 3 cups (750 mL) chopped leeks, white and light green parts only (about 2 leeks)
  • 1 1/2 cups (375 mL) arborio rice
  • 2/3 cup (150 mL) dry white wine
  • 4-5 cups (1 to 1.25 L) simmering chicken stock
  • 1 lb (500 g) asparagus, cut diagonally in 1 1/2-inch (4 cm) lengths
  • 10 oz (300 g) frozen peas, defrosted
  • 1 tbsp (15 mL) freshly grated lemon zest (about 2 lemons)
  • kosher salt and freshly ground black pepper
  • 2 tbsp (25 mL) freshly squeezed lemon juice
  • 1/3 cup (75 mL) mascarpone cheese
  • 1/2 cup (125 mL) freshly grated Parmesan cheese, plus extra for serving
  • 3 tbsp (50 mL) minced fresh chives, plus extra for serving

Heat the olive oil and butter in a medium saucepan over medium heat. Add the leeks and saute for 5 to 7 minutes, until tender.

Add the rice and stir for a minute to coat with the leeks, oil and butter. Add the white wine and simmer over low heat, stirring often, until most of the wine is absorbed. Add the chicken stock, a soup ladleful or two at a time, stirring often.

Most of the stock should be absorbed before adding another ladleful. This should take between 25 and 30 minutes.

Meanwhile, blanch the asparagus in boiling salted water for a few minutes, until just tender. Drain and cool in ice water.

When the risotto has been cooking for about 20 minutes, drain the asparagus and add it to the risotto with the peas, lemon zest, 2 teaspoons (10 mL) salt and 1 teaspoon (5 mL) of pepper. Continue cooking and adding stock, stirring almost constantly, until the rice is tender but still firm.

In a small bowl, whisk together the lemon juice and mascarpone.

When the risotto is done, remove from the heat and stir in the mascarpone mixture, plus the Parmesan and chives. Taste and adjust seasonings as necessary.

Sprinkle with chives and more Parmesan to serve.

Serves 4 for dinner, 6 as an appetizer.

This article first appeared in the Calgary Herald. For recipe ideas and stories about food, check out the Herald’s food page.

Continue Reading

Pork Meatball Banh Mi

I had never even heard of a Vietnamese sub before I moved to Calgary.

But my introduction to banh mi came soon after I arrived, when I took that first bite of a sate beef version, topped with pickled carrots and various sauces, all nestled into a crusty baguette.

Pork Meatball Banh Mi

It was a Saturday afternoon and I was working a reporting shift at the Herald. We were working on a big story and there wasn’t much time to think about lunch, let alone leave the building to get it.

And that’s when a colleague said he was going on a Vietnamese sub run; did I want one?

Yes, yes, I did, though I had no idea what I was agreeing to.

The first few bites had me thankful for the perks of living in a new city.

Now I have my own favourite place to get subs from and I do so often enough that the girls behind the counter recognize me.

It’s that fabulous combination of spicy and sour, salty and sweet – the traditional flavours of Vietnamese cuisine, and others in Southeast Asia – that make these so appealing to me.

The chili heat of the beef, the sweet-sour of the pickled carrots, the slathering of rich mayonnaise, the crusty, chewy bread. It’s all the right flavours and textures coming together.

In the years since, I’ve eaten my fair share (and perhaps more), but never thought about making them at home until I stumbled upon a Bon Appetit recipe for a pork meatball version. It had all the things I was looking for with the benefit of using meatballs instead of slices of beef sate.

But, of course, I made a few adjustments.

I made my meatballs smaller, then jammed a lot of them in to make the sandwich really filling. Feel free to make them larger, though you’ll need to adjust the cooking time slightly. (Ground pork is cooked through when it reaches an internal temperature of 160F or 75C.)

The original recipe also calls for pan frying them first in some sesame oil before finishing them off in the oven. I was looking for something a little less fussy; cooking them in the oven completely left them slightly less golden, but gave me a chance to tidy up at the same time, which is a good thing in my books.

No Vietnamese sub I’ve seen has daikon on it, so I skipped that in favour of more pickled carrots.

The result: Flavourful meatballs, a spicy mayonnaise and a tangy tangle of carrots, topped with basil leaves, all wedged onto a chewy baguette I picked up from a bakery.

Heavenly. And I didn’t even have to work a Saturday shift to get it.

Pork Meatball Banh Mi

Pork Meatball Banh Mi

Pork Meatball Banh Mi

Adapted from Bon Appetit. Don’t be daunted by the list of ingredients and number of steps. Both the mayonnaise and the meatballs can be made a day ahead and kept in the fridge.

Hot Chili Mayo

  • 2/3 cup (150 mL) mayonnaise
  • 2 green onions, finely chopped
  • 1 tbsp (15 mL) hot chili sauce (like sriracha)

Stir all ingredients together, cover and chill until assembling sandwiches.

Meatballs

  • 1 lb (500 g) ground pork
  • 1/4 cup (50 mL) finely chopped fresh basil
  • 4 garlic cloves, minced
  • 3 green onions, finely chopped
  • 1 tbsp (15 mL) fish sauce
  • 1 tbsp (15 mL) hot chili sauce (like sriracha)
  • 1 tbsp (15 mL) sugar
  • 2 tsp (10 mL) corn starch
  • 1 tsp (5 mL) freshly ground black pepper
  • 1 tsp (5 mL) coarse kosher salt

Gently mix together all the ingredients in a large bowl. With moistened hands, roll scant tablespoonfuls of the mixture, forming them into 1-inch (2.5-cm) balls. Place on a rimmed baking sheet. (If doing the day before, line the baking sheet with plastic wrap, then cover the meatballs with more plastic and refrigerate.)

Preheat the oven to 400°F (200°C). Bake the meatballs until golden and cooked through, about 15 to 20 minutes.

Sandwiches

  • 1/4 cup (50 mL) unseasoned rice vinegar
  • 1/4 cup (50 mL) sugar
  • 1 tsp (5 mL) coarse kosher salt
  • 3 cups (750 mL) coarsely grated carrots
  • 4 10-inch (25-cm) baguettes (or 4 10-inch pieces of baguette, cut from 2 baguettes)
  • 16 basil leaves or cilantro sprigs
  • 1 cucumber (or 2 short ones), cut horizontally into 4 wedges thinly sliced jalapeno (optional)

In a bowl, mix together vinegar, sugar and salt. Add grated carrots and toss to combine. Set aside and let stand at room temperature for 1 hour, tossing occasionally.

To assemble sandwiches, slice the baguettes horizontally in half, and pull out some of the bread to make room for the filling. Spread hot chili mayo over each bread shell. Arrange 1/4 of the cooked meatballs, drained carrots, basil or cilantro, cucumber and jalapeno (if using) inside the bread.

Serves 4.

This article first appeared in the Calgary Herald. For more recipes and meal ideas, check out the Herald’s food page.

Continue Reading

Brownies with Sea Salt and Lime

Oh, hello!

Thanks for joining me here on my inaugural post on my NEW blog. While I should be a little ashamed (and I am a bit, to be honest) that it took me this long to get my own domain and I certainly should be (and am) irked that waiting this long meant a lot more hiccups in making ye olde switch from my WordPress version to this one, I’m just tickled that I finally broke down and did it. I own real estate! Internet real estate!

(Side note: I guess this is a good time to say that you may want to update your bookmarks.)

I’m still trying to work out some design kinks. Those classes in HTML that I took in my undergrad (read: a long time ago) haven’t really kept up with the times. But I figured it would be better to just get this thing live and try to fix as I went along rather than wait until it was perfect and have you all give up on ever seeing me post again. (Thanks to the kind person on Twitter who gently nudged me into getting things rolling again.) (Related: if anyone has a quick fix to get the blog’s tagline all on one line and to get the “What It’s All about” over to the left side of the page, I’d be totally grateful.)

And just a few weeks shy of my four-year (four year!) anniversary. Four amazing, heartwrenching, uh, fattening years. But tasty ones too. Of course, I’ll wax a little more poetic when I actually get there. After all, it’s not an anniversary without some cake. Or not in my world, at least.

So, stay tuned for that.

Today, though, I’ve got some really, really, really good brownies.

With lime.

And flakes of sea salt.

Like the margarita of brownies.

Brownies with Lime and Sea Salt

But, you know, without the booze. (Unlike these and these. Oh yeah.)

I had bookmarked them a while ago from the Kitchn, which is a fabulous resource for recipes and kitchen tips. And then kind of forgot about them — surprising considering my love of all things citrus.

But as I was getting ready for (après) ski weekend a few weeks ago, they popped back into my head. (Après) ski weekend is becoming an awesome tradition. We rent a house right at Kicking Horse, pack up lots of goodies to eat (and maybe a couple of bottles of wine, ahem) and then hang out for the weekend. The others ski and board, but the mountain is a bit advanced for me, so I just do the après part. All the hot tubbing, snacking, reading and laughing, none of the actual hurtling down a mountain. Good times!

These brownies totally delivered on all my expectations. They were darkly rich, slightly sweet with the tang of lime and kiss of sea salt.

The most unexpectedly amazing part of these were the chunks of unsweetened chocolate that you stir in before baking. After, they’re these little pockets of chocolate-y goodness and they taste as if they are dark or semi-sweet chocolate. The addition just takes these brownies over the edge.

Well, that and the lime, of course.

We didn’t manage to eat them all over the weekend. (No judgment; I had also packed some Bourbon Blondies and, of course, the Dark Chocolate Chunk Cookies. Plus, everyone brought lots of other delicious dishes for dinner and the world’s supply of chips. Did I mention it’s a very good weekend?) So I took the rest in to work where they were gobbled up.

And now that I know how good they are, I certainly won’t be waiting until the next (apres) ski weekend to make another batch.
Lime and Salt

Brown, green and red

A sprinkle of salt

Brownie with Lime and Sea Salt

Brownies with Sea Salt and Lime

Adapted ever so slightly from The Kitchn.

  • 1/2 cup + 2 tablespoons unsalted butter
  • 4 ounces bittersweet chocolate, chopped coarsely
  • 1 cup sugar
  • 3/4 cup all purpose flour
  • 1/4 cup Dutch process cocoa powder
  • 2 large eggs, lightly beaten
  • 1 teaspoon vanilla
  • 1/4 teaspoon kosher salt
  • 1 lime, juiced and zested
  • zest of 1 lime
  • 2 ounces unsweetened chocolate, finely chopped
  • 3/4 teaspoon flaky sea salt

Preheat oven to 325F and line an 8×8-inch baking pan with parchment paper, leaving the paper extra-long and hanging over two sides.

In a medium saucepan, melt the butter and bittersweet chocolate over medium-low heat. Stir until smooth.

Remove pan from the heat and add the sugar, flour, cocoa powder, eggs, vanilla and kosher salt. Mix until combined. Then add lime juice and zest, as well as the finely chopped unsweetened chocolate. Stir to combine and pour into prepared pan. Sprinkle the sea salt on the top.

Bake for 30 to 35 minutes or until a tester comes out moist. It will not be perfectly clean, but it shouldn’t be sticky either. Allow pan to cool on a wire rack for 15 minutes before removing brownies from pan. To remove the brownies, run a knife around the sides of the pan to help release the brownies, then lift out the parchment paper. Place the brownies on the paper back on the wire rack. Cool completely and cut into 2 inch squares.

Continue Reading

Meyer Lemon and Sea Salt Focaccia

I love all things lemon. Obviously.

And I have a fascination with Meyer lemons.

So, when I spotted a rather large clamshell package of them at Costco, I just couldn’t resist.

Meyer Lemons

So bright, so tempting. So many options.

A long time ago, I bookmarked a recipe over on The Kitchn (which is a fabulous site and well worth checking out, if you have not already) for a lemon and sea salt focaccia. Bread? Lemon? Flaky salt? Yes, that sounds like perfection.

And it did indeed sound like perfection.

I’m just not sure I loved the reality.

I thought a mandolin would get the lemons thin enough to top the focaccia, but the blade wasn’t sharp enough, so, in the end, I just used my extremely sharp paring knife. But I don’t think I got them quite as thin as they needed to be because even after baking they were a bit overpowering. I like the acidic bite of a lemon — maybe more than the average person — but the bites of lemon, even with the bread, were pretty sour.

That said, I loved the actual focaccia part of it. So, I’m going to keep this recipe around because the dough is so great.

Meyer Lemon Focaccia Dough

Meyer Lemon Focaccia I

Meyer Lemon Focaccia II

Meyer Lemon Focaccia III

Meyer Lemon and Sea Salt Focaccia

Adapted slightly from The Kitchn.

For the Dough

  • 1 envelope (2-1/4 teaspoons) active dry yeast
  • 6 tablespoons really good extra virgin olive oil, divided
  • 4 cups bread flour, plus more for kneading
  • 2 teaspoons salt

To Assemble

  • Really good extra virgin olive oil
  • 2 Meyer lemons, washed and very thinly sliced into rounds
  • Flaked salt, like Maldon

For the dough, dissolve the yeast in 1/2 cup warm water in a the bowl of a stand mixer. Stir in 1-1/4 cups water and 2 tablespoons of the olive oil.

Add the flour and salt and, using the dough hook, mix until a ball of dough forms. Put 2 tablespoons of the oil into a large bowl. Roll dough around in bowl until coated with oil. Cover the bowl with plastic wrap and let the dough rise in a warm spot until it has doubled in size, about 2 hours.

Pour a thin film of oil into each of four 8-inch round cake pans. (Though I used a rimmed cookie sheet and spread the entire dough over it.) Quarter the dough and put one piece into each pan. Using your fingertips, spread dough out in each pan. The dough is elastic and will resist stretching. Let it relax for 5 minutes or so after you’ve stretched it as far as it will go. Eventually, it will cooperate and fill the pan.

Preheat the oven to 450°. Cover the pans with damp dishcloths and let the dough rest until it has swollen in the pans a bit, 30-60 minutes.

Uncover the pans. Sprinkle the dough with the rosemary (I didn’t have rosemary, so went without.) Using your fingertips, poke dimples into the dough in each pan, then liberally drizzle with oil so it pools in the hollows. Arrange just the thinnest rounds of lemon on top, drizzle with more oil, and sprinkle with sea salt. We like ours salty. Bake the focaccia until golden brown, 20-30 minutes. Drizzle with more oil when you pull the focaccia from the oven. Serve cut into wedges.

Continue Reading

Leftovers

In the last few months, I’ve shot photos for meals and food adventures here and there that haven’t made it in to any posts. Julie and I were joking that we should just do posts of these leftovers with no real preamble, just letting the photos speak for themselves.

So, yup, that’s what this is.

Enjoy!

Pasta Carbonara

Pasta Carbonara. (Recipe over here)

Pasta with tomatoes, peppers and wilted spinach

Penne with cherry tomatoes, roasted peppers and wilted spinach in a cream sauce.

Japa Dog

Oroshi dog, topped with freshly grated daikon from Japa Dog in Vancouver. My favourite part was chatting with the staff in Japanese.

Shio Ramen

Shio ramen from Hokkaido Ramen Santouka. Check out Andree’s review for more.

Charcuterie

Charcuterie from Cassis.

Steak and potatoes

Steak and potatoes from Cassis.

Strawberry Tart

Strawberry tart from Cassis.

Shrimp Po' Boy

Shrimp po’ boy from Big & Little’s in Chicago.

Lights at the Publican

Lights at Publican in Chicago.

Cinnamon Bun

Pecan sticky bun from Publican in Chicago.

Digging in

Digging in to the Pecan sticky bun at Publican in Chicago.

Kimchi Fried Rice

Kimchi fried rice for brunch at the Publican in Chicago.

Continue Reading