Goat Cheese with Herbed Olive Oil

We have few Christmas traditions in my family. With all us kids grown up and no new generation to take our place, there are only a few activities we cling to during the holiday season. Gone are the days when we wrote letters to Santa and put out a plate of cookies. And we were never the type that gathered around the fire to listen to a parent read The Night Before Christmas.

But over the years we have created a few rituals that we still hold dear when the season finally arrives. The first is listening to Amahl and the Night Visitors – an opera about a poor widow and her lame son who are visited by the Three Kings en route to Bethlehem – while doing some Christmas baking.

A second, more recent, is watching the YouTube video of a house whose Christmas lights are coordinated to the operatically rock-and-roll Trans Siberian Orchestra’s Wizards in Winter – a song my mum and I both acquired permanently last year. This video, with its perfectly timed display of lighted Christmas trees and wreaths, never fails to bring on the giggles.

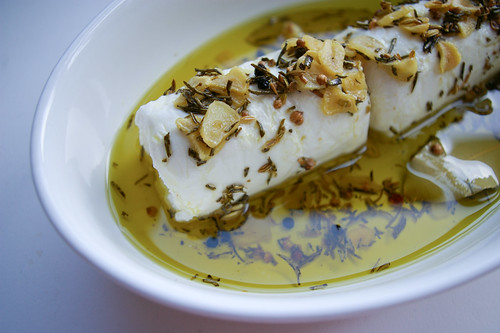
And third, and perhaps most important, we sit down on Christmas Eve and eat goat cheese doused in herb-and-garlic infused olive oil. With a lot of bread. And a glass or two of wine.

Goat Cheese in Herbed Olive Oil

This custom is so tied to our Christmas, in fact, that when I made it once for friends at some point outside of the holiday season, my little sister got mad at me. The word ‘sacrilegious’ may have even been used.

Like all good traditions, it is unclear when exactly it started or why.

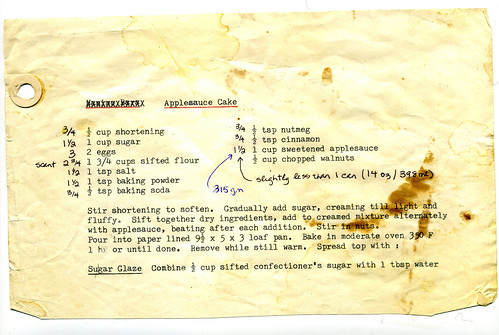
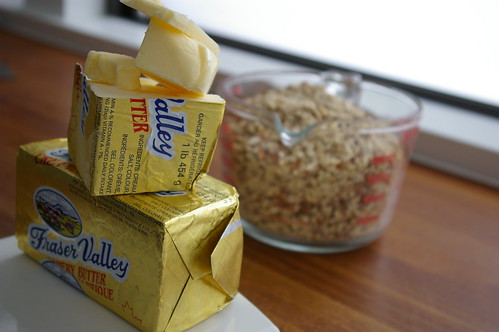
What I do know is that the only reason we even discovered the recipe in the You Asked For It section of Gourmet Magazine was because we wanted the cookie recipe on the same page. At some point later, my mum thought to try out the goat cheese one as well.

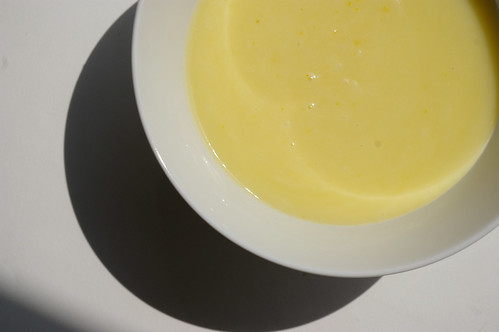
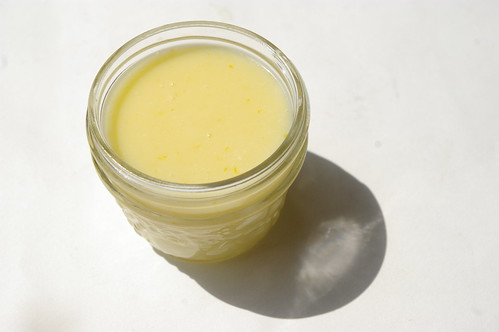
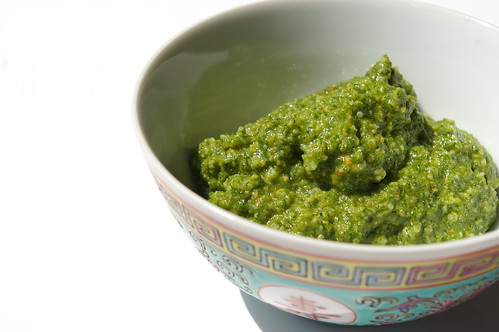
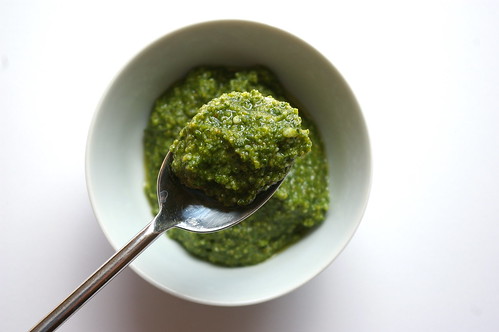
It is almost too much to call it a recipe since the most taxing part appears to be gathering the spices and slicing the bread that goes with it. Heating olive oil with some rosemary, garlic and a few other goodies for five minutes is hardly cooking. And yet the combination of slightly grassy oil, softened garlic and the sharp heat of peppercorns mixed with rich goat cheese is so perfect. Add a slice of chewy baguette – making sure to scoop up a bit of each component – and it’s almost heaven.

Garlic, herbs and spices

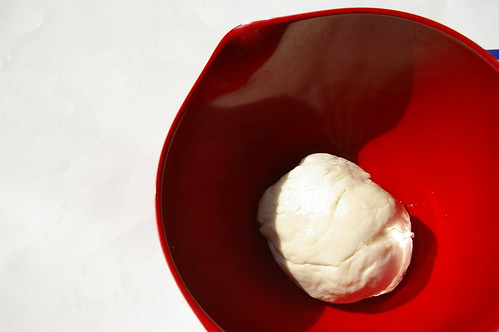
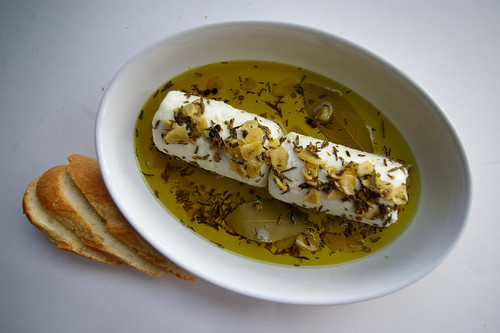
Having read the recipe over before writing this, I see that it says to slice the goat cheese into eight rounds and then pour the herbed oil over top. I have no idea why we have never done this, but decided to stick to tradition – as we have so few – and leave the cheese in log form.

After all, what are the holidays without some traditions?

Flavouring the oil

Goat Cheese in Herbed Olive Oil II

Goat Cheese with Herbed Olive Oil
Adapted from Gourmet Magazine, January 1994
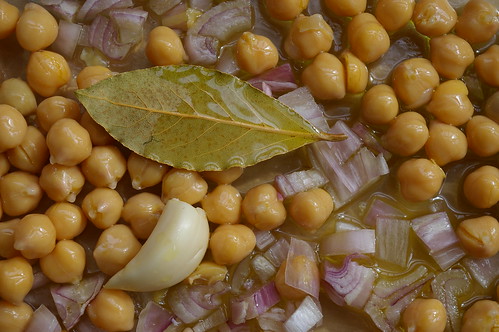
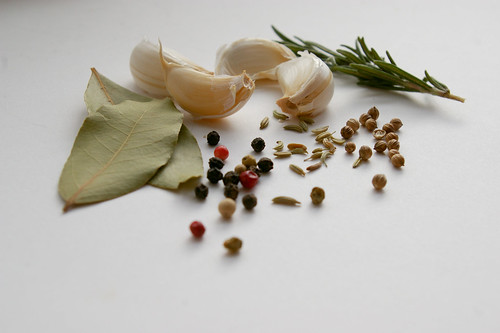
1 small bay leaf
4 garlic cloves, cut into thin slivers
1 tbsp. (15 mL) fresh rosemary leaves
¼ tsp. (1 mL) coriander seeds, crushed lightly
¼ tsp. (1 mL) fennel seeds, crushed lightly
10 whole black peppercorns
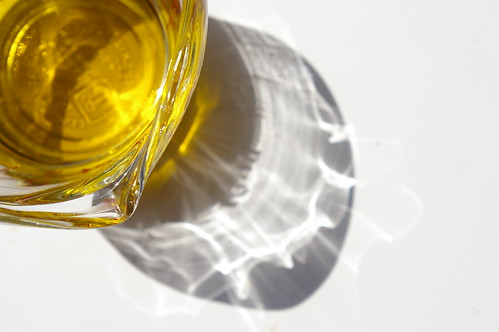
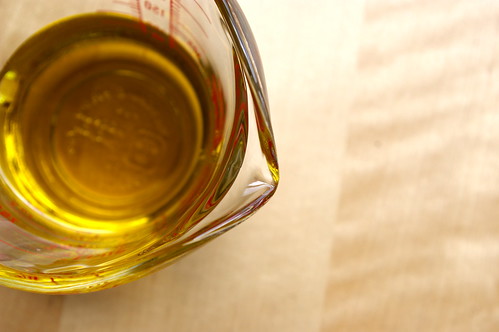
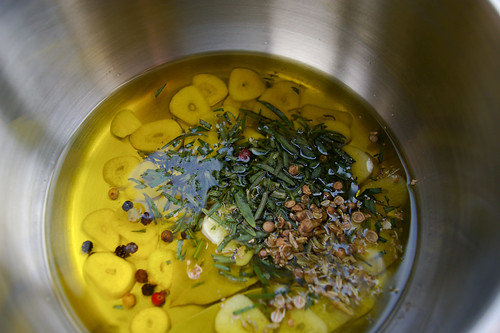
¼ cup (50 mL) extra-virgin olive oil
½ pound (250g) log of soft mild goat cheese
Sliced bread as an accompaniment

In a small saucepan simmer bay leaf, garlic, rosemary, coriander seeds, fennel seeds and peppercorns in oil for 5 minutes. Arrange goat cheese on a platter and spoon oil mixture over. Serve goat cheese with bread.

This story first appeared in the Real Life section in the Calgary Herald. For more delicious recipes, visit CalgaryHerald.com/life.

Continue Reading

Vichyssoise

What do you get when you bring together four food bloggers and the idea to all cook something from Julia Child’s Mastering the Art of French Cooking? A helluva lot of delicious food and many full bellies. Not that any of us were complaining, that’s for sure.

It was all Julie’s idea. In honour of the move Julie & Julia coming out, she invited over myself, Cheryl of Backseat Gourmet, Pierre of Kitchenscraps and Gail of The Pink Peppercorn, along with everyone’s significant others. Our only task was to bring one dish out of Child’s cookbook. Since I had to work that day, there seemed to be only one logical choice: a chilled soup. That way I could make it the day before and just let it sit in the fridge at work without doing any harm and no need to reheat. The fact that it turned out to be about -29C that day made my choice seem to be a bit ridiculous. After all, who wants to eat cold soup when it’s stupidly freezing out? But, after a first course of delicious French cheeses and Julie’s homemade Raincoast Crisps (along with a glass or two of bubbly), we had all warmed up enough that it didn’t seem so bad.

Soup on the table

There is something a bit daunting too about cooking for other food lovers, particularly two who have cookbooks out and are serious players on the local (and beyond) food scene. But, I’m happy to say, this soup is stupidly good.

“Potato milkshake!” Pierre declared.

Leek and Potato

Vichyssoise

And he’s not wrong. It was a rich, thick, creamy soup (I’m sure in no small part to the 3/4 cup of whipping cream that went into it!) that was intensely flavoured. I definitely could have eaten more the bowl I had, but I’m glad I didn’t because there was more courses to come.

The other thing that happens when you bring together four food bloggers is that the actual eating doesn’t take place until after all the photographing. We were all jammed into Julie’s kitchen snapping away for a good 15 minutes or so; what the significant others were doing during that time, I know not.

Bloggers

(For the record, yes, I shot the soup earlier in the day at work because the light was better. I really need to get better at flash photography.)

And it was a fine spread that needed to be documented. Boeuf Bourguignon with mashed potatoes, ratatouille, Pommes Parisien (read: cooked in delicous oil and butter) and a work-of-art Moussaka that had us all holding our breath as it was unmolded.

Unmolding

Moussaka

Potatoes

The Spread

And that was just dinner. For dessert, Cheryl outdid herself with Reine de Saba (a chocolate cake, though that is an understatement) and a Grand Marnier Souffle that I sous-chefed with her (thanks Cheryl!)

Grand Marnier Souffle

The food was fantastic; I stuffed myself silly and felt like I needed to roll myself out to the car after. The next time we do one of these, I’m wearing stretchy pants.

All done

Most of all, though, it was great to meet some great new people and hang out with some old (as in known for longer, for the record) friends.

Conversation

This is the original recipe from Julia Child’s Mastering the Art of French Cooking.

Vichyssoise
[Cold Leek and Potato Soup]

  • 3 cups peeled, sliced potatoes
  • 3 cups sliced white of leek
  • 1 1/2 quarts of white stock, chicken stock or canned chicken broth
  • salt, to taste
  • 1/2 to 1 cup whipping cream
  • 2 to 3 tablespoons minced chives

Simmer the vegetables in stock for about 40 to 50 minutes until tender. Puree in a blender or through a food mill. Stir in the cream. Season to taste, oversalting very slightly as the salt loses savor in a cold dish. Chill. Serve in chilled soup cups and decorated wtih minced chives.

The recipe says it serves 6 to 8. We stretched it to nine with no great effect. But, then again, we had about 10 other things to eat….

Continue Reading

And the nominees are…

I got some lovely news earlier this week. Patent and the Pantry has been nominated for a Canadian Blog Award!

This blog was a pet project for me when I started it, but I have really loved working on it over the last 18 months. I think as it continues to grow, it really is getting better and better. I have enjoyed working harder on my photos and taking on a few projects that I may not have attempted otherwise. And I have really loved connecting with you guys, who have been quick to offer compliments and advice when one or the other is needed.

So, you can check out the Canadian Blog Awards here. I’m in the Crafts, Cooking and Other Activities category. I’d love your vote, but, of course, it’s still an honour to be nominated.

EDIT: Thanks to everyone who voted! The polls are now closed

Cheers,

gwendolyn

Striped tomatoes

(The tomato photo has nothing to do with anything; I just liked it and have not had a chance to use it yet.)

:)

Continue Reading

White Bean Tartlets with Oven Roasted Tomatoes

This post is dedicated to my friend Elsbeth who is going to kick my butt for waiting two weeks to post. I could possibly be the most procrastinating-est blogger ever. It’s a curse.

So, Elsbeth, this one is for you.

Solo Tartlet

I had a little party on Friday two weeks ago to celebrate a blog milestone. The original plan was to have a few friends over for appies and wine to celebrate crossing the 100,000-views mark, but that didn’t work out because I ended up getting to that point faster than originally thought and the timing was off. (No, it was not procrastination related, for once.) Then I thought it would be cute to instead have people over for passing by 123,456 views.

So, that’s what it ended up being.

I sometimes get a bit of party anxiety, though. Will people have fun? Will there be enough food?

And, as usual, my fretting was all for naught. Besides having cheese, crackers, some salami and prosciutto, I also made two appetizers: prawns sauteed with chili, garlic and ginger served in wonton crisp cups and these White Bean Tartlets with Oven Roasted Tomatoes. And thankfully (with the addition of sending one care package home for a friend who couldn’t make it), all of the food was eaten! Frankly, that was the best part. Made me feel like everyone enjoyed the goodies. Plus, you know, less clean up.

(So, I’m making up for the lack of text here with bonus photos. Couldn’t narrow them down….)

Trio of tartlets III

I got the inspiration from one of my 8 million cookbooks, but adjusted the recipe quite a bit and figure that, at that point, it’s safe to call it my own. It was pleasantly garlicky and rich-tasting even though there was almost no fat involved. And, c’mon, they’re just so damn cute.

Thyme

Tomatoes and Thyme

Roasted Tomatoes with Thyme

White Beans pre-puree

Trio of Tartlets

Trio of tartlets II

White Bean Tartlets with Oven Roasted Tomatoes

  • 30 grape tomatoes
  • 30 tart shells or pastry to make 30 tarts
  • 3 tablespoons olive oil, divided
  • 4-5 sprigs of thyme
  • 1 teaspoon thyme leaves, minced
  • 3 cloves garlic, minced
  • 19 oz (540 mL) can white kidney beans
  • 1/2 cup white wine (can substitute stock or even water)
  • Salt and pepper to taste

Bake tart shells as indicated or blind bake homemade pastry until shells are completely cooked.

Preheat oven to 350. Put tomatoes in oven safe dish and toss with 2 tablespoons of olive oil. Sprinkle with a pinch or two of salt and add the sprigs of thyme. Roast in the oven for about 30 minutes until their skins have started to split. Set aside.

In a pot over medium heat, heat 1 tablespoon olive oil and minced garlic. Once the oil is hot and the garlic has started to soften, add the drained and rinsed beans and continue cooking until warmed through and the beans are starting to fall apart, stirring often. Add wine (or stock or water) and thyme leaves and cook until most of the liquid is gone. Remove from the heat. Dump the beans, garlic and thyme into a food processor and whiz until it forms a nice paste. If it appears to be a bit too dry, add some more wine/stock/water. Spoon into cooked pastry shells and top each one with a roasted tomato. At this point I also spooned any drippings from the roasted tomato pan onto the tartlets.

Continue Reading

Applesauce Cake

The original copy of this recipe is a decrepit piece of scrap paper with a lone hole punch that has been reinforced. It is battered, splattered and stained.

It has been typed on an old typewriter using a cloth ribbon, a large series of Xs cancelling out the erroneous title of Nanaimo Bars, while the correct name of Applesauce Cake has been underlined in red.

And there, in my mum’s bubbled handwriting, are the adjustments she has made over the almost four decades she has carried this recipe around. It has travelled from one kitchen to the next, slowly yellowing with age, garnering new splotches as time has passed by.

The original recipe

But the flavour of this applesauce cake — warmly spiced, slightly sweet and oh-so-apple — remains a constant. A taste of childhood and home and family.

The original still resides in my mum’s kitchen, tucked away among her other recipes, typed by her or clipped from the newspaper, newer ones printed from the Internet or photocopied from magazines. But with the technology of a scanner and e-mail, I now have my own digital copy of the beloved Applesauce Cake recipe, complete with brown stain and wrinkled edges.

At its heart, it is a simple loaf cake flavoured with applesauce, nutmeg and cinnamon. But it is also a trigger for childhood memories: trying to wait for it to be cool enough to eat as it sat on the wire baking rack; running little fingers under the rack glaze that had drizzled off the edge of the cake; finally getting a slice and eating it from the bottom up so the last few bites were coated with icing.

Applesauce Cake I

The apple flavour comes through well, but it is the cinnamon and nutmeg that make the cake a little more extraordinary. I’m not a food snob by any stretch, but I will say that there is no comparison between pre-grated nutmeg in a spice jar and the taste imparted by the freshly grated stuff.

These days whole nutmegs are not that hard to find and are well worth the effort for the improved flavour alone. Not to mention, they are gorgeous when grated: cream-coloured with darker brown veins, like marble.

(A fine grater will work, but my family is devoted to the rasps scoop up from Lee Valley Tools, which make quick work of nutmeg and are ideal for zesting citrus, mincing garlic and making fluffy clouds out of Parmesan.)

While the original version made one loaf in a 9.5-by 5-inch pan (24-by 12-centimetres), it left the baker with leftover applesauce. In her wisdom, my mum amended the measurements–writing them neatly down the side of the paper– so it would use up a full can, rather than leaving her to try to deal with roughly a half-cup of the stuff. Plus, in her words, it means “more cake!”

This comes together very quickly–especially if you have the forethought to pull out the butter or margarine early. Patience must come, though, with the hour-long baking time and the dreaded cooling period, which was such a source of frustration as a kid.

My glazing skills apparently need work, but, while unattractive, it tasted just as good as when I ate it in my mum’s kitchen.

Applesauce Cake II

And yes, when I had finally waited long enough for it to be glazed and I could slice off the first piece, I ate it starting at the bottom so the last bite would be the perfect combination of cake and glaze. After all, some things never change.

Applesauce Cake III

Applesauce Cake IV

Applesauce Cake

  • ¾ cup (175 mL) margarine or butter, softened
  • 1½ cups (375 mL) sugar
  • 3 eggs
  • 2¾ cups (675 mL) sifted flour
  • 1½ tsp (7 mL) salt
  • 1½ tsp (7 mL) baking powder
  • ¾ tsp (3 mL) baking soda
  • ¾ tsp (3 mL) nutmeg
  • ¾ tsp (3 mL) cinnamon
  • 1 14 oz (398 mL) can sweetened applesauce

Preheat oven to 350°F (180°C).

Cream together margarine and sugar until light and fluffy. Blend in eggs. Sift together dry ingredients. Add to creamed mixture, alternating with applesauce, beating after each addition.

If you like, stir in ¾ cup (175 mL) chopped walnuts before pouring batter into loaf pans.

Pour into two prepared (sprayed or rubbed with a bit of butter or margarine) 8-by 4-in. (20-by 10-cm) loaf pans. Bake for 1 hour or until done. (Start checking at the 50-minute mark.)

Remove and let cool for about 10 minutes before removing from pans and putting on rack to cool completely.

Sugar Glaze:

Combine ½ cup (125 mL) sifted icing sugar with 1 tbsp. (15 mL) water. Pour over cake.

This story first appeared in the Real Life section in the Calgary Herald. For more delicious recipes, visit CalgaryHerald.com/life.

Continue Reading

Sour Cream Pumpkin Streusel Bundt Cake

I bought a bundt pan about a year ago and it’s been wasting away in my cupboard since then, unwashed, unused, unloved. The whole reason for buying it was because i wanted to start making bundt cakes (duh), but I constantly found myself getting pulled towards cupcakes (I love individual desserts) and layer cakes (so pretty).

Bundt Pan

But when I saw a recipe for a Sour Cream Pumpkin Streusel Bundt Cake, I was smitten. Pumpkin? I love pumpkin! Streusel? Yes, please! And a chance to finally crack open my poor bundt pan? What could be better?

The first thing I noticed was that it called for a 12-cup bundt pan. Um, they have more than one size? I felt a bit silly, but I really wanted to avoid some big mistake halfway in, so I poured 12 individual cups of water into the clean pan just to make sure I really did own a 12-cup pan. (I do; And I now know that without a doubt.)

I thought that would be the only potential disaster and I felt satisfied knowing that I had nipped that little thing in the bud.
I shouldn’t have tempted fate.

I really hate kitchen disasters. I know I have a small perfectionism problem and it’s really stupid, but I like it when things come out they way they’re supposed to. Or, in this case, when they actually come out. As in, physically out of the pan.
But I’ll get to that in a second.

For me, it’s not a pumpkin recipe unless there’s nutmeg. Yes, cinnamon and allspice are yummy, but nutmeg and pumpkin are an inseparable pairing, as far as I’m concerned. (OK, maybe not for savoury recipes.) So, I made a couple of adjustments to the original recipe, which didn’t call for this lovely warm spice.

Also, this makes a serious amount of batter. When I had finished it and was about to put it in the bundt pan, I wasn’t actually convinced it was all going to fit. It did. Thankfully.

To the brim

So, the recipe makes it clear not to let any of the streusel layer touch the edges of the pan. I made an effort, but, well, some of the brown sugar-butter mixture may have made its way up against the tin. Later, when only 3/4 of the cake came out of the pan, I wondered if part of the reason was because the streusel layer weakened the cake at the edges. Making it easy for it to separate out when gravity took over as I upended it onto a rack to cool. Either that or I had not prepared my pan well enough. I had sprayed liberally with cooking spray, but have had problems with it in the past. As in, other cakes have not always made their entire way out of the pan either. This isn’t usually a problem because the bottom of a layer cake or loaf cake stays on the bottom of the plate or whatever and no one ever knows that you had a bit of a problem. The issue with a bundt cake is that the bottom of the cake is actually the top part, which you present, of course.

Whatever the reason, the damn thing didn’t turn out (in both definitions) properly. I was too proud to photograph the crater in the cake where the nicely rounded bundt edges should have been. Though, in hindsight, it may have been good therapy just to show that not everything works out all the time and that I can be OK with that.

I’m not even going to get into the fact that I am inept when it comes to glaze. But it sure was not, in the end, a very attractive cake.

Nevertheless, it was damn tasty! And that glaze? Spicing it up with a little nutmeg, cinnamon and allspice made a huge difference.

In all, a dreamy, autumnal cake. Even if it was ugly as all get out.

Sour cream pumpkin batter

Streusel layer

Full bundt pan

Spiced Icing Sugar

Spiced glaze

Sour Cream Pumpkin Bundt Cake with Streusel

Sour Cream Pumpkin Streusel Bundt Cake
adapted from Mommy? I’m Hungry (go here for a photo of what the thing should actually look like. Sigh.)

Streusel:
1/2 cup packed brown sugar
1 teaspoon ground cinnamon
1/4 teaspoon ground allspice
1/4 teaspoon nutmeg
2 teaspoons butter, cold

Cake:
3 cups all-purpose flour
1 tablespoon ground cinnamon
1/4 teaspoon nutmeg
2 teaspoons baking soda
1 teaspoon salt
2 cups granulated sugar
1 cup butter, softened
4 large eggs
1 cup canned pumpkin
1 cup sour cream
2 teaspoons vanilla extract

Glaze:
1 1/2 cups sifted icing sugar
dash cinnamon
dash allspice
dash nutmeg
splash of milk

Preheat oven to 350. Butter and flour (or spray, though we know how well that turned out for me) a 12-cup bundt pan.
For the streusel, combine the sugar and spices in a small bowl. Cut in butter with pastry blender or two knives until the mixture is crumbly. Set aside

For the cake, mix together flour, spices, baking soda and salt in a bowl and set aside. Beat together sugar and butter until light and fluffy. Add eggs, one at a time, beating each thoroughly after each is added. Add pumpkin, sour cream and vanilla. Mix well, Gradually beat in flour mixture.

To assemble, spoon half of the batter into the bundt pan. Sprinkle in streusel, not letting it touch the sides of the pan. Top with remaining batter, making sure the batter layer touches the edges of the pan.

Bake for 55 to 60 minutes or until a toothpick (this is a tall cake, I used a wooden skewer) inserted into the middle comes out clean. Cool for 30 minutes in pan on wire rack, then invert onto rack to cool completely.

When cool, combine icing sugar with spices and splash of milk to make glaze. Stir thoroughly until well mixed and drizzle over cake.
Continue Reading

Roasted Chickpeas with Chard

I can’t say I’ve ever gone out of my way to buy/cook/eat chard. But there was something about Julie’s entry during her year-long, post-a-day, blog-a-thon involving roasted chickpeas and chard that, for some unknown reason, really appealed to me. I filed it away, figuratively, for a future date and carried on with things.

Chard II

So, when a friend at work was extolling the virtues of her chard crop, I was immediately reminded of my plan to try out this dish. And, very fortuitously, she was happy to provide me with a large bunch of chard to use in my attempt.

Bundled Chard

Oh chard! Why have I foresaken thee for so many years? You are quick to prepare and delicious! And I’m pretty sure you’re good for me too!

Chard I

I’m just sad now that the chard season (at least in my friend’s garden) is over for another year. Most of the generous bunch she gave me went into the dish with the roasted chickpeas. But I held back a few stalks that I sauteed quickly with garlic and topped with a fried egg for breakfast one day.

The original recipe just calls for the leaves from what I can tell. But I liked the rainbow stalks so much that I diced them finely and fried them for a few minutes before adding the leaves to the mixture.

I can only hope that next year my friend’s chard crop is even bigger and she is as giving as this time around with it….

This recipe has been adapted ever so slightly from the original, as seen here. Mostly because I didn’t have enough garlic to do it properly and, as mentioned before, because I used up the stalks too.

Chickpeas, garlic, shallots and bay leaves

Chard III

Chopped chard stalks

Roasted chickpeas with garlic and bay leaves

Roasted Chickpeas with Chard

Roasted Chickpeas with Chard

For the chickpeas
1 19 oz.  can chick peas, rinsed and drained
3 cloves garlic, peeled (original calls for entire head; will try this next time)
2 shallots, roughly chopped
2 bay leaves
1/3 cup olive oil

For the chard:
2 tablespoons olive oil
1 large bunch Swiss chard, center stems removed and chopped finely, and leaves coarsely torn
2 garlic cloves, crushed
1/2 cup vegetable, chicken or beef broth

Preheat oven to 400. In a baking dish, combine chickpeas, garlic, shallots, bay leaves and oil. Roast for about 45 minutes, shaking the pan at least once (twice is probably even better) until everything is golden. Remove from oven and set aside.

In a frying pan on the stove, add olive oil and heat until hot. Saute garlic for about 30 seconds until it is fragrant, add chard stems and saute for a minute or two until tender. Add chard and continue cooking until it has wilted — about five minutes. Pour over stock, cover and cook for another 10 minutes. Remove lid and drain excess liquid. Add chickpea mixture, season with salt and pepper and mix until heated through. Add a little more olive oil if desired.

Continue Reading

Rhubarb Pudding Cakes

I guess you could call me a fruit purist.

I’m not really interested in your bumbleberry mixes, your apple-cherry pies or any strawberry-rhubarb co-mingling.

I like my rhubarb straight up, please, with a little crisp topping, a flaky crust or simply folded in with whipped cream. Or, in this case, in the form of a pudding cake.

Rhubarb Pudding Cake II

Rhubarb, to me, is the quintessential summer dessert. The ruby-ish stalks with slight green tint always made at least one appearance a summer when I was growing up. Usually it was in the form of Rhubarb Fool, a stewed fruit and whipped cream dessert that always tasted like more work went into it than really had.

So, I was excited to see the slim stalks make their first appearance at the farmers’ market.

The decision was not whether or not to buy them. It was: how do I narrow down the recipes I want to try? Rhubarb custard tart. Rhubarb scones. Rhubarb crumb cake. My recipe folder is brimming with possibilities. But I had recently come across a recipe for Rhubarb Pudding Cakes baked in ramekins. And, if nothing else, I am a sucker for individual desserts.

Rhubarb Pudding Cake I

This recipe comes together quickly and easily. A quick chop of the rhubarb, a little simmer on the stove, some stirring of wet and dry ingredients. I didn’t even pull out a mixer. And while you do have to turn on the oven for a bit, I promise the payoff is worth the extra heat in the kitchen.

These are moist little cakes, slightly studded with softened and sweetened rhubarb on top and another layer of the fruit on the bottom. The cake-to-rhubarb ratio is perfect and I like eating it right out of the ramekin, sweeping my spoon around the bottom to scrape up all the pinkish syrup.

The original recipe calls for one cup (250 mL) of strawberries–taking the place of one of the cups of rhubarb–and only 1/3 cup (75 mL) of sugar for slightly stewing the fruit. Feel free to make that adjustment.

But I’ll be keeping mine strictly rhubarb, thank you.

Rhubarb and sugar

Slightly stewed rhubarb

Rhubarb and ramekins

Rhubarb and Batter

Rhubarb Pudding Cake III

Rhubarb Pudding Cakes

Adapted from Gourmet, April 2007

  • 1/4 cup (50 ml)water
  • 1½ tsp (7 ml) cornstarch
  • 1 cup (250 ml) sugar divided
  • 3 cups (750 ml) chopped fresh rhubarb stalks
  • 1 cup (250 ml) all-purpose flour
  • 1¾ tsp (8 ml) baking powder
  • 1/2 tsp (2 ml) salt
  • 1 large egg
  • 1/2 cup (125 ml) milk
  • 1/2 cup (125 ml) unsalted butter, melted and cooled slightly
  • 1 tsp (5 ml) pure vanilla extract

Preheat the oven to 400°f (200°c), ensuring the rack is in the middle. Butter 4 individual 1-cup (250-ml) ramekins.

Mix together water, cornstarch and half of the sugar in a small pot, then add the rhubarb. Simmer, stirring constantly for about three minutes. Remove from heat.

In a bowl, whisk together flour, baking powder, salt and the remaining sugar.

In a second bowl, whisk the egg, milk, melted butter and vanilla. Add the wet ingredients to the dry and whisk until just combined. It will make a thick batter.

Reserving ½cup (125 ml) of the rhubarb mixture, divide the rest of the fruit and syrup among the ramekins. Spoon the batter evenly into each dish over the rhubarb. Top each ramekin with a portion of the remaining rhubarb syrup mix.

Bake until a tester inserted in the middle comes out clean and the tops are slightly golden, about 25 to 30 minutes. Cool slightly and then serve.

Note: mine took less time than this. Start to keep an eye on them at the 20-minute mark.

This story first appeared in the Real Life section in the Calgary Herald. For more delicious recipes, visit CalgaryHerald.com/life.

Continue Reading

Meyer Lemon Curd

A few years ago I started reading all these articles and blog posts and forums about the loveliness that are Meyer Lemons. Excited writers posted about them coming into season and all their delicious plans. Others wrote about acquiring the fruit and then, essentially, hoarding it, only using them sparingly to make them last.

Of course, none of them talked about where to get them in Canada.

It was only after a physiotherapy appointment one day that I discovered you could get them right here in Calgary.

As a treat for being subjected to the torture that is fixing my ongoing back problems (painful, but necessary and my physiotherapist is a miracle worker), I often wander over to Mercato for a little Italian pick-me-up in the form of a panini or crusty baguette sandwich full of arugula and prosciutto. Then I peruse the gourmet food store side of this market/restaurant to look at the pretty tomatoes on the vine, the big bunches of herbs and the shelves of balsamic and olive oil. And it was during one of these wanderings that I found they had a giant basket of Meyer Lemons.

They look to have a slight orange tinge to them, but are otherwise indistinguishable.

Meyer Lemons

Apparently, it’s believed to be a cross between a lemon and a mandarin orange, so that would explain the slightly darker hue. And perhaps the slightly sweeter taste often attributed to this fruit.

So, I was intrigued. Scooped up four, came home and realized I had no idea what to do with them.

Then I remembered lemon curd.

Dreamy, smooth, lemony. That seemed like a logical — and delicious — application.

And it was.

Not to mention ridiculously easy. Zest, squeeze, crack eggs, add butter, and beat all over double boiler. Done.

In fact, it’s frighteningly easy and I now have to resist making another batch. At least for another few weeks.

Meyer lemon zest

Meyer Lemon Curd I

Meyer Lemon Curd II

Meyer Lemon Curd Drop

Meyer Lemon Curd

  • 1 pound medium Meyer lemons (I used four)
  • 1/2 cup sugar
  • 2 large eggs
  • 1/2 cup unsalted butter, cut into four pieces

Zest the lemons to gather 2 teaspoons, then squeeze out 1/2 cup of juice. Whisk together zest, juice, eggs and sugar in a metal bowl or double boiler. Add butter, then set over a pot of simmering water. Whisk continually until thickened and smooth. (Some recipes suggest an instant-read thermometer should read 160F. I didn’t bother with that, just eyeballed it when it was thick.) It should take about five or six minutes. Force through a fine sieve to ensure the curd is smooth. Serve warm or store in the fridge.

Continue Reading

In search of the perfect burger

In the moments that followed the first bite, as the flavour of beef and bacon and cheese filled our mouths, we knew this was one of our more brilliant plans.

Mmmmm

Of course, it didn’t start out that way.

It started out as a tongue-in-cheek joke, a nod to our mutual love of burgers. But as my sister’s trip from the coast to Cowtown neared, it morphed into a serious scheme.

The burger tour of southern Alberta was born.

You see, a truly great burger is more than the sum of its parts.

A solid, but not too filling, bun provides the backbone. It needs to hold the burger together, soak up the juices from beef and sauce, but not be too tall, too bread-y or so flimsy it becomes an annoyance.

Sauces–relish, mustard, ketchup, special or otherwise– should add to the flavour and not overpower the patty taste.

Lettuce and tomato are optional. Onion is not.

The burger should just fit into your hands and be bitten through without feeling you have to dislocate your jaw.

It should be messy. Bonus points for burgers that cause juices to trickle down your hands.

(The trick, I would come to learn, is to turn your plate so the burger drippings fall onto your french fries.)

Establishing a plan took several e-mail exchanges and thorough research.

A cruise through the Chowhound online forums, suggestions from friends and even a photo posted on Flickr  — a photo-sharing website — gave us our plan of attack: five burger joints in four days.

There were tentative discussions about beef detox after that point.

And so, to the journey. From Calgary International Airport, we made our way to the first tour stop: Boogie’s Burgers on Edmonton Trail.

The little sister was off to the races with a double patty burger, adorned with cheese, bacon and pickles. (And a bacon, banana, peanut butter milkshake to wash it all down; if I hadn’t been around when she was born, I would swear she was adopted.)I wanted a slower pace and went with a single with bacon and cheese.

The burgers were the size of my outstretched hand, with a tangy red sauce. The buns were fresh-tasting, with a slightly crisp crust that gave nicely when bitten into. Thick slices of bacon and melted cheddar cheese rounded out the burgers. And they passed the requisite messy test with me having to go through several paper napkins.

Boogie's Burger

The aftermath

We were off to a good start. Day 2 took us down Highway 22 to Turner Valley for a stop at the Chuckwagon Cafe. Charmed by the red barn exterior and the slightly kitschy decor inside, we were eager to see what this little restaurant had to offer.

Chuckwagon Cafe

We both ordered the House Burger, minus the mushrooms, featuring a six-ounce patty of beef raised on a Longview farm with no hormones or steroids, topped with fried onions, bacon and marble cheese.

Chuckwagon Cafe's House Burger

Chuckwagon Cafe Burger

After the plates were set down, the first five minutes were punctuated solely with the sounds of beef contentment, echoed by little more than groans of acknowledgment.

Mmmm. Uh-huh. Mmmm. Seriously.

The thick patty was juicy and flavourful, had nice charred bits and was well-spiced and complemented by the homemade relish.

Charred bits

For the next hour as we drove further south on Cowboy Trail–she marvelled at the expansive Prairie sky while we sang along with bubble gum pop songs –there were moments when we stopped to talk about those burgers again.

In High River, we pulled up to a little red-roofed burger shack whose reputation is well known. The Hitchin’ Post is a local favourite and the steady line of traffic in and out of the dirt parking lot surrounding the tiny takeout restaurant spoke volumes.

Hitchin' Post

Cheeseburgers topped with a full slice of onion and sitting atop yellow mustard and relish were ordered up and washed down with orange soda. The burgers were about the size of my palm and tasty, but more akin to a burger from a fair. It filled the burger need, but not in the way that would keep us talking about them for days after.

Hitchin' Post cheeseburger

By 11 a. m. the next morning, we were ready for round four: Rocky’s Burger Bus –literally, an old red bus jammed into the city’s southeast industrial area just off Blackfoot Trail, with a few picnic tables in behind.

Rocky's Burger Bus

The cheeseburgers were adorned with little more than a generous helping of mustard and relish and a piece of processed cheese. But the thick wedge of beef was the star attraction of this meat-centric burger. It was juicy and tender, likely because the patties are shaped by hand. And it was hot off the grill, which was deliciously unexpected.

Burger Bus I

Rocky's fries

The final stop on the tour was at downtown steak house Saltlik, where friends joined us to try the double-fisted bacon cheeseburger. This was not just a turn of phrase. A thick patty topped with bacon, cheddar, a healthy tomato slice, lettuce and red onion, all jammed into a tall bun–two hands were definitely necessary.

But, as we entered a virtual beef coma at the end of day four, there was no debate about who served the best burger. Even now, weeks later, I think about the Chuckwagon Cafe and how easy it would be to climb into my car and head south.

The sister has already marked it as a must-do for the next tour.

This story first appeared in the Real Life section in the Calgary Herald. For more delicious recipes, visit CalgaryHerald.com/life.


Continue Reading

Big Crumb Rhubarb Coffee Cake

Holy crap, how is summer halfway over already?

I have, like, eight recipes for rhubarb stuff on my delicious (warning: about 80 lemon-related recipes ahead) and rhubarb season is already starting to slip away. Gah.

Rhubarb

At least I got this one out of the way.

Sadly, though, procrastination got the better of me and I’m only posting it now . . . about five weeks after making it. This is bad for several reasons.

1) Rhubarb season is slipping away quickly.

2) Now I am craving a piece of this cake and there is none to be had.

OK. Two reasons.

I love crumb cakes. And I love rhubarb. So, really, there was no debate on whether or not I’d be giving this recipe a shot.

Sadly, my crumb topping didn’t turn out quite as nicely. In fact, I had to kind of manipulate the crumb topping into actual “crumbs” (I suspect I needed a little more butter), but it was still delicious. A nice layer of sweetened rhubarb slices through the middle was a good contrast to the cake and sweetened crumble topping.

Normally, I’d meditate more on the failures of this attempt, but, let’s face it, it was cake, with rhubarb, topped in a mixture of sugar and butter. Even if the crumb topping was kind of crummy, it was still going to be fantastic.

Update: I just went back to Smitten Kitchen’s recipe and found that I’m not the only one who had problems with the crumb topping. Apparently, it’s all about the order in which you mix the crumb ingredients… (Instructions below the recipe will outline the correct way.) Yay! Now I’m ready to try this again and hope for much better results.

Sliced rhubarb

Cake pre-crumb

Big Crumb Rhubarb Coffee Cake

This is courtesy of Smitten Kitchen, which she apparently adapted from the New York Times.

‘Big Crumb’ Coffeecake with Rhubarb

Rhubarb filling

  • 1/2 pound rhubarb, trimmed
  • 1/4 cup sugar
  • 2 teaspoons cornstarch
  • 1/2 teaspoon ground ginger

Crumb topping

  • 1/3 cup dark brown sugar
  • 1/3 cup granulated sugar
  • 1 teaspoon ground cinnamon
  • 1/2 teaspoon ground ginger
  • 1/8 teaspoon salt
  • 1/2 cup butter, melted
  • 1 3/4 cups all-purpose flour

Cake

  • 1/3 cup sour cream
  • 1 large egg
  • 1 large egg yolk
  • 2 teaspoons vanilla extract
  • 1 cup all-purpose flour
  • 1/2 cup sugar
  • 1/2 teaspoon baking soda
  • 1/2 teaspoon baking powder
  • 1/4 teaspoon salt
  • 6 tablespoons softened butter, cut into 8 pieces.

Preheat oven to 325. Butter an 8-inch-square baking pan.

Slice the rhubarb into 1/2″ thick pieces, then toss with sugar, ginger and cornstarch.

In a large bowl, whisk together the sugars, spices and salt into melted butter until smooth. THEN, add flour with spatula or wooden spoon. It (should) will look and feel like a solid dough. Set aside.

Stir together sour cream, egg, yolk and vanilla. Using a mixer, stir together flour, sugar, baking soda, baking powder and salt. Mix in butter and a spoonful of the sour cream mixture until flour is moistened. Increase speed for 30 seconds. Add the rest of the sour cream mixture in two batches, beating for 20 seconds each time. Scoop out about 1/2 cup of the batter and set aside. Put the rest of the batter into the prepared pan.

Spoon rhubarb mix over the batter, then top with dollops of the 1/2 cup of batter set aside.

Using your fingers, break topping mixture into big crumbs — 1/2″ to 3/4″.  Sprinkle over cake.

Bake for between 45 and 55 minutes — until a toothpick inserted in the centre comes out clean.

Continue Reading

Pesto

The smell of basil is the smell of summer.

basil

And not just because it is readily available in the months when the sun is out more often than not and the days are long.
It’s also because I will forever associate the smell of basil with my grandfather and summer afternoons in his studio when we would make pesto.

Pesto

He had a greenhouse that somehow managed to produce a never-ending supply of this fragrant herb. (Along with peppers and tomatoes that tasted like tomatoes. I loved eating them when their skins were still warm from being inside the hothouse; their taste was unparalleled.) So pesto was not just a treat that could be made with basil, it was a way of harvesting and putting to use mass quantities of the stuff.

The remaining ingredients, he always had on hand. Heads of papery garlic always sat in a bowl on the work table that separated the kitchen from the rest of the studio. Parsley was harvested from a large pot on the front deck. As a man who wished he was Italian, olive oil and parmesan were always part of the pantry.

He would store the pesto in baby jars in the freezer, sending a few home with me at the end of my visits to the island.

I started making my own pesto a couple of years ago, though in infinitely smaller batches since I have no garden nor greenhouse and must depend on the bags of basil from the farmer’s market. But I, like him, freeze what I don’t think I’ll quickly consume. Then, in the depths of winter, when the sun goes down before I get home from work and the wind can chill me to the bones, I can pull it out. I add it to soups or pasta sauces or cook it with a little cream and pour over pasta with a fresh few grates of Parmesan. In these small ways, I bring back the summer, and the smells and sounds of being with my grandfather.

Olive Oil

Parmesan

Pesto pre-blending

Pesto II

There are a million variations on pesto recipes. This is one I like, which I adapted from two recipes.

Pesto

  • 2 cups packed basil
  • 1/2 cup parsley
  • 3 cloves garlic
  • 1/2 cup pine nuts, toasted and cooled
  • 1/2 cup grated Parmesan
  • 1/2 teaspoon salt
  • pinch or two pepper (I just do a few grinds)
  • 1/2 cup olive oil

Place all ingredients except oil in a food processor. Blitz two or three times to get it going, then turn on and let run while drizzling oil in. Stop when all the oil is incorporated but before it gets too thin. I like mine to still have a slightly chunky feel to it.

Continue Reading

Lemon Rosemary Olive Oil Cake

OK.

It’s official.

I need an intervention.

My love of rosemary and lemon have reached new levels of ridiculousness.

Cake slice

And here’s how I know that.

As some of you may know, I write for the Calgary Herald’s Real Life section on occasion. I like to pitch the topic in advance, just in case it’s going to clash with any of the other upcoming articles the editor may have planned.

Me: Here’s what I’m thinking: Lemon Rosemary Olive Oil Cake

(Pause)

Her: Lemon?

Me: (confused) …Yes…?

Her: Wasn’t your last thing on lemon? And, um, the one before that?

Me: Okey-dokey. I’ll figure something out. Maybe I should do a boozy recipe….

Her: Good idea.

It was only when I got back to my desk and looked up the drink recipe I had added to my to-do list that I realized I may have a problem: Vodka Rosemary Lemonade Fizz.

Damn you, lemon, why do I love you so? And, uh, rosemary too.

Lemon and Rosemary

But, just because I couldn’t write it for the Herald didn’t mean this bad boy (and, at some point down the road, the vodka recipe too) wasn’t going to get made. After all, one can only deny their love for lemon desserts for so long. And, let’s face it, it was raining and snowing and sleeting out at the time, so what was a girl to do? Bake.

This is adapted slightly from Julie’s recipe (over at Dinner with Julie). Her original recipe calls for a finely chopped or grated pear. I omitted it this time around, but will be tempted to throw one in next time.

Olive Oil

Studded with rosemary

Golden cake

Lemon Rosemary Olive Oil Cake

  • 4 large eggs
  • 3/4 cup sugar
  • grated zest and juice of a lemon
  • 1/2 cup regular or extra virgin olive oil or canola oil
  • 1 1/2 cups all-purpose flour
  • 2 tsp. baking power
  • 1/4 tsp. salt
  • 2 sprigs of rosemary, leaves stripped off and chopped
  • a couple more sprigs of rosemary to decorate the top (optional)

Preheat oven to 350. In large bowl, beat eggs for about a minute until frothy. Add sugar and beat for a few minutes until mixture is thick and pale. Add lemon zest, juice and olive oil and beat again.

Combine flour, baking powder, rosemary and salt in another bowl, then add to egg mixture. Stir by hand until just combined.

Pour into prepared loaf pan (sprayed or lined with parchment). Lay decorative rosemary on top. Bake for 45 minutes, until golden. (Mine was done in a little less, so you may want to check earlier if your oven runs a bit hot.

Continue Reading

Salt-kissed Buttermilk Cake

One of the more baffling mysteries of grocery shopping is how certain ingredients disappear into the ether exactly when I want to cook with them.

Baked cake closer

For weeks and weeks there were punnets of raspberries in the produce section. Velvety little rubies in their clamshell packages. So, of course, I just assumed there would be some there when I decided I actually needed to buy some to make Heidi Swanson’s Salt-kissed Buttermilk Cake. And, of course, there wasn’t.

Damn.

I waited another couple of days in the hope they would miraculously return. And then I gave up and figured blackberries would work just as well.

And they did.

Blackberries

It should come as no surprise I was attracted to the very idea of this cake. Sweet and salty? Yes, please! I love it when there is a tinge of saltiness to my desserts, in the same way that I love a slight sweet to my savoury dishes. I mean, look at the rosemary cashews, the rosemary-pine nut shortbread…. (Wow, apparently I have a serious thing for rosemary.)

Sugar

Sea salt

I bought my little cannister of sea salt during a trip to France. I am led to believe it is gathered from the Camargue — a river delta just off the Mediterranean and near the Canal du Midi, which I was barging along at the time I bought the salt. Of course, you can get it here (I just saw it in Safeway the other day), but I like that my little bit of salt traveled around with me during my last week in France. Pulling it from the cupboard reminds me of lazy afternoons on the barge, a glass of rose in hand following lunch and the joy that can come from being away.

As a sea salt, it has a definitive burst of saltiness on the tongue. The slightly larger flake tends not to melt away into food. So, it makes a good counterpart to the large grains of sugar that I sprinkled on top of the cake before putting it in to bake.

I’ve only made some very minor adjustments to the original recipe, mostly around the fact that I just don’t have natural cane sugar lying around the house and, therefore, took her suggestion to use brown sugar instead. While she calls for raspberries, I’m sure almost any berry would do. I quite liked the blackberries actually, but will give raspberries a go the next time I come across them. (Actually, saw golden ones at the farmer’s market on the weekend. Tempted. Very tempted.)

Eggs and buttermilk

Before the oven

Before the oven II

Baked cake

Baked cake overhead

Slice of cake

Heidi says this serves 12. Um, OK. Only if people like dainty slices….

Slice of Cake II

Salt-kissed Buttermilk Cake

  • 2 1/2 cups whole wheat pastry flour
  • 1 tablespoon baking powder
  • 1/2 cup brown sugar
  • 1/2 teaspoon salt
  • 2 eggs
  • 1 cup buttermilk
  • 1/4 cup butter, melted and cooled a bit
  • zest of 2 lemons
  • 1 cup of raspberries (blackberries, in my case. And I probably used more than a cup.)
  • 3 tablespoons large grain sugar
  • 1 teaspoon large grain salt (Sea salt works well here.)

Preheat oven to 400. Grease and flour (or line bottom with parchment paper) one 11″ tart pan. (I used a pie dish that I just buttered. It worked fine.)

Combine flour, baking powder, sugar and salt in a large bowl. In a separate smaller bowl whisk eggs and buttermilk, then melted butter and zest. Pour the buttermilk mixture over the flour mixture and stir until just combined. Don’t overmix.

Spoon batter into prepared pan, pushing out to edges. Drop berries across the top. (I squished them in a bit too.) Sprinkle with large grain sugar and then salt. Bake for about 20 to 25 minutes until cake is set and slightly golden.

Continue Reading

Fettucine with Roasted Tomato Sauce

The actual title of this blog post would have been far too long:

Fettucine with Roasted Tomato Sauce and Balsamic Reduction, as well as testing out the new KitchenAid pasta attachment.

Roasted tomato sauce on fresh fettucine

It’s a bit of a double barreled post, really. Call it multi-tasking.

Actually, that’s a bit of a lie too. The actual, actual title of this post should have been:

Fettuccine with Roasted Eggplant and Tomato Sauce and Balsamic Reduction, as well as testing out the new KitchenAid pasta attachment.

But I’ve realized I really don’t like eggplant when I cook it and, in the end, did not end up eating any of it. You will notice its absence in the final photos, but had to include a photo of the palm-sized eggplants because they were just so darn cute.

Baby Eggplants

Which pretty much illustrates the fact that I make the worst impulse food buys known to man.

At any rate, a couple of months ago I was approached by a marketing company asking if I’d be interested in reviewing the KitchenAid pasta kit on my blog. As a huge pasta fan, I was definitely intrigued.

I’ve typically shied away from making it homemade, even though the boxed stuff pales in comparison to the tender noodles that come from real pasta.

The real issue here is my inability to knead properly. Unsure if that’s because I’m impatient, don’t have a feel for it, or just generally have no idea what I’m doing. But whether one of these reasons or a combination of all three, it basically adds up to me never quite reaching the smooth, elastic stage needed to make bread or pasta.

Full disclosure: I was sent the KitchenAid pasta kit, as well as the mixer required to run the attachments, by the marketing firm in order to review them. This is my unbiased review of the kit. I am not required to return the items (which, really, makes sense. I mean, what are they going to do with a used mixer, pasta roller and cutter?).

The mixer and kit arrived a few weeks after some back-and-forth emailing and I set aside an afternoon to give it a whirl.

The kit itself includes two boxes of pasta dough mix (just add water), a pasta roller, fettucine cutter, cleaning brush and cooking utensils. The roller and cutter attach to the front of the stand mixer and are powered by the appliance.

Pasta Mixes

Roller and Cutter

Roller and Cutter

Cleaning brush

Making the dough was pretty simple. Add water, mix, produce crumbly dough and mush it together.

As always, I was nervous from the get-go that I had done something wrong. But I divided the dough into about eight pieces and then gave them each a quick knead before powering up the roller attachment and letting the dough slide through.

On its widest setting, the roller can actually be used to knead the dough. I sent one chunk through, then folded it in half and let it run through the rollers again. I did this about five or six times until the dough was shiny and elastic and stretched out into a long rectangle. Then I started on the next chunk of dough.

Pasta first run

Once that was all done. I then put the roller onto a thinner setting and ran them all through again. And then again on a thinner setting. And so on.

When it was thin enough, I exchanged the roller attachment for the fettucine cutter and watched as the flat sheets of pasta were cut into perfect (albeit extremely long) ribbons.

Fresh Fettucine

It was, all in all, astonishingly easy. And a bit hypnotic.

I liked that I could forego all the annoying kneading and with relative ease make a batch of homemade pasta. I liked the chew of the noodles I made and how quickly it cooked.

The next test, of course, will be to make my own actual dough.

While I loved the roller and cutter, I was initially not 100 per cent sure I would have been tempted to buy the entire kit. Most food lovers are already going to have their own slotted spoon and pasta server and probably would enjoy the challenge of making their own dough rather than using a boxed mix, I reasoned.

I would, however, definitely be tempted to buy the roller and cutter separately.

Roller

Fettucine cutter

Then after a bit of research, I found the kit is not a bad deal considering a pasta roller, motorized drive and a fettucine cutter is going to cost roughly the same as the KitchenAid’s kit, which comes with the utensils, dough mix and cleaning brush. If you already have the stand mixer, it’s not a bad way to go.

The pasta kit retails for about $180.

And here’s what I did with the noodles. The recipe is not so much a recipe as much as me just fiddling around, but, since it turned out so well, I’m going to recommend it anyway.

Roasted tomato sauce on fresh fettucine II

Fettucine with Roasted Tomato Sauce

  • 1 pound tomatoes, cut into 1 or 1/2″ chunks
  • 3 cloves garlic, whole, unpeeled
  • olive oil
  • balsamic vinegar
  • salt
  • pepper
  • pasta
  • parmesan
  • balsamic reduction

Set oven to 375. Chop tomatoes into roughly 1/2″ to 1″ pieces (depending on how chunky you want the sauce to be), place in baking dish, scatter in unpeeled garlic cloves, then drizzle with olive oil, balsamic and sprinkle on kosher or sea salt and pepper. Bake for about 30 to 45 minutes until tomatoes are starting to carmelize and break down.

Cook pasta according to directions or, if using fresh, cook in boiling, salted water for just a few minutes until al dente. (Depending on the thickness of noodle, this can take anywhere from about three minutes and up.)

Slip cloves of garlic out of their peels and then mush with fork into tomatoes. Scoop sauce onto cooked pasta, sprinkle with grated parmesan and fresh chopped parsley (if you have any). Drizzle lightly with extra virgin olive oil and balsamic reduction.

Continue Reading

Guinness Chocolate Cupcakes

I don’t like beer.

I was absent the night in university when my friends went to the grungy student pub, bought a pitcher and sat down, determined to acquire a taste for the stuff.

No idea where I was–I like to think I was responsibly studying somewhere–but it seems my decision means I will never really love beer the way I might have if I had sat in that smoky room with them.

Around St. Patrick’s Day, food bloggers were raving about cupcakes that included a rather unexpected ingredient: Guinness. Given my distaste for beer, I passed those entries by.

Frankly, the only thing that intrigues me about Guinness is the hypnotic rolling where the head meets the dark liquid in the pint glass just after it’s been poured. But I kept thinking about the recipes.

Cupcakes in profile

I think I was intrigued because they were so boldly unusual. Beer and chocolate? Really? Would the taste of stout be overpowering?Would it mellow into the background to add a perhaps unidentifiable richness? Or would it just be a chocolate cupcake with a good storyline?

It should come as no surprise this recipe comes from a British chef — Nigella Lawson — considering the other culinary oddities that have sprung from the United Kingdom. I mean, consider the blood sausage.

Her version makes an entire cake, though, and I prefer the idea of cupcakes, I suppose, for their portability. It is also much easier to pass them along to friends than a slice of cake. Leaving an entire cake in my fridge is not an option.

And she has paired it with a cream cheese icing, which creates a sort of play on the stout itself, with its creamy white head balancing atop the velvet dark drink.

Three whole cupcakes

I don’t believe in skimping on the icing. The original cream cheese icing recipe suggested adding more whipping cream to thin it out, but I reined in the extra liquid to ensure I had a nicely thick, spreadable topping. As a result, I also didn’t have enough. Given that I ate two cupcakes before even making the icing (quality control–OK, that’s a lie, I was dying of curiosity) and I still had four cupcakes left at the end that went unadorned, I suggest doubling the icing recipe. That way, there will be more than enough to coat all of the cupcakes.

The original recipe called for a half cup of whipping cream. I only used two tablespoons. If you’d like a thinner icing, feel free to add more cream.

My first bite made me realize –again–that Nigella certainly knows her stuff. These cupcakes are rich and dark with only a hint of their secret ingredient –certainly not enough to turn me off the idea of eating several more. Combined with the icing, the Chocolate Guinness cupcakes were heavenly. The icing, perhaps ironically, cuts some of the darkly chocolate flavour.

Bitten

A friend graciously offered to buy the remaining five bottles of Guinness from me, knowing full well they would simply gather dust next to my wine rack. But, having given these a shot, I think I will hang on to them. After all, I think I’d like to make the cake version next. Apparently, all it took for me to like beer was to add chocolate.

Bitten and whole

Bitten profile

Chocolate Guinness Cupcakes

Excerpted from Feast by Nigella Lawson (Hyperion Books, $39.95, 2006)

  • 1 cup (250 mL) Guinness
  • 4 oz (1/2 cup or 125 mL) unsalted butter, cut into chunks
  • 3/4 cup (175 mL) unsweetened cocoa powder
  • 2 cups (500 mL) granulated sugar
  • 3/4 cup (175 mL) sour cream
  • 2 large eggs, room temperature
  • 1 tbsp (15 mL) vanilla extract
  • 2 cups (500 mL) all-purpose flour
  • 2½tsp (12 mL) baking soda

Icing

  • 8 oz (250 g) cream cheese
  • 1 cup (250 mL) icing sugar
  • 2 tbsp (25 mL) whipping cream

Preheat oven to 350°F (180°C). Line two 12-cup muffin pans with paper liners.

Pour the Guinness into a large saucepan, add butter and heat at medium-low until melted. Whisk in the cocoa powder and sugar, then remove from heat. In a small bowl, beat together the sour cream, eggs and vanilla. Pour into the slightly cooled Guinness-butter mixture. Whisk in the flour and baking soda.

Spoon batter into cupcake pan, so each liner is about three-quarters full. Bake for 15 to 18 minutes or until a tester comes out clean. Let cool in the pan, then remove to a rack to cool completely.

Once completely cooled, make the icing.

Beat cream cheese and icing sugar until smooth. Add the whipping cream and beat again until it is thoroughly mixed and spreadable. Add more cream if you want a thinner icing. Spread onto cooled cupcakes.

Makes 24 cupcakes.

This story first appeared in the Real Life section in the Calgary Herald. For more delicious recipes, visit CalgaryHerald.com/life.

Continue Reading

Red Velvet Cake

It was a year ago that I embarked on a very special relationship. It has, at times, been hard work. And, other times, very rewarding.

Yes, that’s right. It’s my first blogiversary. Yay!

I felt the best way to celebrate was to take another stab at a Red Velvet Cake. The first attempt was, well, less than stellar. And my fascination with this southern U.S. specialty hasn’t waned in the intervening months. Plus, there is something so appealing about ritual, no?

Red Velvet Slice III

There are about 800 million different red velvet cake recipes on the Internet.* (*Slight exaggeration possible.) And I have a collection of about seven that I’m slowly working my way through. One day I will find the perfect recipe. This one is certainly a step closer.

Take two was far and away better than my first attempt, though, troublingly, not perfect. Friends disagreed. Of course, when you layer that much cream cheese icing on anything it’s going to taste good.

Red Velvet Slice IV

Even though I created a paste using the liquid food colouring and cocoa, I still got faint chocolate-coloured swirls in the batter. I suspect I was overly cautious when it came to mixing the paste in. But this time was definitely more red than the hot pink version from last year. Still, not quite the deep red I was looking for.

I also, decadently, decided to go with a triple layer cake instead of the usual double. (Anything to acquire new baking equipment; I am the worst when it comes to wanting new kitchen things. Single handedly fighting through the recession with baked goods and the stuff in which they are baked!)

And I ate the first piece with a lovely antique silver fork I bought a few days earlier during an antiquing trip with my friend Sherri Zickefoose to Nanton — a little town about an hour south of Calgary that has a handful of very fine shops. Because, when it is a celebration, even if you are alone, it should be done right.

Red Velvet Slice II

Red Velvet Slice

The next day I took the rest of the cake into work. So, on a Sunday morning, three of us sat around listening to the police scanner eating cake with plastic forks at our desks, hours before noon. A rather decadent weekend shift, to be sure.

Lining the cake pans

Cocoa and colouring

Cocoa and colouring

Empty bottle

Batter stained

Cake batter

Dye spot

Icing dollop

Icing the layers

All iced up

Red Velvet Cake

  • 2 1/2 cups sifted cake flour
  • 1 teaspoon baking powder
  • 1 teaspoon salt
  • 2 tablespoons unsweetened cocoa
  • 2 oz. red food colouring (I used two bottles, which I think were 1 oz. each)
  • 1/2 cup unsalted butter, room temperature
  • 1 1/2 cups sugar
  • 2 eggs, room temperature
  • 1 teaspoon vanilla extract
  • 1 cup buttermilk, room temperature
  • 1 teaspoon white vinegar
  • 1 teaspoon baking soda

Preheat oven to 350.

Butter and flour three 8″ cake pans. (Or, butter and line base with parchment.) Sift together cake flour, baking powder and salt in bowl, then set aside. In a small bowl, mix food colouring and cocoa powder until there are no lumps. Set aside.

In a large bowl, using a mixer, beat butter and sugar until light and fluffy. Beat in eggs one at a time, then add vanilla and cocoa-colouring mix. Add one-third of the flour mixture to the batter, beat well, then add half of the buttermilk. Beat in another third of the flour, then the rest of the buttermilk. End with the last third of the flour mix. Beat until just combined, making sure to scrape down the sides.

In a small bowl, mix vinegar and baking soda, then add straight to cake batter and stir well. Quickly divide batter between three pans and put in oven. Bake for 25 to 30 minutes. Cakes are baked when a toothpick inserted in the center comes out clean.

Let cakes cool in their pans on a wire rack for 10 minutes, then remove and let them cool completely. Frost with cream cheese icing.

Cream Cheese Frosting

  • 16 oz. cream cheese (2 packages), softened
  • 1/2 cup unsalted butter, room temperature
  • 1 teaspoon vanilla extract
  • 2 1/2 cups icing sugar, sifted
  • pinch of salt

Using a mixer, blend cream cheese and butter until smooth. Blend in salt, vanilla and then powdered sugar. Beat until light and fluffy and then ice cake.

Continue Reading

Potato Pizza with Rosemary

I love the French word for potato: pomme de terre.

Apple of the earth.

It’s so evocative. It speaks of wholesomeness and simplicity. The dusty rows in farmer’s fields, the pockmarked tubers hidden under clumps of dirt and the round potatoes that tumble out when finally unearthed.
Also, it’s a damn tasty vegetable.

Potato Pizza with Rosemary I

My love of potatoes goes back to childhood. At one time I even had a potato scrapbook. I’m not kidding.

In the ’80s, the potato farmers in the U.S. had a big ad campaign to try to convince Americans that potatoes were vegetables. One was a photo of a big baker potato with a big daub of green paint on it, next to a jar of paint and dripping brush. Underneath was a caption that read something like, “What do we have to do to show it’s a vegetable?”

And, while the scrapbook has disappeared from my life, my love of potatoes remains.

I was so excited a couple of weeks ago to spy a massive (read: too big for a single person) bag of multi-coloured baby potatoes at Costco. I rooted through to find one that had a high proportion of purple potatoes. These things rock. I love their vibrant colour! Am tempted to boil and squash up the next batch for a little violet-coloured mash….

Purple Potato

So, I knew they would be perfect for this potato pizza. This recipe would have Atkins rolling over in his grave. A carb base, topped with carbs. Mmmm!

But, damn it, sometimes a girl just needs her potatoes.

Pizza dough rising

Sliced potatoes

Pizza for the oven

Potato Pizza with Rosemary II

Potato Pizza with Rosemary III

I apologize. I have no idea where this recipe came from originally. Something I found years ago, cut and paste into a plain document and then printed…. Even then, it’s been slightly adapted, of course.

Potato Pizza with Rosemary

  • 1 1/2 cups all-purpose flour
  • 1/2 teaspoon salt
  • 1/2 teaspoon sugar
  • 1/2 cup cold water
  • 1/2 teaspoon instant dry yeast
  • Olive oil for bowl and pan
  • thinly sliced potatoes (2 or 3 large potatoes, 10 or more baby potatoes)
  • 1/4 onion, cut in half and thinly sliced
  • 4 tablespoons extra virgin olive oil
  • 2 tablespoons fresh rosemary, chopped
  • sea salt for sprinkling

Combine flour, salt, sugar and yeast in a bowl, then slowly add water. Mix with spoon until ingredients start to come together, then using dough hook on a mixer, knead/mix for another 10 minutes until the dough is smooth and elastic.

Place in oiled bowl and let rise for two or more hours. (Note: mine didn’t rise quite as much. Unsure why, but ended up with pretty thin crust as a result.)

Using a mandoline or a knife, thinly slice potatoes. (The recipe then calls for the potatoes to be soaked in several changes of water. I didn’t do this because I was worried what would happen to the purple potatoes. Still tasted fine to me, so….?) Combine potatoes with pinch or two of salt, rosemary and 1 tablespoon of extra virgin olive oil.

Preheat the oven to 425. Spread thin layer of olive oil on rimmed baking sheet. Stretch dough out on pan until it reaches the edges. Evenly layer potatoes over dough, then drizzle on three tablespoons olive oil, along with sea salt and chopped rosemary.

Bake about 20 minutes until bottom is golden. Let cool slightly before cutting, then serve. Also good at room temperature.

Continue Reading

English Toffee

Candy making kind of scares me.

Thread stage, soft ball, hard crack. It just all sounds like it could go horribly wrong with little or no notice. And the thought of burnt sugar (or, perhaps, more importantly, trying to clean up burnt sugar) is enough to put me completely off the idea entirely.

But when I went home at Christmas (and yes, that’s how long I’ve procrastinated on this post. I have no idea why.), my mum and I thought this would be a good afternoon project. Considering about three feet of snow was surrounding the house and even the four-wheel-drive SUV was having a hard time making it up the narrow gravel road, staying in to do some baking and candymaking seemed like a grand plan. Not to mention the newly renovated kitchen was ideal for photos. Hello natural light!

We’re both big fans of English Toffee, even though I’m generally not a huge fan of almonds. My mum is more of a connoisseur than me, though; she can judge good toffee from bad. So, it was entertaining to think we could have a go at making our own.

English Toffee

It was great to cook with someone else. Since I have no tripod, my photos tend to be very static. Just too tricky to try to pour or stir and shoot at the same time. Not to mention that my cave-like kitchen is terrible when it comes to lighting. I actually take things out of my kitchen and shoot them by the window to get the best light. So, I took full advantage of having another pair of hands.

Also, frankly, I wasn’t going to attempt this recipe without having someone there who has some expertise.

But this has made me feel that I could attempt candy again in the future.

It’s essentially a waiting (and stirring) game. Keeping an eye on the temperature and watching as two basic ingredients transform themselves into something completely different. I liked the molten lava look of the toffee as it grew closer to being ready and then how it changed again when it was poured into the sheet pan, taking on an almost stained glass type look: coloured and glossy and flat.

Mostly, though, what I enjoyed was a chance to hang out, catch up and just spend time together. I only get back to Vancouver once or twice a year and I’m usually rushing around to see old friends and poke around some of my favourite stores.

The giant piles of snow that continued to fall almost the entire time I was there over the Christmas holidays were a blessing, in the end. There was no reason to rush off on errands or to visit. Instead, we had the perfect excuse to stay in and just spend time in the kitchen, bonding over a bubbling pot of sugar and butter.

Butter and almonds

Butter

Bubbling hot toffee

Pouring the toffee

Smooth Toffee

Adding the chocolate chips

Making the chocolate layer

Spreading the chocolate

Almonds

Finished Toffee

Breaking it up

Smashed up

English Toffee

  • 3 cups salted butter (1.5 pounds)
  • 3 cups sugar
  • 2 cups semi-sweet chocolate chips
  • 3 cups roasted, unsalted almonds crushed

In a heavy bottom stock pot, start to melt the butter, adding the sugar after it has started to melt. Stir to emulsify the mixture, then add the candy thermometer, making sure there is enough of a gap between it and the bottom of the pot. (A wooden spoon should just be able to sweep underneath it.) Keep stirring the mixture. As it gets hotter, the mixture will thicken and start to darken. Keep cooking until the mixture reaches 294 degrees F. Caution, the temperature will climb quickly through the final 20 degrees.

Let the mixture cool slightly and then pour into a 13×18″ pan. Let cool for about 10 minutes, then sprinkle on the chocolate chips. The heat of the toffee should be enough to melt the chocolate. It didn’t for us, so we threw it in the oven (warm from roasting the almonds) for a minute or two until it was spreadable and then used a spatula to get the chocolate covering the toffee.

Sprinkle on chopped nuts and press into chocolate.

After it has cooled to room temperature, put another pan of the same size over the toffee and invert. It should pop right out.

We used a meat mallet to break it into manageable pieces.

Continue Reading

Penne alla Vodka

I don’t cook much with alcohol.

Vodka

Sure, there’s been the odd wine reduction sauce, a shot or two of brandy to a roasted tomato soup to round out the taste or a splash of sherry in my chicken tetrazzini. But the goal in these recipes is to add that hint of flavour, to enhance the other ingredients, not to dominate the dish.

So, I was a bit intrigued the first time I heard about Penne alla Vodka. There was no way the liquor was taking a back seat in this recipe; it’s in the name, after all. But how would the drink I associate with martinis and Caesars work over a plate of steaming pasta?

Vodka II

Let me be frank: it worked like a charm. So charming, in fact, I made it twice in one week–the sign of any good recipe, as far as I’m concerned.

I was a bit worried at first, because the instructions call for the vodka to be poured over the hot drained pasta instead of letting the alcohol cook out in the tomato part of the sauce. I feared it would be like eating a Bloody Mary for dinner with a scraping of Parmesan over it.

The tomato sauce

But a strange sort of alchemy happens once the butter starts to melt over the hot pasta and mingle with the boozy vodka.The flavours smooth together. (Because, yes, for experimentation purposes I did try a piece of penne with just the butter and vodka. You know, for scientific reasons and certainly not because I was getting hungry and curious.)

Adding the butter

Dumping in the tomato mixture, delicately perfumed with garlic and scattered with bits of soft, slightly caramelized onions, transformed some very basic pantry ingredients into a rich, guilty-pleasure type dish.

It should be said here that I like it saucy–as in, the pieces of penne should merely act as sauce conveyors. Spiked on the end of my fork, the pasta is swept around the bowl to pick up the last bits of onion and tomato, the last dribble of rich sauce.

And this sauce is dangerously good — enough to make you want to lick the bowl when no one else is looking. Ahem, not that I’m condoning that. So, I’ve adjusted the recipe slightly to al-low for my preference for more sauce. Feel free to add more pasta if desired.

Before the mixing

Unexpectedly, this is fantastic cold the next day. Perhaps it’s be-cause vodka is best when straight from the freezer? I ended up eating most of the leftovers straight from the fridge rather than waiting for the workplace microwave to be freed up. After all, with a dish like this, who would want to delay taking a bite?

Penne alla Vodka

The original Nigella Lawson recipe calls for garlic-flavoured olive oil. I don’t tend to keep that around, so I’ve adjusted accordingly. Of course, if you do have it, just go ahead and use it and skip the part about sauteing garlic in the first step.

Penne alla Vodka

  • 1 large onion, diced
  • 2 tablespoons (25 ml) olive oil
  • 2 garlic cloves, roughly chopped
  • Salt
  • 2 tablespoons (25 ml) whipping cream
  • 1 28-oz (796-ml) can diced tomatoes
  • 1 lb (500 g) penne
  • ½ cup (125 ml) vodka
  • 4 tablespoons (60 ml) unsalted butter
  • Parmesan

Add olive oil to large frying pan and bring up to medium-low heat. add garlic and saute for one or two minutes to flavour the oil. don’t let the garlic burn.

Remove the garlic and add the onion, along with a pinch or two of salt. Cook the onion, stirring occasionally until soft and just starting to caramelize. add the can of tomatoes and let simmer so the liquid has reduced. (this took about 10 minutes when i made it, so i put the pasta on to boil as the sauce was cooking.) when the sauce has thickened, remove from heat and stir in whipping cream.

Add pasta to salted, boiling water and cook as instructed until the noodles are al dente. drain and return the pasta to the pot. pour vodka over pasta and add butter and another pinch or two of salt. stir until the butter has melted, then add the tomato mixture. toss all together until coated evenly, then check for seasonings. add more salt if necessary.

Serve with fresh parmesan serves 5.

This story first appeared in the Real Life section in the Calgary Herald. For more delicious recipes, visit CalgaryHerald.com/life.

Continue Reading