Blackberry Gin & Tonic

It is unclear to me when I realized I liked gin.

I remember having some in high school – and we’re well past the statute of limitations on that incident, I’m sure – and not being entirely enamoured with the juniper flavour.

At some point between then and now, however, it’s become my preferred liquor. (Though, admittedly, the brand has changed in the intervening years.) Gin and tonics are now my preferred highball.

Although lime is traditional, I like mine with a squeeze of fresh lemon. Sometimes I add in some rhubarb bitters I found at a small shop in Portland, Ore. But even with these minor tweaks, the recipe is essentially the same.

Every favourite can benefit once in a while from a little change, however, so when I stumbled on this recipe for a Blackberry Gin and Tonic while cruising Serious Eats – an excellent online resource for recipes, cooking tips and, perhaps most important to me, reviews of hamburgers all over the U.S. – I bookmarked it immediately.

Blackberry Gin & Tonic I

The scorching heat over the past weekend that had me wilting in my apartment seemed like the perfect time to give it a try. Gin and tonics are a good way to beat the heat, in my opinion, and adding the juicy, sweet and tart summer flavour of blackberry only adds to that.

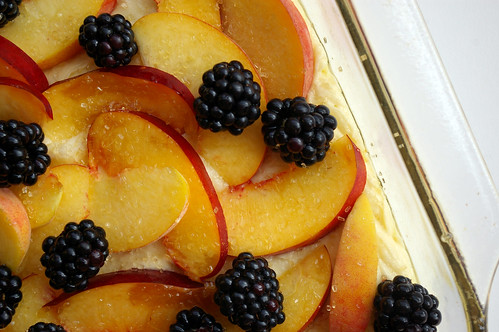
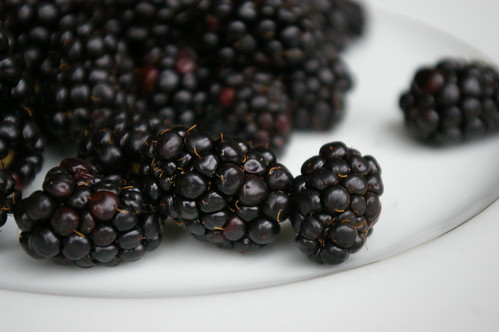
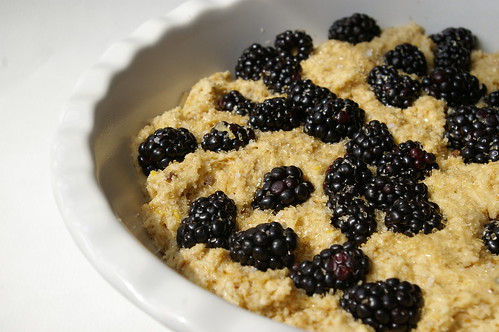
With my ice and wee clamshell case of some of the juiciest blackberries I’ve ever seen in the grocery store, I set to work.

While I do have a cocktail shaker and set, I don’t have a muddler – a long-handled, often wooden pestle used by bartenders to pound at fruit and herbs to release their flavours. I’m sure a real bartender would balk, but let me assure you that the back of a large spoon pressed against the inside of the cocktail shaker seemed to do a very nice job squeezing out that deep purple juice from the ripe berries.

A little squeeze of lime, some tonic and a large handful of ice then get all shaken up. (I love watching the shaker fog over from the cold as it’s shaken.)

The resulting liquid is berry bright in the glass, even after the tonic is added.

Blackberry Gin & Tonic IV
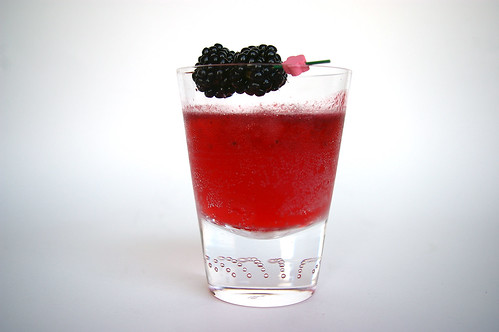
(P.S. How sweet are these glasses? My little sister has very good taste.)

It tastes of summer and refreshment and of a welcome change to my old favourite.

Blackberry Gin & Tonic III

Blackberry Gin and Tonic

This recipe comes from Serious Eats.

  • 6 ripe blackberries, plus 2 more for garnish
  • 1/2 oz fresh lime juice
  • 1 oz simple syrup (see Cook’s Note)
  • 1 1/2 oz gin
  • 2 to 3 oz tonic water

In a cocktail shaker, muddle the blackberries and lime juice. Fill with ice and add simple syrup and gin. Shake vigorously for about 10 seconds.

Fill a Collins glass with ice. Double strain into serving glass using a cocktail strainer and its strainer or a mini fine-mesh strainer to prevent the blackberry seeds from going into the glass. Add tonic water and stir gently. Garnish with a few blackberries on a skewer.

Cook’s Note: To make simple syrup, combine equal parts water and sugar in a small saucepan and heat over medium heat, stirring, until all the sugar is dissolved. Cool before using. It will keep in a sealed container in the fridge for up to five days.

Edited to add: At a friend’s request, I made these again the weekend this story first appeared in the Calgary Herald. It would be an understatement to say they went over well. This is, hands down, my new favourite summer drink.)

Continue Reading

Fruit Cobbler Cake

Look! It’s more peach-related baking.

Actually, that’s not entirely true. I only had one peach by the time I finally got around to this cake from Julie over at Dinner with Julie, so I had to get a little creative with the other fruit I had bought from the Farmer’s Market the weekend before, adding a nectarine and some blackberries to the mix.

(And I feel a little bit badly posting this since peach season is just about over for the year. Sorry!)

Julie’s version used rhubarb (and I kind of wish I had thought of this recipe when that fruit was still available. Must keep in mind for next year), but pretty much any fruit will work. The only adjustment that needs to be made is to the amount of sugar you sprinkle on over top. Rhubarb, with it’s tart flavour, needs more sugar. These needed barely any. And in an effort to get creative, I actually used large-grained raw sugar, which probably gave it a much more caramel-like flavour on top.

As you can see in the photo, it, uh, caramelized the edges of the cake. Actually, truth be told, I was freaking out the whole thing was going to burn before the centre was finally cooked. But people seemed to like it quite a bit (favouring the edges where it hit more of the batter and less of the fruit), but next time I’d like to try it with straight-up sugar to see what kind of difference it makes.

I liked the idea of this cake, the way it bakes up around the fruit, enveloping it even. And it didn’t disappoint.

Peaches and Nectarines

Scattered Fruit

Fruit Cobbler Cake

Fruit Cobbler Cake Slice

It’s definitely one to keep in mind when next summer gets going or, even better, when you are craving a taste of summer and the fruit isn’t exactly ripe and delicious enough to eat on its own. Baking it into this cake will elevate it, I swear.

This recipe, like so many good ones, comes from Julie over at Dinner with Julie. (And hey, while you’re over there, check out her peach bran muffins recipe, which I also made and was fabulous.)

Fruit Cobbler Cake

  • 1/2 cup butter, at room temperature
  • 1 1/2 cup sugar
  • 4 large eggs
  • 1 teaspoon vanilla
  • 2 cups all-purpose flour
  • 2 teaspoon baking powder
  • pinch salt
  • 2 – 4 cups assorted fruit (rhubarb, strawberries, peaches, plums, nectarines, blackberries etc. I used a peach, a nectarine and a scattering of blackberries in my version)
  • 1/8 to 1/2 cup sugar (depending on the tartness of the fruit; rhubarb, for example, would need a greater amount of sugar)

Preheat the oven to 350F.

In a large bowl, beat together the butter and sugar until well combined and starting to get fluffly. Add the eggs one at a time, beating after each, then beat in the vanilla.

Add the flour, baking powder and salt and stir by hand or beat on low speed just until combined; the batter will be thick. Spread into a 9″x13″ pan that has been sprayed with nonstick spray, and scatter the fruit over top. Sprinkle with sugar and bake for 45-50 minutes, until the cake is golden and the cakey parts springy to the touch.

Makes one large cake.

Continue Reading

Salt-kissed Buttermilk Cake

One of the more baffling mysteries of grocery shopping is how certain ingredients disappear into the ether exactly when I want to cook with them.

Baked cake closer

For weeks and weeks there were punnets of raspberries in the produce section. Velvety little rubies in their clamshell packages. So, of course, I just assumed there would be some there when I decided I actually needed to buy some to make Heidi Swanson’s Salt-kissed Buttermilk Cake. And, of course, there wasn’t.

Damn.

I waited another couple of days in the hope they would miraculously return. And then I gave up and figured blackberries would work just as well.

And they did.

Blackberries

It should come as no surprise I was attracted to the very idea of this cake. Sweet and salty? Yes, please! I love it when there is a tinge of saltiness to my desserts, in the same way that I love a slight sweet to my savoury dishes. I mean, look at the rosemary cashews, the rosemary-pine nut shortbread…. (Wow, apparently I have a serious thing for rosemary.)

Sugar

Sea salt

I bought my little cannister of sea salt during a trip to France. I am led to believe it is gathered from the Camargue — a river delta just off the Mediterranean and near the Canal du Midi, which I was barging along at the time I bought the salt. Of course, you can get it here (I just saw it in Safeway the other day), but I like that my little bit of salt traveled around with me during my last week in France. Pulling it from the cupboard reminds me of lazy afternoons on the barge, a glass of rose in hand following lunch and the joy that can come from being away.

As a sea salt, it has a definitive burst of saltiness on the tongue. The slightly larger flake tends not to melt away into food. So, it makes a good counterpart to the large grains of sugar that I sprinkled on top of the cake before putting it in to bake.

I’ve only made some very minor adjustments to the original recipe, mostly around the fact that I just don’t have natural cane sugar lying around the house and, therefore, took her suggestion to use brown sugar instead. While she calls for raspberries, I’m sure almost any berry would do. I quite liked the blackberries actually, but will give raspberries a go the next time I come across them. (Actually, saw golden ones at the farmer’s market on the weekend. Tempted. Very tempted.)

Eggs and buttermilk

Before the oven

Before the oven II

Baked cake

Baked cake overhead

Slice of cake

Heidi says this serves 12. Um, OK. Only if people like dainty slices….

Slice of Cake II

Salt-kissed Buttermilk Cake

  • 2 1/2 cups whole wheat pastry flour
  • 1 tablespoon baking powder
  • 1/2 cup brown sugar
  • 1/2 teaspoon salt
  • 2 eggs
  • 1 cup buttermilk
  • 1/4 cup butter, melted and cooled a bit
  • zest of 2 lemons
  • 1 cup of raspberries (blackberries, in my case. And I probably used more than a cup.)
  • 3 tablespoons large grain sugar
  • 1 teaspoon large grain salt (Sea salt works well here.)

Preheat oven to 400. Grease and flour (or line bottom with parchment paper) one 11″ tart pan. (I used a pie dish that I just buttered. It worked fine.)

Combine flour, baking powder, sugar and salt in a large bowl. In a separate smaller bowl whisk eggs and buttermilk, then melted butter and zest. Pour the buttermilk mixture over the flour mixture and stir until just combined. Don’t overmix.

Spoon batter into prepared pan, pushing out to edges. Drop berries across the top. (I squished them in a bit too.) Sprinkle with large grain sugar and then salt. Bake for about 20 to 25 minutes until cake is set and slightly golden.

Continue Reading