Pecan Pie Bars

Going through my delicious bookmarks, I clicked a few links for things I wanted to make this week. And then I was mildly surprised to see that about half were from Family Kitchen on Babble.

Including this one for Pecan Pie Bars.

Pecan Pie Bars III

I’ve only had a few pecan pies in my time. Probably the most memorable was one I was served by the parents of a boy I was dating for a couple of weeks in England. He was the friend of my friend’s boyfriend, so he hung out with us while I was visiting her in the summer between Grade 11 and Grade 12. Saw the sights of England, drank a lot of Buck’s Fizz, spent a week in the Welsh town of Aberdovey and got a temporary boyfriend (who broke it off shortly after I returned to Vancouver, though not after sending me one or two care packages filled with mix tapes. He made me a friendship bracelet too. Ah, young romance.)

As part of our extremely short courtship, he invited me to his parents’ house for dinner. I don’t remember much about that meal, though I’m sure it was chock-full of awkwardness, except that his mother made pecan pie.

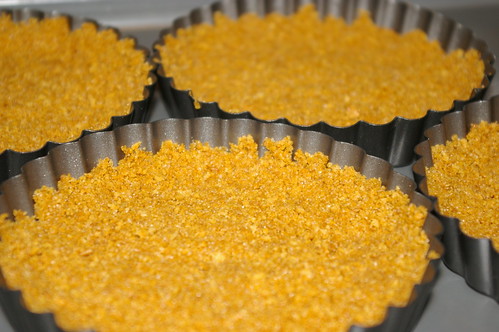
Anyway, I’ve never attempted making one (that damn fear of pastry), but when I saw this recipe for Pecan Pie Bars, I was totally smitten. Who doesn’t love a shortbread crust?

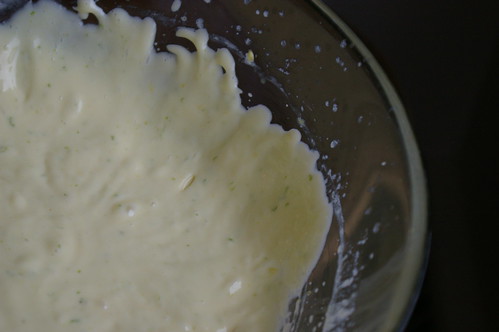
The trick with shortbread, I’ve learned, is to wait and let the butter get really gloppy before getting started. I let my butter sit out for 36 hours, I think, so it was perfect for this recipe. But before I got started, I finally took a moment to fix my KitchenAid mixer, which had too large a gap between the mixing implements and the bottom of the bowl, which meant I was constantly scraping down and around the base of the bowl to make sure everything was getting mixed together. Bless the Kitchn for their oh-so-helpful tutorial on how to make that adjustment. It took about three seconds and has greatly improved things.

Just after they went into the oven, I got a text from a friend saying she had unexpectedly come into two tickets to the Heritage Classic. Did I want to go? Although no one would call me a huge hockey fan, I do like to go to games when opportunities present themselves to me. And the thought of attending this game was kind of appealing, despite the negative temperatures.

Heritage Classic
The view from our seats as the sun set.

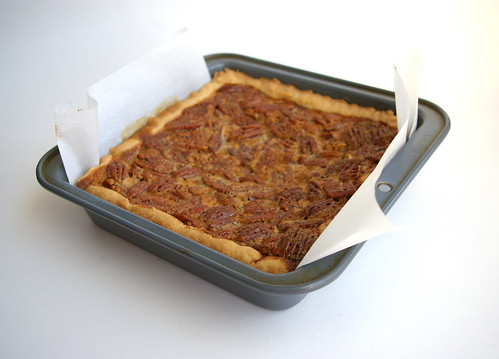
I thought the bars would be done in plenty of time, but they were still incredibly jiggly in the centre when I went to pull them out (albeit a bit early since my oven sometimes runs a bit hot). I gave them five more minutes. And then another five. And then another three. And then I had to leave. The centre was still not set, but I had high hopes it would solidify more as it cooled and then after a night in the fridge.

It was not to be.

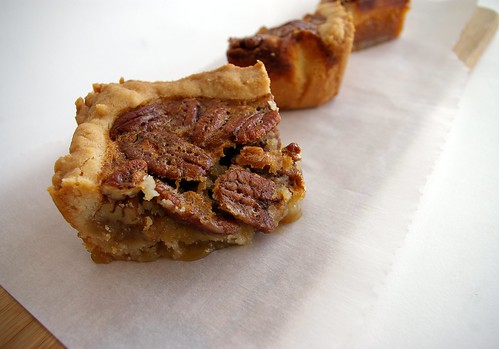
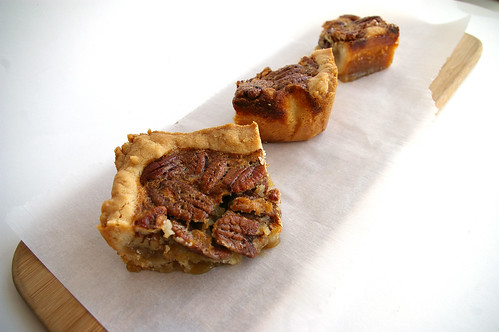
When I cut into the bars the next day, the edges were fine, if not slightly (and deliciously) gooey. The centre fell completely apart in a liquid mess of pecans and sticky goo. Not going to lie, I ate part of it with a spoon, but that’s why there are only photos of edge pieces.

The sauce also bubbled up over the top of the crust in some places, sneaking under to the bottom of the pan. This was kind of a lovely accident, really because it baked into the crust.

I will definitely make these again, this time letting them bake a little bit more.

Pecans and crust

Pecans, crust and filling

Pecan Pie Bars

Pecan Pie Bars II

Find the original post on Babble here.

Pecan Pie Bars

for the crust:

  • 1 1/2 stick unsalted butter at room temperature
  • 1/2 cup sugar
  • 1/2 teaspoon salt
  • 1 1/2 cup unbleached flour

for the filling:

  • 1 cup corn syrup
  • 3/4 cup granulated sugar
  • 1/4 cup light brown sugar
  • 3 tablespoons melted butter
  • 3 eggs, lightly beaten
  • 1/2 teaspoon salt
  • 1 teaspoon pure vanilla extract
  • 2 tablespoons flour
  • 1/4 teaspoon cider vinegar
  • 2 cups pecans

Preheat oven to 325.

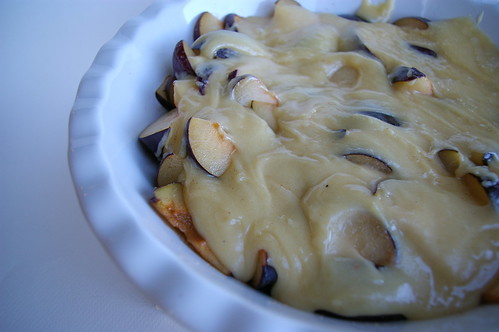
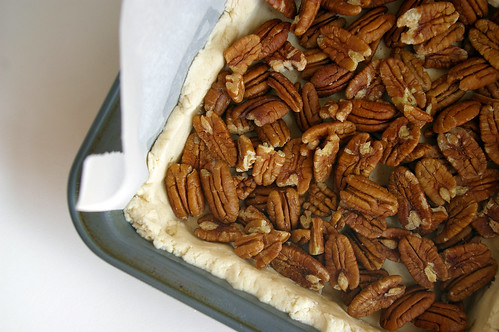
For the crust: In a medium bowl, cream together butter, sugar, and salt. Add in flour and mix until just incorporated. Press into the bottom and up the sides of an 8-inch square pan. The crust should come up at least two inches on the sides.

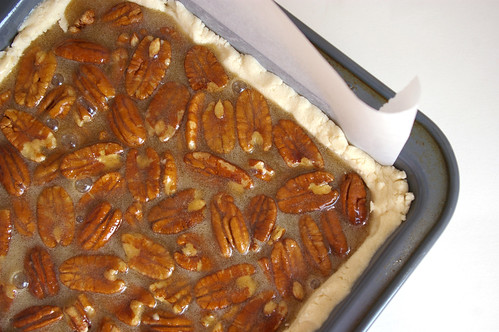
For the filling: In a large bowl, whisk together corn syrup, sugars, melted butter, eggs, salt, vanilla, flour, and vinegar. Spread pecans out in the bottom of the crust. Pour sugar mixture over the top. Bake for 40-50 minutes, or until the center is just set.

Cool completely and cut into squares.

Continue Reading

Key Lime Pie

Any Dexter fans out there?

Season Three has turned out to be even more intense than the previous two — something I didn’t think the writers could do. But after the episode where … WARNING, possible spoilers and a little bit of profanity ahead for anyone not keeping up with this season … Camilla asks Dexter to find her the perfect piece of key lime pie, I found myself wanting a taste of that myself.

Camilla: You know, Dexter, my whole life I’ve been searching for…

Dexter: The meaning of life.

Camilla: The perfect key lime pie. And what do I get when I’m about to croak? Fucking pie crust, Reddywhip and green Jell-o

End spoilers and profanity.

So, the research began. And, after flipping through pages of recipes, it became clear there were two things that made a key lime pie authentic: key limes and no dairy. (My understanding is that this pie was born at a time when there was no real refrigeration in the Florida Keys, which is why canned condensed milk is used.)

As usual, this adventure was not without its disasters, er, learning experiences.

One valuable lesson: just because a can doesn’t have an expiry date doesn’t mean it doesn’t have a shelf life.

I was all excited that I already owned a couple of cans of sweetened condensed milk. (Side rant: Why are the cans in Canada 300-milliletres and the U.S. ones come in 14 ounces? That means I need to use one full can and most of another, but am left with some, which really bugs me. We share a border, why can’t we share can sizes? Also, on that note, a lot of recipes that come from the States simply say “one can of sweetened condensed milk” so I had to find out exactly how much that was. Yes, yes, I could have mathematically figured out how to use up both cans, but that was going to be a lot of fractions. Not that I don’t love math, I just don’t want to do it all the time. Okay, moving on.) And I was excited that they had no expiry dates.

And then I opened them.

They had gone golden coloured, looking a bit like they were turning themselves into dulce de leche. A little googling indicated they were safe still to eat, but one person posted in a forum that they probably shouldn’t be used for something like Key Lime Pie, which should come out a very pale, creamy yellow colour. So, it was off to the grocery store for two more cans. Thinking about it later, it occurred to me that I actually had no idea when I bought those first two cans. Yikes.

Key limes. Teeny, tiny limes. Full of teeny, tiny amounts of juice. They weren’t hard to find — most grocery stores around here have mesh bags of them amongst the Persian limes and lemons — nor were they hard to squeeze. But it took about 16 of them to get all the juice the recipe called for.

Key Limes

So, I could have made one big pie (in my still relatively new pie dish), but then I was out shopping and spied baby tart tins. Oh yeah, have to have those. First, who doesn’t love individual desserts? Second, they were just so darn cute. And they were on sale. There, three very fine reasons to purchase more bakeware.

The tarts ended up a bit shallow for all that filling, so I threw the rest of the mixture into a ramekin and just baked it off. That was a pretty tasty dessert too.

I cut it close, but had them ready to go for Sunday when I and my Dexter-watching friends dined on them while watching the next episode.

And I get what Camilla was searching for.

Zesty limes

Key Lime massacre

The filling

Pie shells

Little pies pre-oven

Key Lime Pie

I kind of combined a couple of recipes here, and this is what I ended up with.

Key Lime Pie

  • 15 graham crackers, crushed
  • 2 tablespoons sugar
  • 1/2 cup butter, melted
  • 4 large eggs, yolks only
  • 1 3/4 cups sweetened condensed milk (14-ounce can)
  • 12 key limes, juiced (1/2 cup fresh lime juice; it took 16 limes for me)
  • 2 teaspoons lime zest

Preheat oven to 350

Beat egg yolks with a mixer until they lighten in colour and thicken. Add the zest and beat again. Add the juice and condensed milk, then thoroughly mix and let sit for 30 minutes as the mixture thickens.

Mix the crackers in a food processor until they are crumbs. Add sugar, then turn on processor and slowly pour in melted butter. Press into a nine-inch pie dish or tart pan and push up the sides slightly. Bake for 12 minutes until the pie shell is golden.

Pour mixture into the pie shell, and bake for 15 minutes. (Less if you are doing smaller, individual servings.) The centre should jiggle slightly when the pan is shaken.

Remove from the oven and allow to cool to room temperature before putting in the fridge. Let cool for another three hours before serving. Serve with whipped cream if desired. (I liked it with the whipped cream, even if it isn’t traditional, because it cuts the richness of the pie.)

Continue Reading

Brown Butter Plum Cake

It’s not often that I see a recipe, print it off and then make it immediately. But when I saw Julie’s post on what she has called Browned Butter Bliss, I was intrigued.

Not only had she raved about this baked dessert, but it sounded delicious and ridiculously easy. If that doesn’t tempt someone (namely me) to try it out, what will?

Brown Butter Plum Cake

Plus, making such a fantastic looking dessert also meant I would have to purchase a pie plate. Any excuse to buy new kitchen goodies! Of course, now I might actually have to learn how to make pie.

A cake/cobbler type of dessert, its flavour is heightened by browning the butter before making the dough, adding a nice nuttiness. But, other than the added step of watching and swirling the melting butter to make sure that it doesn’t go from browned loveliness to black, this recipe is a cinch.

I ate a piece as soon as it had cooled enough for, you know, scientific, recipe-testing purposes. And then I ate another piece a few hours later when it was well and truly cooled to room temperature for, you know, comparison purposes. And I have to say that while Julie seemed to prefer it fresh from the oven, I had different feelings. Once it had cooled, the purply plummy juices had soaked more into the cake, which had solidified slightly.

Plums

Plums and spices

Ready to bake

Plum Cake and Ice Cream

This recipe is adapted from Julie (see her post here), which in turn appears to be adapted from elsewhere. That’s one of the things I love about cooking: it’s about taking something and making it your own.

Brown Butter Plum Cake

  • 8 or so plums, thickly sliced (or try peaches, apples, apricots)
  • 3/4 cup + 3 Tbsp. sugar, divided
  • 1/2 tsp. cinnamon
  • dash nutmeg
  • 1/2 cup butter
  • 2 large eggs
  • 1 cup all-purpose flour

Preheat the oven to 350F and butter a pie plate.

Toss the fruit in a bowl with about 2 tbsp. of the sugar, the cinnamon and nutmeg. Spread into the plate.

Melt the butter in a saucepan or small frying pan and keep cooking it for about five minutes until it turns golden. (Swirl the pot occasionally and watch it carefully; it goes quickly from brown to black.)

Pour the butter into a bowl and add the 3/4 cup of sugar, then the eggs and flour. Pour over the fruit and sprinkle with one tablespoon of sugar.

Bake for 40 to 45 minutes until golden and the juices are coming up around the edges.

Delicious with vanilla ice cream.

Continue Reading