Cream Biscuits with Sausage Gravy

If I believed in past lives, I’d swear I was a southern belle in one of mine. Give me a pitcher of sweet tea, porch swings, some fried chicken or chicken-fried steak and especially give me some Biscuits with Sausage Gravy.

Biscuits and Sausage Gravy II

I’ve been bookmarking recipes for biscuits and gravy on Delicious for a while now. In fact, when going through to clear out some old links (I mean, do I need 800 bookmarked recipes? No, I don’t think so.), I found a few I had forgotten about. I left one of them because it was different enough that I think I’d like to give it a go later.

Because this certainly won’t be the last time I cook up some biscuits and gravy.

Oh yeah.

So, instead of the usual biscuits, which involve cutting in butter to make them nice and flaky, this recipe only uses cream.

And they were a total revelation. Light and fluffy, cracking perfectly in half when pulled apart and with not an ounce of butter to be seen. Not that using butter in shortcakes or scones is difficult, since I discovered Nigella’s trick, but avoiding it all together certainly makes things go much faster.

The sausage gravy recipe was just as simple and straightforward. I think next time I may want something where I have a bit more control over the flavours. However, this was super tasty and it came together very quickly, which, if I was making this for a crowd would definitely put this recipe in the win column.

It’s easy to adjust the flavours just by changing up the type of sausage you use, which is also nice.

I’d call this a very good starter recipe, but I’m certainly not done exploring the world of biscuits and gravy.

Cream Biscuits

Cream Biscuits

Sausage Gravy

Biscuits and Sausage Gravy I

Cream Biscuits

  • 2 cups all-purpose flour, plus extra for the counter
  • 2 teaspoons granulated sugar
  • 2 teaspoons baking powder
  • 1/2 teaspoon table salt
  • 1 1/2 cups heavy cream

Preheat oven to 425. Line a baking sheet with parchment paper.

In a medium bowl, whisk together the dry ingredients. Stir in the cream (starting with about 1 1/4 cups and adding more if necessary) until a dough forms, about 30 seconds or so. Dump the dough out onto a lightly floured counter. Gather it together and squash it together (not quite kneading it) until smooth.

Shape it into a circle about into a circle about 3/4″ thick. Cut biscuits into rounds and place on parchment-lined backing sheet. Bake biscuits until golden brown, about 15 minutes.

Sausage Gravy

  • 12 ounces bulk pork sausage
  • 2 tablespoons all-purpose flour
  • 2 cups milk
  • Salt and freshly ground black pepper, to taste

Heat a medium pan over medium-high heat. Add the sausage and cook, stirring occasionally and breaking it up into little bits, until browned and cooked through, about 7 to 10 minutes. Remove from the pan and set aside.

Sprinkle the flour into the remaining fat in the pan and cook for about a minute. Whisk the flour mixture while slowly adding the milk. Bring to a boil, then reduce the heat and simmer for 2 minutes or so to let the gravy thicken. Add salt and pepper to taste, then stir in the sausage.

Serve the sausage gravy over the cream biscuits.

Serves 8 or fewer, depending on how hungry people are.

Continue Reading

Teriyaki Trout and Quick Japanese Pickles

When I’m nostalgic for Japan, there is one recipe I pull out.

Though, oddly, I didn’t find it in Japan nor use it when I was there.

Instead, this recipe for Teriyaki Trout was one I inherited from my family, who has been cooking it for years.

Teriyaki trout with quick pickles IV

Although only really a nod to a traditional teriyaki, it is my fallback recipe when I’m longing for the Land of the Rising Sun. There, I often made an authentic teriyaki salmon that I would serve with steamed rice and a selection of tsukemono (pickles).

But this tastes just as good and the ingredients are readily available, unlike the two types of soy and mirin that usually went into my marinade when I was overseas. (These can, of course, be found at Asian grocery stores, but this recipe is built on ingredients most people have readily available in their cupboards: soy, sugar and sherry.)

This is not the thick gloppy sauce you find on supermarket shelves. This is a thin marinade that infuses the fish with that salty-sweet teriyaki flavour.

A few cloves of smashed garlic perfume the marinade without overpowering the flavours. (And, bonus, they are easy to fish out when it’s time for the trout to go in the oven.)

In the beginning, my parents made this with salmon, as the original recipe calls for, but when the price of that got too dear, they started using steelhead trout. Now that’s what I grab as well.

Teriyaki trout with quick pickles II

My version is a photocopy of the original, with no notation of where it came from. Even the amount of fish called for is absent from the recipe.

But I’ve found the marinade is enough for about two pounds of fish. I prefer to do whole sides rather than individual fillets or steaks, though please use what you want.

Since it’s usually only me dining, I often make the full batch of marinade and divide it between two pieces of fish, throwing one into the freezer for dinner at a later date. I’ll pull it out in the morning and let it sit in the fridge. As it thaws, it continues to infuse the teriyaki flavour into the fish and by the time I get home from work, it’s ready to cook, which, some nights, is exactly the kind of meal I like to have around.

When I’m a little homesick for the rice paddies and stunted hills of the small town in Japan where I lived, I make this dish, serving it with rice and some steamed green vegetables. Sometimes, when I’m really feeling nostalgic, I also make quick pickles -thin slices of de-seeded cucumbers left to sit in a bath of rice vinegar, sugar and salt.

The tangy flavour is a nice balance to the rich fish.

Cucumbers

Sliced Cucumbers

Teriyaki trout with quick pickles

Teriyaki Trout

  • 2 pounds (1 kg) steelhead trout, side or steaks
  • 1 cup (250 mL) soy sauce
  • 1/4 cup (50 mL) sherry (drinking, not cooking)
  • 2 tablespoons (25 mL) sugar
  • 3 cloves garlic, crushed
  • 2 tablespoons (25 mL) grated ginger or ginger paste

Combine the soy, sherry, sugar, garlic and ginger in a bag or flat dish. Add the trout. Let marinate for at least 30 minutes or up to overnight.

Preheat oven to 450°F (230°C). Place fish in a casserole dish (if using steaks, grease the dish slightly so they can be easily removed) and bake until fish is cooked and flakes easily, about 12 to 20 minutes depending on the thickness of the fish.

Quick Japanese Pickles

The amount of salt and sugar can be easily adjusted for taste. I use Maldon flaked sea salt, which has a milder flavour. Sea salt can be easily substituted, but start with just 1 tsp (5 mL) and add more only if needed. The rice vinegar should be unseasoned.

  • 1 English cucumber (or 3-4 small cucumbers)
  • 1/2 cup (125 mL) rice vinegar
  • 1 tablespoon (15 mL) sugar
  • 1½ teaspoons (7 mL) flaked sea salt
  • 2 tablespoons (25 mL) water

Slice cucumbers in half and use a small spoon to scrape out seeds. Slice on a diagonal into ½-cm half-moons. Stir together vinegar, sugar, salt and water and mix until salt and sugar have dissolved. Add cucumber slices, tossing them with brine. Let rest in the fridge for at least an hour, tossing occasionally.

This originally ran in the Calgary Herald. For more recipes and food stories, head to the Calgary Herald’s Food page.

Continue Reading

Butter, onion, tomato sauce

My general approach to tomato sauce is simple: I wing it.

After years of watching my parents throw basic ingredients into a pot and letting it simmer for an hour or two to create a hearty and rich tomato sauce, and even more years of making it from scratch on my own – owing to a perhaps unnatural love of pasta – I don’t give too much thought to cooking up a decent red sauce.

I’m a big believer in the long-simmered sauce with a multitude of ingredients that all come together over a slow heat, melding and marrying into something that is so much greater as a whole than the sum of its parts.

But I can also turn around a very basic sauce in 15 minutes.

At the very least, my spaghetti sauce usually has garlic and diced onions, sauted in olive oil with a generous pinch of salt, canned plum tomatoes I roughly (and gently, using a butter knife) chop in my hand over the pot, fresh basil if I can get my hands on it, a little sprinkle of sugar if the whole mix is too acidic, and a Parmesan heel, which I stash in my freezer for just such occasions.

So, it takes an unusual tomato sauce recipe to catch my eye.

Like this one. It has three ingredients. (OK, four, if you count salt, which, in general, I don’t, since almost all recipes call for salt.)

Canned tomatoes. A yellow onion. Butter.

That’s it.

Butter, onion, tomato II

Marcella Hazan’s recipe for tomato sauce with butter and onion has made appearances over the years on various food blogs I follow.

Each time I saw it, I thought I really should remember to give that a try.

And then I’d forget about it until someone else posted their love of this simple yet rich dish.

This seemed like a great weeknight dinner recipe since there is minimal fuss. No chopping or dicing, sweating or sauteing.

You dump it all into the pot, let it come to a simmer, reduce the heat, and go about things. In this case, a little laundry, some tidying and things that allowed for a quick wander past the pot to give the tomatoes a stir and squish against the side with a wooden spoon.

At the end of 45 minutes, all it needed was a small pinch of salt and to be dolloped over a nest of noodles.

Some have suggested sprinkling on Parmesan, but I opted not to. The sauce is rich and tasty without adornment, which is sort of the beauty of it.

The butter adds an almost unidentifiable creaminess and mellows out the acidity of the tomatoes.

And, luckily, such an easy recipe is simple enough that in the future I can pretty much wing it.

Butter, onion, tomato

Cooked sauce

Spaghetti and Sauce I

Spaghetti and sauce II

Marcella Hazan’s Tomato Sauce

This was adapted from Hazan’s The Essentials of Classic Italian Cooking by way of several food blogs. Since there are only three ingredients, I do recommend using San Marzano or San Marzano-style canned tomatoes, which are packed in tomato puree instead of water and have, therefore, a greater tomato flavour. You can find Marzano-style tomatoes in most grocery stores these days.

  • 1 28-oz (796-mL) can of whole tomatoes
  • 5 tbsp (75 mL) butter
  • 1 medium yellow onion, peeled and halved
  • 1 lb (500 g) spaghetti
  • salt to taste, if needed

Put the tomatoes, butter and onion in a pot over medium heat. Once the butter is melted, stir to combine, then reduce the heat to low or medium low – depending on how hot your element is; you’re looking for a slow but steady simmer – and cook for about 45 minutes. Stir occasionally, squishing the tomatoes against the side of the pot.

Cook pasta according to package instructions.

Remove sauce from heat, discard the onion and taste. Add salt if needed. Serve over cooked pasta.

This article first appeared in the Calgary Herald. For more recipes and meal ideas, head to the Calgary Herald’s food page.

Continue Reading

Cheddar Corn Chowder

It’s cold. Ergo, I want soup.

Cheddar Corn Chowder - close crop

For one thing, it’s warm and soothing. And for a second, it doesn’t need to take much time to put together, which means I’m back under a blanket eating it without much fuss.

Soup for me often means throwing in random vegetables from the crisper, potatoes, onions and garlic, a Parmesan heel (the leftover rind, which I save in a tightly sealed bag in the freezer) if I have it, fresh herbs if there are any to be found and a few handfuls of a small pasta or rice. It’s about creativity and frugality. Emphasis equally on both.

Other times, I want a bowl of soup that requires no real thought on my part, but delivers with soothing flavour.

I want comfort in a bowl.

Without much hassle.

The Barefoot Contessa’s Cheddar Corn Chowder delivers.

Cheddar Corn Chowder - blue napkin

“It tastes like Thanksgiving,” a friend once said when she tried some.

It’s an apt description. The corn and potatoes, combined in the unexpectedly rich, chicken-y broth is a nod to the family holiday.

The turmeric adds a nice golden colour, while the addition of flour cooked in a decadent combination of bacon fat, olive oil and butter, thickens the soup to an almost gravy-like consistency. The sweetness of the corn works nicely in the savoury broth with the soft potatoes, and a few handfuls of white Cheddar.

Cheddar Corn Chowder - ingredients

And yet for a mid-week meal, it’s a good choice. The chowder is relatively quick to make — especially since you can easily substitute frozen corn for fresh, as I have done here, and the potatoes require no peeling. Paired with a salad, it can be a full, well-rounded meal.

Frankly, on its own, it’s quite filling.

And fairly fast.

From start to finish, this took less than 45 minutes. That could be partly because I prepped as I went along. Tossing the bacon into the pot, I started chopping onions. Onions starting to saute, and I moved on to dicing the potatoes. (I use baby potatoes, which need little more attention than cutting into quarters, so even less work this way.) Once the potatoes were cooking in the soup, I got on with grating the cheddar. And so on.

(That even includes the inevitable 30-second break I have to take after chopping onions to deal with my intensely watering eyes. Aside: I seem to have lost any immunity to raw onions. Sad but true.)

There are enough gaps between adding ingredients and letting them cook that there’s even a bit of time to tidy up before the soup is served.

That means when it’s ready, there’s less guilt about pouring a bowl and getting back under the blanket for some soup sipping.

And with temperatures slipping back down to the negative double digits this week, that’s exactly what I’m looking for.

Cheddar Corn Chowder - red napkin

Cheddar Corn Chowder

I cut this recipe from The Barefoot Contessa Cookbook (Clarkson Potter, 1999) in half because the original serves 10 to 12 people. Even halved it makes a lot of soup, which is great for leftovers.

Need more? Doubling it is easy. In the summer and fall, substitute frozen corn with fresh (from about 5 ears) by cutting off the kernels and cooking them for 3 minutes in boiling salted water.

  • 1/4 lb (125 g) bacon, chopped
  • 2 tbsp (25 mL) olive oil
  • 3 cups (750 mL) chopped yellow onions (about 2 large)
  • 2 tbsp (25 mL) unsalted butter
  • 1/4 cup (50 mL) allpurpose flour
  • 1 tsp (5 mL) salt
  • 1/2 tsp (2 mL) freshly ground black pepper
  • 1/4 tsp (1 mL) ground turmeric
  • 6 cups (1.5 L) chicken stock
  • 3 cups (750 mL) medium-diced white boiling or baby potatoes, unpeeled
  • 5 cups (1.25 L) corn kernels
  • 1 cup (250 mL) half-and-half
  • 1/4 lb (125 g) sharp white cheddar cheese, grated

In a large stockpot on medium-high heat, cook the bacon and olive oil until the bacon is crisp, about 5 minutes. Remove the bacon with a slotted spoon and reserve.

Reduce the heat to medium, add the onions and butter to the fat, and cook for 10 minutes, until the onions are translucent.

Stir in the flour, salt, pepper, and turmeric and cook for 3 minutes. Add the chicken stock and potatoes, bring to a boil and simmer uncovered for 15 minutes, until the potatoes are tender.

Add the corn to the soup, then add the half-and-half and cheddar. Cook for 5 more minutes, until the cheese is melted. Season to taste with salt and pepper.

Serve hot with a garnish of bacon.

Serves 5 to 6.

This originally ran in the Calgary Herald. For more recipes, check out the Herald’s online food section.

Bonus: I took a shot of the set up I used to make this photo work. Since it was earlier in the day than usual (I typically shoot in the afternoon), I needed to get the dish up even closer to the window. So, that’s why there’s a stool on the table. That’s a laptop sleeve propping up the edge of the white cardboard. Classy, right? Sometimes I have to also hold up the edge of the cardboard to ensure it’s a plain white background. This gets particularly tricky when dealing with things like soup. It’s really time to invest in a tripod.

This is how I shoot photos

Continue Reading

Beef Bulgogi

I had never tried Korean food before I moved to Calgary.

There had been Thai and Vietnamese, Japanese and Chinese, of course. But in all my opportunities to eat Asian food, there had been no kimchee or bulgogi.

Beef Bulgogi II

And then a group of friends formed an ad hoc supper club where we would all go out for dinner on Thursday nights, typically for ethnic foods.

We dined on Indian and pho and then, finally, a Korean place where I had my first taste of beef bulgogi.

I didn’t know what to expect, but was in beef heaven by the time I took that first bite. The marinated short rib meat was almost as soft as butter, flavoured with ginger, garlic, soy and sesame. I wedged it into crisp, cold lettuce leaves and savoured each bite. (Or as much as I could, as it was so fantastic it was hard to remember to eat slowly.)

I went back a couple of months later and there was only one thing on the menu I wanted.

Later, I stumbled on a recipe in my oft-thumbed Everyday Food cookbook (Clarkson Potter, March 2007) for a version of beef bulgogi. Instead of the more traditional Korean short ribs, it called for thinly sliced rib-eye and it required no ingredients more exotic than sesame and chili oils and some staples found in most kitchens: brown sugar, soy, ginger, garlic.

Craving the taste again of that distinct mix of salty soy, garlic and the hint of sweet from the brown sugar, I thought it was worth a try.

The book now cracks open to that page, left slightly spattered by being set too close to the fry pan when cooking — the sign of a successful recipe.

At home, the first time I tried this out, I couldn’t be bothered with the lettuce wraps; it seemed too fussy for eating in front of the TV. So, I just put a couple of scoops of it on cooked rice and ate it with chopsticks. The rice soaked up the extra sauce, making for a very satisfying and flavourful meal. (And the leftovers were a nice lunch at work the next day.)

But I also like the idea of rolling up the beef and onions and peppers in soft butter lettuce, so this time around I did exactly that.

Beef Bulgogi I

The leaves of butter lettuce (or Boston lettuce, as it is also known) are tender and pliable, making them a perfect container for the bulgogi mixture. The thin leaves also don’t interfere with the flavours and softness of the meat.

Either way, it’s a delicious and fast way to taste Korea.

And one I’ll come back to again and again.

Beef Bulgogi III

Beef Bulgogi

This recipe from Everyday Food calls for hot chili sesame oil, which I have never found in my grocery store travels. Instead, I use half sesame oil and half chili oil. In a pinch, you can use all sesame oil and a dash of red pepper flakes.

  • 1½lbs (750g) rib-eye steak, trimmed of excess fat
  • 1/4 cup (50 mL) soy sauce
  • 1½ tsp (7 mL) sesame oil
  • 1½ tsp (7 mL) chili oil
  • 2 tbsp (25 mL) dark brown sugar
  • 6 garlic cloves, minced
  • 1 tbsp (15 mL) finely grated, peeled fresh ginger
  • 2 medium red onions, halved and cut lengthwise into 1-inch (2.5-cm) wedges
  • 1 green bell pepper, seeds and ribs removed, sliced into ½-inch (1-cm) strips
  • 4 tsp (20 mL) vegetable oil, divided
  • 1 small head Boston (also known as butter) lettuce

Freeze the beef for 20 minutes; transfer to a clean work surface. Slice diagonally (across the grain) into 1/8-inch (3-mm) thick strips.

In a small bowl, whisk together the soy sauce, sesame and chili oils, brown sugar, garlic and ginger. Place the onions and peppers in a small bowl; toss with half the soy marinade. Toss the steak in the remaining marinade; let stand for 15 minutes

Heat 2 tsp (10 mL) of the vegetable oil in a large non-stick skillet over medium-high heat. Add the onions and peppers; cook until softened, about 5 minutes. Transfer to a plate. Wipe the skillet clean with a paper towel.

Heat the remaining 2 tsp (10 mL) vegetable oil over high heat. Cook half the meat, turning often, until browned, about 2 minutes. Transfer to a plate. Cook the remaining meat. Return the first batch and any accumulated juices to the pan; add the onion mixture. Cook, tossing, until heated through, about 1 minute.

To serve, roll up the beef mixture in lettuce leaves.

Serves 4.

This first ran in the Calgary Herald. For more recipes and food stories, check out www.CalgaryHerald.com/life.

Continue Reading

No-knead Pumpkin Cinnamon Rolls

Last day of October and I’ve got a pumpkin recipe in just under the wire.

Though, truth be told, I made these a couple of weeks ago and took them in to the newsroom for election night, hoping the sugar rush would keep us all going through the tight deadlines and late night. With so many people voting and such a crazy race right up until the end, most of us stayed later than we ever have for an election. I can’t remember ever covering one as interesting and found myself watching the results roll in live as if it was some sort of TV show.

Anyway, back to the rolls.

They’re no-knead. Sensing a theme here? First no-knead pizza dough (if you haven’t tried this, please bookmark it, so very worth it) and then no-knead bread and now no-knead cinnamon rolls. God only knows what will be next, but I am loving this trend.

Once again, it takes some planning since it takes more time for these to rise. The recipe suggests, though, you can let them rise then refrigerate overnight and continue the next day, which is exactly what I did and it worked like a charm. Sure, there were some paranoid moments, like when I cut them into slices and let them rise in the pan prior to baking but couldn’t discern they actually rose a second time. I didn’t have much hope when I put them into the hot oven, but they came out all fat and puffy, shouldering each other in neat little rows.

I gave two to some friend who had popped by with her new baby since she was in the ‘hood and she texted me seemingly minutes after leaving to say she had eaten them both already and was tempted to lick the plastic wrap. That, my friends, is a pretty good endorsement.

The dough is beyond sticky and please learn from my misstep by using a really big bowl. I had a difficult time incorporating all the flour in my small-ish bowl (which felt big before I combined the wet and dry ingredients) and eventually had to dive in with my hands. Let me repeat: beyond sticky. (But, you know, kind of fun at the same time.)

But beyond that, it was pretty easy to work with once it came time roll out and, uh, roll up again. Some of my filling leaked out the edges. Obviously, I’m no expert at cinnamon rolls. But I’ll take ugly and tasty any day. And man are these tasty. I mean, really, how can you go wrong? pumpkin, cinnamon, brown sugar, butter, glaze? Yeah, it’s all good.

So, this is kind of short and sweet but if I don’t post this soon, I’m going to miss my Oct. 31 deadline.

In short: these are good, pumpkin-y and easy. Enjoy.

No-knead pumpkin dough

Misshapen rolls

Pumpkin cinnamon rolls

Glaze

Glazed pumpkin cinnamon rolls

This comes from the folks over at the Kitchn, like quite a few recipes I’ve posted here. It’s almost to the point where I’m wondering if I need to create a tag for them . . . .

The only change I made was I omitted the pecans. I’ve got nothing against them but was just too lazy to get them out of the freezer, toast and chop them. Oh, and I didn’t use as much milk in the glaze which is why, I’m pretty sure, it’s so much thicker. Not that anyone was complaining.

No-Knead Pumpkin Rolls with Brown Sugar Glaze
Makes 16-18 rolls

For the dough:

  • 1/4 cup water
  • 1 scant tablespoon yeast (1 package)
  • 1 cup milk
  • 1/2 cup butter
  • 1/2 cup sugar
  • 1 15-ounce can pumpkin puree
  • 1 1/2 teaspoons kosher salt
  • 5 1/2 cups all-purpose flour

For the filling:

  • 1/2 cup butter
  • 1 cup packed brown sugar
  • 2 teaspoons cinnamon
  • 1/2 teaspoon ginger
  • 1/2 teaspoon nutmeg
  • 2 cups pecans – toasted, chopped, and divided in half (optional)

For the glaze:

  • 1/4 cup butter
  • 1/2 cup milk
  • 1 cup brown sugar
  • pinch salt
  • 2 1/2 cups powdered sugar

Sprinkle the yeast over the water and let it sit a few minutes until the yeast is dissolved.

Meanwhile, warm the milk and butter in a small saucepan on the stove top until the butter is melted. Combine this with the sugar in a large heat-proof mixing bowl and stir until the sugar is completely dissolved.

Let the milk mixture cool until it is just warm to the touch – NOT HOT. Then stir in the yeast and the pumpkin. Add the salt and five cups of the flour all at once, stirring until all the flour has been absorbed. Squish it between your hands if you’re having trouble incorporating the last of the flour. The dough will be sticky, but should come together in a shaggy ball. If it’s still more the consistency of cookie batter, work in an additional 1/2 cup of flower.

Cover the dough and let it rise for 1-3 hours. During this time, it should double in bulk. At this point, you can punch the dough down and refrigerate it overnight or continue shaping the rolls.

To shape the rolls (either immediately or with the refrigerated dough), sprinkle your work surface with a little flour and dump the dough on top. Pat it down into a rough rectangle and then use a floured rolling pin to roll it into a rectangular shape about a half an inch thick, longer than it is wide. If the dough gets sticky, sprinkle a little more flour on the dough’s surface and on your hands.

Melt the butter in the microwave and stir in the brown sugar and the spices. Spread this over the rectangle of dough, leaving an inch of bare dough at the top. Sprinkle one cup of the toasted pecans over the dough, if using. Starting at the edge closest to you, roll the dough into a cylinder and pinch it closed at the top.

Rub a tablespoon of soft butter into the bottom of two 9×13 baking dishes, two 9-inch cake pans, or a combination. Using a bench cutter or a sharp knife, cut the cylinder into individual rolls 1 – 1 1/2 inches thick. Place them into your baking dishes so they have a little wiggle room on all sides to rise. Cover them with a clean kitchen towel and let them rise until they fill the pan and look puffy, 30 minutes for already-warm dough and 1 hour for dough that’s been refrigerated.

About 20 minutes before baking, begin heating the oven to 375°. When the rolls are ready, bake them for 20-25 minutes, until the tops are golden and starting to look toasted around the edges. Rotate the pans halfway through cooking.

While they are baking, prepare the glaze. In a small saucepan over medium heat, combine the milk and butter. When the butter has melted, add the brown sugar and salt. Stir until the brown sugar has melted. Remove from heat and strain into a mixing bowl to remove any sugar clumps. Stir in the powdered sugar. This should form a thick but pourable glaze.

Let the baked rolls cool for about five minutes and then pour the glaze on top. Sprinkle the remaining cup of pecans over the top, if more nuttiness is desired. Eat them immediately. Leftovers will keep for several days and are best reheated for a minute in the microwave.

Continue Reading

No-knead bread

Little side note: Patent and the Pantry now has a page on Facebook. Come say hello and join in the discussion. Find it here.)

And now, on with the baking!

No one would ever call me trendy.

I’m not on top of the latest fashions, my music tastes are more eclectic than current and I’d label my style retro rather than cutting edge.

So, when food trends begin taking over the Internet, appearing on blogs and in newspaper articles alike, I don’t exactly jump on board. Macarons? Those look a bit tricky, I say. Whoopie Pies? Not sure what the allure is there. No-knead bread? Looks complicated.

No-knead bread was everywhere about four years ago, shortly after the New York Times’ Mark Bittman wrote a piece about Jim Lahey and his revolutionary recipe for a crusty loaf of bread that required very little effort, only advance planning. Soon bloggers were extolling the virtues of this bread and posts abounded with photos of the round boule with its dark gold crust and large-holed interior.

Bread slice I

My parents jumped on the bandwagon and in the intervening years have abandoned their bread maker in favour of no-knead bread, making a loaf seemingly every other day.

So, on a recent visit with them, I was finally able to taste what all the fuss was about.

It’s no surprise everyone’s been raving.

Bread II

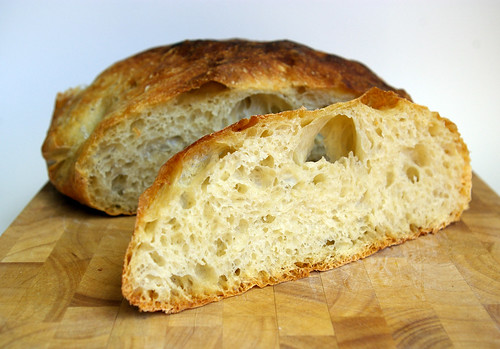
This bread has a crisp crust, but the interior — riddled with the large air bubbles that come from the long fermentation — is all soft chew. It tastes like bread should.

And it makes amazing toast.

But even with all those points, I still resisted for another year before finally deciding it was time to see if I could do it, too.

(I will readily admit here that part of that hesitation stemmed from the inevitable danger that comes from a carboholic realizing she can have access to fresh, homemade bread at will.)

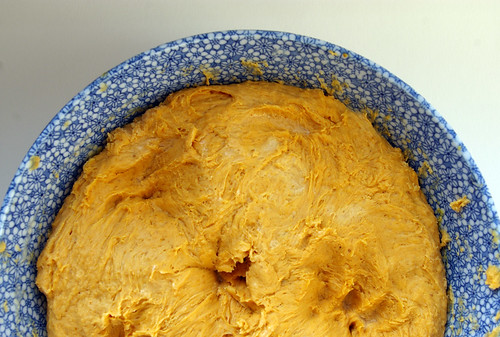
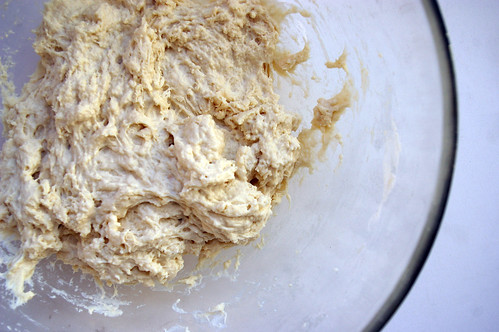
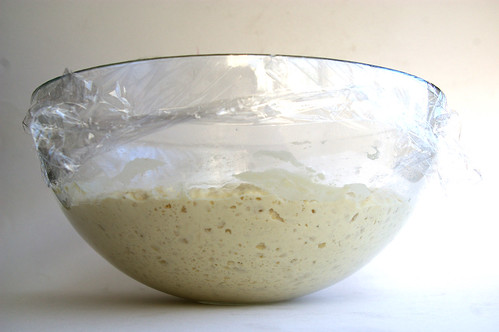
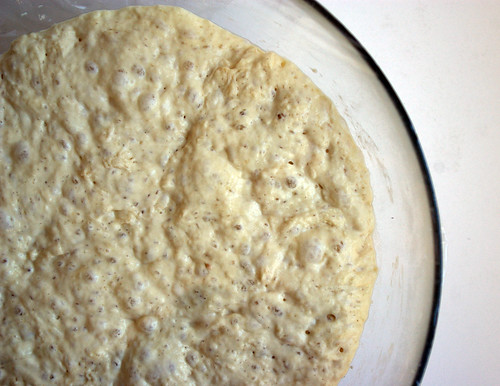
In my glass bowl, I mixed the flour, salt, instant yeast and cool water. I stirred it into a sticky, shaggy mess, covered it with plastic wrap and left it alone for 18 hours. The next day (the most reasonable way to make this bread, I figure, is to let it rise overnight), the dough had tripled in size and was dotted with hundreds of tiny bubbles.

It smelled of yeast and good things to come.

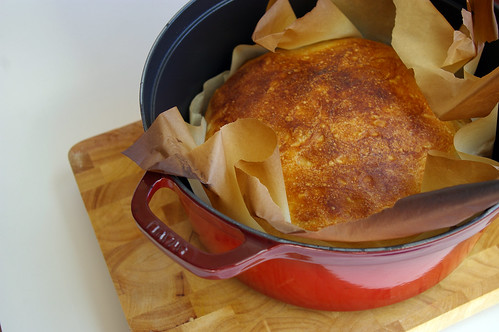
The only time I deviated from the recipe was when Lahey called for a second rise on a clean kitchen towel using wheat bran or additional flour to keep it from sticking, which is then used to dump the dough into a preheated cast iron or enamel pot. Instead, I let it rise again on a piece of parchment. When it came time to get the dough into the cooking vessel, it was just a matter of picking up the four corners of the paper and plopping it in the pot, greatly lessening any chances of getting burned.

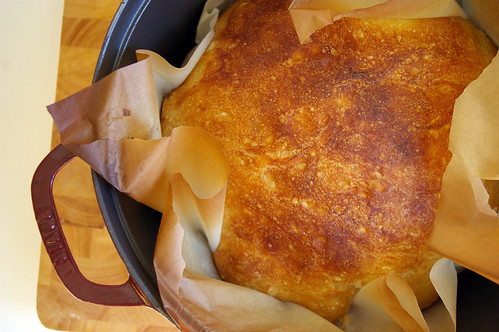
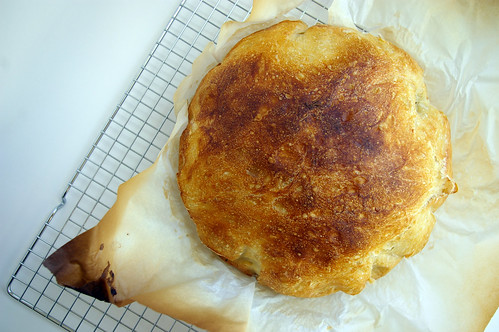
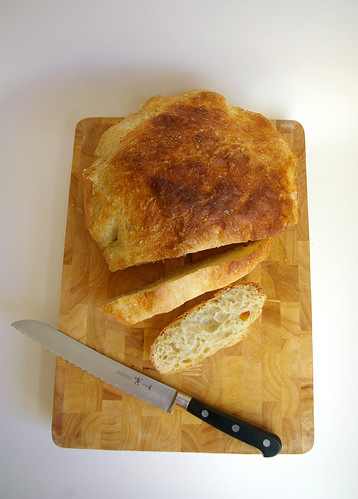
When it came out of the oven, and I lifted it out of the pot using two wooden spoons, I was excited. It looked and smelled like a perfect round loaf.

And that first slice was perfection, topped only with a thin smear of real butter.

Besides the undeniable beauty of eating a slice of bread still slightly warm from the oven (although Lahey calls for it to rest for at least an hour before cutting into it, it is often hard to resist waiting the entire 60 minutes), there is something so satisfying about baking a loaf of bread on your own.

So — I may be behind the times in finally trying it, but this bread is no passing fad.

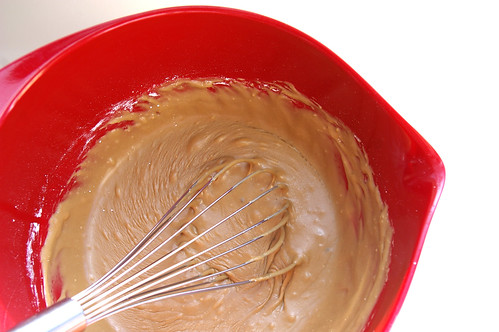
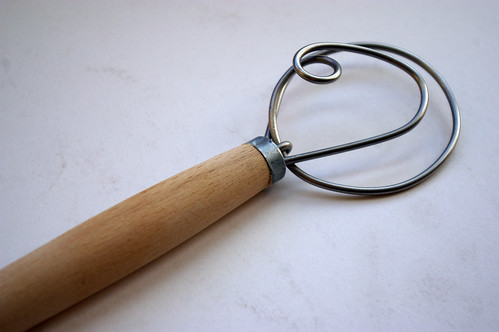
(This is a Danish Dough Whisk — a tool that is great for mixing dough.)
Danish Dough Whisk

One gram over

Sticky dough

Risen

Risen from the top

Bread

Bread III

Bread slice II

The recipe is Lahey’s own, but I have adapted it to use parchment paper for the second rise. I also found the cooking time too long, so when I bake this bread I cut it down by about 10 minutes.

(The cooking times here are as Lahey suggests.)

Basic No-Knead Bread

Adapted slightly from Jim Lahey’s My Bread (W. W. Norton & Company, 2009, $37.50)

  • 3 cups (750 mL) bread flour
  • 1¼ tsp (6 mL) table salt
  • ¼ tsp (1 mL) instant yeast
  • 1 ¹/³ cups (325 mL) cool water, at 55°F to 65°F (12°C to 18°C)

In a medium bowl, stir together the flour, salt and yeast. Add the water and, using a wooden spoon or your hand, mix until you have a wet, sticky dough, about 30 seconds. Make sure it’s really sticky to the touch; if it’s not, mix in another tablespoon or two of water.

(Note: I’ve had to use more water almost every time. I suspect it’s because Calgary is so dry.)

Cover the bowl with a plate, tea towel or plastic wrap and let sit at room temperature (about 72°F/22°C), out of direct sunlight, until the surface is dotted with bubbles and the dough is more than double in size.

This will take a minimum of 12 hours and (Lahey’s preference) up to 18 hours. This slow rise -fermentation -is the key to flavour.

When the first fermentation is complete, generously dust a work surface (a wooden or plastic cutting board is fine) with flour. Use a bowl scraper or rubber spatula to scrape the dough on the board in one piece.

When you begin to pull the dough away from the bowl it will cling in long, thin strands (this is the developed gluten), and it will be quite loose and sticky, but do not add more flour.

Use lightly floured hands, a bowl scraper or spatula to lift the edges of the dough toward the centre. Nudge and tuck in the edges of the dough to make it round.

Place on a piece of parchment paper, seam side down. Cover with a clean towel and place in a warm, draft-free spot to rise for 1 to 2 hours. The dough is ready when it is almost doubled in size.

Half an hour before the end of the second rise, preheat the oven to 475°F (240°C), with a rack in the lower-third position and place a covered 4½ to 5½ quart (4¼ to 5 L) heavy pot in the centre of the rack.

Using pot holders, carefully remove the preheated pot from the oven and uncover it. Gather up the dough by holding the four corners of the parchment paper and place the entire thing, paper and all, into the pot.

Cover the pot and bake for 30 minutes.

Remove the lid and continue baking until the bread is a deep chestnut colour, but not burned, 15 to 30 minutes more.

Use a heatproof spatula or pot holders to carefully lift the bread out of the pot and place it on a rack to cool thoroughly. Don’t slice or tear into it until it has cooled, which usually takes at least an hour.

Makes one large loaf.

This article first appeared in the Calgary Herald’s Real Life section. For more delicious recipes, visit CalgaryHerald.com/life.

Continue Reading

Shaved Asparagus Pizza

I have a confession: I am incapable of kneading. I don’t know if it’s a character defect, a lack of practice or sheer laziness, but I cannot seem to take a mix of flour and water and yeast and make it into a smooth mass that balloons into a beautiful ball of dough. I end up with something shaggy and ragged and, well, downright ugly.

When it comes to pizza crusts, I have tried to persevere. There have been a few successes (and one colossal failure where I essentially made a giant, pizza-sized cracker), but I was typically undone by my less-than-stellar kneading skills.

And then, a revelation: no-knead pizza dough.

It was a circuitous route that brought me to a place where I realized I too could easily make homemade pizza dough.

It started with shaved asparagus pizza.

Shaved aspargus pizza IV

I stumbled onto the idea on Smitten Kitchen — a popular food blog written by the charming Deb Perelman — and was immediately enchanted. Warm chewy crust, melted cheese and thin shavings of asparagus that would roast on top? Yes, please.

But, as Perelman pointed out, she was not the only one to think this would be a fantastic combination. Indeed, Jim Lahey, who revolutionized bread baking with his no-knead concept, serves a high-end version at his restaurant.

Surely, Lahey must have a pizza dough recipe.

Yes, yes he does. And it doesn’t involve kneading.

Sold!

This time, the dough is intentionally shaggy and ugly. And, after a few stirs and some squishing together of the ingredients (I can’t even bring myself to call it kneading), it only wants to be left alone for two hours.

When finally baked, it has a pleasing crispness with just an appropriate amount of chew. Topped with a tangle of shaved asparagus that had roasted and intensified in flavour, along with the richness and slight salt of the cheese, this is something I could eat over and over.

Shaved aspargus pizza II

My first taste of asparagus came in Grade 10 when my boyfriend made me dinner one night and steamed some to go with steaks. I don’t remember much about that meal other than feeling overwhelmingly shy and excited to have a boy I liked cook for me.

Since then, I’ve grown to love the green-stalked vegetable and I’ll take it just about any way it can be prepared. Roasting, though, is my favourite because I like how it slightly caramelizes the tops and intensifies the flavour.

This pizza takes advantage of that, particularly because you shave the asparagus. None of the stalks shave perfectly, so you end up with varying thicknesses of asparagus strips, each of which cook slightly differently. Some will caramelize, while others will still retain a slight bite to them.

The beauty of pizza is that it is infinitely adaptable and this recipe is no exception.

While I used buffalo mozzarella cut into rounds and a sprinkle of Parmesan, I was tempted to throw on some bits of goat cheese as well and will probably try that next time. A squeeze of lemon would have been nice at the very end. Like it spicy? Toss on some red pepper flakes.

Lahey’s version uses some rather fancy cheese, quail eggs and shaved black truffles.

But even with slightly less-glamorous ingredients, this dish is delicious.

P.S. This crust was so good that I made another batch about four days later. Yes, I have a pizza problem.

Buffalo Mozzarella

Asparagus bunch

Shaved Asparagus

Asparagus shavings

Shaved aspargus pizza I

Shaved aspargus pizza III

Shaved Asparagus Pizza
Crust, from Jim Lahey’s My Bread

  • 3 ¾ cups (925 mL) bread flour
  • 2 ½ teaspoons (12 mL) instant yeast
  • ¾ teaspoon (3 mL) table salt
  • ¾ teaspoon (3 mL) plus a pinch sugar
  • 1 1/3 cups (325 mL) room temperature water (about 72F or 23C)
  • 1 to 2 teaspoons (5 to 10 mL) olive oil for pans

In a medium bowl, stir together the flour, yeast, salt and sugar. Add the water and, using a wooden spoon or your hand, mix until blended, at least 30 seconds. Cover the bowl and let sit at room temperature until the dough has more than doubled in volume, about two hours.
Using a bowl scraper or rubber spatula, remove the dough from the bowl onto a floured work surface. Gently form into a rough ball. Then divide the dough into two halves (to make his two 13×18 – 33×45 cm – pizzas or, do as I did, and divide into three parts for round pizzas) spacing them 4 inches (10 cm) apart, and cover with a moistened kitchen towel for 30 minutes.

Pizza, from Smitten Kitchen:

  • ½ pound (250 g) asparagus
  • ¼ cup (50 mL) grated Parmesan
  • ½ pound )250 g) mozzarella, cut into rounds, shredded or cubed
  • 2 teaspoons (10 mL) olive oil
  • ½ (2 mL) teaspoon coarse salt
  • black pepper to taste

Preheat oven to 500F (260C).
Using the rough end as a handle, hold the asparagus against a cutting board and use a vegetable peeler to make long strips. (I got anywhere between two to five shavings from each stalk depending on how thick they were or how easily the peeler went through the asparagus. They were also of varying thicknesses, which is fine.) After shaving, you should just be left holding the rough end, which can be discarded. Repeat with all of the asparagus.
In a bowl, toss together asparagus, olive oil, salt and pepper.

Roll out or stretch dough to create 12” (30 cm) round. (Lahey calls for it to be stretched by hand, but I used a rolling pin and did only a bit of hand stretching after getting the dough on the pan.) Brush olive oil on pan and transfer dough.
Sprinkle on Parmesan, then add mozzarella. Top with asparagus strands.
Bake for 10 to 15 minutes until crust is golden, cheese is melted and asparagus is roasted.

This story first appeared in the Real Life section in the Calgary Herald. For more delicious recipes, visit CalgaryHerald.com/life.

Continue Reading

Sautéed Chard over Polenta with Fried Eggs

I came into a plethora of eggs over the weekend.

Farm fresh eggs

I was at work on Sunday when a colleague came up to me.

Him: You like X, right?

Me: Oh yes, that’s how I get through the day sometimes. (In my best, most sarcastic and slightly confused voice.)

Him: Uh, OK. Well, I have some and I wondered if you wanted to buy some.

Pause.

Me: Wait, did you say eggs?

Him: What did you think I said?

Me: Um…..

Anyway, he had a few dozen from this totally organic, self-sustaining farm outside of Calgary called Thompson Small Farm. I’ve been searching for really good eggs since I moved here from Vancouver. I’ve found the ones here, even from area farms, to be pretty anemic looking and I’ve craved those with those golden-orange yolks that are so beautiful. So, the thought of finding those was enough to tempt me to buy two dozen. Plus, well, he said one of them was blue-green and that was just a bonus.

So, for the next two days I dreamed up things to make with these pretty eggs in their multicoloured shells. And I realized I wanted to do something that would really showcase the egg itself. Somewhere in my food-related Internet travels, I came across a post where someone had topped polenta with cooked greens and a poached egg. Since I have come to love chard mostly owing to this, I thought it would be cool to do a riff on that idea.

Polenta and chard with egg

For the most part, I made this up as I went along, taking inspiration from the chickpeas and chard entry. But I did a lot of research on poaching eggs (vinegar, no vinegar, swirl, boiling water, stainless steel etc. Who knew there were so many variations?), so that I would be fully prepared when it came time to make them. On the drive home, though, I realized I just wanted to do something fast and, in all honesty, I really didn’t want to dirty another dish. I figured frying the egg in the pan where I had just sautéed the chard would add even more flavour.

I have about three different grinds of cornmeal as I keep thinking I have the wrong one for polenta. In the end, I used the instant stuff. What? It was in my cupboard already and I’m desperately trying to clear space. Plus, that stuff is INSTANT and that makes for a very, very quick dinner. I followed the instructions and then just doctored it up with a bit of cream (er, yes, well, it was already in the fridge . . . .) and some butter and a nice pinch of flaked salt.

This was quick, easy and delicious. I loved the soft polenta, garlicky chard and the ever-so-slightly oozing egg yolk all combined into one. Maybe next time I will try poaching the eggs, but, in a pinch, this was just fine.

Chard

Egg

Blue eggshell

Chopped chard stems

Polenta and chard with egg II

I’d call these more guidelines than a recipe, so adjust as you see fit.

Sautéed Chard over Polenta with Fried Eggs

  • 1 bunch chard
  • 2 cloves garlic, minced
  • 1 tablespoon olive oil
  • 1/4 cup white wine (or water or chicken stock)
  • 2 eggs
  • butter
  • cooked polenta
  • salt and pepper to taste

Cook polenta according to directions, adding some butter/cream/salt/pepper/cheese or whatever else you desire.

Remove the stems from the chard, then dice finely. Chop leaves into thin strips and set aside. In a large frying pan, heat up olive oil over medium heat. Add stems and a pinch of salt. Saute until they start to soften, about five minutes. Add the garlic and cook for about a minute, until it gets fragrant. Add wine (or water or chicken stock) and then the strips of chard leaves. Stir, then top with a lid and cook for about five minutes until the leaves are wilted. Scrape out pan and add a small knob of butter to melt. When bubbling add eggs and fry to desired doneness.

Dollop polenta onto plate, top with chard and fried egg.

Continue Reading

Lemon Ricotta Pancakes

I’m not a big breakfast eater. Don’t get me wrong, I do eat breakfast. But these days it’s usually a bagel at my desk or a scone picked up on my way to work because, frankly, I’d rather have those extra 10 minutes of sleep than a sit-down morning meal. Unsurprisingly, I’m not much of a morning person.

Brunch, I like. Breakfast-type meals, but after a good sleep-in.

Lemon Ricotta Pancakes I

Growing up, when I was a bit better about waking up in time to eat before leaving the house — partly because it was trickier to eat and walk to school at the same time — I had the strange habit of preferring to eat leftovers for breakfast. Pasta and tomato sauce? Yes, please. Mashed potatoes with gravy? Warm and filling. Cold pizza? Breakfast of champions — after all, it does have several major food groups.

My parents thought it was amusing. Except for the day I wanted to make fish sticks for breakfast; my mom drew the line at that. But sometimes I do want a real breakfast. At home. In my pyjamas.

What I don’t want, though, is a basic pancake.

My Internet travels provided a solution, as I came across a recipe for lemon ricotta pancakes — an intriguing idea. And what a pleasant surprise this recipe turned out to be. Not only did they combine my love of all things lemon, but they were light, like flat baby souffles, with golden edges and a hint of salt from the melted butter they were fried in.

I shamelessly scarfed a bunch down as, ahem, quality control before handing a plate to a friend I had staying with me. In my defence, I had made them quite tiny.

So fluffy and weightless, so bright with their lemon flavour. I couldn’t get enough.

Lemon Ricotta Pancakes II

But this recipe wasn’t without its foibles. Confusingly, the tubs of ricotta are measured in grams and not millilitres or cups. I did some math and the 250-gram tub was a little more than one cup.

I wasn’t going to hang on to a tablespoon or two of ricotta cheese, so I just dumped the whole thing in. Surely, I figured, it wasn’t going to do much harm. And it didn’t. Plus, it’s one of my huge pet peeves to have a recipe that calls for almost an entire can/jar/tub or something, leaving us cooks with random leftover ingredients.

Also, I couldn’t be bothered to zest the lemon onto something just to put it in a measuring spoon and then add it the mixture, so I just zested one lemon straight into the egg yolks. I might be tempted to try the zest of two lemons next time, but only because I love that flavour and feel there’s no such thing as too much lemon.

Lastly, the original recipe I found for this suggested mixing raspberry jam with maple syrup as a topping.

But I wanted something that was going to complement the light lemon flavour of the pancakes, rather than weighing it down. Just before I got started, I diced up about two cups of strawberries, sprinkled on some sugar and let them sit to macerate while I got down to business.

It was the perfect pairing. The slightly sweetened berries added the right touch of fruit, but still let the pancakes shine.

Lemon Ricotta Pancakes III

Lemon Ricotta Pancakes

This recipe is adapted from the Alberta Egg Producers.

  • 4 eggs, separated
  • 1 tub (250 grams) or 1 cup (250 ml) ricotta cheese
  • 3 tbsp (50 ml) sugar
  • ½cup (125 ml) all-purpose flour
  • zest of one lemon
  • 2 tbsp (25 ml) butter
  • 2 cups (500 ml) strawberries, diced
  • sugar to taste

In a large mixing bowl, whisk egg yolks, ricotta cheese, sugar, flour and lemon zest.

In another bowl, whip egg whites with a mixer until glossy peaks form. Stir about one-quarter of the whites into the ricotta mixture, then fold in the remaining whites gently.

Melt butter in pan over medium heat, drop batter on using small ladle or large spoon. I used a ¼-cup (50-ml) measure.) Flatten slightly, then let cook for about two minutes per side until lightly browned. Top with macerated strawberries.

This story first appeared in the Real Life section in the Calgary Herald. For more delicious recipes, visit CalgaryHerald.com/life.

Continue Reading

Glazed Lemon Cakes

While winter seems to beg for rich, warm or comforting desserts — sticky toffee pudding, brownies and apple pie — I crave lemon.

Of course, I’ve always been a go-against-the-grain kind of girl.

I like all those desserts, too; they have their place. But lemon tang on a dark, wintry day takes me away from the snow and cold. It can brighten a dreary afternoon, send me a shot of virtual sunshine.

Glazed Lemon Cakes II

Sure, we’ve been enjoying a lengthy bout of relatively warm weather, but I’m not easily fooled. Real spring is still weeks away and if I can trick myself into feeling like winter has already snapped and the fresh green and blossoms are quickly nearing, then I have to take advantage of that.

But which lemon dessert?

Conservatively, I have about 40 lemon-based tarts, bars, cupcakes and other concoctions saved on the online bookmarking site, Delicious. (All right, I checked. There are 41. But probably not for much longer.) All of these things have caught my eye at one time or another and I’ve saved them for just such wintry occasions when I need a taste of bright and tart.

The lemon bars had their appeal. The pull-apart lemon loaf looked tempting, but a bit time-consuming for me in this fit of citrus craving. But glazed lemon cakes? Oh yes, those I could handle.

The hardest part of this recipe was remembering to pull the butter out of the fridge so it could come to room temperature. Almost all of the ingredients are standard in most fridges, except, perhaps, the plain low-fat yogurt or buttermilk. In this case I went with the yogurt because it seemed like something I could more easily use up. Buttermilk is great for baking, but it’s not something I tend to go through quickly.

These little cakes were light, tender and full of tang. With the addition of the thick glaze that dripped down the edges, they reached lemon perfection. Not puckeringly tart, but deliciously citrus: a little injection of sunshine on an overcast day.

I can’t lie. I ate two before I even mixed the glaze.

And if that isn’t enough motivation to whip up a batch, I’m not sure what is.

One last note, the original recipe calls for a “6-cup jumbo muffin tin.” Since I try to avoid buying new bakeware for just one recipe, I decided to make do with what I had lying around.

My advice? Bake them in a regular muffin tin for 15 minutes (though consider starting to check them at the 10-minute mark, just in case) and eat two!

Lemon Cakes

Glazed Lemon Cakes I

Glazed Lemon Cakes III

This recipe is from Everyday Food.

Glazed Lemon Cakes

  • 1/2 cup (125 mL) unsalted butter, room temperature, plus more for muffin tin
  • 1½ cups (375 mL) all-purpose flour, plus more for muffin tin
  • 2 tsp (10 mL) baking powder
  • 1/2 tsp (2 mL) salt
  • 1/2 cup (125 mL) low-fat buttermilk, or plain low-fat yogurt
  • 1 tsp (5 mL) vanilla extract Zest of 1 lemon, finely grated, plus juice, plus 2 tbsp (25 mL) more lemon juice for the glaze
  • 1 cup (250 mL) granulated sugar
  • 2 large eggs
  • 1½ cups (375 mL) confectioners’ sugar

Preheat oven to 350°F (EDIT, this should be 180°C). Butter and flour a 6-cup jumbo muffin tin or 12-cup regular muffin tin. In a medium bowl, whisk the flour with the baking powder and salt. In a small bowl, whisk together the buttermilk, vanilla and lemon zest and juice of 1 lemon. Set aside.

With an electric mixer, cream butter and granulated sugar until light. Add eggs one at a time, beating well after each addition. With mixer on low speed, add flour mixture in three batches, alternating with two additions of buttermilk mixture.

Divide evenly among muffin cups. Bake until a toothpick inserted in centre of a cake comes out clean, 20 to 25 minutes. (Or about 15 minutes for a 12-cup muffin tin. Start checking at the 10-minute mark.) Cool 10 minutes in tin, then cool completely on a rack.

Set rack over wax or parchment paper. In a small bowl, stir confectioners’ sugar with remaining lemon juice until smooth. Pour over cakes, spreading to edges with a small knife. Let set 30 minutes.

This story first appeared in the Real Life section in the Calgary Herald. For more delicious recipes, visit CalgaryHerald.com/life.

Continue Reading