Roasted Tomato Tart

(I am so proud of this post because it marks my first food article in the Herald’s revamped Sunday edition. My photo of my little roasted tomato tart was on the cover of the ‘mix’ section. For those that haven’t seen the new Sunday edition, that means the photo was the entire front of the ‘mix’ section. Yay! And a warning, this post is photo heavy! What can I say? I had a hard time paring it down.)

And now, back to the article.

I have an unabashed love of tomatoes. Meaty slices of them wedged between two pieces of buttered toast with a sprinkle of salt and pepper is my idea of comfort food. Roma tomatoes drizzled with a little balsamic vinegar and good olive oil make a simple side dish. And I love that burst of seeds and flavour that comes when biting into a plain cherry tomato.

Tomatoes II

I once bought a perfume called Tomato because it smelled like the aroma given off after brushing up against the green stalks of a tomato plant — that verdant scent of heat and summer. A few spritzes on my wrist could transport me back to being a kid and visiting my grandparents on one of the Gulf Islands where I sometimes helped in the garden.

Enclosed in chicken wire to protect it from ravenous deer, the garden produced sweet tiny carrots I ate straight from the ground after a quick rinse from the hose, grape vines that tangled their way along trellises, and rows of tomato plants.

I would use a plastic watering can to fill the coffee tins with water, from which my grandfather had removed the bottoms, nestled into the earth next to the plants — a trick that allowed the water to get right at the plant’s roots. And I would brush up against the stalks, filling the air with that distinct smell.

If any were ripe, I’d pull them sun-warmed from the dark green plants and eat them unadorned.

There is no taste like a vine-ripened tomato.

Tomatoes

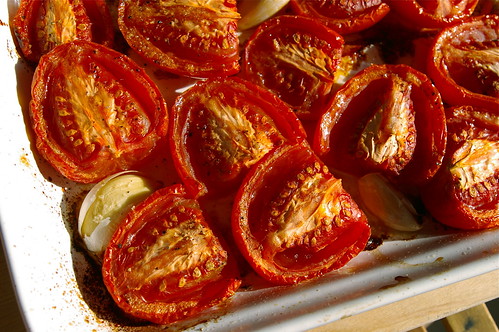
But sometimes I like to roast them to intensify their essence and bring out more of their natural sweetness.

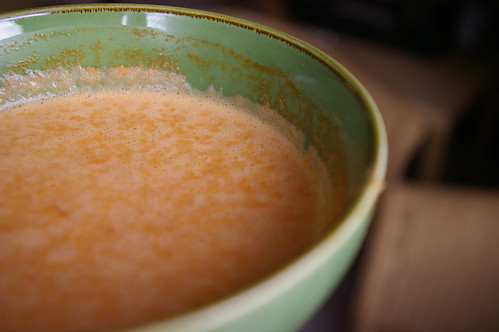
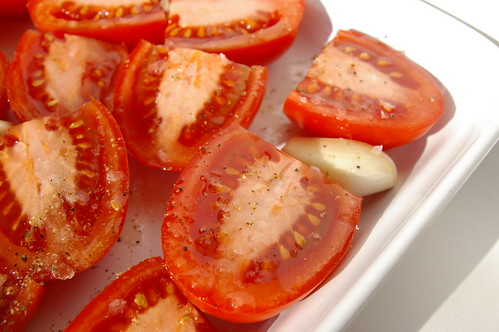
Baking halved Roma tomatoes in the oven with a few unpeeled garlic cloves is an excellent base for a good tomato soup.

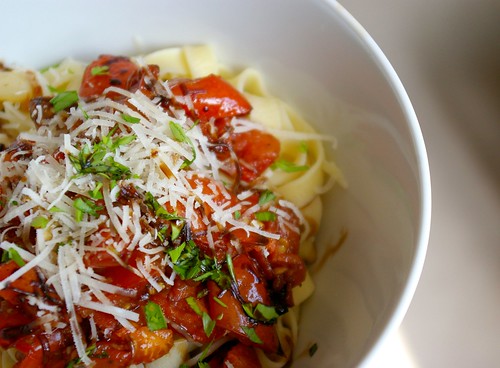
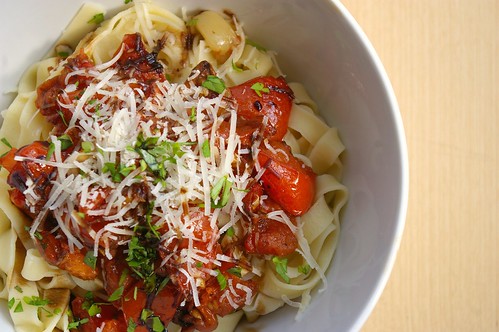
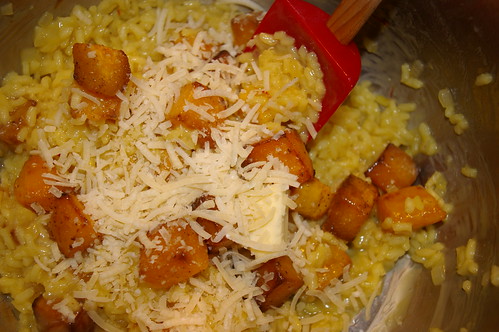
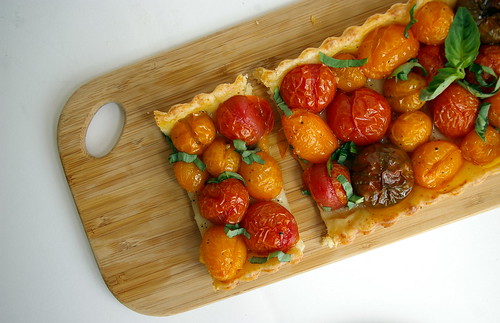
Cherry tomatoes, when roasted, shrink and wrinkle to softish pouches of concentrated tomato flavour. I’ve made simple pasta sauces like this, topped only with shaved Parmesan and a sprinkle of basil or parsley if I have them lying around.

Roasted Tomato Tart-round

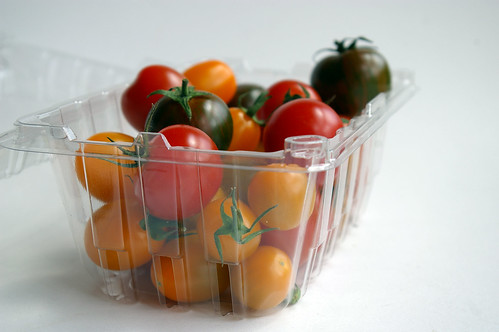
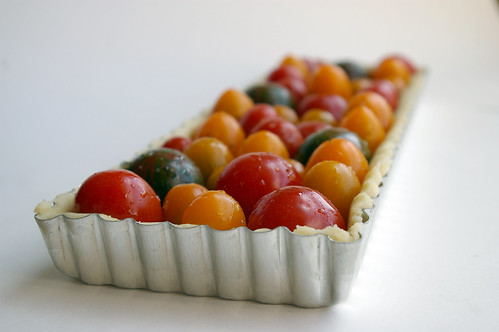
I thought recently — after seeing a clamshell package of multicoloured cherry tomatoes at the farmers market — that they would make a good savoury tart, particularly if paired with a hearty crust.

When I began imagining a roasted cherry tomato tart, I thought there was potential in adding a few handfuls of Parmesan cheese to the dough to bring out a nice nutty, rich taste when baked.

A little research led me to realize I wasn’t the first person to think of this, but I didn’t love any of the recipes I came across. I am by no means a pastry expert, but was willing to give myself a chance to experiment.

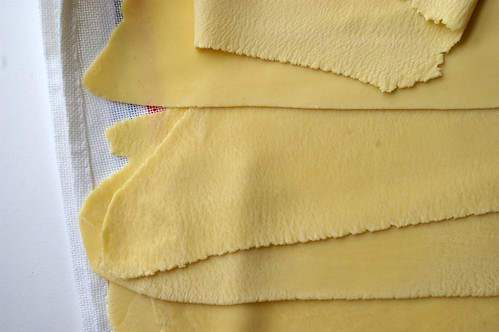
Using ideas from several different recipes, I decided to create a hybrid pastry that used cream instead of water and a cup of Parmesan cheese, finely grated and blitzed with the other ingredients in the food processor.

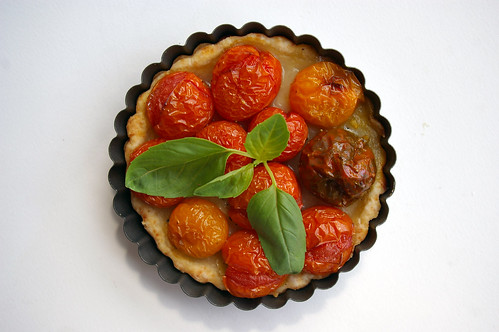
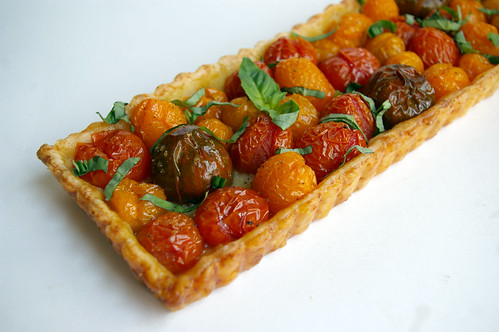
The dough was easy to work with and resulted in a golden crust that played nicely against the sweet, soft tomatoes.

(This would likely work just as well, though, with a regular pastry.)

Because cherry tomatoes are so juicy, there was a lot of liquid bubbling away as the tart was baking. (Truth be told, I was a bit nervous about just how much I could see as I peered through the oven door.) Some of it did cook off in the process, but there was definitely a thin layer of tomato liquor when I pulled the tart out. Some may call it soggy; I prefer to think of it as tomato-infused pastry. Either way, the base of the tart pastry was crisp and I liked the taste of it.

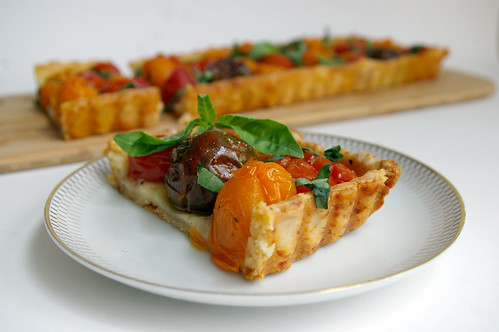
A sprinkle of basil gave it a nice fresh taste when added as the tart cooled slightly. (And yes, you’ll want to let it sit for a few minutes because cutting into the tomatoes will likely cause some to burst. Ouch.)
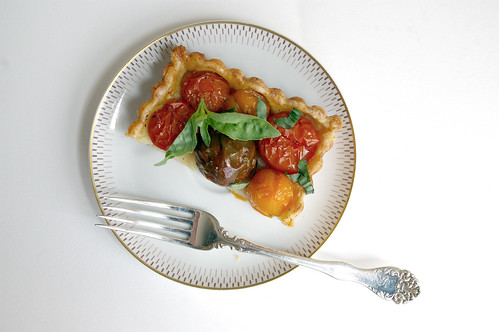
Chilled parmesan pastry

Pastry in tart dish

Tomatoes III

Tart pre-oven

Roasted Tomato Tart II

Tomato Tart and slice

Sliced Tomato Tart

Roasted Tomato Tart Sliced

Roasted Tomato Tart

  • 1½ cups (375 mL) flour
  • 7 tbsp (115 mL) butter, cold and cut into small cubes
  • ½ cup (125 mL) cream
  • 1 cup (250 mL) finely grated Parmesan
  • pinch salt
  • 1-1¼ lb. (500 to 625 grams) cherry or grape-sized tomatoes
  • 1 tbsp (15 mL) olive oil
  • 1 tsp (5 mL) salt
  • ½ tsp (2 mL) fresh ground pepper
  • 2 tbsp (25 mL) fresh basil, chiffonade (rolled like a cigar and cut into strips)

Add the flour and pinch of salt to the bowl of a food processor, then sprinkle the butter cubes on top. Pulse two or three times until the butter starts to break down, then add the Parmesan. Pulse until the mixture is crumbly and the butter is in pieces no larger than a pea.

Add the cream slowly while pulsing until the dough starts to come together. (It will bunch up and the food processor noise will change.)

Empty the contents onto a lightly floured surface and knead it a few times to pull the dough together.

Wrap in plastic and refrigerate for at least 30 minutes or as long as overnight.

Preheat oven to 325 F (160 C).

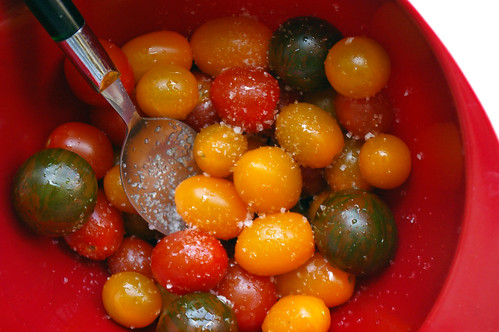
Toss the tomatoes in a bowl with the olive oil, 1 tsp salt and pepper. Set aside.

On a lightly floured surface, roll out the dough until it is about 1/3 inch to 1/4 inch (8 millimetres to 6 mm) thick. Press into tart tin (9 inch/23 cm round tin or a 14-inch/35 cm rectangular tin), stretching it as little as possible, and cut off excess. Arrange tomatoes in the tart tin.

Bake for an hour until tomatoes are soft and pastry is golden brown. Remove and let cool on a rack for 10 minutes. Roll basil leaves like a cigar and then slice them to make herb strips. Sprinkle over tart.

Serve while still warm.

Cook’s note: The amount of tomatoes will vary depending on how tall or fat they are and how well they fit together in the tart tin.

This story first appeared in the Real Life section in the Calgary Herald. For more delicious recipes, visit CalgaryHerald.com/life.

Continue Reading

Fettucine with Roasted Tomato Sauce

The actual title of this blog post would have been far too long:

Fettucine with Roasted Tomato Sauce and Balsamic Reduction, as well as testing out the new KitchenAid pasta attachment.

Roasted tomato sauce on fresh fettucine

It’s a bit of a double barreled post, really. Call it multi-tasking.

Actually, that’s a bit of a lie too. The actual, actual title of this post should have been:

Fettuccine with Roasted Eggplant and Tomato Sauce and Balsamic Reduction, as well as testing out the new KitchenAid pasta attachment.

But I’ve realized I really don’t like eggplant when I cook it and, in the end, did not end up eating any of it. You will notice its absence in the final photos, but had to include a photo of the palm-sized eggplants because they were just so darn cute.

Baby Eggplants

Which pretty much illustrates the fact that I make the worst impulse food buys known to man.

At any rate, a couple of months ago I was approached by a marketing company asking if I’d be interested in reviewing the KitchenAid pasta kit on my blog. As a huge pasta fan, I was definitely intrigued.

I’ve typically shied away from making it homemade, even though the boxed stuff pales in comparison to the tender noodles that come from real pasta.

The real issue here is my inability to knead properly. Unsure if that’s because I’m impatient, don’t have a feel for it, or just generally have no idea what I’m doing. But whether one of these reasons or a combination of all three, it basically adds up to me never quite reaching the smooth, elastic stage needed to make bread or pasta.

Full disclosure: I was sent the KitchenAid pasta kit, as well as the mixer required to run the attachments, by the marketing firm in order to review them. This is my unbiased review of the kit. I am not required to return the items (which, really, makes sense. I mean, what are they going to do with a used mixer, pasta roller and cutter?).

The mixer and kit arrived a few weeks after some back-and-forth emailing and I set aside an afternoon to give it a whirl.

The kit itself includes two boxes of pasta dough mix (just add water), a pasta roller, fettucine cutter, cleaning brush and cooking utensils. The roller and cutter attach to the front of the stand mixer and are powered by the appliance.

Pasta Mixes

Roller and Cutter

Roller and Cutter

Cleaning brush

Making the dough was pretty simple. Add water, mix, produce crumbly dough and mush it together.

As always, I was nervous from the get-go that I had done something wrong. But I divided the dough into about eight pieces and then gave them each a quick knead before powering up the roller attachment and letting the dough slide through.

On its widest setting, the roller can actually be used to knead the dough. I sent one chunk through, then folded it in half and let it run through the rollers again. I did this about five or six times until the dough was shiny and elastic and stretched out into a long rectangle. Then I started on the next chunk of dough.

Pasta first run

Once that was all done. I then put the roller onto a thinner setting and ran them all through again. And then again on a thinner setting. And so on.

When it was thin enough, I exchanged the roller attachment for the fettucine cutter and watched as the flat sheets of pasta were cut into perfect (albeit extremely long) ribbons.

Fresh Fettucine

It was, all in all, astonishingly easy. And a bit hypnotic.

I liked that I could forego all the annoying kneading and with relative ease make a batch of homemade pasta. I liked the chew of the noodles I made and how quickly it cooked.

The next test, of course, will be to make my own actual dough.

While I loved the roller and cutter, I was initially not 100 per cent sure I would have been tempted to buy the entire kit. Most food lovers are already going to have their own slotted spoon and pasta server and probably would enjoy the challenge of making their own dough rather than using a boxed mix, I reasoned.

I would, however, definitely be tempted to buy the roller and cutter separately.

Roller

Fettucine cutter

Then after a bit of research, I found the kit is not a bad deal considering a pasta roller, motorized drive and a fettucine cutter is going to cost roughly the same as the KitchenAid’s kit, which comes with the utensils, dough mix and cleaning brush. If you already have the stand mixer, it’s not a bad way to go.

The pasta kit retails for about $180.

And here’s what I did with the noodles. The recipe is not so much a recipe as much as me just fiddling around, but, since it turned out so well, I’m going to recommend it anyway.

Roasted tomato sauce on fresh fettucine II

Fettucine with Roasted Tomato Sauce

  • 1 pound tomatoes, cut into 1 or 1/2″ chunks
  • 3 cloves garlic, whole, unpeeled
  • olive oil
  • balsamic vinegar
  • salt
  • pepper
  • pasta
  • parmesan
  • balsamic reduction

Set oven to 375. Chop tomatoes into roughly 1/2″ to 1″ pieces (depending on how chunky you want the sauce to be), place in baking dish, scatter in unpeeled garlic cloves, then drizzle with olive oil, balsamic and sprinkle on kosher or sea salt and pepper. Bake for about 30 to 45 minutes until tomatoes are starting to carmelize and break down.

Cook pasta according to directions or, if using fresh, cook in boiling, salted water for just a few minutes until al dente. (Depending on the thickness of noodle, this can take anywhere from about three minutes and up.)

Slip cloves of garlic out of their peels and then mush with fork into tomatoes. Scoop sauce onto cooked pasta, sprinkle with grated parmesan and fresh chopped parsley (if you have any). Drizzle lightly with extra virgin olive oil and balsamic reduction.

Continue Reading

Roasted Tomato Soup

Sometimes, my apartment is the place where tomatoes go to die. I buy them, forget about them, and the slowly grow old, wrinkling away in their clamshell package until I’m utterly baffled about what I can do with them.

And then I had a brainwave (triggered in no small part by a recipe I saw over at 101 Cookbooks and then combined with an article from one issue out of my random collection of Cook’s Illustrated): why not roast them and make them into a soup? Then it doesn’t matter if they’re wrinkled. Or if they are wintry supermarket tomatoes that have virtually no flavour. Roasting will take care of both problems, especially the lack of flavour aspect as their summery, tomato flavour will intensify in the oven. Throw a couple of garlic cloves in with the tomatoes while they roast and add a hint of buttery, roasted garlic flavour to the soup.

Roasted Tomato Soup

The first time I made this, there was a tomato emergency. The collection I had was rapidly going south and was going to have to be tossed soon if I didn’t figure out something to do with them. Of course, since I was just playing around in the kitchen, I didn’t bother documenting the process.

The soup was full of flavour and velvety smooth. It was definitely a keeper.

A civilized lunch

The second time I made the soup, it was almost as good, but I’m going to suggest not using as much stock as I did this round. The first soup, which only had about two cups of stock, had a much more intense tomato flavour, which is what made the soup so great. The second one, I used three cups of stock. The tomato flavour was duller and I won’t be doing that again.

Tomatoes

Roasted Tomatoes and Garlic

Diced Onion

Soup in blender from above

In the blender

Soup from the side

Roasted Tomato Soup

  • Six or seven tomatoes, cut in half or quarters depending on their size
  • 2 tablespoons olive oil, divided
  • one onion, diced
  • four cloves garlic, unpeeled
  • 1/4 cup brandy, optional
  • 1 tablespoon sugar
  • 2 cups chicken or vegetable stock
  • 1/4 cup cream, milk or half-and-half
  • Salt and pepper

Preheat the oven to 375. Cut tomatoes in halves or quarters, depending on their size, and lay cut side up in a roasting pan. Throw in unpeeled garlic cloves amongst the tomatoes. Drizzle everything with one tablespoon of olive oil and sprinkle with kosher or sea salt and fresh ground pepper. Roast for 30 to 45 minutes until the tomatoes and garlic have started to caramelize.

Heat the remaining tablespoon of olive oil in a saucepan on medium heat, then add the diced onion and saute until transluscent — about four or five minutes. Add brandy, if using, and cook for another minute or two. Add sugar, then stock. Bring to low boil.

Remove paper skins from garlic, then add the tomatoes and garlic into the pot with the stock. Let cook for a few minutes. Pour everything into blender and whiz until velvety smooth. Add cream or milk and whiz for another minute. Taste for seasonings. (Since there is salt on the tomatoes and in the stock, I advise waiting until the end before seasoning because you may not need to add anything.)

Continue Reading

Risotto with Roasted Butternut Squash

Last week I worked a couple of night shifts.

I used to have a position where I worked nights for a month at a time, every three months. That was too much for me. Over the course of the weeks, I’d start to feel more and more ghost-like, spending my days alone and my nights with only a handful of colleagues; the final hour I was pretty much alone and I would slink out into the dark night, drive home and stay awake until three in the morning before finally crawling into bed.

But I don’t mind the odd night shift, actually. Sleeping in? A sunny day to one’s self? A few hours to bake and cook and photograph and eat? Sounds good to me. (Especially in these days of waning winter light, when full sun has been minimized to just a few short hours in the early afternoon.)

Plus, who doesn’t love the idea of waking up and having Risotto with Roasted Butternut Squash for breakfast?

Risotto with Roasted Butternut Squash

That morning, searching around for something to eat, I realized I had better use up some butternut squash that was otherwise going to have to be imminently pitched. Roasting it was the only reasonable answer. And, as I dumped the cubes into a roasting dish and drizzled it with olive oil and sprinkled on salt and pepper, I remembered a Barefoot Contessa recipe for a risotto with roasted squash.

In pulling out my recipe book, however, I realized I was missing some key ingredients, including shallots and pancetta. I’m sure these things make her version even better, but this bastardized version made me swoon when I sat down less than an hour later with a big bowlful and the contented feeling that comes from hot food and knowing work is still hours away.

Luckily, I did have a small box of saffron — another of my myriad food impulse purchases that had not been cracked open. Saffron, those delicate threads, so scarlet, so fragile. I remember growing up, seeing the same type of small, clear plastic box in my mum’s cupboards. But I have no recollection of her ever using it. The red threads impart a lovely orange-yellow colour to the risotto and also their own flavour, which I can’t really attempt to explain. Still, while I made this with saffron, if you don’t have it, I wouldn’t panic.

This made enough to feed two adults generously, likely four as a side dish. Or, one of me over the course of several meals.

Roasted butternut squash

Saffron

Getting the risotto started

Final steps

Risotto with Roasted Butternut Squash

  • 1 small butternut squash (1 pound)
  • 2 tablespoons olive oil, divided
  • salt and pepper
  • 1/2 onion, diced
  • 3/4 cup arborio rice
  • pinch saffron (optional)
  • 1/2 cup white wine
  • 3 cups chicken stock
  • 2 tablespoons butter
  • 1/2 cup freshly grated parmesan

Preheat oven to 400. Peel the butternut squash, halve it and remove seeds. Cut into 3/4″ cubes. Place squash in roasting dish or on sheet pan, toss with olive oil, 1 teaspoon salt and 1/2 teaspoon pepper. Roast until tender and golden in spots, about 25 minutes. Toss once to ensure even roasting.Meanwhile, heat the chicken stock in a small covered saucepan. Leave it on low heat to simmer.

In saucepan, heat 1 tablespoon olive oil, add diced onion and saute until translucent. Put chicken stock in microwave safe bowl or measuring cup and heat. (Time will vary on the microwave; start with two minutes. This can also be done by warming the stock on the stove, but I find the microwave system saves me another pot to wash. If the stock cools too much, just microwave it again.)

Add rice to onion and oil mixture and stir until the grains are coated. Add the wine and let it reduce slightly. Add one cup of stock, along with the saffron, if using. Simmer, stirring occasionally, until the stock is absorbed — about five to 10 minutes. When the stock is almost gone, add the next cup. Repeat with the last cup of stock. When the liquid is all absorbed, remove pot from heat, stir in butter and cheese. Toss in roasted squash. Add salt and fresh pepper to taste.

Continue Reading