Saifun Salad

I don’t know why I always forget how great T&T supermarket is.

Yesterday, I went grocery shopping. After 10 days away it was time to restock the fridge with vegetables and fresh herbs. I was really craving fresh herbs now that the temperature is starting to climb. (Mother Nature is, apparently, apologizing for the extra long winter by moving us straight into summer.) Safeway was out of basil, though, so after dropping a friend off at the airport this morning, I decided to quickly stop by T&T in the city’s northeast.

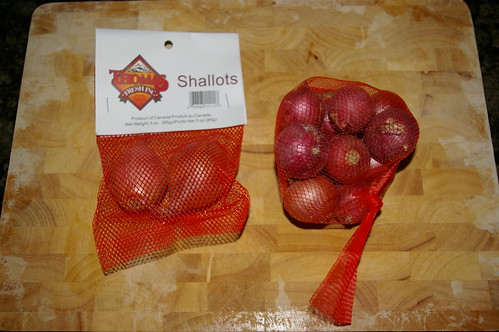
Let’s do a little comparison shopping, shall we?

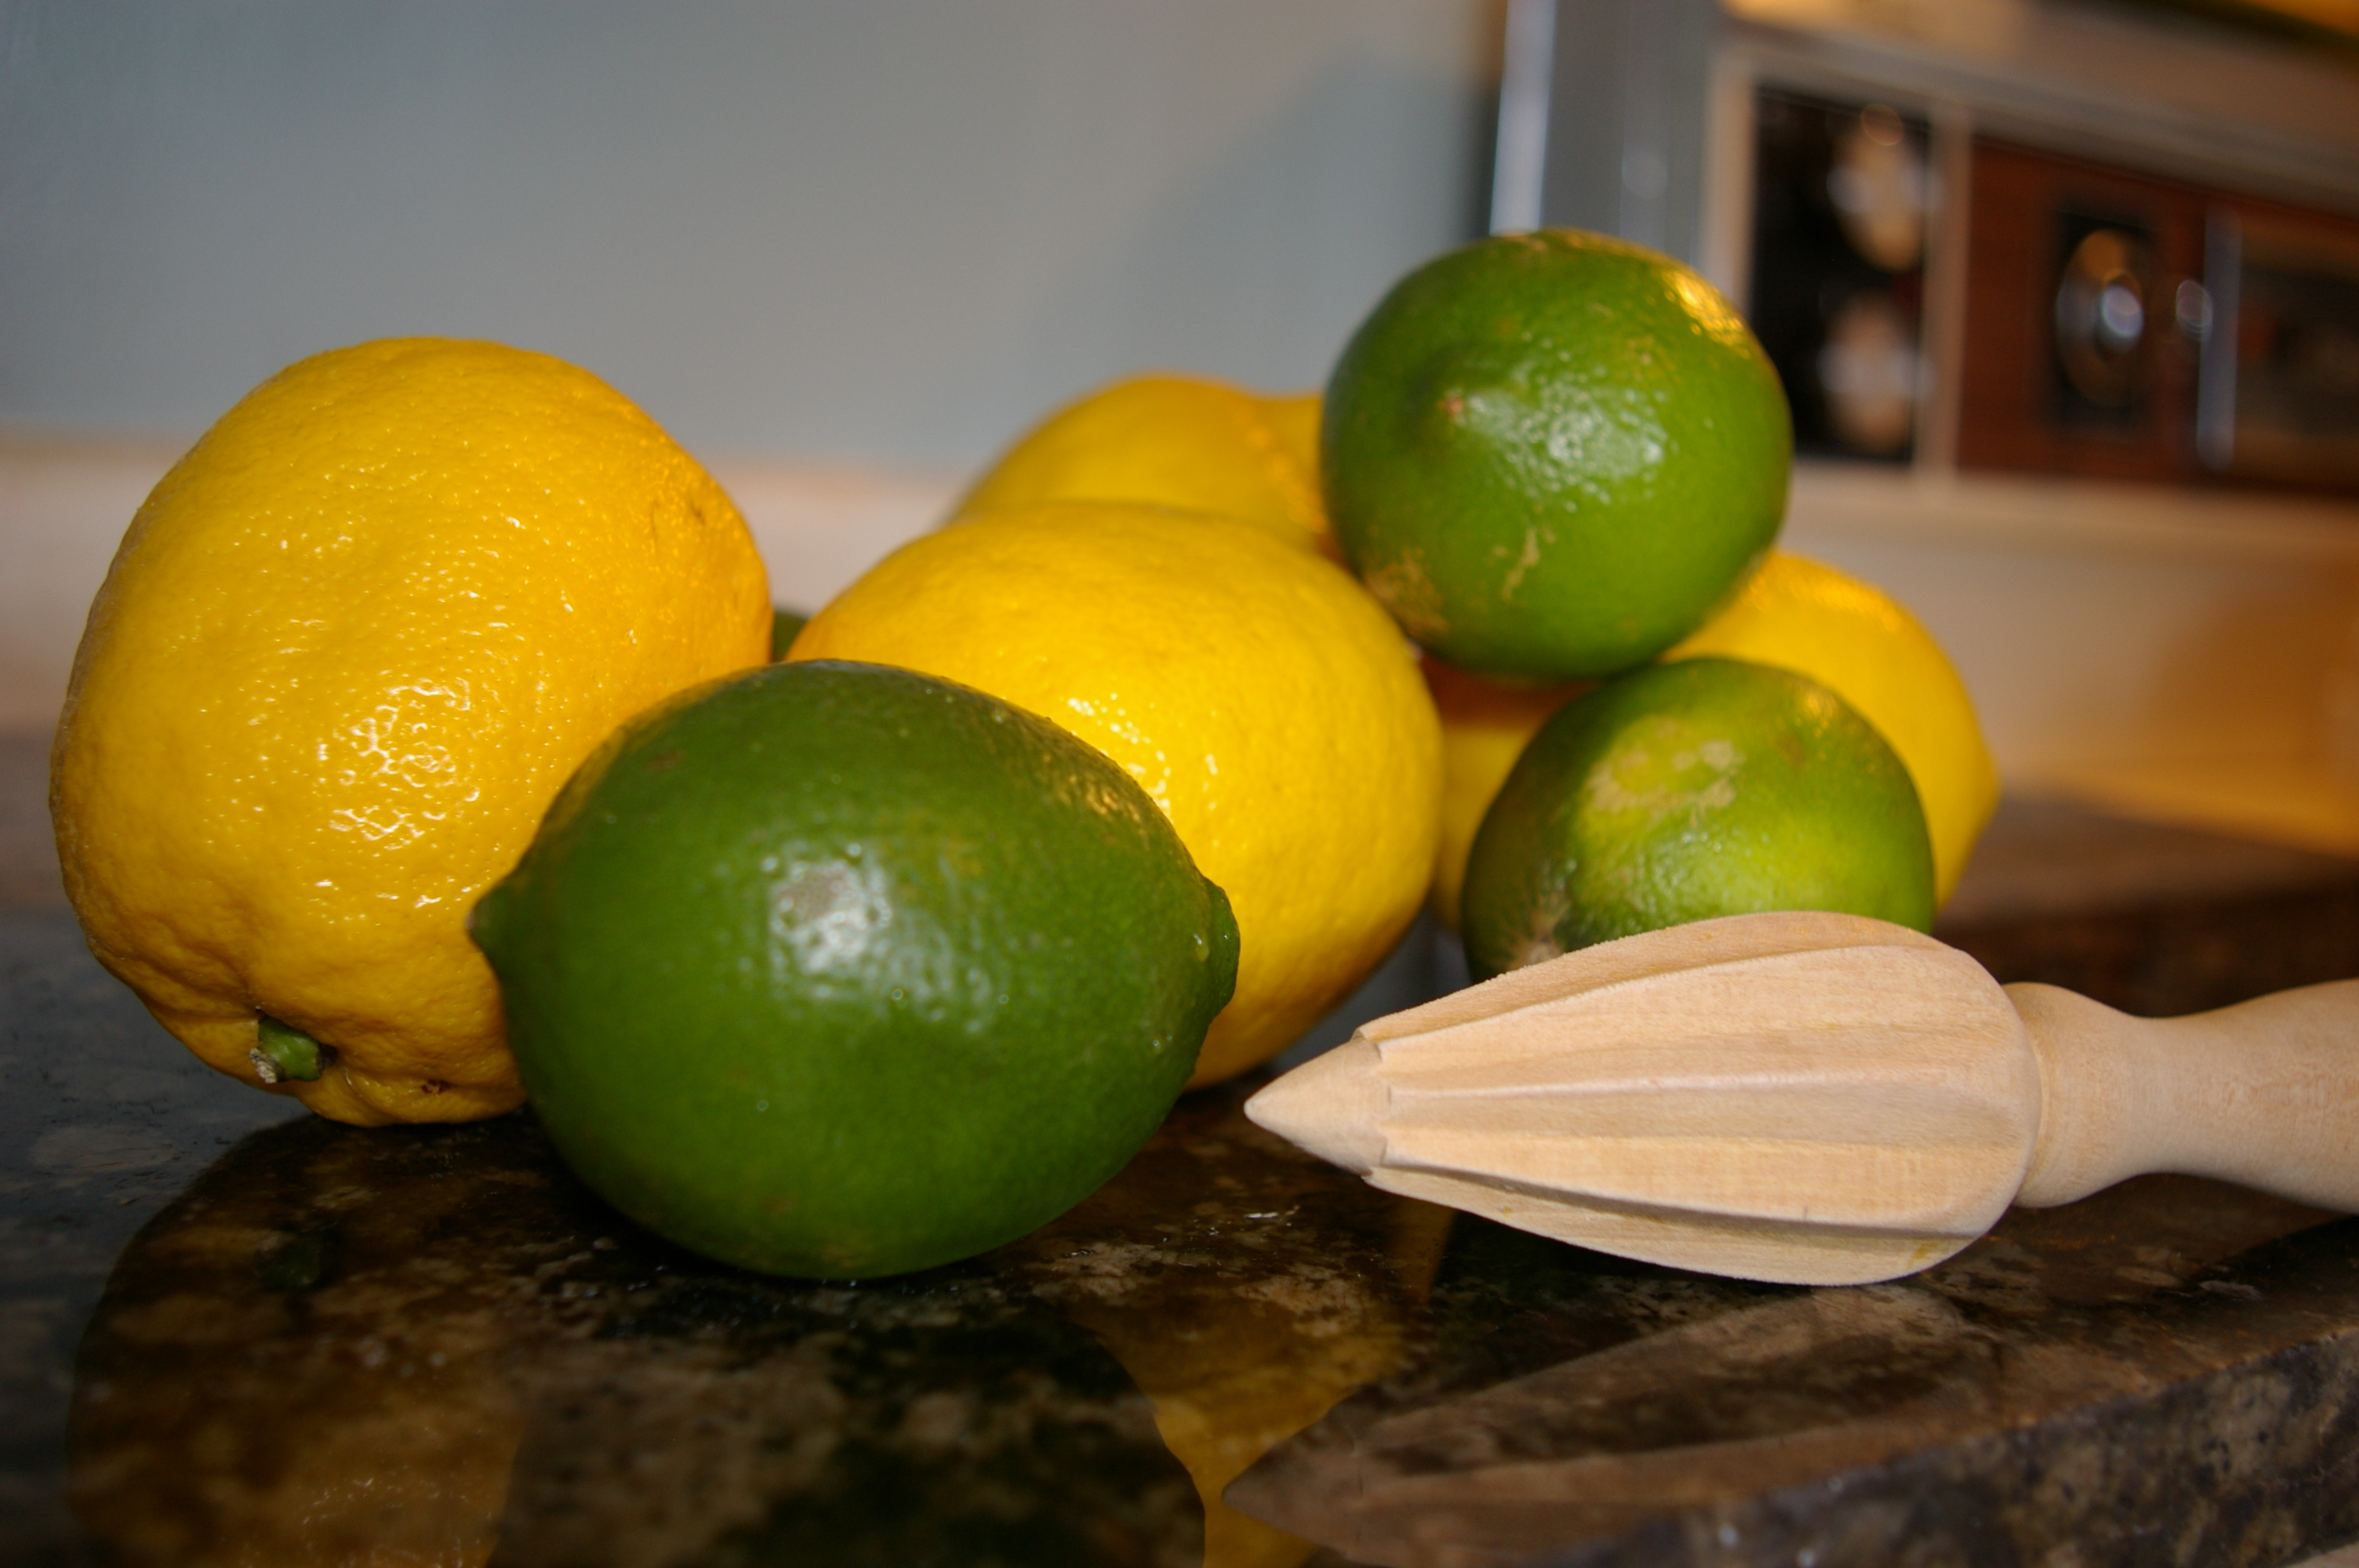
Two shallots at Safeway: $1.99

Bag of eight shallots at T&T: $1.49

Shallots

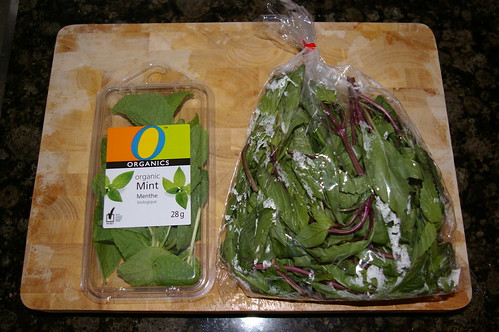
Packages of herbs at Safeway: $2.49

Bag of Thai basil about three sizes larger than Safeway’s: $2.64 (by weight)

Fresh herbs

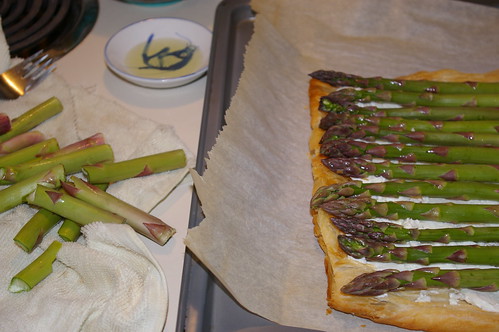
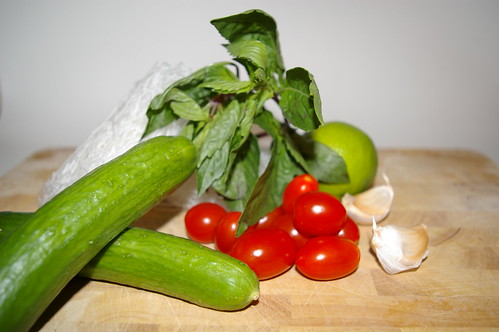
Okay, so I only needed a little bit of basil, but bonus basil means more room for creativity. Now, instead of one or two recipes that call for the stuff, I can make three or four. With three baby cucumbers sitting in my car (from my aforementioned friend who needed to ditch the last of her produce before heading on holidays), grape tomatoes at home and a package of mint also sitting in my fridge, I remembered this great little summer salad recipe that uses Saifun noodles.

Saifun noodles — before the softening

Saifun noodles softening

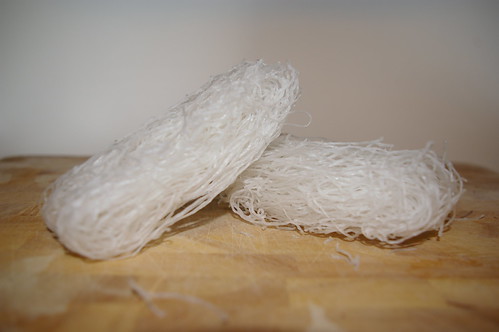
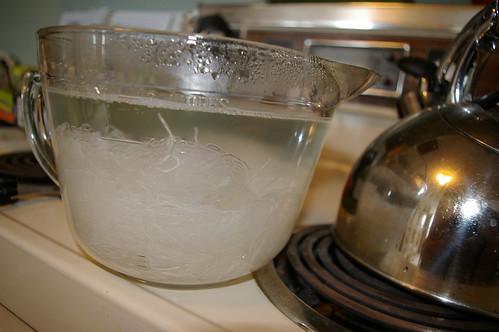
These noodles — also known as mung bean noodles, bean threads or vermicelli — are the perfect summer food. They don’t need to be boiled, just reconstituted in a little hot water, which is easily done while chopping the rest of the ingredients. The noodles are light and when dressed with lime, rice vinegar, garlic and fresh herbs can be very refreshing. The hits of fresh herbs also make it super tasty.

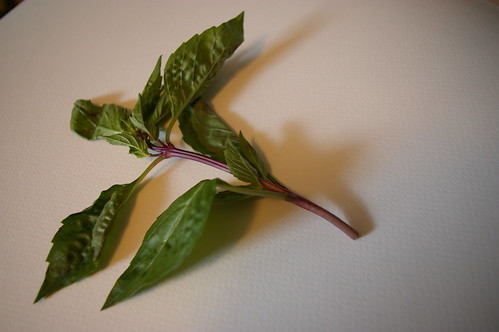
For the record, Thai basil (also known as holy basil, apparently) does not taste the same as traditional Italian basil, so I wouldn’t suggest using it for your favourite tomato sauce or other Italian dishes. But if it’s a Thai, Vietnamese or southeast Asian recipe that calls for basil, you could definitely use Thai basil if you can find it. A lot of Asian grocers seem to carry it, so keep an eye out.

Thai basil

I originally found this recipe in the Edmonton Journal. My additions and changes are noted in italics. Also note that these noodles suck up the vinaigrette like string sponges, so, when in doubt, don’t skimp. Oh, and I like to use those baby cucumbers that seem to be cropping up everywhere these days; they’re less bitter than the long English cukes. Either way, I’d recommend scraping out the seeds because that ups the soggy factor if you’re not eating it all in one go (or, of course, serving it all in one go).
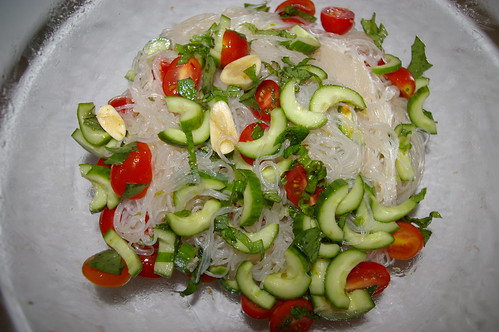
Saifun Salad ingredients

Saifun Salad dressing and kitchen mess

Saifun Salad before the dressing

Saifun Salad with the dressing

Saifun Salad

  • 8 oz. (250 grams) saifun bean thread noodles
  • 1 cup grape tomatoes (I chop mine in half so they stretch further)
  • 1 small cucumber, diced
  • 2 tbsp. chopped fresh mint leaves
  • 2 or 3 green onions, minced
  • a few cilantro leaves, chopped (cilantro and I are not friends. I do not like it nor understand everyone’s obsession with it. If you like it, by all means add it; I do not.)

Dressing:

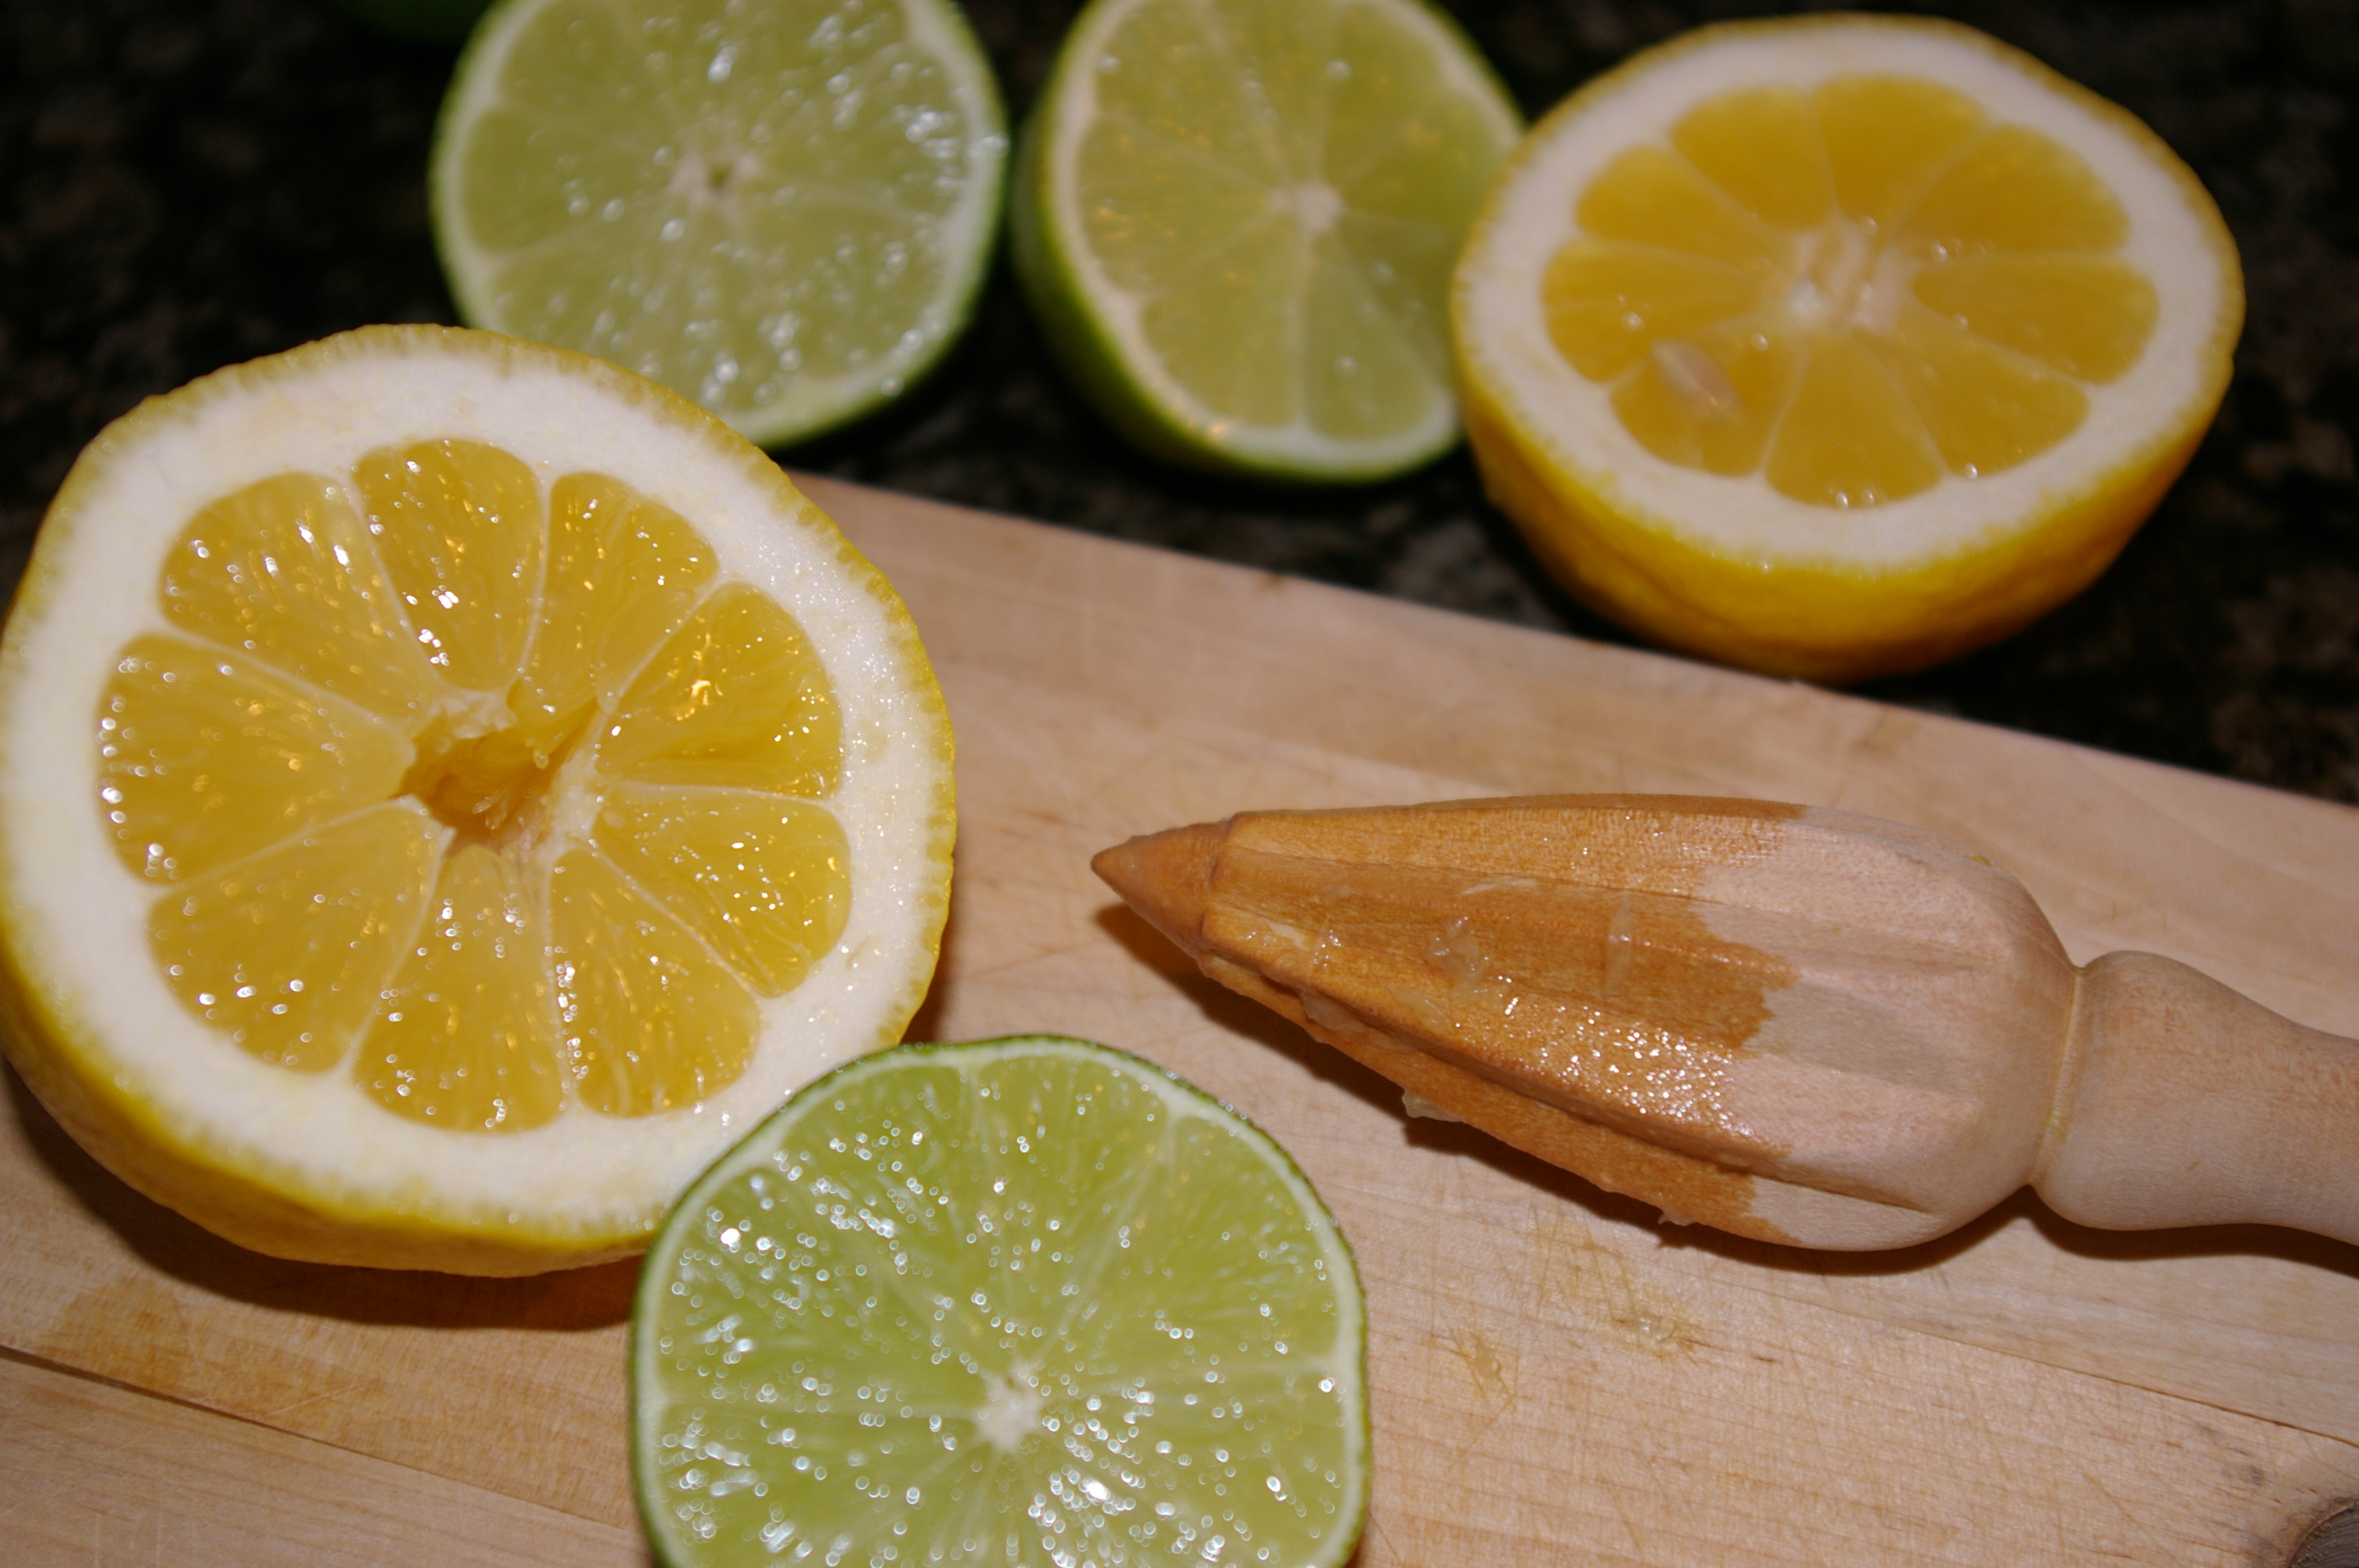
  • 1/4 cup rice vinegar
  • 3 tbsp. sugar
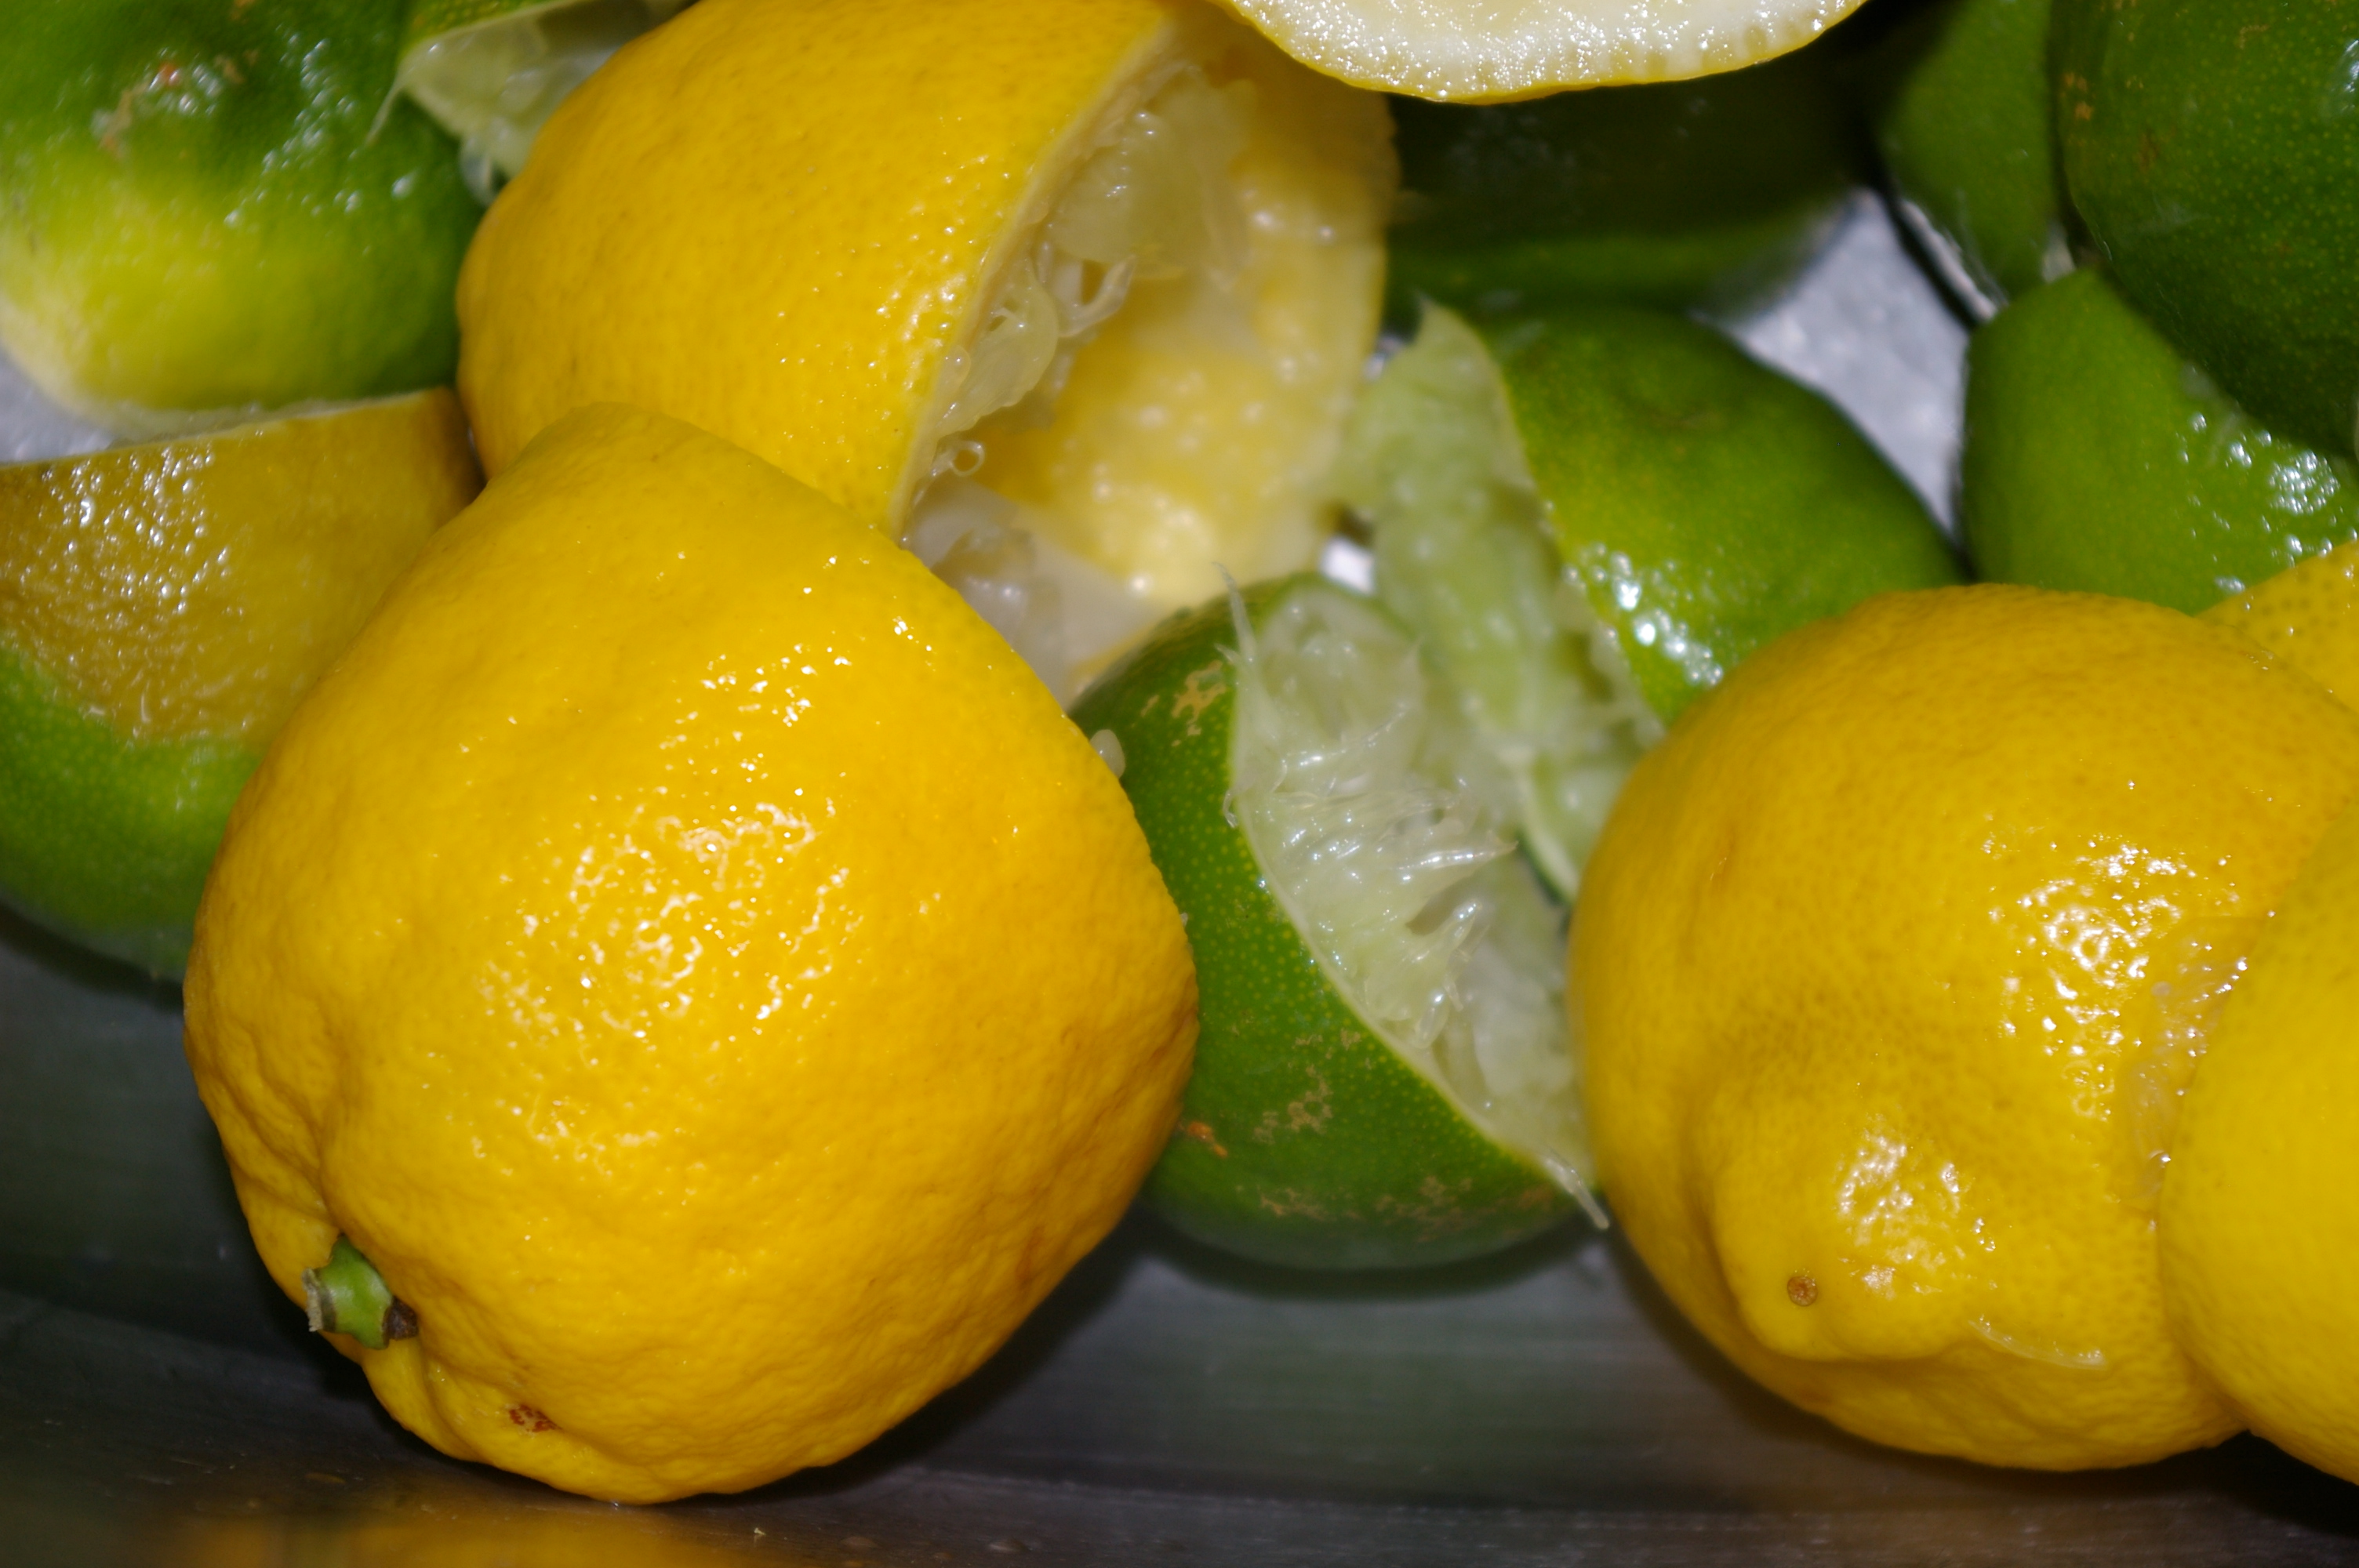
  • grated zest and juice of one lime
  • 2 tbsp. Thai basil, torn (Of course, if you can only find Italian, that’s fine.)
  • 2 garlic cloves, mashed (I mash them, throw them in the dressing, then fish them out just before eating so as to impart as much garlic flavour but without the burn of eating raw garlic.)
  • 1 tsp. red chile paste
  • 2 tsp. fish sauce
  • 2 tsp. soy sauce
  • 1/4 cup canola oil (I’m sure any vegetable oil will do. But I wouldn’t use olive oil, which I feel would overpower the light flavours of the salad.)
  • 1/2 tsp. sesame oil (I usually don’t add this because I find it overpowering.)

Soak the noodles in a bowl of warm water just until softened, about five minutes, then cook one minute in boiling water. (I simply cover them with boiling water and wait about five or six minutes for them to soften.) Drain and immediately rinse with cold water to stop the cooking. Cover and store in the fridge until ready to make the salad.

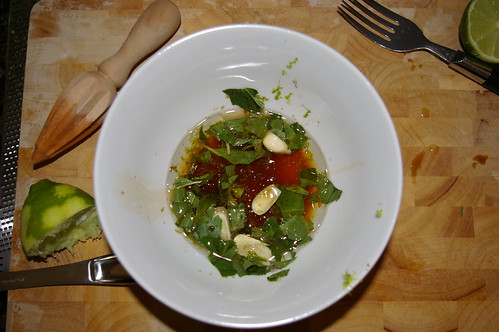
Whisk together the dressing ingredients. Taste to check for seasonings.

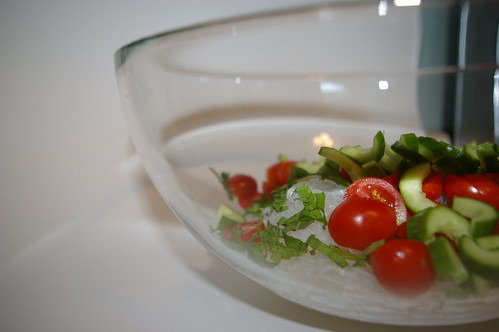
Place cold noodles in a large salad bowl. Add tomatoes, cucumber, onions and herbs. Top with dressing and toss well, then put the salad in the fridge for about 30 minutes before serving, so the noodles have a chance to soak up the flavours of the dressing.

Continue Reading

Long Lost Cookies

Say what you will about Facebook, it reunited me with a long-lost recipe for some of the best cookies I’ve baked in a long time.

Long Lost Cookies

Of course, it’s a little more convoluted than that.

Let me try to put this in as small a nutshell as possible. Back in high school, I traveled to England for six weeks to spend time with a friend of mine. The summer was pretty awesome: we snuck into pubs with our pitiful fake IDs that should not have helped us gain entry anywhere (Seriously, mine literally said: Canadian I.D.), visited London and Stonehenge, spent a week in a cottage in a seaside town in Wales and basically spent a lot of time hanging out without much parental supervision. But back in Vancouver, a girl whom I had called a best friend (and whose friend we were visiting in England) essentially severed our friendship. Since she had been friends with the girl in England much longer than I, I pulled back.

And then, 15 years later, she found me on Facebook. Did I still make those famous cookies? she queried. Um, what cookies?

Over the course of several e-mail conversations, she then relayed this message: I see you travel a lot. Any chance you’re coming over here any time soon? And I was.

Was I hesitant to reconnect with a person I had not seen, let alone communicated with, in more than a decade? A woman now with a husband and children who probably no longer craves Buck’s Fizz (an awful concoction of fizzy wine and orange juice that I guzzled that summer) and with whom I may no longer have anything in common? Um, yes. But then I arrived in Bristol to a Welcome Home sign coloured by her two children. I was welcomed at the dinner table like family and everything fell into place as if no time had passed other than we have grown wiser (for the most part) and can now legally buy our alcohol.

During the three days in Bristol, she pulled out of her recipe book and showed me the short list of ingredients written in my own bubbled printing that I had given her when we were still teens. I had, apparently, made these all the time. I have no recollection of them. I copied out the recipe — an odd sensation copying something written in my own hand — in my travel journal. Since then, there have been little nudges from overseas, reminding me of the recipe.

So, when a cup of butter sat softened on the counter and my plans to make a type of roll-out cookie had fallen through, it seemed only right to see just why that recipe had stood the test of time.

I am so grateful to have it, and my friend, back in my life.

Getting started

The batter

Mmmmm chocolate chips

Preparing to bake

It’s so basic that I don’t quite understand how all these dull-normal ingredients can come together to make such a thick, chewy cookie. But I’m definitely not going to lose this recipe again.

Long Lost Cookies

  • 1 cup butter
  • 2/3 cup white sugar
  • 2/3 cup brown sugar
  • 2 eggs
  • 1 tsp. vanilla
  • 1 1/2 cups flour
  • 1 tsp. salt
  • 1 tsp. baking soda
  • 2 cups oatmeal
  • 1 1/2 cups chocolate chips

(I would consider the addition of nuts or dried cranberries might be a nice touch. But this recipe is pure deliciousness as is, so don’t feel you have to experiment.)

(EDIT: Some people have wondered why there are two types of chocolate chips in my photo. The answer is, quite simply, that I had half of a bag of milk chocolate chips left over from some other baking frenzy and wanted to use them up. Though the combination was good, just use whatever you have on hand.)

Preheat oven to 350. Cream together softened butter and sugars until light. Beat in eggs and vanilla. Add flour, salt and baking soda, then oatmeal. Stir in chocolate chips (and nuts or cranberries, if desired). Bake for 10 – 12 minutes. (I like my cookies a good solid size. These ones I measured out using a mounded soup spoon and they took 12 minutes.) Let cool.

Long Lost cookies

Continue Reading

Asparagus and Goat Cheese Tart

Puff pastry is my new nemesis.

This was supposed to be a ridiculously easy recipe — based on the “fake instead of really bake” principle of entertaining. I don’t believe in cheating, but I do believe that sometimes simplifying is a good way to go … especially when hosting a party. And this had all the things I like assembled together: puff pastry, goat cheese, roasted asparagus.

And yet, not a triumph.

Tart corner

I had my suspicions this wasn’t going to go right from the point of attempting to roll out the thawed pastry. Instead of a nice oblong rectangle, I got a wiggly-edged square that was about half the size of the crust in the photo ripped out of the magazine. No problem, I thought, I’ll make two tarts. It will be daintier, I figured.

After my wiggly-edged oblong was rolled out, I placed it on the parchment-paper-lined pan and docked the hell out of it with a fork. Theoretically, that should have made the centre of the tart not puff quite so much. Emphasis on theoretically.

After 10 minutes of baking, I took a peek into the oven only to be horrified by the mound of pastry puffing up into a golden pillow. NO! I docked you! I prickled your pastry skin with my four-tined fork! Get down! Actually, in reality, I’m pretty sure I just swore, then pulled the damn thing out of the oven and de-puffed it with the aforementioned fork, shattering the pastry.

Then came the attempt to smear on the layer of softened goat cheese. A bit more complicated now that the outer crust was in shards. On the upside, once I managed to successfully get the cheese on, no one could sense the puff pastry disaster that lay underneath. I added the lovely green spears of asparagus, some lemon zest and put it back on the oven, at the same time retrieving the second wobbly oblong that had also grown into a big puffed pillow. And repeat.

Mid-tart

As I assembled the second tart, I felt the urge to check the progress on the first only to discover the edges were starting to move beyond golden and into burnt territory. Gah! The asparagus still hadn’t fully roasted, but the pastry was cooking much too fast. I turned the temperature down and adjusted the rack higher and hoped for the best.

However, for all the fuss puff pastry involves, there is one undeniable benefit. Because it’s all thin layers, a solution for the slightly-burnt-bottom-problem was immediately apparent. With a little careful knife work, I pried off the blackened bottom layer. And, lo, all was right.

I don’t think I’ll be attempting this one again. At least not until I get better practiced with the puff pastry. But I would suggest more lemon zest. Also, I squeezed over some lemon juice when the tarts had just come out of the oven, which I think helped add some zing and slightly cut the richness of the goat cheese.

Asparagus and Goat Cheese Tart

The recipe comes courtesy from Real Simple magazine.


Asparagus Tart

  • 1 sheet frozen puff-pastry, thawed (apparently overnight in the fridge is best)
  • 1 10-ounce log goat cheese
  • 1 1/2 pounds asparagus, ends trimmed
  • 1 tbsp. olive oil
  • zest of 1/2 lemon
  • salt
  • freshly ground pepper

Preheat the oven to 400. Roll out the pastry into a 10″x18″ rectangle. Leaving a one-inch border, prick the surface of the pastry all over with a fork. (If this works for anyone else out there, please let me know.) Bake about 15 minutes or until golden, then remove from oven. Spread the cheese over the pastry. Lay the asparagus on top of the cheese. Brush with the oil and sprinkle with the zest salt and pepper. Bake an additional 20 to 25 minutes. Let cool before serving.

Continue Reading

Evil blog Brownies

I’m starting to think this blog could be very dangerous.

It used to be that when I had strange cravings for late-night sweets or snacks, I could resist them until the temptation passed. But on Thursday night, when an intense and undeniable craving for brownies overwhelmed me, I had a supposedly legitimate reason to fulfill it: I could make a blog entry out of it.

I fear I set a dangerous precedent that night.

Plate of Brownies

When I decided to make the Red Velvet Cake oh-so-many weeks ago, I bought a tin of cocoa — the only one I could find besides the generic grocery brand. Back at home, I discovered that at some point in recent history I had already purchased a tin of Fry’s Cocoa, presumably when I was on some kick to make something chocolate-y and then never followed through. I buried the tin in my baking cupboard — which is, let’s face it, not the most organized space — and completely forgot about it. Until I came home with the second tin.

Brownies seemed like a logical thing to do with an overwhelming supply of cocoa. And, as the snow fell outside (in May for goodness sake), I thought a little baking may be in order.

The best part about the recipe (compliments of the back of the Fry’s Cocoa tin — why research if you don’t have to?) is that I didn’t have to wait for butter to soften as the recipe calls for it to be melted. Virtually instantaneous satisfaction could be achieved!

A little sugar, some vanilla and flour, thoroughly sifted cocoa, eggs and I was good to go. I also had in my cupboard some halved pecans, which I ended up breaking into smaller pieces and throwing into the batter for a little contrast. I didn’t even bother breaking out my hand mixer for this and barely worked out my arm mixing everything together because it took so little effort.

The batter

The aftermath

I should have read the recipe all the way through, however, because by the time I got to the fact that four eggs were going into the batter I realized I probably should have halved it. Instead of a nice little pan of brownies, I ended up with a 9″ x 13″ tray of them.

I was too lazy to wander out in the snow for the vanilla ice cream the brownies so badly wanted to be paired with. But, lo, what is this in my fridge? The quarter-cup dregs of whipping cream? Hello freshly-whipped- cream puffed into a little cloud to sit atop my fudgey brownie.

Brownie and whipped cream

As it was, I didn’t end up having to eat the entire pan myself. I was unexpectedly back at work on my day off the next day and my plans to make cookies for an event that night were dashed. But showing up with a plate of brownies was definitely the next best thing.

Fry’s Fudgey Brownies

  • 1 1/3 cups all-purpose flour
  • 1 tsp. baking powder
  • 1/2 tsp. salt
  • 1 cup butter
  • 1 cup Fry’s Cocoa (but, presumably, other cocoas would also work)
  • 2 cups sugar
  • 4 eggs
  • 1 1/2 tsp. vanilla
  • 1 cup chopped nuts (optional, obviously)

Stir together flour, baking powder and salt in a small bowl. Melt butter in a large saucepan. Remove from heat. Stir in cocoa. Blend in sugar, eggs and vanilla. Blend in dry ingredients and nuts. Pour batter into greased 13x9x2″ rectangular baking pan. Bake in preheated 350 oven for 30 to 35 minutes or until done. Cool.

Continue Reading

Whiskey Sours

I drank my first Whiskey Sour at the behest of my friend Julie who had spent two years in Ireland where she developed a taste for the amber liquor. That tall drink sipped in the plush lounge of the Four Seasons in Vancouver (two nights of luxury while on assignment in my hometown. L’Occitaine products in the bathroom, three soft pillows on the bed and turn-down service; this is exactly why I never stay at hostels) sparked what would become a several-year quest to find the perfect replica.

There is something deliciously retro about a Whiskey Sour. Makes me want to sing Danke Schoen while prancing around in heels and a frilly, white apron. (And a dress, people, what kind of blog do you think this is?)

I’ve had pitiful recreations at some bars where the bartender believes mixing whiskey and lime-ade will fulfill the need. May I just say, No. No. No. No.

The ingredients

It seems the secret is to have one at a hotel bar and every time I’ve done this, it has been successful. Still, I wanted to give them a try at home, so I was ecstatic when the Barefoot Contessa included a recipe in her latest book, Barefoot Contessa at Home. Her recipe calls specifically for Jack Daniel’s and who am I to doubt Ina? But when I made a batch, I didn’t love them and I wondered if perhaps I wasn’t as enchanted with Whiskey Sours as I once had been.

But I was determined to make them for my pre-blog launch on Saturday night. (And then I got impatient, launched the blog and made it a post-launch.) Another friend kindly offered to donate a half bottle of Gibson’s Whiskey that she had lying around and didn’t think she’d drink on her own, so I decided to make it what that.

I nearly got a hand cramp from reaming the eight limes and six lemons required to make two cups of fresh-squeezed citrus and I was very grateful I had no paper cuts. But it was beyond worth it. Once combined with the sugar syrup and the smooth whiskey, these drinks were fantastic. I think my guests and I made it through the entire batch in the first 30 minutes of the party.

The Aftermath

For the record, I didn’t bother with the cocktail shaker step because I made a pitcher of them and had kept everything in the fridge until just before serving. No one seemed to mind, but I bet ice cold would be even better. In fact, writing about this is tempting me to go squeeze out the rest of the lemons and limes in the fridge for another round.

The recipe comes from Barefoot Contessa at Home.

Fresh Whiskey Sours

  • 3/4 cup Whiskey (use what you like, though my friend Julie — to whom I turn for all things Whiskey — recommends Jameson or Bushmills.)
  • 1/2 cup freshly squeezed lemon juice (3 lemons)
  • 1/2 cup freshly squeezed lime juice (4 limes)
  • 2/3 cup sugar syrup

Combine the whiskey, lemon juice, lime juice and syrup. Fill a cocktail shaker halfway with ice and fill two-thirds full with the cocktail mixture. Shake for 30 seconds and pour into glasses. Add a maraschino cherry and serve ice cold.

Note: To make sugar syrup, put 1 cup of sugar and 1 cup of water in a small saucepan and cook over medium heat until the sugar dissolves. Chill thoroughly before using.

Serves four (apparently).

Whiskey Sours

Continue Reading

Tuna Melt

I don’t like mayonnaise. And, as a rule, I don’t love tuna. But there is something about the combination of the two atop a doughy bagel and under a cap of bubbling orange cheddar that really turns my crank.

Tuna Melts

When leaving work tonight, debating whether or not to get take-out or try to make something fabulous out of the cooked chicken breast, lettuce and leftover red velvet cake still in the fridge, I was overcome by an undeniable desire for a tuna melt. It’s quick comfort food made from things I generally have on hand (though it did require a stop for bagels) and consumed my thoughts all the way home

No official recipe here; it’s pretty straightforward. But the results are delicious.

The Ingredients

Tuna Melt

  • bagel, your choice (I prefer Everything Bagels)
  • mayonnaise
  • celery
  • can of tuna
  • salt and pepper
  • cheddar

Drain the can of tuna and add diced celery, mayonnaise, salt and pepper. Spoon onto cut bagel and top with slices of cheddar. Pop in the oven set to a high temperature (450 degrees or so). Wait for the cheese to bubble and then pull out. Careful, they will be piping hot.

I usually toast the bagel too before adding the tuna mix. It keeps it a bit crusty, I believe.

Continue Reading