While winter seems to beg for rich, warm or comforting desserts — sticky toffee pudding, brownies and apple pie — I crave lemon.
Of course, I’ve always been a go-against-the-grain kind of girl.
I like all those desserts, too; they have their place. But lemon tang on a dark, wintry day takes me away from the snow and cold. It can brighten a dreary afternoon, send me a shot of virtual sunshine.
Sure, we’ve been enjoying a lengthy bout of relatively warm weather, but I’m not easily fooled. Real spring is still weeks away and if I can trick myself into feeling like winter has already snapped and the fresh green and blossoms are quickly nearing, then I have to take advantage of that.
But which lemon dessert?
Conservatively, I have about 40 lemon-based tarts, bars, cupcakes and other concoctions saved on the online bookmarking site, Delicious. (All right, I checked. There are 41. But probably not for much longer.) All of these things have caught my eye at one time or another and I’ve saved them for just such wintry occasions when I need a taste of bright and tart.
The lemon bars had their appeal. The pull-apart lemon loaf looked tempting, but a bit time-consuming for me in this fit of citrus craving. But glazed lemon cakes? Oh yes, those I could handle.
The hardest part of this recipe was remembering to pull the butter out of the fridge so it could come to room temperature. Almost all of the ingredients are standard in most fridges, except, perhaps, the plain low-fat yogurt or buttermilk. In this case I went with the yogurt because it seemed like something I could more easily use up. Buttermilk is great for baking, but it’s not something I tend to go through quickly.
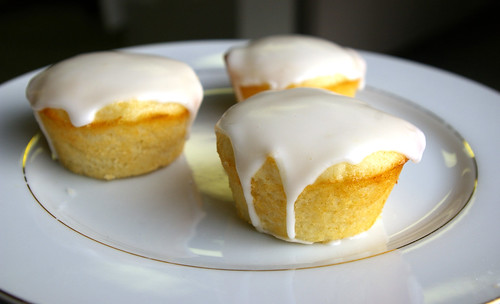
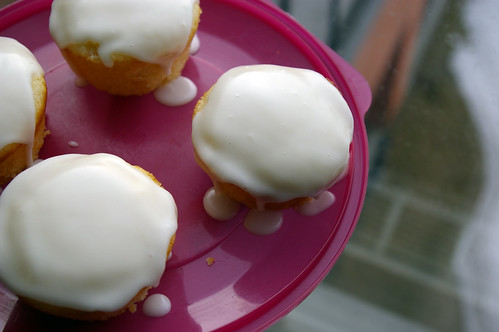
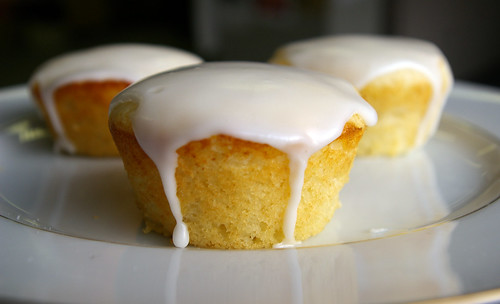
These little cakes were light, tender and full of tang. With the addition of the thick glaze that dripped down the edges, they reached lemon perfection. Not puckeringly tart, but deliciously citrus: a little injection of sunshine on an overcast day.
I can’t lie. I ate two before I even mixed the glaze.
And if that isn’t enough motivation to whip up a batch, I’m not sure what is.
One last note, the original recipe calls for a “6-cup jumbo muffin tin.” Since I try to avoid buying new bakeware for just one recipe, I decided to make do with what I had lying around.
My advice? Bake them in a regular muffin tin for 15 minutes (though consider starting to check them at the 10-minute mark, just in case) and eat two!
This recipe is from Everyday Food.
Glazed Lemon Cakes
- 1/2 cup (125 mL) unsalted butter, room temperature, plus more for muffin tin
- 1½ cups (375 mL) all-purpose flour, plus more for muffin tin
- 2 tsp (10 mL) baking powder
- 1/2 tsp (2 mL) salt
- 1/2 cup (125 mL) low-fat buttermilk, or plain low-fat yogurt
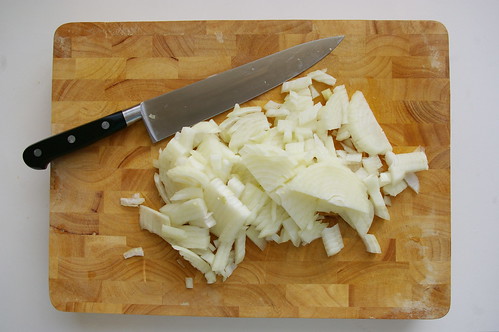
- 1 tsp (5 mL) vanilla extract Zest of 1 lemon, finely grated, plus juice, plus 2 tbsp (25 mL) more lemon juice for the glaze
- 1 cup (250 mL) granulated sugar
- 2 large eggs
- 1½ cups (375 mL) confectioners’ sugar
Preheat oven to 350°F (EDIT, this should be 180°C). Butter and flour a 6-cup jumbo muffin tin or 12-cup regular muffin tin. In a medium bowl, whisk the flour with the baking powder and salt. In a small bowl, whisk together the buttermilk, vanilla and lemon zest and juice of 1 lemon. Set aside.
With an electric mixer, cream butter and granulated sugar until light. Add eggs one at a time, beating well after each addition. With mixer on low speed, add flour mixture in three batches, alternating with two additions of buttermilk mixture.
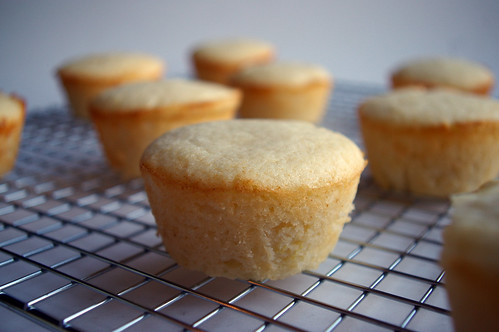
Divide evenly among muffin cups. Bake until a toothpick inserted in centre of a cake comes out clean, 20 to 25 minutes. (Or about 15 minutes for a 12-cup muffin tin. Start checking at the 10-minute mark.) Cool 10 minutes in tin, then cool completely on a rack.
Set rack over wax or parchment paper. In a small bowl, stir confectioners’ sugar with remaining lemon juice until smooth. Pour over cakes, spreading to edges with a small knife. Let set 30 minutes.
This story first appeared in the Real Life section in the Calgary Herald. For more delicious recipes, visit CalgaryHerald.com/life.