Lemon Custard Cakes

I once “smiled” at a guy on an Internet dating website simply because in his write-up he noted he liked lemon-flavoured desserts and despite the fact he was far out of my romantic league (not to mention geographic).

That citrus kiss of lemon almost makes me swoon sometimes. The pucker, the tang, the play of sweet and sour.

Lemon Custard Cake

I first made these Lemon Custard Cakes on Valentine’s Day for three girlfriends in a sort of lonely hearts’ dinner. Though, truth be told, only two of us were single at the time. Really it was a way of ensuring I wasn’t alone that night and, yes, the friends — not to mention the two (or was it three?) bottles of wine — and these little lemony babies made it a night to remember.

And I have thought about them many a time since then.

Last week I thought it was time to pull that recipe back out and enjoy these cakes again. But as I prematurely began salivating over thoughts of the light lemon cake that forms over the creamy lemon pudding at the base, I realized two things. 1) My milk was not really milk anymore. (Yikes!) and 2) I was out of all-purpose flour. (How did that happen?) Dreams dashed, I put the book away again.

But, a quick stop at the grocery store on the way home from work tonight and I was good to go.

And it was all going very well until it came time to squeeze the lemon and I realized that this might be tricky considering the ginormous paper cut I subjected myself to yesterday (while on the phone no less, which left me trying to deal with the wound, while typing, while pretending to the person on the phone that nothing was happening. No small feat.) And yes, lemon juice got in it. And, yes, it hurt. But it also reminded me of this exchange from The Princess Bride:

Inigo Montoya: Are you the Miracle Max who worked for the king all those years?

Miracle Max: The king’s stinking son fired me, and thank you so much for bringing up such a painful subject. While you’re at it, why don’t you give me a nice paper cut and pour lemon juice on it?

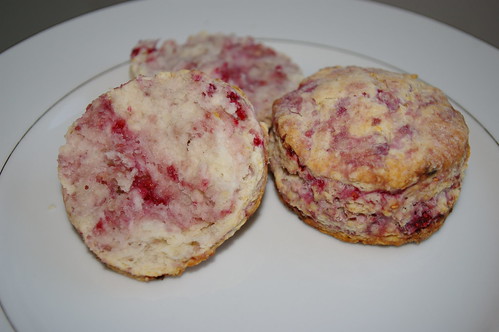
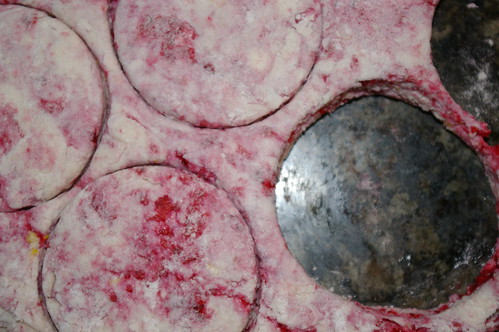
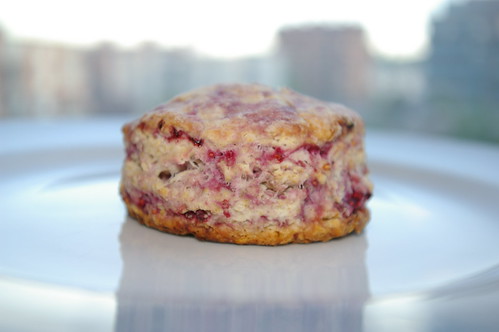
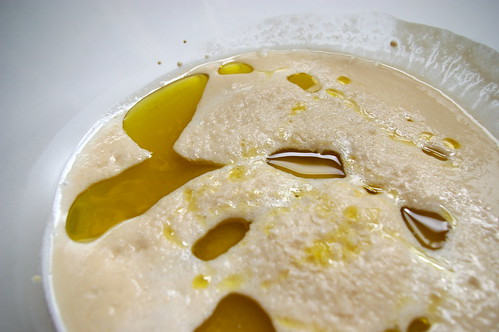
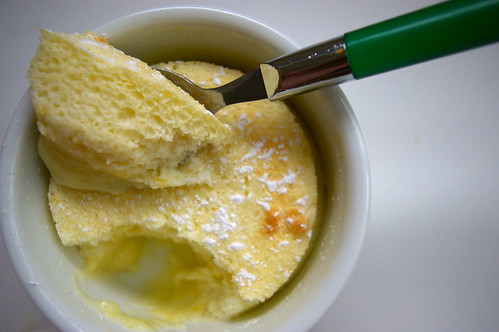
These Lemon Custard Cakes are a strange piece of alchemy. A thin, watery batter goes into the oven and a cake-topped custard comes out. I was so pleasantly surprised the first time I made them. The unctuous custard, the hint of lemon, a powdering of icing sugar, what wasn’t to like?

The first time I followed the recipe exactly, right down to the fact that you cook them in a water bath sitting on a kitchen towel. It was only this time that I saw the explanation why:

Baking the desserts in a hot-water bath keeps them creamy and custardy beneath their golden cakey tops. Linking the roasting pan with a dish towel helps water circulate under the cups for even cooking.

Who am I to question that?

Of course, my version looks nothing like the picture in the cookbook, but I think that’s because I’m using larger ramekins and filling them up a bit more than is probably recommended.

Egg yolks, sugar and lemon zest

Empty lemon

Whipped egg whites

Mix it up

Into the oven

Lemon Custard Cake II

This recipe comes from Everyday Food — an offshoot of Martha Stewart Living. (Yet another cookbook impulse buy but with some very impressive and consistently delicious and easy recipes.) My notes are in italics.

Lemon Custard Cakes

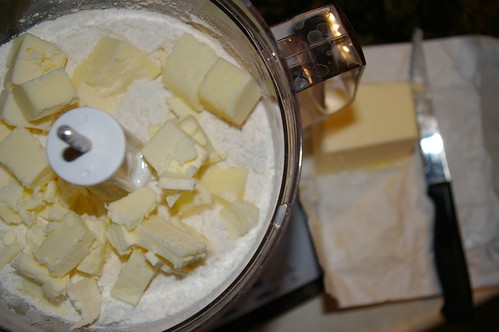
  • Unsalted butter, at room temperature, for custard cups
  • 3 large eggs, separated
  • 1/2 cup granulated sugar
  • 2 tbsp. all-purpose flour
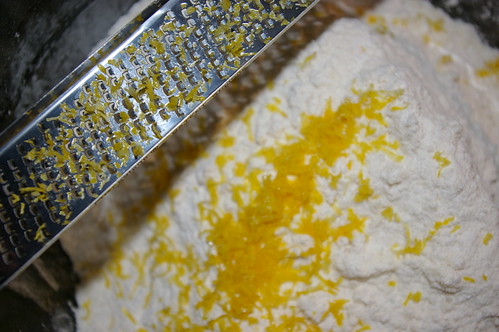
  • 2 to 3 tbsp. grated lemon zest (from one lemon)
  • 1/4 cup fresh lemon juice
  • 1 cup milk
  • 1/4 tsp. salt
  • Icing sugar for dusting

Preheat the oven to 350. Set a kettle of water to boil. Butter six 6-ounce custard cups, and place them in a roasting pan or baking dish lined with a kitchen towel.

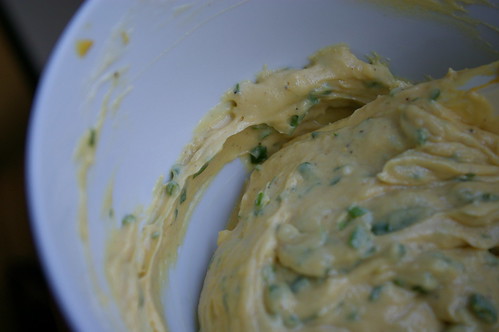
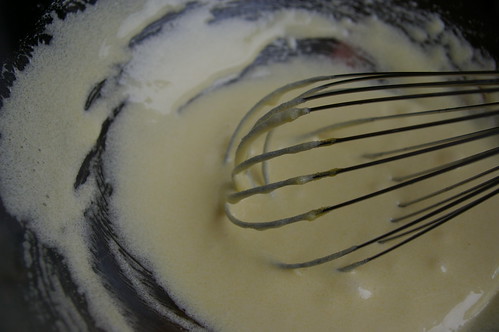
In a large bowl, whisk together the egg yolks and granulated sugar until the mixture is light; whisk in the flour. Gradually whisk in the lemon zest and juice, then whisk in the milk.

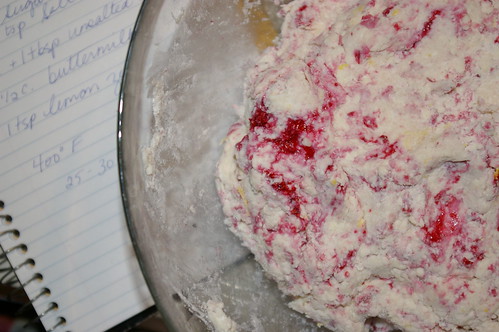
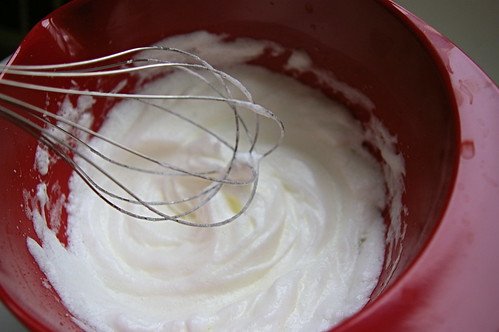
With an electric mixer, beat the egg whites and salt until soft peaks form. Add to the lemon mixture; gently fold in with a whisk (the batter will be thin).

Divide the batter among the prepared cups. Place the pan in the oven, and fill with boiling water to reach halfway up the sides of the cups. Bake until the puddings are puffed and lightly browned, 20 to 25 minutes. (Note: Because I used larger ramekins, mine took a bit longer but only one or two minutes, so I suggest checking at the 20-minute mark.) Serve warm or at room temperature, dusting with icing sugar.

Note: If you do not have individual custard cups, bake the batter in an 8-inch square baking dish (or other shallow 2-quart baking dish) for 30 to 35 minutes. (I bet this would be great too and will consider trying that next time.)

Continue Reading

Berry Scones

I’m behind on my blogging due to many reasons, including the fact that I am unsure what I’ve even been subsisting on for the last two weeks. (Well, that’s not completely true; I had about four days’ worth of mustard-butter broccoli pasta to get through.) And I guess I was also hesitating to post these scones for several reasons, not the least of which is that they were only mostly successful. I mean, who wants to read a cooking blog by someone who keeps making mistakes? It doesn’t scream confidence.

Finished scone

That’s not to say these Berry Scones weren’t light and flaky and fully of raspberry deliciousness. It’s just that I really should have moved the oven rack up about two levels so the bottoms didn’t bake (um, brown) quite as quickly as they ended up doing. However, perhaps we can all use this as a lesson about making sure your oven rack is in the middle of the oven when it comes to baking and not being lazy about moving it when you discover it’s a bit low.

So, this really all began because I had this extra buttermilk lying around and I really didn’t want to waste it. And I was on a bit of a scone kick because I do believe that practice makes perfect. Oh, and because I believe in full disclosure, it was also a bit because I had just bought my first set of biscuit cutters — a lovely batch of three varying sizes that nest inside each other. So, really, a buttermilk scone made perfect sense. And, bless the Internet, I found a nice recipe.

All went surprisingly well, though it did get a bit messy because I broke apart the frozen raspberries as I wanted them to be a little more well distributed. I now have a pink-stained rolling pin, but it was worth it. I’d much rather have raspberries in every bite than just one or two in an entire scone.

Thankfully, because they were pretty tall and flaky, it was easy to just cut the less-than-desirable bottoms off and continue to enjoy.

In future, I would add more lemon zest because I love all things lemon and I feel it would have perked these up even more, adding to the summery flavour.

Cutting in the butter

Adding the zest

Scone dough

Scone cutouts

Solo scone

Berry Scones

  • 4 3/4 cups flour
  • 1 cup, 1 tbsp. unsalted butter
  • 1 tbsp. baking powder
  • 3/4 tsp. baking soda
  • 1/2 cup sugar
  • 3/4 cup fruit (fresh or dried)
  • 1 1/2 cups buttermilk
  • 1 tsp. lemon zest

Preheat oven to 400. Mix together flour, baking powder, baking soda, salt and sugar. Using a food processor, a pastry blender or two knives, cut the butter into the flour until it looks like coarse oatmeal. Add the lemon zest and fruit and mix to combine. Add all of the buttermilk at once, then stir just until the dough comes together. Topple out onto floured counter and form into a ball before rolling out until it’s about an inch thick. Cut out using cutters or into rustic triangles using a knife.

Bake for 25-30 minutes, though I would start checking sooner.

Eat. Especially if you can find devonshire cream somewhere.

Continue Reading

Mustard-butter Broccoli Pasta

I have very particular feelings about condiments. These may verge a bit on condiment OCD.

Growing up, I refused to eat — in no particular order — mayo, mustard, relish, chutney. And mushrooms. Not a condiment, I know, but it was something I refused to eat. My burgers were dry except for ketchup and that was just fine with me. Except, oddly, McDonald’s hamburgers with their thin scraping of yellow mustard. Somehow that was OK with me.

Nowadays, things have relaxed slightly. I still ask for no mayo, if it’s just straight-up, out-of-the-jar, spread. Bring on the pesto, lemon, dill, herb, curry variations. I won’t go out of my way to add relish or mustard, but I enjoy them on my burger. (Oh god, when I decided to finally try a White Spot burger — the real ones from B.C., not these faux Alberta versions —and had the Triple O sauce? Damn, that is good condiment.)

(Ketchup is good, but belongs only on fries, hot dogs, hamburgers and sausages. That is all.)

And the turning point may have been Mustard-butter Broccoli Pasta.

Until I had this, I was certain I didn’t like Dijon mustard. I was wrong. Oh, so, very wrong.

Broccoli

This is a wonderful summer pasta, partly because of the bright colour and fresh taste, but also because it requires but one pot. And, if you’re quick on the ball and plan ahead, you can use the summer heat to soften butter, which is one of the “sauce” ingredients. Of course, if you’re a bit forgetful (like me), there is always the microwave. That said, softening the butter naturally is much tastier. (Full disclosure: I have used Becel to make this and it’s still good.)

My Mum first made this many, many years ago, then photocopied it for me while I lived for a summer in Kitimat with her own notes neatly written out in red pen. And this recipe has become one of those comfort ones that has followed me as I lived in teeny-tiny towns across B.C., slogging my way through jobs at teeny-tiny newspapers, and over to Japan where I lived for a year. Sure, finding Dijon was tricky, but it was doable. And, more importantly, it was worth it.

I like to use penne with this because then it’s super easy to eat, plus the penne rigate’s ridges pick up more sauce. Of course, the big carriers are the broccoli spears; they become sponges for the mustard-butter sauce. And, frankly, I’ll use whatever pasta I have on hand. Case in point: tonight’s dinner was farfalle.

Mustard-butter sauce

All in the pot together

Mustard-butter Broccoli Pasta

I’ve made some changes from the original recipe, so this is the version as I make it.

Mustard-butter Broccoli Pasta

  • 1/2 cup butter
  • 4 tbsp. Dijon mustard (I use generic — gasp! — Safeway brand. I like it better than Grey Poupon.)
  • 2 cloves garlic, finely minced (I use my lovely, lovely rasp.)
  • Salt and pepper
  • Herbs (chives, parsley or green onion tops), about 4 tbsp. total (And if I don’t have them, I don’t worry about it.)
  • 2 or 3 cups broccoli florets, from two crowns
  • 3/4 pound pasta

Let the butter soften, then mix in the mustard, herbs and pepper. Check for seasonings before adding more salt. Set a huge pot of water on the stove to boil. When it comes to a rolling boil, season liberally with salt, then add the pasta. Cut the broccoli florets off the stem and set aside. When the pasta is about two or three minutes from being cooked to al dente, throw in the broccoli and stir to let it cook with the pasta. Drain when the pasta is tender and the broccoli is still green. Throw back into the pot and stir in the mustard-butter mixture. The heat from the cooked pasta and broccoli will melt the butter mixture. Check for seasonings and serve.

Note: I usually hold back some of the mustard-butter. Often you won’t need all of it. But when I put away the leftovers in containers, I spoon a bit of the mixture on top. That way, when you reheat it the next day (or whenever) in the microwave, it’s still a bit saucy.

Continue Reading

In pursuit of focaccia perfection

There is a restaurant in Victoria that I am almost incapable of avoiding during any visit to that lovely little city. Pagliacci’s was the scene of more than a few fun nights out with friends while we procrastinated on assignments from UVic and has subsequently become a place that speaks to me of good memories along with good food. I am positively addicted to their dish called the Prawn Broker (spinach pasta, prawns and cashews in a coconut-curry sauce) and will admit with no hesitation that I always order the full size — which is far too big for one sitting — so that I can enjoy just a little bit more later. (Side note: Every few weeks I search the Internet in the apparently feeble hope that the recipe will magically appear. Future blogging may include attempts to recreate the thing myself. Success is not guaranteed.)

But, while the Prawn Broker is my main dish of choice, I could very easily live on the baskets of focaccia set on the table shortly after ordering. Chewy, thickly crusted, salty. I have no idea what magic lies in that recipe which leads to such bready perfection. I can only presume part of the reason is a thick dousing of olive oil. But there are no apparent herbs or crystals of salt to hint at what else goes into this recipe.

My pursuit of focaccia perfection began about a year ago when I bought (finally!) a handheld mixer. (Friends were unsurprisingly baffled when I made cookies without a mixer, using my own arm strength to cream butter and sugar together.) To my delight, it came with two dough hooks, which opened up the world of bread baking. Okay, so, it’s a pretty limited world at this point, but nevertheless. Since then, I’ve tried to make focaccia a few times, but found it lacking. Where i wanted dense and chewy, these attempts were light and, at one point, crumbly (don’t try to make bread with all-purpose flour, apparently). The top was delicious, owing mostly to a liberal sprinkling of flaky Maldon salt, chopped rosemary and a few generous glugs of olive oil that filled in the divots I had dimpled across the surface of the pale dough. But it wasn’t the best ever.

Baking bread, I fear, is one of those arts that is being lost in my generation. The reason I never made bread before was that, frankly, kneading baffles me. I never seem to get the dough to come together and never seem to have the patience to keep going. Growing up, my mum often made homemade bread and I would “help” but eventually she would take over the kneading. (This is why the dough hooks were such a welcome addition to my mixer.) But also lost is the knowledge on how to affect the outcome of recipes.

I was sharing the focaccia dilemma with my friend Shelley one afternoon when she asked me a few questions about the recipe and I mentioned that it called for the dough to rise three times. Well, she said, that explained why it was so light. Fewer chances to rise = denser dough. Of course, now that she has said that, it makes perfect sense. But since I didn’t know much about baking bread, it didn’t occur to me to play around with the recipe. Of course, now that i *do* know, I’m making it a mission to make the best focaccia possible.

This time I tried a different recipe, but modified it slightly by not letting it rise a second time in the hope it would produce a chewier end result. It definitely did. But it’s still not as good as the bread from Pagliacci’s and I felt the focaccia overall could have used some more flavour. The top was pretty good, though, owing I’m sure to the generous amount of salt, olive oil and chopped rosemary.

And so, the pursuit continues.

Yeast, water, sugar and olive oil

Just mixed dough

Rising dough

Ready for the oven

Fresh from the oven

Here is the latest attempt. It comes from the fabulous Rebar Modern Food Cookbook, which, as previously mentioned, I bought only for a salad dressing recipe. In this case, however, I didn’t let it rise a second time and I didn’t bother with the garlic, as I find it very hard to keep it from burning. There are few tastes worse than burnt garlic. This is the recipe as printed.

Rosemary Garlic Foccacia

  • 1 3/4 cups warm water
  • 1 tbsp. traditional baking yeast
  • 1/2 tsp. sugar
  • 2 tsp. salt
  • 1/4 cup olive oil
  • 4 cups unbleached flour

Topping

  • 4-6 garlic cloves, minced
  • 4 tbsp. olive oil
  • 2 tsp. coarse salt
  • 2 tbsp. chopped rosemary
  • cracked black pepper

In a large mixing bowl, combine the warm water, yeast and sugar. Let the mixture sit until it foams. Stir in salt and olive oil, then start adding flour, one cup at a time, beating well with a wooden spoon. (Yeah, I used my mixer here.) When you can no longer stir, turn the dough out on a floured surface and knead in the remaining flour. Knead the dough until smooth and elastic, sprinkling just enough flour on the counter to prevent sticking.

Form the dough into a ball and place a large, lightly oiled bowl. Cover with a clean, damp cloth and set the bowl in a warm, draft-free spot. Let rise until doubled in bulk (1 – 1 1/2 hours). Punch the dough down and let it rise again until doubled.

Pre-heat the oven to 350F. Place the dough on a well-oiled 12″x16″ baking sheet with 1/2″ sides. Gently stretch the dough to roughly fit the dimensions of the pan. Drizzle the surface with olive oil and spread the minced garlic over the entire area. Sprinkle chopped rosemary evenly on top, followed by coarse salt. Finish with cracked pepper. Using your fingertips, gently poke indentations over the entire surface. It should appear dimpled and rustic-looking. Let rise again for about 15 minutes, or just until it puffs up slightly.

Place the loaf in the center rack of the oven. Bake for 20 minutes, rotating the pan halfway through. The garlic should be lightly golden. Be careful not to over bake. Serve warm.

Continue Reading