Chocolate Lime Cheesecake

The problem with getting behind in blogging is you start to forget why you made something in the first place.

OK, that might not be a problem others have. This may be particular to me.

Chocolate Lime Cheesecake Slice I

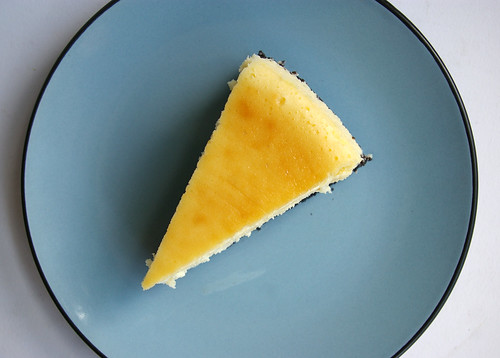
I think I came up with the idea of making a Chocolate Lime Cheesecake while flipping through cookbooks one night and remembering this had been on my to-do list for eons. I’m almost sure I had pulled Nigella Lawson’s Nigella Bites from my (overstuffed) shelf looking for one of her salad recipes when I re-stumbled across this one. And it occurred to me, since it was a long weekend and I was going to be working on the stat holiday, that I should bake this up and bring it in to the rest of the Calgary Herald crew working on the holiday Monday just like I used to when I was over in the city section. (Back then, I worked Sundays every week and I often baked and brought in goodies for what became known as Civilized Sundays, which would see us sitting around at 10 a.m. eating cake and listening to the police scanner. And reading our horoscopes.)

Then, and I do remember this correctly, I told the people who I knew would be also working that I was going to bake a cheesecake, which actually made me do it.

And, man, am I glad I did.

Nigella, my friends, she knows her stuff.

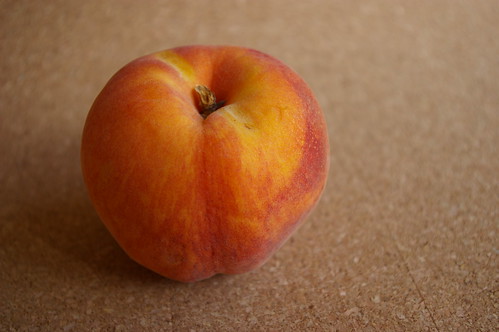
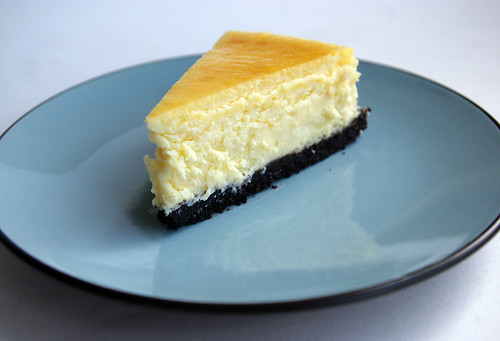
You know I love lime. It’s no surprise I also like chocolate. These two together are a very nice, very unexpected treat.

It may seem a bit fussy, but I followed all the instructions, including baking it in a water bath, which is a relatively common suggestion for baking cheesecake (a gentler way that theoretically keeps the top from cracking but always seemed like an unnecessary additional step). And I think it is indeed worth it. And the trick of snapping the aluminum foil into the springform pan (which sounds more confusing than it actually is) really does protect the crust and cake from any water.

Aluminum foil-wrapped pan

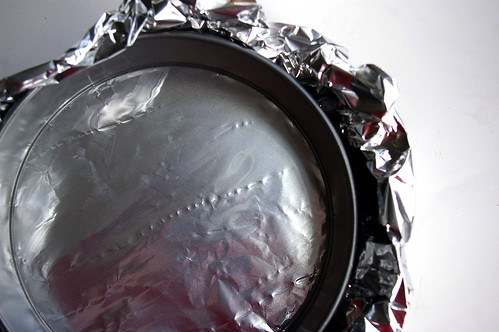
However, I must also add that I bought extra-wide aluminum foil thanks to the suggestion of my friend, Colette, who knew such a thing existed. Thanks Col! That way there was no panic about making sure the various pieces were secure enough. I would recommend this as a great way of alleviating any concern over seepage.

Seepage. What an odd thing to be mentioning on a food blog.

And, goodness, this is a very scattered post, isn’t it?

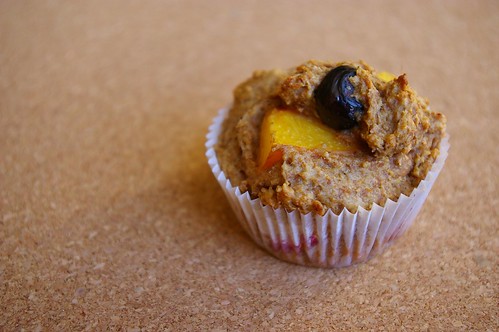
To summarize: this cheesecake is tasty. I enjoyed it. So did my friends. Make it. Don’t wait as long as I did to do so.

End.

Chocolate Lime Cheesecake I

Chocolate Lime Cheesecake II

Chocolate Lime Cheesecake Slice I

Chocolate Lime Cheesecake Slice I

Chocolate Lime Cheesecake

Straight from Nigella Lawson’s Nigella Bites.

  • 7 ounces chocolate wafer cookies
  • 1/3 cup unsalted butter, melted
  • 1 1/2 pound cream cheese (recommended: Philadelphia)
  • 1 cup sugar
  • 4 whole eggs
  • 2 egg yolks
  • 4 limes, juiced or 3/4 cup

Special equipment: springform pan

Preheat oven to 350 F.

Place a large overlapping piece of aluminum foil over the bottom of the springform pan, and then insert pan ring over it. Fold the foil extra foil up and around the pan and place the whole thing on a second piece of foil, also folding it and pressing it securely around the pan, having a water tight covering.

In a food processor, process cookies until they are crumb-like, add melted butter and continue to process. Pour crumb mixture into springform pan and press with your fingers to line the pan. Place the pan in the refrigerator to set while you prepare the cheesecake.

Place a kettle of water on for water bath. In a food processor beat the cream cheese until smooth, add the sugar, eggs, egg yolks, and lime juice.

Take crumbed pan from the refrigerator and place it in a roasting pan. Pour the cheesecake mixture into the crumb pan, and then carefully pour the hot kettle of water into the roasting pan so the water reaches 1/2 way up the pan so the water does not splash into cheese cake.

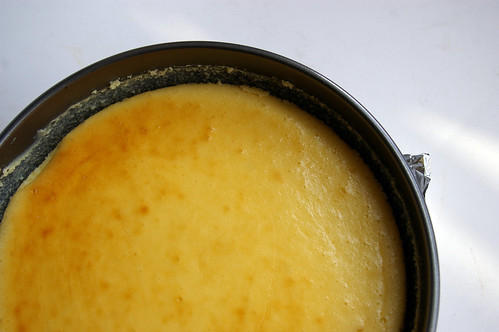
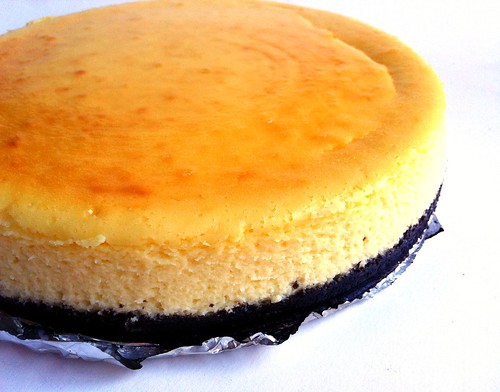
Place roasting pan in oven for 1 hour, checking after 50 minutes. It should feel set, but still wobbly in the center. Take the roasting pan out of the oven, carefully remove the springform pan from the roasting pan and place it on a rack. Peel off the outer layer of foil, and tear away the side bits of the first layer of foil and leave the pan to cool. Once the cake comes to room temperature, place it in the refrigerator for 20 minutes before serving. Transfer to the plate you’re going to serve it on, a plate without a lip, or a cake stand. Unclip the springform pan and remove the outer part. Carefully lift the cheesecake removing the metal bottom. The aluminum foil can stay on the cake. Serve chilled.

Continue Reading

Quinoa Tabouleh

Some people impulse buy gum.

I impulse buy five-pound bags of quinoa.

Oh sure, I thought it was a lovely idea in that moment, romanced by all the things I could do with this versatile, healthy, nutritious ingredient chock full of protein and fibre.

Especially after I saw on the back of the hefty bag that I can cook quinoa in my rice cooker. (Cooking rice and rice-related ingredients? Not my forte. I blame it on a year living in Japan where my apartment came equipped with a rice cooker.)

And then I got the family-sized bag home, jammed it into my cupboard and kind of forgot about it as it occupied valuable real estate in my kitchen. I finally unearthed it many weeks later, concocting a biryani-style salad with currants, chickpeas and a curry-lime dressing.

And then I forgot about it again.

Since then, there has been a bit more experimenting with quinoa.

But there is also something to be said about going back to basics — honest-to-goodness classic dishes that remain in the cooking repertoire for a reason.

Things like tabouli.

Or tabbouli. Or even tabouleh.

Or however you want to spell it.

Quinoa Tabouleh III

In theory, this is a salad I should like. Mint and parsley, lemon juice, tomato and cucumber. All those herbs with that zip of acidic lemon, the crunch of cucumber and umami taste of tomato? I like all those things. A lot.

What I don’t like is bulgur, the grain traditionally used in tabbouleh salads.

I made a huge bowl of it once using a recipe that called for bulgur and then had to eat it for two days to get through it, hating it the entire time.

I didn’t like the taste or the chew and forcing myself to finish the thing, which had taken a bit of time and effort to prepare, did not help the situation.

So, as I was sorting through my cupboards the other day and stumbled across the still half-full bag of impulse quinoa, I was struck by a thought: why not make tabbouleh with a grain-like ingredient I actually enjoy?

And I pulled out my rice cooker and did exactly that.

Quinoa Tabouleh II

(As a result of cooking it this way, I can offer you no suggestions or guidelines for cooking quinoa, other than tell you what I was also told: give it a bit of a rinse or a soak – say about 10 minutes or so — before cooking, which should alleviate any of the bitterness you might taste otherwise.)

With the exception of using quinoa and the addition of a red (or orange or yellow) paper for a bit of additional colour and crunch, this recipe holds quite true to traditional tabbouleh.

It’s the abundance of herbs, slight onion bite from the green onions and generous amount of lemon juice that gives it such a refreshing and light taste.

It’s the substitution of quinoa for bulgur that makes it no hardship to finish it off pretty quickly.

And, thankfully, I still have plenty more quinoa to make this again.

A trio of peppers

Mint

A Cup of Tomatoes

Quinoa Tabouleh I

Quinoa Tabbouleh

  • 4 cups (1 L) cooked quinoa
  • 1 red, orange or yellow pepper, diced
  • 1 cup (250 mL) cherry or grape tomatoes, halved or quartered
  • 2 to 4 green onions, sliced thinly
  • 2 mini cucumbers, halved, seeded and sliced
  • ¼ cup (50 mL) mint, chopped
  • ¼ cup (50 mL) parsley, chopped
  • 1/3 cup (75 mL) lemon juice (from about 2 lemons)
  • 1 tsp (5 mL) salt
  • freshly ground pepper
  • 1/3 cup (75 mL) extra virgin olive oil

Cook quinoa according to directions. Let cool and place in large bowl. Add red pepper, tomatoes, green onions, cucumbers, mint and parsley. In separate bowl, mix lemon juice, salt and pepper. Whisk to dissolve salt. While whisking, slowly drizzle in olive oil to emulsify. Pour about ¾ of the dressing over the salad and toss. Add the remaining dressing if the salad seems dry.

Serves 4.

This piece originally ran in the Calgary Herald. For more great recipes and stories, head to the Herald’s food page at CalgaryHerald.com/life.

Continue Reading

Peach-blueberry muffins

Oh hey!

Just popping in with some bran muffins.

Peach-blueberry muffins

I know I’m a bit of a baking freak, but I think I reached new lows (highs?) when I baked these up yesterday in the 30-degree heat. But I had a flat of peaches and they’re all pretty much perfectly ripe at this exact moment and I need to come up with ways to use them before I have to toss them. The original plan was a streusel peach cake, or a rustic tart, but by the time I got back from brunch with a friend and did some other chores, it seemed a bit late to be putting together a cake. And pastry? Well, that’s probably not going to be great when your kitchen is that blazing hot. (Plus, you know, pastry. We’re not the best of friends. One day, I hope. One day.)

Anyway, I’ve been making these peach bran muffins of Julie’s for awhile now. They’re what I think muffins should be. Healthy, full of good-for-you ingredients like bran and not too much sugar. Not those cake-in-disguise muffins, which I know are tasty, but really are just cupcakes with a different name.

I grew up eating Sunny Boy Muffins. Warm from the oven, cracked open with a little pat of butter. I can still taste them. (And this serves as a good reminder that I really need to track down some Sunny Boy; there is nothing like the taste of nostalgia.) So, I like a good, solid muffin. And these deliver.

I’ve made them several ways: with buttermilk, with plain yogurt thinned with some milk, with white sugar, with brown and with a mixture of the two. And here’s what I’ve decided: pretty much any way you go, these are good, hearty muffins. But, since I rarely have buttermilk on hand, I usually go with the yogurt-milk mix and I think I like the dual-sugar combination. Julie’s recipe calls for one peach, but I usually double that (or 1.5 that, if the peaches are really big) because I like the extra fruit. And this time around I added in some blueberries, which I just happened to have around. I’m sure other fruit would also be fantastic.

I like making muffins and cupcakes but an ongoing issue I have is that I appear to have some sort of miniature muffin tin. I mean, it looks all normal sized but whenever a recipe says it will make 12 muffins, I end up with anywhere between 16 and 20. At first, I thought it was just me and I was maybe not filling the tins enough. And then I realized it happens so consistently that I’m now pretty confident that it’s this tin. I can’t quite justify getting a new one, though.

All this to say, the recipe says it makes 12 muffins. I got 18 out of it, after dropping the cooking time almost in half. If your muffin tin runs on the small side and you have leftover batter after all the cups are filled, lower the cooking time to around the 13- or 14-minute mark. You can always bake them longer, but you don’t want to overbake them.

OK, go forth, make muffins. Enjoy.

All-bran cereal

Peach

Blueberries

Muffin batter

Peach-blueberry muffin

Fresh Peach Bran Muffins

from Dinner With Julie.

  • 2 cups All Bran cereal
  • 1 3/4 cups buttermilk or plain yogurt, thinned with milk
  • 1/2 cup sugar (white or brown)
  • 1/4 cup canola oil
  • 1 large egg
  • 1 1/2 cups all-purpose flour
  • 2 tsp. baking powder
  • 1 tsp. baking soda
  • pinch salt
  • 1 or 2 peaches, chopped (or additional fruit, as desired)

In a large bowl, stir together the cereal and buttermilk; let stand for 10 minutes, until soft. (Sometimes I drizzle in a bit more milk if this mixture seems really, overly solid. Never had any problems with a little additional liquid.) Preheat the oven to 375F.

Stir the sugar, oil and egg into the bran mixture. Add the flour, baking powder, baking soda and salt and stir until almost combined; add the peach and stir just until blended.

Divide the batter among 12 muffin cups that have been lined with paper liners or sprayed with nonstick spray. Bake for 25 minutes, until golden and springy to the touch. Makes a dozen muffins.

Continue Reading