Dolly Bars

I like my blog stats. I’m always interested to see where people are coming from or what search words have led them to my little site. I am usually grateful to anyone and everyone who has linked up to my blog and I am quick to investigate a referrer when I’m getting more than a handful of hits coming in from a particular place.

So, when I saw I was getting visitors from a bulletin board on the America’s Test Kitchen website, I got curious.

I wish I hadn’t.

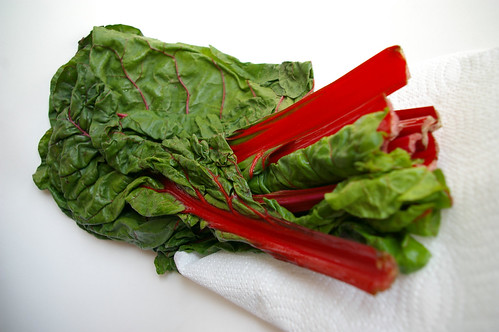
It was a discussion linking back to my rhubarb crumb cake post (which seemed odd, how did they even find that one particular post) with the subject of: Okay, guys, am I the only one who thinks this photo is great?

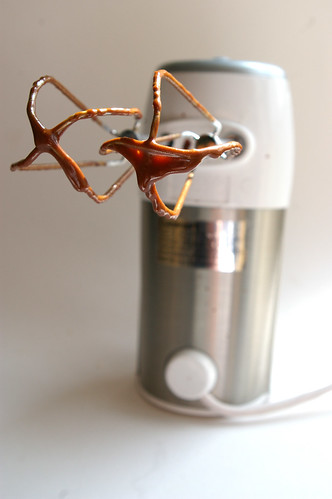
At first I thought she was referring to my rhubarb and/or cake photos, but it turned out she was referring to my blog’s header. Me and my red patent shoes and my red mixing bowl.

There were a few nondescript responses. And then the original poster said something that left me feeling like ice. I think it’s a good thing that I don’t have a photographic memory because it’s probably best I don’t remember the comment exactly. Instead, I’ll give you a summary: It looks as if this woman and her “pleasantly plump” calves (because that I do remember) has eaten everything before it could go in the oven and has had to lie down to digest it all.

And then, further down, another comment that struck even deeper.

No (Original Poster), when I opened the link and saw that across the top, I thought “Wa-huh? Did she get murdered while she was stirring her cookie dough? Or did she go into a diabetic coma from too much sugar? Or is she trying to look alluring with that red plastic bowl from Target and the red plastic shoes from Payless?” I couldn’t quite figure out the point of the picture.

It certainly does not make me want to eat….her cooking.

I felt ill to read that.

I have long known the Internet to be a place where meanness spreads easily. After all, I’ve read the comments on some of my articles for the Herald. People are quick to criticize or make mean comments. Anonymity, no doubt, plays a significant role in how people choose to comport themselves online.

And I know there is a valuable lesson in here about paying attention to the 99 people who like you and ignoring the one critic.

But here’s the problem.

These comments from these women confirmed all the things I feared people thought about me.

The original poster later took down her comments, editing the first post to say she had never intended to offend anyone. My initial reaction was to be appreciative that she seemed sorry. But, after a few minutes, I realized that her edited comment was just as strange. How did she not think people would be offended? Did she believe her comments were being made in a vacuum and the object of her criticisms would not find out? Likely, yes. But she was mistaken.

More than 60 people visited my site because of that bulletin board discussion. I have no idea what the others thought, but I can safely say that I’d prefer to get my traffic some other way.

And yes, a small part of me thinks they would probably be less mean if they had a nice slice of cake once in a while.

So, on that note, (she says, clapping her hands together), that is enough time wasted on that. Let’s eat something delicious!

Dolly Bars I

For elective choices in Grade 8 at high school (because there was no junior high in Vancouver and I’ll spare you the woes of being a 12-year-old girl going to school with 18-year-old boys who would never look at a kid like me) one could decide between food/wood/metal and home ec (food and sewing). I had no interest in working around giant saws that would probably take my finger off, so I chose home ec.

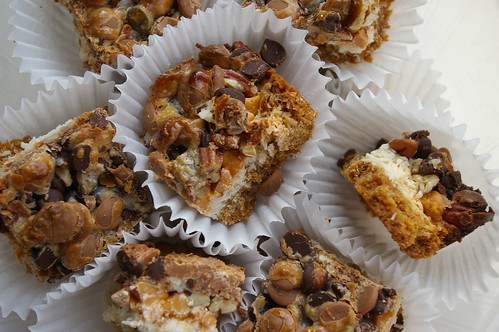
I don’t remember many recipes worth saving, except baby cheesecakes that used vanilla wafers for a crust and these things called Dream Bars. I kept the cheesecake recipe but have no idea where the one for the bars went, which is too bad because I think about them pretty often. (As in, more often than really is reasonable to reminisce about a baked good.) They were sort of chewy-gooey with a shortbread type crust and a sweet layer on top. I think there were pecans involved. And chocolate chips. And that’s about all I remember. I’ve googled until the cows come home, but nothing that calls itself a “dream bar” is actually what I remember.

And then I saw Dolly Bars. They seemed a reasonable facsimile and, therefore, worth a try.

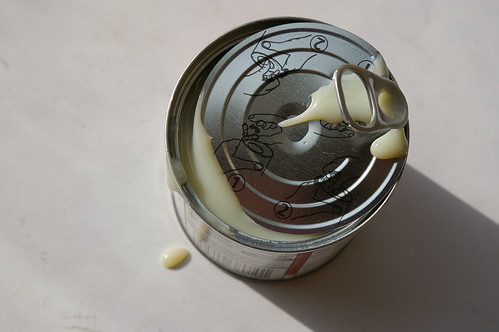
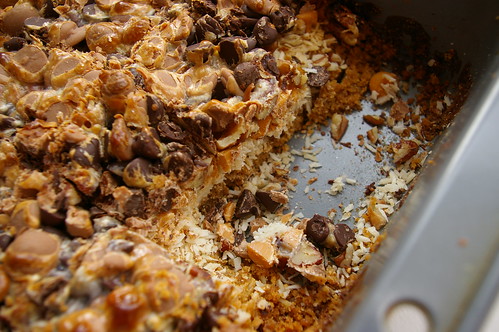
I found this recipe on Smitten Kitchen who adapted it from Homesick Texan. I didn’t notice the discrepancy in the amount of sweetened condensed milk until after it became clear this recipe was a bit of a failure for me. A little more online research showed that almost every recipe calls for an entire can of the stuff, while the one I used called for about 1/3 of a cup. My toppings didn’t really stay stuck to the graham cracker base as a result. Still tasty, but a bit of a failure. So, I’m going to try this again and use the entire can.

All the toppings

Condensed Milk II

Condensed Milk II

Dolly Bars before baking

IMGP1327

Dolly Bars II

Dolly Bars

  • 1/2 cup (1 stick) salted butter, cut into large pieces
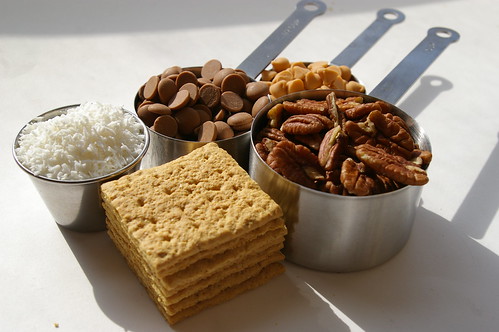
  • 1 1/2 cups graham crackers crumbs (about 8 graham crackers, pulsed in a food processor)
  • 1 1/2 cups chocolate chips
  • 1 cup butterscotch chips
  • 1 cup shredded coconut
  • 1 cup pecans, coarsely chopped
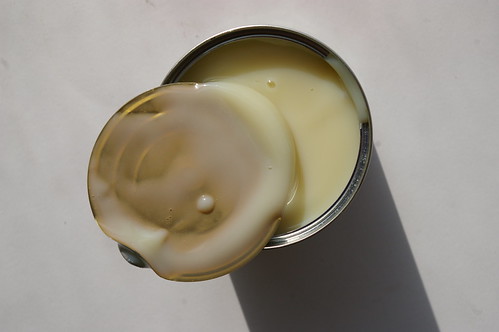
  • 1 14 oz. can sweetened condensed milk

Preheat oven to 350 degrees.

Melt butter in microwave in heatproof bowl until just melted when stirred. Add graham cracker crumbs. Mix and then press evenly into the bottom of 8×8 baking pan.

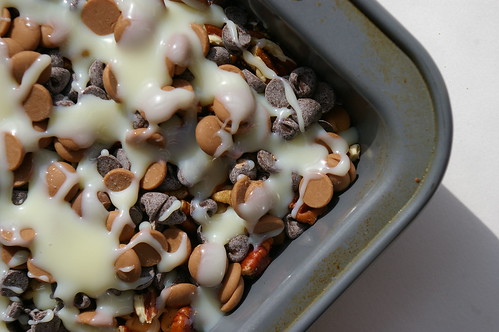
Layer coconut, pecans, butterscotch and chocolate chips on top of graham cracker base. Pour sweetened condensed milk over whole mixture.

Bake in oven for 25 to 30 minutes, or until the top is light brown.

Continue Reading

Strawberry Shortcakes

I suppose my scone anxiety started about 10 years ago when I was doing a stint teaching English in Japan.

My next-door neighbour invited me to a cooking class being hosted by one of the American wives who lived on a nearby U. S. naval base. Every so often they would run these courses and local housewives in my small town would sign up, looking for a chance to learn some foreign cooking and perhaps practise English.

I’m sure I paid attention. I’m also sure we put in all the ingredients. I’m confident we didn’t overmix.

But pulling our tray from the oven, it was painfully obvious something, somewhere had gone wrong.

The navy wife clucked her tongue and kindly suggested we forgot to add the baking powder.

To say they were hockey pucks would have been polite.

To add to that anxiety was the confusion I suffered when attempting to make scones again: how best to mix the butter with the flour to ensure even incorporation while the butter remains cold.

Pastry blender? Fingertips? Food processor?

It was all a bit much for this would-be perfectionist to handle.

I understood the logic behind it. If the butter stays cold and is perfectly mixed in with the rest of the ingredients, it will melt in the heat of the oven, creating light layers in the scone. But I just didn’t know which method was best.

Still, one can only be afraid of scones for so long.

And it’s strawberry season.

And if those two things aren’t enough to make this girl face down her anxiety with a round of strawberry shortcakes, I’m not sure what would be. After all, the thought of a light, golden scone-like shortcake, topped with slightly sweetened strawberries and a healthy dollop of whipped cream is enough to make me do things much worse than attempt a recipe while bracing for failure.

Within reason, of course.

As hoped for, my anxiety completely melted away when the recipe came together quickly and the shortcakes out of the oven were the requisite golden colour, pulling apart neatly to display all their lovely inner layers.

Strawberry Shortcake II

It may have been thanks to chef Nigella Lawson’s approach to the butter conundrum, which is to grate frozen butter into the dry ingredients. It seems so ridiculously smart, now that I think about it. After all, if the goal is even distribution, what better tool to use than something that will conveniently portion the butter out into tiny pieces? Not to mention the fact that because the butter is frozen, it’s difficult for it to warm up too much before the mixture goes into the oven anyway.

It may also have been that I made absolutely sure to add the leavening.

And it may have been that sometimes anxieties just need to be confronted.

After all, the rewards to be reaped here will carry on and on.

And, in the immediate moment, there are shortcakes to enjoy.

Strawberry Shortcake I

Strawberry Shortcakes

Adapted slightly from chef Nigella Lawson’s How to Be a Domestic Goddess.

For the shortcakes:

  • 1½ cups (325 ml) flour
  • ½ tsp (2 ml) salt
  • 1 tbsp (15 ml) baking powder
  • 5 tbsp (75 ml) sugar, divided
  • 1/2 cup (125 ml) unsalted butter, frozen
  • 1 large egg
  • ½ cup (125 ml) half-and-half cream
  • 2 tbsp (25 ml) whipping cream
  • 2 tbsp (15 ml) sugar, divided
  • 1 cup (250 ml) whipping cream

for the filling:

  • 1 pound (500 g) strawberries, hulled and sliced
  • mix the sliced strawberries with 1 tbsp (15 ml) sugar and set aside in the fridge.

Preheat the oven to 425°f (220°c).

Mix together the flour, salt, baking powder and 3 tbsp (50 ml) of the sugar in a bowl. Grate the frozen butter into the dry ingredients and use your fingertips to lightly toss all together. Whisk the egg into the half-and-half cream and pour into the flour mixture a little at a time, using a fork to mix. (Nigella notes you may not need all the cream; I needed another tablespoon or so.)

Turn the dough out onto a lightly floured surface, then roll gently to about ¾-inch (2 centimetres) thick. Dip a cutter in flour and cut out as many shortcakes as possible. Work the scraps back together, re-roll and cut more. (Nigella suggests using a 3-inch/6½-cm round cutter to make 8; I used a much smaller square one and subsequently got 15 shortcakes.) Place on a baking sheet, brush the tops with the 2 tbsp (25 ml)whipping cream and sprinkle with the remaining sugar.

Bake for 10 to 15 minutes (because mine were significantly smaller than suggested, they only took 8 minutes) until golden. Remove to wire rack to cool.

Whip the whipping cream with the remaining 1 tbsp (15 ml) sugar-and a splash of vanilla extract if desired.

Split the shortcakes through the middle, top with a spoonful of strawberries and dollop of whipped cream and then put the top back on.

These are best served slightly warm.

This story first appeared in the Real Life section in the Calgary Herald. For more delicious recipes, visit CalgaryHerald.com/life.

Continue Reading

Triple Layer Chocolate Cake

It’s my Blogiversary!

Two years ago I decided it was time for me to finally join the blogging world and I started up Patent and the Pantry as a way of celebrating my love of food and photography. But, let’s face it, mostly because of my love of food.

Chocolate Cake slice II

And I got a nice little present just in time for it. I just had my 200,000th page view. I never thought it would grow this much and I am so grateful to all my readers who have bookmarked my blog, forwarded recipes along and faithfully kept up with all my updates even if half of them have involved lemon recipes. Thanks too must go to all my friends and family, which have supported me in this little project.

Any good celebration requires cake. Or at least as far as I’m concerned.

I found this recipe while getting my hair done a few weeks back. Flipping through Bon Appetit, I came across this Chocolate Mayonnaise Cake and immediately wrote it all down with an eye of making it sooner rather than later. Although Red Velvet Cake was fun for the first entry and first anniversary, I wanted to switch things up this time around. And you can never go wrong with chocolate.

I took half over to Andree’s house to share with her. She has been a big supporter of P&P since I launched, offering tips, advice and gently encouraging me to do less baking, more cooking. So, I thought she might like it if she tasted some of the fruits of my baking labours.

The other half went in to work for my “Civilized Sunday” girls who are kind enough to eat all the baking I can’t keep at the house out of fear I will consume it all. Then we all sit around the desk at work eating goodies and reading our horoscopes . . . . And then, yes, we do get down to serious work because otherwise how would we fill the Monday paper?

The cake went over well, but I’m not entirely convinced it was as good as it could be. My main concern here is that the recipe indicates to beat the cake until well blended after each of the four additions of flour. I’ve always been told to go gently when adding flour to a cake and mix (not beat) only until blended because you don’t want to develop the gluten. I wish I had followed my instincts; I’m convinced this cake would have been even more tender. Not that anyone was complaining . . . .

So, if I attempt this again, I’m going to go gentle on the batter. I’m sure it will only improve things.

However, all that said, it was still a good little cake for a special little day.

Prepared pans

Melted chocolate and cocoa

Chocolate Cake Batter

Chocolate beaters

Chips and chunks for chocolate icing

Melted chocolate for the icing

Two layers

All iced up

Sky high cake

Chocolate Cake slice I

Chocolate Cake

  • 2 ounces bittersweet chocolate (do not exceed 61% cacao), chopped
  • 2/3 cup unsweetened cocoa powder
  • 1 3/4 cups boiling water
  • 2 3/4 cups all purpose flour
  • 1 1/4 teaspoons baking soda
  • 1/4 teaspoon baking powder
  • 1 cup sugar
  • 1 cup (packed) dark brown sugar
  • 1 1/3 cups mayonnaise (do not use reduced-fat or fat-free)
  • 2 large eggs
  • 1 teaspoon vanilla extract

Chocolate Frosting

  • 10 ounces bittersweet chocolate (do not exceed 61% cacao), chopped
  • 1 1/2 cups (3 sticks) unsalted butter, room temperature
  • 3 cups powdered sugar
  • 1 tablespoon vanilla extract
Preheat oven to 350°F.

Butter and flour three 8″ diameter cake pans with 1 and 1/2-inch-high sides. Combine chopped chocolate and cocoa powder in medium metal bowl. (I used a plastic bowl and it appeared to work just as well.) Add 1 and 3/4 cups boiling water and whisk until chocolate is melted and mixture is smooth. Sift flour, baking soda, and baking powder into another medium bowl. Using electric mixer, beat both sugars and mayonnaise in large bowl until well blended, 2 to 3 minutes. Add eggs 1 at a time, beating until well blended after each addition. Beat in vanilla. Add flour mixture in 4 additions alternately with chocolate mixture in 3 additions, beating until blended after each addition and occasionally scraping down sides of bowl. (Again, I’d take it easy here and only mix until just blended instead of beating it.) Divide batter among prepared cake pans (about 2 1/3 cups for each).

Bake cakes until tester inserted into center comes out clean, 30 to 32 minutes. Cool cakes in pans on racks 20 minutes. Run small knife around sides of cakes to loosen. Carefully invert cakes onto racks and let cool completely.

For the frosting, place chopped chocolate in medium metal bowl; set bowl over saucepan of simmering water and stir until chocolate is melted and smooth. Carefully remove bowl from over water; let melted chocolate cool until lukewarm, stirring occasionally.

Using electric mixer, beat butter in large bowl until smooth and creamy. Sift powdered sugar over butter and beat until well blended, about 2 minutes. Beat in vanilla. Add melted chocolate and beat until well blended and smooth, occasionally scraping down sides of bowl.

Place 1 cake layer on platter. Spread 3/4 cup frosting over top of cake layer to edges. Top with second cake layer; spread 3/4 cup frosting over. Top with third cake layer. Spread remaining frosting decoratively over top and sides of cake.

Cut cake into wedges and serve.

Continue Reading

Sautéed Chard over Polenta with Fried Eggs

I came into a plethora of eggs over the weekend.

Farm fresh eggs

I was at work on Sunday when a colleague came up to me.

Him: You like X, right?

Me: Oh yes, that’s how I get through the day sometimes. (In my best, most sarcastic and slightly confused voice.)

Him: Uh, OK. Well, I have some and I wondered if you wanted to buy some.

Pause.

Me: Wait, did you say eggs?

Him: What did you think I said?

Me: Um…..

Anyway, he had a few dozen from this totally organic, self-sustaining farm outside of Calgary called Thompson Small Farm. I’ve been searching for really good eggs since I moved here from Vancouver. I’ve found the ones here, even from area farms, to be pretty anemic looking and I’ve craved those with those golden-orange yolks that are so beautiful. So, the thought of finding those was enough to tempt me to buy two dozen. Plus, well, he said one of them was blue-green and that was just a bonus.

So, for the next two days I dreamed up things to make with these pretty eggs in their multicoloured shells. And I realized I wanted to do something that would really showcase the egg itself. Somewhere in my food-related Internet travels, I came across a post where someone had topped polenta with cooked greens and a poached egg. Since I have come to love chard mostly owing to this, I thought it would be cool to do a riff on that idea.

Polenta and chard with egg

For the most part, I made this up as I went along, taking inspiration from the chickpeas and chard entry. But I did a lot of research on poaching eggs (vinegar, no vinegar, swirl, boiling water, stainless steel etc. Who knew there were so many variations?), so that I would be fully prepared when it came time to make them. On the drive home, though, I realized I just wanted to do something fast and, in all honesty, I really didn’t want to dirty another dish. I figured frying the egg in the pan where I had just sautéed the chard would add even more flavour.

I have about three different grinds of cornmeal as I keep thinking I have the wrong one for polenta. In the end, I used the instant stuff. What? It was in my cupboard already and I’m desperately trying to clear space. Plus, that stuff is INSTANT and that makes for a very, very quick dinner. I followed the instructions and then just doctored it up with a bit of cream (er, yes, well, it was already in the fridge . . . .) and some butter and a nice pinch of flaked salt.

This was quick, easy and delicious. I loved the soft polenta, garlicky chard and the ever-so-slightly oozing egg yolk all combined into one. Maybe next time I will try poaching the eggs, but, in a pinch, this was just fine.

Chard

Egg

Blue eggshell

Chopped chard stems

Polenta and chard with egg II

I’d call these more guidelines than a recipe, so adjust as you see fit.

Sautéed Chard over Polenta with Fried Eggs

  • 1 bunch chard
  • 2 cloves garlic, minced
  • 1 tablespoon olive oil
  • 1/4 cup white wine (or water or chicken stock)
  • 2 eggs
  • butter
  • cooked polenta
  • salt and pepper to taste

Cook polenta according to directions, adding some butter/cream/salt/pepper/cheese or whatever else you desire.

Remove the stems from the chard, then dice finely. Chop leaves into thin strips and set aside. In a large frying pan, heat up olive oil over medium heat. Add stems and a pinch of salt. Saute until they start to soften, about five minutes. Add the garlic and cook for about a minute, until it gets fragrant. Add wine (or water or chicken stock) and then the strips of chard leaves. Stir, then top with a lid and cook for about five minutes until the leaves are wilted. Scrape out pan and add a small knob of butter to melt. When bubbling add eggs and fry to desired doneness.

Dollop polenta onto plate, top with chard and fried egg.

Continue Reading