Fried Chicken Dine-Around

I don’t remember how the idea even first formed, what the precipitating discussion had been, only that at some point the idea was arrived upon that a group of us should have a night eating fried chicken from a variety of spots around Calgary.

A fried chicken tour – or dine-around as we later called it – seemed like one of those ridiculous ideas that is so decadent that you kind of can’t not do it.

So we did.

Saying yes was a no brainer. After all, fried chicken is one of those dishes that inspire made cravings. That juicy meat, crackle-crisp breading, spices and herbs, all check the boxes for a dish worth yearning for.

_MG_4078
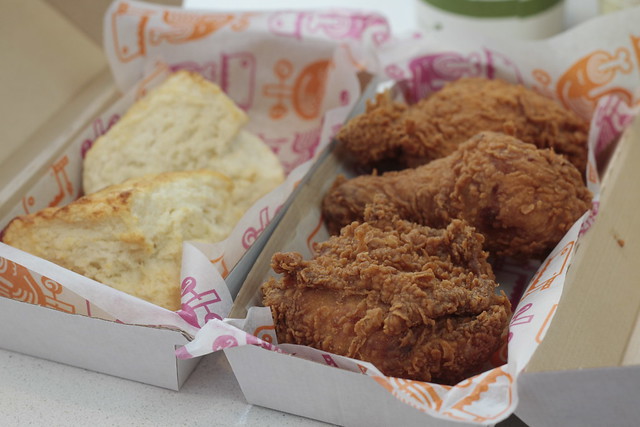
A selection from Chicken On the Way

The harder task was trying to narrow down the field from all the restaurants dishing up their versions of fried chicken around the city. Especially since – out of fear of heartburn or coronaries – we limited ourselves to four spots. Even that is not really for the faint of heart.

Chicken on the Way was a given, since it’s a Calgary institution and, well, the fritters are deadly good.
Cluck n’ Cleaver was added to the list as the newest on the scene.

And to cover off a variety of price points, we also wanted to include some sit-down restaurants, which meant Model Milk – which has been serving up fried chicken in some combination or another since it opened, including numerous iterations of southern classic combination chicken and waffles – and Anju which, while known maybe more for its yearn-worthy wings and sliders does offer large-format plates of fried chicken.

The original plan also included Olive Chicken, though I also love Ogam Chicken, which is down on Macleod Trail across from Chinook Centre.

In the end, we put those on the list for the inevitable round two of the Fried Chicken Tour.

I’ve dabbled in making fried chicken for a couple of dinner parties – where someone else was responsible for the waffles – and had a lot of success with recipes by Tyler Florence and J. Kenji Lopez-Alt – whose version I heartily endorse, as do my fellow dinner party diners.

Fried chicken looking so fine. Thanks @kenjilopezalt for the recipe! Not pictured: the waffles alongside.

A post shared by gwendolyn (@gwendolynmr) on

Dinner! Homemade chicken and waffles with bourbon syrup. Eff yes.

A post shared by gwendolyn (@gwendolynmr) on

I was mostly willing to tackle it because, well, I do love fried chicken and because the party hosts have one of those deep-fat fryers that’s all enclosed and maintains temperature and means no one is carefully watching a pot of boiling oil on a stove and dealing with splatter. Also, they cleaned up, so….

Because, as much as I love eating fried foods, I kind of hate cooking them. Though that may also be due to lack of experience (a chicken-and-egg situation, to be sure) and never quite getting the knack of keeping the temperature steady and so on.

Eating someone else’s fried chicken is so much easier.

With a date picked and an order selected, we set forth.

It started with Chicken on the Way.

After all, one should start at the beginning.

_MG_4081

A few people questioned why we would include this spot, but for me there was no doubt it had to be part of the tour. They’ve been frying up chicken and fritters and fries for nearly 60 years; they’re a Calgary institution.

Although the goal was to not fill up on side dishes, we couldn’t resist the corn fritters which are satisfyingly crusty on the outside with soft, corn-studded interiors.

The chicken itself has a rather thin coating when compared to Korean fried chicken or even the robust crust on Cluck n’ Cleaver. But it’s nice and crisp and the chicken underneath is juicy enough.

This is straightforward, know-what-you’re-going-to-get fried chicken – which is likely why it has remained a part of Calgary’s dining scene for so long. (And has expanded to other Calgary locations and other communities, like Airdrie, Brooks and Edmonton.)

The tour was off to a good start.

A straight shot south on 14th Street lands you at the front door of Cluck n’ Cleaver, the fried and rotisserie chicken spot opened by Nicole Gomes, of Nicole Gourmet Catering (who is currently competing on Food Network Canada’s Top Chef Canada: All Stars) and her sister Francine.

Like Chicken on the Way, you can stop and enjoy your food in the space, but mostly it’s to-go orders. (And, perhaps dangerously, they do delivery.)

The “avoid ordering sides” decision went straight out the window here, as we tried three salads (coleslaw, black bean and corn, and a stick-to-your-ribs potato salad) along with biscuits and gravy. And a milkshake. Because why not?

_MG_4083
The camera eats first. At Cluck n’ Cleaver.

Where Chicken on the Way has a thin coating, Cluck’s is all thick and craggy with plenty of seasoning. Hiding beneath, deeply juicy chicken that counterbalances that crispy coating.

It’s excellent on its own but I wouldn’t stand in the way of anyone considering dipping some of that chicken into the gravy served on the side, which is also fantastic on the biscuits.

_MG_4089

For an entirely different take on fried chicken – at least in terms of seasonings and spices – we then headed down 17th Avenue to Anju, home of some of the city’s most crave-able hot wings.

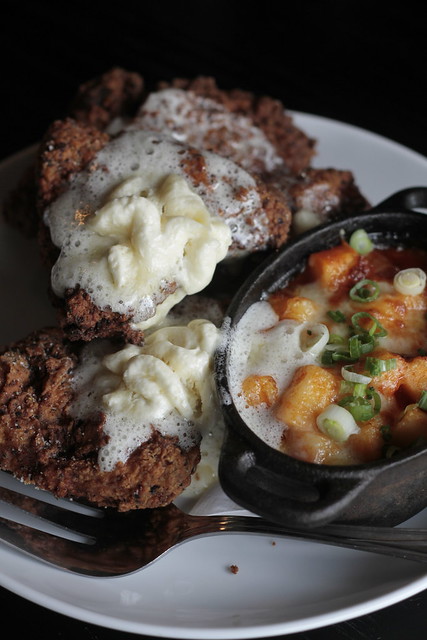
While a go-to order for me when stopping in, we forewent the gochujang wings for chef Roy Oh’s latest fried chicken creation, which he frequently changes to keep things interesting. There were only a few days left for the version then still on the menu, which was a spicy chicken topped with airy light honey-butter that melted into the crooks and crannies of the crispy skin. Alongside, a playful take on macaroni and cheese, but instead of pasta, Oh used rice stick.

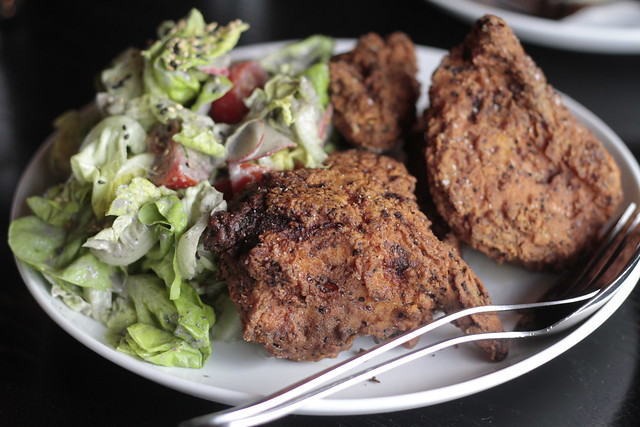
Since the menu change was imminent, Oh also served up the newest iteration that is now on the menu: sriracha-brined fried chicken served with a black sesame-dressed salad. The cooling salad was a nice counterpoint to the hot chicken that, while spicy, didn’t blow out my tastebuds. (I’m, admittedly, a total spice wimp.)

_MG_4097

_MG_4102

No lie. We had to pause here for a bit before continuing.

Also no lie? I wasn’t sad because it meant time for one more Lock, Stock & Two Smoking Barrels – one of my favourite cocktails in the city. Into a smoked glass with a massive ice cube is a mixture of bourbon (yay!), ginger liqueur, sugar and bitters. So, it’s kind of like a super jazzed up Old-fashioned. (Also yay!)

I may enjoy trying all sorts of menu items while at Anju, but when it comes to the cocktail list, it’s Lock, Stock every time.

From Anju, it was a quick (much-needed) walk down to the other end of the block to hit up Model Milk.

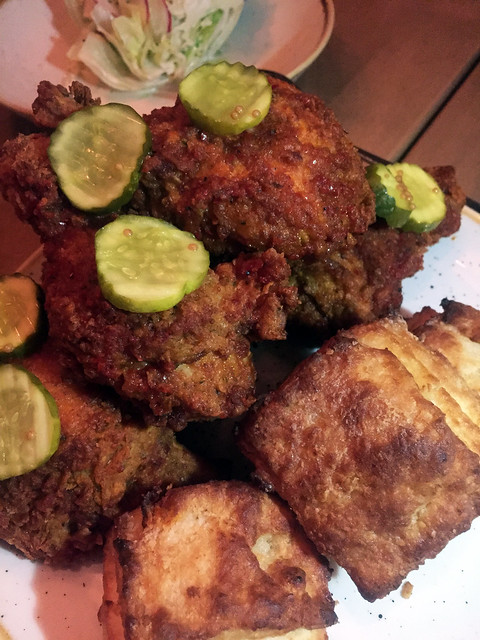
Fried chicken has been on their menu almost since the beginning, but how it’s prepared and what it’s served with is constantly evolving. First, it came with grits, then waffles entered the picture. At one point, those waffles were deep-fried to be, essentially, donuts. (This was my favourite iteration of them all.)

The latest edition comes with fluffy, flaky biscuits, a wedge of iceberg salad and dill pickle coins whose acidic tang play nicely against the chicken.

This chicken had some kick, to be sure. The salad was soothing, though and I couldn’t get enough of those light biscuits.
Sorry. Not the best photo. Trust me, it looks so much better than this.

IMG_0523

And so, some five hours later, the chicken dine-around came to a close. Amazingly – frighteningly – we were already discussing the next one as the plates were cleared.

Continue Reading

Wolf in the Fog

We’re in for a treat, we’re told shortly after being led to our table.

I feel that, even before we’ve opened the menus or heard the specials.

Because we are here, at one of the top restaurants in the country, in one of my favourite spots in the world.

Since 2014, when Wolf in the Fog landed a coveted spot on enRoute Magazine’s list of the 10 best new restaurants in Canada, its reputation has only grown. Tucked into the cosy community of Tofino, it defies the common belief that stellar dining is limited to major metropolises. Instead, here, on the western brink of the country, where craggy rocks, long stretches of sand and wind-beaten trees edge the Pacific, Wolf has found firm footing as a destination restaurant.

The inevitably seasonal menu reflects the rugged landscape and coastal abundance with dishes that feature fresh seafood – pulled from the ocean that can be seen from the restaurant – and ingredients foraged from the rainforest, as well as vegetables and meats from local farmers and producers.

Wolf had been on my list of restaurants to try since it opened – and even more so as the accolades poured in – so a stop here was inevitable during a trip the Tofino area as part of a month-long visit to the coast last year.

(Calgary connection: Chef-owner Nicholas Nutting trained at SAIT and worked under Michael Noble for three years at Catch when it first opened. He would later run the kitchen for The Pointe at the Wickaninnish Inn – another restaurant with a reputation for impeccable food.)

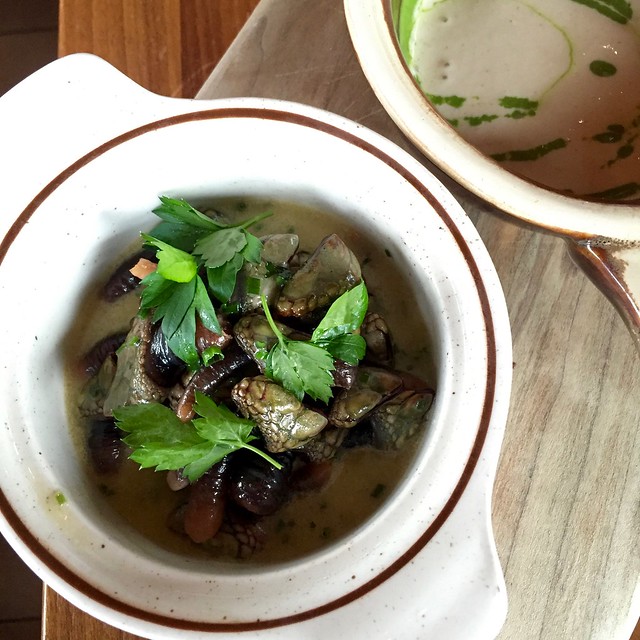
The treat the server was referring to, however, turned out to be a specific one: the last order of gooseneck barnacles that had come in that morning and quickly sold out.

The prehistoric-looking crustaceans, with their armoured tips and meaty trunks, are a prized delicacy because they’re difficult and dangerous to harvest from below the high-tide line of rocks pounded by surf.

As a special of the day, Wolf was offering them in a sherry cream with a verdant green oil made from tarragon, dill, parsley and chives – with bread for swiping through the sauce. The tender and slightly sweet shellfish may not be pretty to look at, but a few bites in and it was clear why this is such a coveted ingredient.

IMG_1665

The barnacles would turn out to be one plate in a series of well-crafted, creative and robustly flavoured dishes that landed on our table. We were in for a treat indeed.

But the experience started as we reached the top of the stairs and were greeted by the warm and welcoming space, with soaring windows, long wood tables and sculptural light fixtures dangling from the steepled ceiling. It continued from cocktails to the pair of desserts that would cap off the night.

_MG_1108

Although many entries on the cocktail list were tempting, there was no way I was going to have a meal at Wolf in the Fog and not try the famed Cedar sour, which I had seen numerous times on various forms of social media. (And lord knows, I do love a good sour.)

That distinctive woodsy aroma of west coast cedar was infused into the well-balanced cocktail that put it well into the top of the list of sours I’ve enjoyed.

IMG_1664

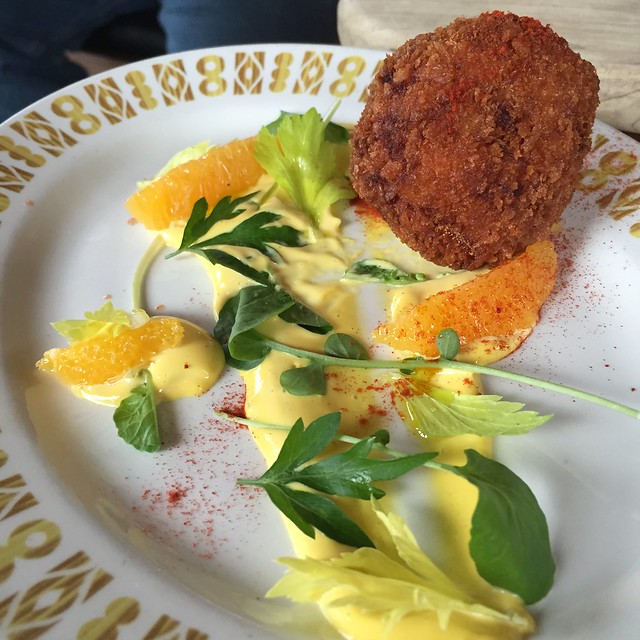
Besides the barnacles, we enjoyed a plate of smoked cod fritters with a bright saffron aioli, like a dollop of sunshine on the plate, and fresh chunks of orange that played nicely against the rich, crisply crusted fritters.

IMG_1662

There was a local halibut with sesame-nori croquette and sautéed bok choy, as well as a zatar-spiced game hen with farro, earthy from the spices and grains but brightened from the addition of a pickled veg salad.

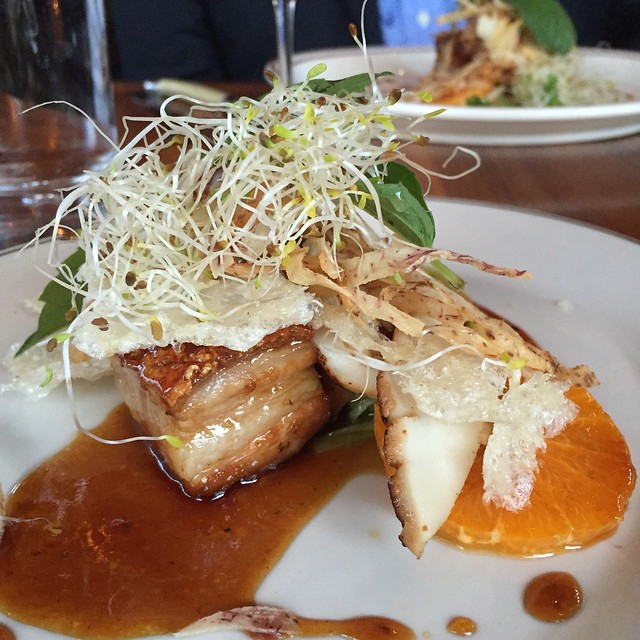
The highlight, for me at least, though was the crispy pork belly with Humboldt squid and charred daikon in a Szechuan glaze. I’m not a particular fan of squid as a general rule (and yes, I do keep trying), but this put any other one I’ve had to shame. Expertly prepared and cooked, it was a joy to eat, especially with the fatty, meaty belly that had been fried to a gorgeous amber colour. The play of the pork and squid worked perfectly and we basically scraped that plate clean with the edges of our forks to get any last drippings of glaze.

IMG_1669

That dish would be one of the best I ate in 2016 and I still think back on it.

On Tuesday night, Canada’s 100 Best Restaurants unveiled their list of the best establishments in the country, from coast to coast. Unsurprisingly, Wolf made the cut (sitting nicely at no. 41).

All the more reason, I think, to make sure I get out again to Tofino this spring.


Continue Reading

Szechuan Green Beans

I get into food ruts sometimes.

It’s like I get into a culinary funk and lose all my imagination, rotating through the same few dishes until something breaks the cycle.

Other times, I get into food obsessions.

During those periods, I make the same thing over and over – not because I’ve seemingly run out of culinary creativity, but because I just want to keep eating the same great dish.

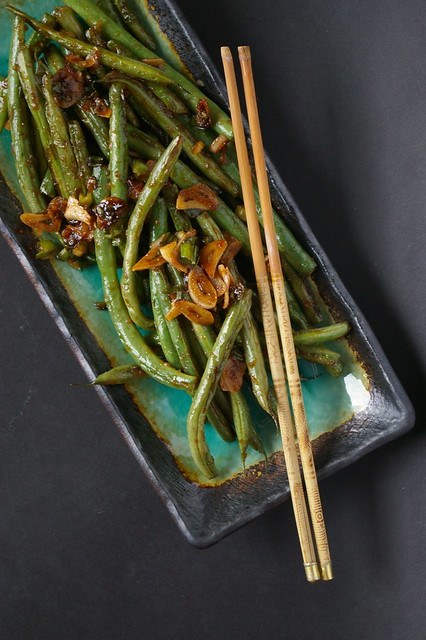
One of those obsessions is Szechuan Green Beans – a recipe I got from Julie Van Rosendaal.

IMGP3435

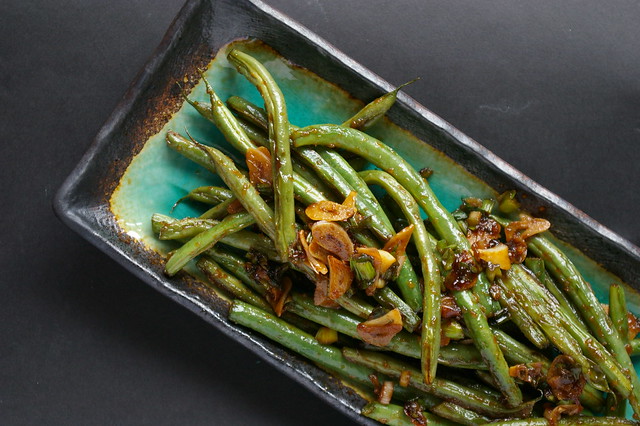
I had swung by her house one afternoon a few years ago where she had just been nibbling on some of these green beans sauteed with garlic, ginger and a squeeze of chili paste. She pushed the plate toward me; I took a bean and never looked back.

That first bite of slightly softened bean with the hit of spicy heat, the pungent garlic and green onions, now sauce soaked, hit all the right notes. So, I reached for another. And then another. When all the beans were gone, I found myself picking up the thin slices of garlic and stray bits of onions until the plate was picked completely clean.

I made them for the first time two days later. And the next night after that.

Since then, every few weeks I find myself grabbing fistfuls of green beans at the market, dreaming of eating the spicy, hot, slightly wrinkled beans over some rice with chopsticks.

This addiction runs so deep that I now typically double the recipe just to ensure I will have plenty to take to work the next day for lunch. This most recent batch was only a single – I didn’t have enough garlic at the time to make more – and when the beans were gone, I felt suitably bereft.

IMGP3458

I ate them all with rice and a side of pickled ginger – another bizarre food obsession that has manifested in the last year or so.

And, as there are still beans in the fridge, I’m pretty sure I know what will be for dinner tomorrow night.

And here is a more accurate photo of what it looks like when I’m eating it. Since, really, I’m not fancy enough for that kind of plating when I’m eating on my couch.

But picture a whole bunch of pickled ginger with it.


Szechuan Green Beans

This is virtually the same recipe as posted on Van Rosendaal’s blog, though I recommend going to the higher end of the garlic and I upped the green onions, as well. Instead of Sriracha, I’ve also used Sambal Olek to good effect.

  • 1 tbsp (15 mL) canola oil
  • 1 tsp (5 mL) sesame oil, optional
  • 1/2 lb (250 g) green beans, stem ends trimmed
  • 2 tsp (10 mL) grated fresh ginger
  • 3-5 garlic cloves, thinly sliced
  • 3 green onions, chopped
  • 1 tbsp (15 mL) soy sauce
  • 1 tsp (5 mL) sugar
  • 1 small spoonful of Sambel Olek (or a squirt of Sriracha)
  • Toasted sesame seeds, optional

Heat a heavy pan over medium-high heat and add the canola and sesame oils. Add the beans and cook, stirring occasionally until they start to turn golden. Add the ginger, garlic, green onions, soy sauce, sugar and Sriracha and cook a few minutes more, stirring often, until the garlic is golden, the beans are deeper golden and the sticky sauce has coated them all.

Sprinkle with toasted sesame seeds, if desired.
Serves 4.

A version of this article originally appeared in the Calgary Herald.

Continue Reading

The Best Eats of 2016 – Part I

I’m not going to go on ad nauseum about the annus horribilis that was 2016.

Bad stuff happened. To a lot of us.

Thankfully, good stuff happened too.

Unsurprisingly, for me, that was mostly around eating and traveling and eating while traveling – which, when combined with pretty dresses and patent shoes makes for a very happy Gwendolyn.

There was a month-long trip to the West Coast to visit Tofino and check out good eats there (more on that in an upcoming post), time in Victoria with my best friend and my family, a junket to Cranbrook and Fernie where I ate some amazing Indian food in a very unexpected place, a special trip to San Francisco to celebrate a milestone birthday for a friend, and, of course, an epic return to Japan to see the country I fell in love with when I lived there oh-so-many years ago.

Along the way I ate untold bowls of ramen, found new restaurants to love and dishes that have caused severe cravings for repeat visits.

The year had its tough moments, no doubt, but it was often damn tasty.

Here, in no order, are the best things I ate in 2016. (Part I because, wow, apparently there was more than I initially remembered.)

I can’t wait to see what 2017 brings.

So, Part I:

The main benefit of what I jokingly called ‘funemployment’ was that it made it easy to take off from Calgary. There is some delight in not having to clear vacation days with a boss or trying to manage making 15 days off last across an entire year. I had two weddings out on the coast, about three weeks apart, in the spring and decided to do a road trip out, seeing old friends, exploring some favourite spots and eating lots of delicious things.

Tofino is one of my favourite places in the entire world. (Kyoto is too, and what a blessed year to be able to go to both of these spots.)
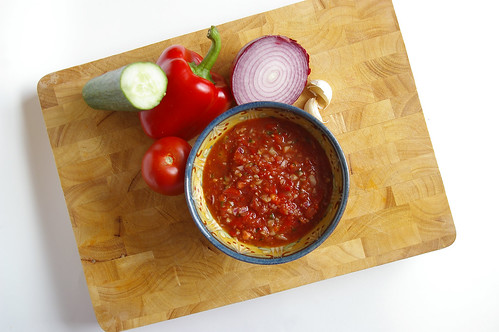
There were two nights at the famed Wickaninnish Inn that sits on my favourite beach at the western edge of Canada. The days were spent exploring tide pools and walking the long expanse of sand on Chesterman Beach, grabbing lunch at Tacofino (oh those tacos, so damn good) and generally poking around.
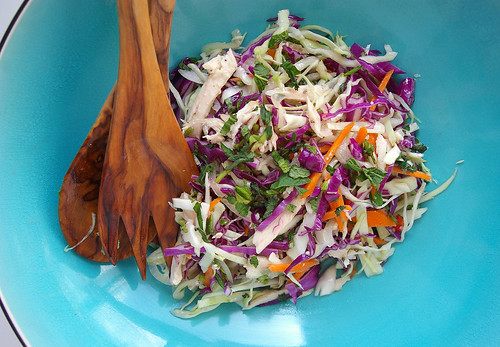
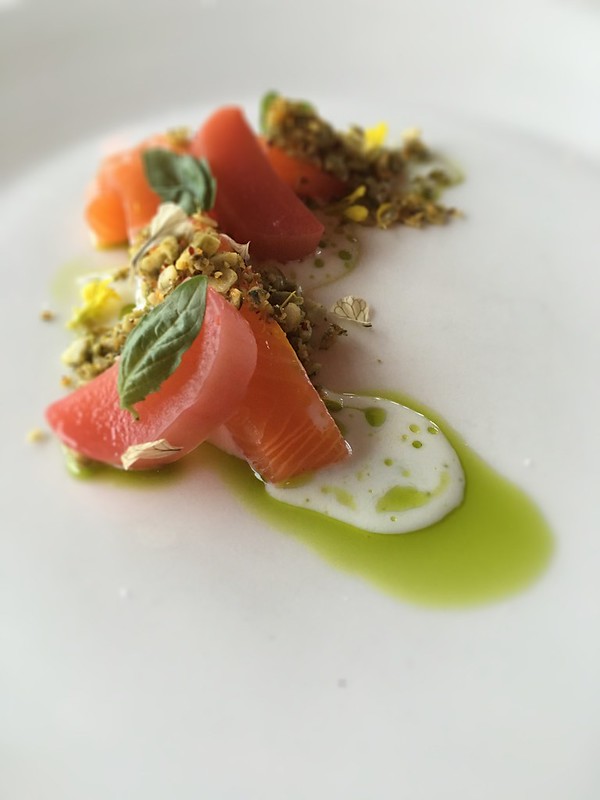
On one of the nights, we were hosted by the hotel to dine at The Pointe restaurant, sampling some of the incredible dishes created by executive chef Warren Barr. Among them, a delicate dish of cured steelhead trout with vanilla-poached rhubarb. The rich fish was neatly balanced by the tangy rhubarb.

Cured steelhead trout with vanilla-poached rhubarb from The Pointe at the Wickanninis Inn at Long Beach.

It was like dinner and a show as eagles swooped past the stretch of windows looking for their own meal and the grey surf broke into white spray against the rocks.

Slightly south, on Cox Bay sits Long Beach Lodge.

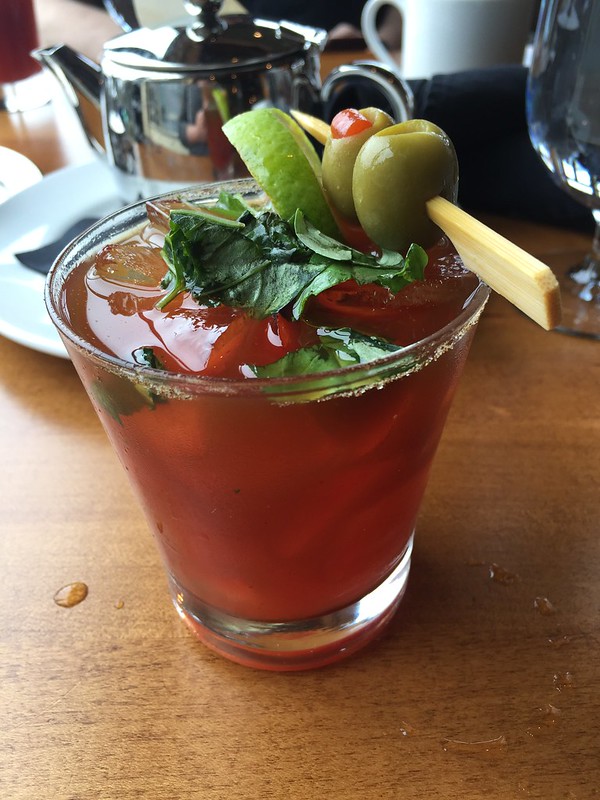
When not poking around that beach and the rocky outcropping that borders it to the north, a delicious afternoon was spent in the Great Room, the lodge’s restaurant-lounge hybrid. Cosy and welcoming, guests are invited to grab a board game and settle in for cocktails and snacks, which we happily did, spending a couple of hours battling over Scrabble while eating the lodge’s hot wings (which executive chef Ian Riddick was kind enough to share the recipe for, so those will be happening in my kitchen this year) and sipping Gin & Basil Caesars. When the calendar flipped to 2016, I had only had one Caesar in my life. Now I seem obsessed. And with these ones, it’s no wonder; the basil gives it a nice freshness and the lemon brightens it all up. I couldn’t get enough.

IMG_1721

Victoria will always feel like home to me. I did my undergrad at UVic and make it back at least twice a year to see my best friend, Kirsten. Now that my parents have moved to a quiet spot on the ocean about an hour outside of the city, there’s even more reason to make trips to the coast.

Kirsten and I have our rituals; there is always a lunch at Blue Fox for their Moroccan Chicken Sandwich (with a side of their green apple barbecue sauce for dipping fries in for me), there are pedicures at Sapphire Day Spa, there is a stop at Red Fish, Blue Fish if I’m there in the months when it’s open, a visit to Stage Wine Bar (where the gnocchi is a must-order) and there is shopping.

Since we are always racing against a limited amount of time, we rarely stray from the favourites.

When I was there in the spring, though, we decided to take a chance on somewhere we hadn’t been before but that had been highly recommended: Mo:Le.

Untitled

It was a drizzly morning and there was a bit of a wait, so we started with lattes at Mo:Le’s sister coffee shop next door. The great part is then you can take your drink with you when your table is ready.

The menu is a melting pot, with Mexican influences married with flavours from neighbouring Chinatown. It’s an unexpected mix. And it works perfectly.

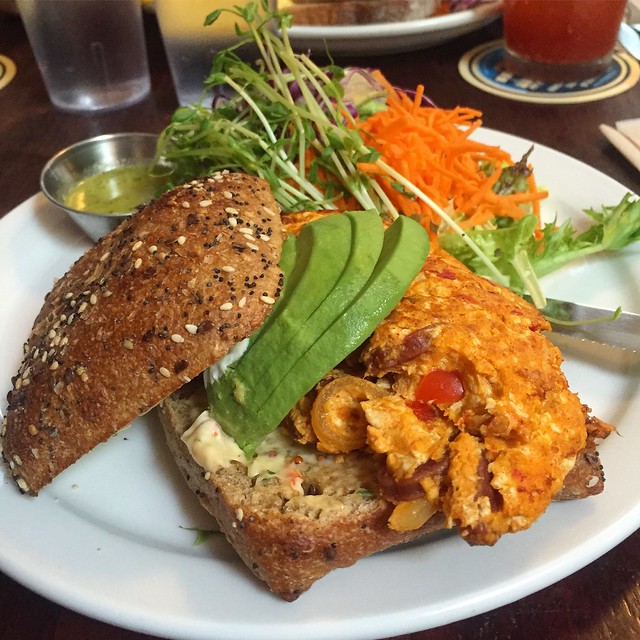
I couldn’t initially decide on what to order, but, with a helpful server offering her opinion when asked, I went with the Chinatown Ciabatta, a breakfast sandwich with eggs scrambled with cream cheese, that sweet Chinese sausage usually reserved for dim sum-type dishes and a spicy chilli bean sauce.

Untitled

On my next visit, I was insistent the itinerary include a stop at Mo:Le. It’s now just become part of the ritual.

Also? Order the Caesar.

IMG_4500

During that same road trip, I met my former mentor for lunch at Longtail Kitchen in Westminster Quay. This spot had been featured on You Gotta Eat Here, so I was already curious about it. I let Shelley handle the ordering; there wouldn’t have been a way for me to narrow down the choices. Pad thai, curry, wings (clearly, I have some things I must always order) and a flatbread-pancake hybrid with peanut sauce. There were no bad choices on that menu.

IMG_2202

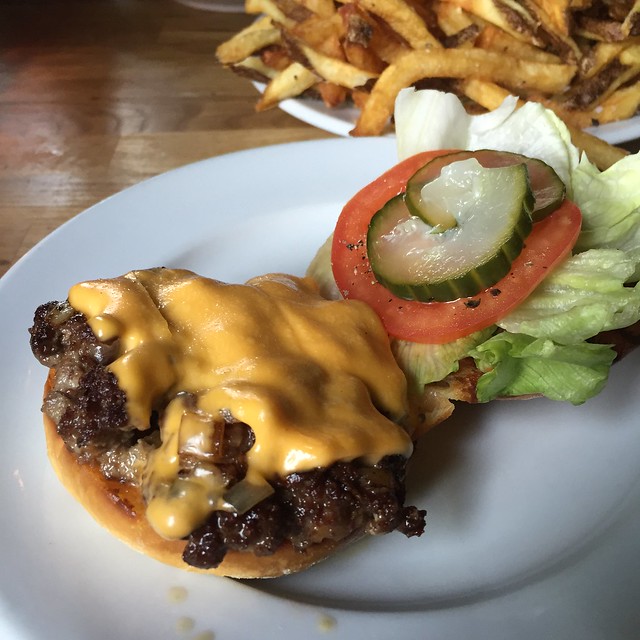
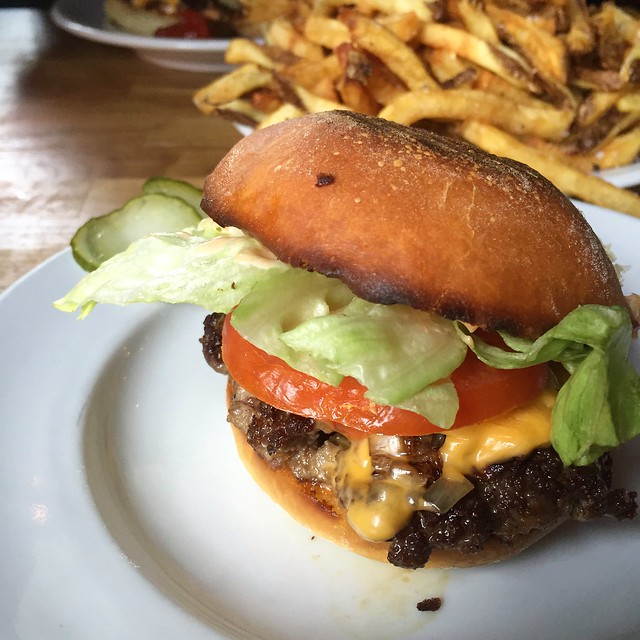
No list of my best eats would be complete without a burger, as any of you know me could guess. The one from ‘Camp Upstairs’ – a little bar with an incredibly limited menu that sits above Vancouver’s Campagnolo – may initially seem not that noteworthy.

It’s no frills, for sure, but no frills are needed when something is so expertly made. And these are somewhat cult-like as the bar only makes a limited number per night.

The standard version of the so-called Dirty Burger comes with a beef patty, melted American cheese, lettuce tomato and a couple of pickle coins.

Mine also had fried onions, deeply dark at the edges with that slight sweetness from caramelization.

IMG_2021

This burger is sincerely beefy and juicy with a requisite crust on the patty that adds a gorgeous flavour.

My friend and I split a colossal plate of fries and paired the meal with a perfect Boulevardier, sipping and sharing fries while swapping stories.

A perfect night.

IMG_2026

Stay tuned for Part II, coming later this week, when I cover some Calgary favourites and the best ramen I’ve ever had. Spoiler alert: I had it in Japan.


Continue Reading

Khao Soi

As a general rule, I won’t complain about the weather. Snow happens. As does rain. As do those chinooks which bring a brief and welcome reprieve from the short days of winter.

But this year, for the first time, I’ve actually found myself daydreaming about a tropical holiday: aquamarine waters, warm beach, cold drink.

My bank balance, however, won’t allow it.

The next best thing is to eat like I’m somewhere exotic.

A spicy kick to warm the belly was the aim, a meal evocative of southwest Asia to cut through the grey afternoon with wind-whipped snow swirling outside. A little searching led me to Khao Soi, a Thai soup thickly spiced with red curry, but balanced with creamy coconut and spikes of lime. Chicken shredded after cooking in the broth and egg noodles add heartiness to this dish, which requires both fork and spoon to eat.

Pickled mustard greens or cabbage, crispy shallots and deep-fried noodles are traditionally added, but I craved a simpler soup that could be whipped up in less than hour without the need for all the pots in the cupboard. If I was going to pretend to be on a holiday, then coming up with something easily put together made sense.

As such, despite my recent vocal opposition to “recipes” that use cake mixes or jarred sauces – which I’m not against them as a general rule; I just expect when I click over to a food blog for a recipe that it will be how to make something, not just assemble it from pre-made parts – I admittedly came up with a version of Khao Soi that uses Thai red curry paste. I’d argue this falls more toward the practical end of the jarred sauce continuum since it’s comprised of numerous, and sometimes obscure, ingredients. But, since I could have technically made my own curry paste (recipes abound on the Internet), I’ll simply say there are times when shortcuts are warranted; this is one of those times.

I did enhance the curry paste with more garlic and ginger and a sprinkling of spices sautéed to enhance their flavour. The broth is rounded out with salty fish sauce and a bit of brown sugar then poured over bowls of chewy noodles and chicken cooked in the creamy, hot and spicy soup.

A bit of cilantro, lime wedges and bean sprouts added just before serving adds to the complexity.

The soup was all I had hoped for, hot and spicy enough – definitely at the upper end of my albeit low tolerance for heat – with the requisite sour, salty and sweet components that comprise a lot of southwest Asian cooking.

It wasn’t quite like sitting on a beach as aqua waters lap at the sandy shore, but it was at least a culinary escape from the dreary winter.

Khao Soi

I adapted this from a number of sources. I used chicken thighs which have more flavour, but boneless, skinless chicken breasts will work just as well in a pinch or if preferred. It can easily be made vegetarian by skipping out on the chicken and using vegetable broth. In that case, I’d add some fried tofu to round out the dish.
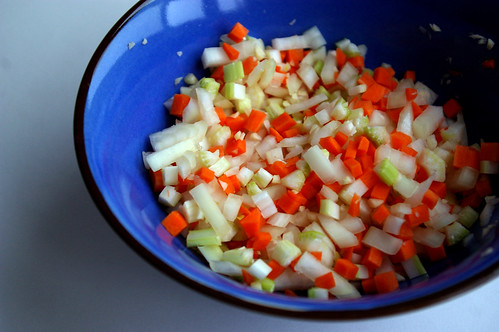
  • 2 tbsp (30 mL) vegetable oil
  • 2 cloves garlic, minced
  • 1 tbsp (15 mL) ginger, finely minced
  • 1 tsp (5 mL) curry powder
  • 1/2 tsp (2 mL) turmeric
  • 1/4 tsp (1 mL) cardamom
  • 3 tbsp (45 mL) red curry paste
  • 2 14-oz cans (796 mL) coconut milk
  • 2 cups (500 mL) chicken stock
  • 1 1/2 lbs. (750 g) chicken thighs, sliced in half lengthwise
  • 3 tbsp (45 mL) fish sauce
  • 2 tbsp (20 mL) brown sugar
  • 1 lb (500 g) fresh egg noodles (see note)
  • Lime wedges, cilantro, sliced shallots, bean sprouts for serving

In a large pot set over medium heat, warm the oil until it’s shimmering slightly. Add the garlic and sauté until fragrant, about 1 minute, then stir in the ginger. When the garlic and ginger are just cooked, but aren’t yet brown, add the curry powder, turmeric and cardamom. Sauté the spices until the form a paste with the oil and are fragrant, about 2 to 3 minutes. Add the red curry paste and stir with the spices, garlic and ginger. Work the paste and spices together and continue cooking, stirring nearly constantly and scraping it up off the bottom of the pot, until they are completely mixed and fragrant, another 2 to 3 minutes. Watch to ensure the spice mixture doesn’t burn. Scoop off the solidified coconut cream from the two cans of coconut milk and add to the pot. Mix well with the spice paste and cook, stirring often, until the red oil from the curry paste starts to separate, bubbling up to the surface, about 3 or 4 minutes. Add the rest of the coconut milk and the chicken stock. Bring to a boil. Add the chicken thighs, reduce the heat to a simmer and cover until the chicken has cooked, about 20 to 25 minutes. Remove the chicken to a dish and shred with two forks, setting aside until ready to serve.

Add the fish sauce and brown sugar and taste for seasonings, adding more of one or the other if desired.
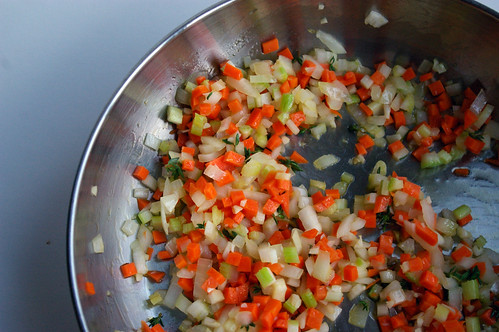
Bring another pot of water to a rapid boil and cook the egg noodles until just tender with a slight chew. (Mine only needed about 45 seconds.) Drain and divide between 4 bowls.

Top with shredded chicken and ladle over the broth.

Serve with lime wedges, cilantro, sliced shallots and bean sprouts.

Serves 4.


Note: Find egg noodles at most grocery stores in the produce section or at Asian supermarkets.

Continue Reading

Eggs in Purgatory

Necessity is the mother of invention.

True in the world of technological advances. True also in the world of the kitchen.

Because, on those nights when there doesn’t appear to be anything in the cupboards and the fridge is down to just the basics, there are still meals to be made.

Such was the case the other night when I found myself hungry and with only the very basics in my cupboards and fridge. (Eclectic basics due to my bizarre impulse grocery shopping skills, but basics nevertheless.)

Among them, a can of diced tomatoes I’m sure I bought for a Bolognese that never ended up getting cooked, a chunk of Parmesan, part of a red onion, some rapidly wilting herbs and eggs.

In short, all the ingredients for a dish known as Eggs in Purgatory.

(It’s sometimes also known as Eggs in Hell, though I’d argue that’s for a spicier version than I can handle.)

Eggs in Purgatory II

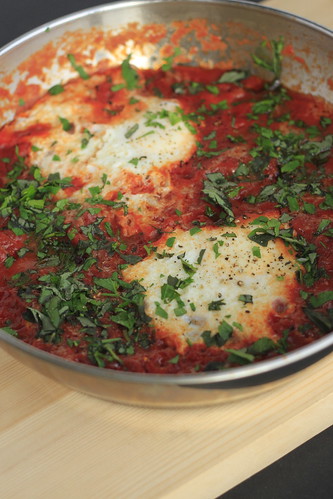
There are millions of variations for this recipe, but they all start with the basic concept of cooking eggs in a tomato sauce. Beyond that, it can be as creative as one wants or dependent on what one has on hand: wilt in some greens like spinach or kale, add sausage, spicy chorizo or strips of prosciutto, sauté onions and garlic to give the sauce more flavour. Make a more “hellish” version by throwing in some chopped jalapenos or chilies while sautéing the onions. The options are limitless.

With my limited supplies, however, I kept it pretty basic. Thankfully, basic doesn’t mean boring.

With only 10 minutes and a very small amount of effort, I had a flavourful and filling dinner. The rich eggs with slightly runny yolks are a nice foil to the spicy tomato sauce. I mopped it all up with a crusty piece of bread slathered with some butter.

Using just one pan to make a meal means this dish is near perfection.

Next time, I probably won’t wait until necessity forces me to make this for dinner; I’ll make sure I have the ingredients for Eggs in Purgatory.

Eggs in Purgatory I

Eggs in Purgatory

For a spicier version, add more red pepper flakes or add some diced jalapeno. For some more green, wilt spinach or kale just as the onions have softened before adding the diced tomatoes.

  • 1 tbsp (15 mL) olive oil
  • 2 tbsp (30 mL) diced onion, about ¼ of a small onion
  • 1 clove garlic, diced
  • ¼ tsp (1 mL) red pepper flakes
  • 1 13.5-oz (398 mL) can diced tomatoes
  • ¼ tsp (1 mL) salt
  • freshly ground pepper
  • 2 eggs
  • ¼ cup grated Parmesan
  • ¼ cup chopped herbs

In a pan over medium heat, warm the oil and then add the onion, letting it sauté until softened and slightly transluscent. Add the garlic and red pepper flakes and sauté until fragrant, about a minute longer. Pour in the diced tomatoes and juice, stir and let come to a simmer. Add the salt and a few grinds from the pepper mill, then let the tomato sauce cook until the liquid reduces and the sauce thickens slightly. Taste for seasonings, adding more salt or pepper as needed.
Using the back of a spoon, make two divots in the sauce and crack the eggs into the spaces. Sprinkle the parmesan over the sauce and egg whites.
Cover with a lid and let the eggs cook until the whites are set and the yolk is slightly runny (or to your desired doneness).

Remove from the heat, then sprinkle with the chopped herbs.

Serve immediately.

Serves 1 to 2.

Continue Reading

Fettuccine con Prosciutto e Piselli

The joke goes that my grandfather was born on the kitchen table and so his love affair with food began right from the start.

His passion for cooking fostered my own love of being in the kitchen and eating good food from the time I was a child.

My grandfather and me

My memories of him revolve around food: making fresh pasta, picking basil in his greenhouse and making little pots of pesto to be eaten on bread with cheddar, and eating plates and plates of pasta.

(The other joke is that my grandfather is secretly Italian.) I still feel that influence today.

When I cook the dishes he would make for me as a child, I am back in the kitchen with him. Comfort dishes are often those I associate with him: tomato and red onion salad, sweet peppers braised in tomato sauce and served with chunks of crusty bread, soft-boiled eggs with toast and, of course, pasta.

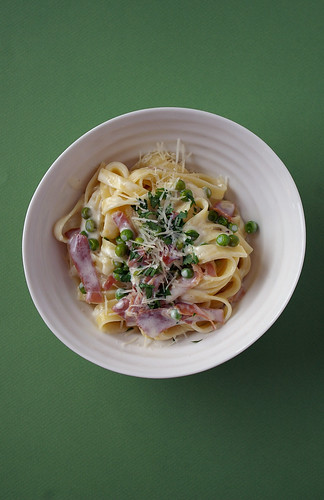
He makes a wicked carbonara, but the dish I have inextricably linked to him is Fettuccine con Prosciutto e Piselli – a much more romantic way of saying pasta with cream, peas and ham.

Piselli e Prosciutto

I’d sit at the dining room table and he would bring in heaping bowls of it, steaming hot and speckled with pink ham and green peas, dusted over with Parmesan and a sprig of parsley from the plant on his front deck.

There have been unusual and unexpected variations over the years, depending on what ingredients he had available. At one point, it was a truly bastardized version made from army green-coloured canned peas and canned flaked ham.

When I moved out on my own to go to university, my grandfather bought me a copy of The Umbergo Menghi cookbook containing the actual recipe which had spawned all his own versions. (And also the braised sweet peppers recipe.) Making it in the early ’90s on a student budget and without much experience finding specialty stores meant using more readily available types of ham since most grocery stores back then weren’t carrying prosciutto. Still, combining some version of ham with some cream and frozen peas and tossing it all with cooked pasta felt luxurious when competing against whatever food was being served in the cafeteria. (Lucky me to have had a boyfriend who lived off campus and, therefore, had a kitchen I could putter in occasionally.) Nowadays, prosciutto is easy to spot in the deli section, which means when I make this dish, it’s as Menghi intended.

Most of the time, though, I cook it from memory. Typically that also means adding more peas and prosciutto than called for. Partly because who doesn’t like all the good bits mixed with the pasta and also because that’s exactly how my grandfather does it.

A couple of years ago, while visiting my grandfather on the coast, we made some pesto together.

Then I let him sit at the dining room table sipping a glass of wine while I made Fettuccine con Prosciutto e Piselli for him, serving up a bowlful, sprinkled with Parmesan and a scattering of parsley from the plant on his front deck.

Piselli e Prosciutto

Fettuccine con Prosciutto e Piselli

While the measurements are quite specific, I won’t tell if a few extra peas and a slice or two of prosciutto find their way into the mix. I also like to let the cream reduce a little bit more than the recipe suggests. For reheating leftovers – if there are any – I find a touch more cream, or even milk in a pinch, helps. (ETA: if the mixture is too thick before serving — which happens when the cream reduces a bit too much — another splash of cream or some reserved pasta cooking water can thin it a bit.)

  • 1 lb (500 g) fettuccine
  • 2 tbsp (30 mL) butter
  • 2 tbsp (30 mL) dry white wine
  • 6 tbsp (90 mL) peas
  • 2 cups (500 mL) whipping cream
  • 2 oz (60 g) prosciutto, julienned
  • salt
  • pepper
  • 1 1/2 cups (375 mL) Parmesan cheese, divided
  • 2 tsp (10 mL) fresh parsley, finely chopped

Cook pasta in boiling, salted water until al dente, about 3 to 5 minutes for fresh pasta and 5 to 7 minutes for packaged fettuccine.

Sauté peas in butter and wine in a large skillet on medium heat for 2 to 3 minutes. Add cream to peas and cook on medium heat until cream begins to bubble. Add prosciutto to peas and cream and simmer on medium heat for 2 to 3 minutes. Season with salt and pepper, but use less salt than you would normally use. The prosciutto will give you some salt.

Add fettuccine to peas, cream and prosciutto. Gradually add 1 cup (250 mL) Parmesan cheese to fettuccine. Toss together and heat thoroughly until cheese has melted.

Put fettuccine into a warm serving bowl or on warm plates. Sprinkle with remaining 1/2 cup (125 mL) Parmesan and parsley and serve.

Serves 4 to 6.

Continue Reading

Roast Salmon and Potatoes with Mustard-Herb Butter

Some meals are made perfect simply by the company and the conversation.

There’s something about gathering together good friends and good food that makes a meal so much greater than the sum of its parts.

The first time I had this Roast Salmon and Potatoes with Mustard-Herb Butter was in Edmonton while visiting friends. For the last day of the weekend, we decided to have some fun in the kitchen and, after flipping through Martha Stewart’s Dinner at Home, we settled on it.

A trip to the farmers’ market netted us the fingerling potatoes and herbs, a stop at the fishmonger, the salmon, and the final stop was at the wine store for some rose. (I drink what I like and do not profess to know anything about pairings; but I did like this match.)

The recipe comes together so quickly that there was more time to chat and set the table for the early afternoon meal.

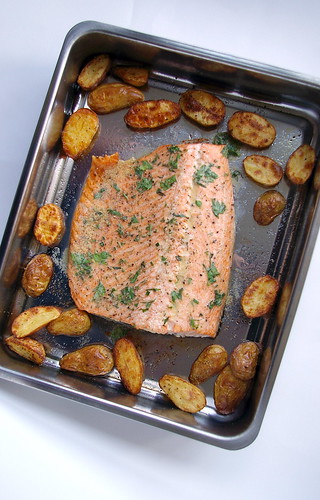
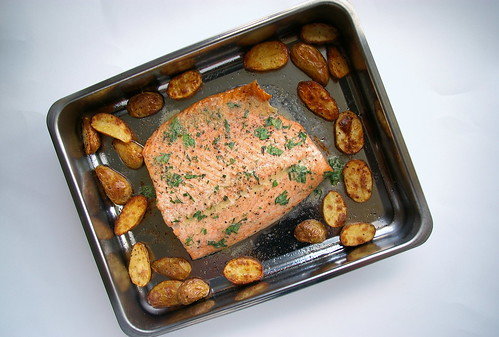
And when the coral pink salmon and lightly browned potatoes came out of the oven and we smothered on the green-flecked butter, we knew it was going to be good.

Roasted salmon and potatoes with mustard-herb butter

But it was the combination of the rich salmon, crisp-edged potatoes and fresh herbs, along with the crisp rose and the inevitable laughs and conversation that made the the meal so memorable. That said, when I made it again Monday night, alone in my apartment, and ate it with a now-requisite glass of rose, it was still incredibly tasty.

The Dijon is not overwhelming and the rich fish is brightened by the slight mustard tang and fresh herbs.

And I love the idea of a one-pan dish, particularly since I’m the one doing the dishes.

Maybe that’s another great reason why this should be enjoyed with friends.

Roasted salmon and potatoes with mustard-herb butter

Roast Salmon and Potatoes with Mustard-Herb Butter

I’ve had this with fingerling potatoes, which are great, but this time around I used the more readily available Yukon Golds.

  • 1 tbsp plus 2 tsp (25 mL) extra-virgin olive oil, plus more for the pan
  • 1 lb (500 g) fingerling potatoes, halved lengthwise
  • coarse salt and freshly ground pepper
  • 2 lb (1 kg) fillet salmon, skin on
  • Mustard-Herb butter (see below)
  • fresh herbs, plus more leaves for garnish

Preheat oven to 400°F (200°C). Brush the bottom of a roasting pan with oil. Place potatoes in pan; season with 3/4 tsp (3 mL) salt and a pinch of pepper, and drizzle with 1 tbsp (15 mL) oil. Toss to coat, and spread in a single layer.

Roast 30 minutes, turning with a spatula after potatoes begin to turn golden underneath (about 20 minutes). Season salmon on both sides with salt and pepper. Push potatoes to edges of pan, and place salmon, skin side down, in centre of pan. Brush with remaining 2 tsp (10 mL) oil, and roast until salmon barely flakes on the edges when pressed, 25 to 28 minutes for medium-rare (it will still be pink in the centre). Brush salmon and potatoes with herb butter while still hot.

Serve, garnished with herbs. Serves 4.

Mustard-Herb Butter

While the original recipe calls for chervil, thyme and parsley, I used dill, tarragon and parsley.

Use what you like or what you have on hand. I didn’t use all of the butter, so don’t feel you need to put it all on. Stewart suggests it goes well with roasted, grilled or broiled fish, chicken or pork.

I’m thinking of roasting the rest of my potatoes and tossing it with them.

  • 1/2 cup (125 mL) unsalted butter, room temperature
  • 1 tbsp (15 mL) Dijon mustard
  • 1/4 cup (50 mL) tightly packed small herb leaves, such as parsley, thyme and chervil, plus more for garnish
  • coarse salt and freshly ground pepper

Stir butter and mustard together in a small bowl until smooth. Stir in the herbs and season with 1/4 tsp (1 mL) salt and 1/8 tsp (0.5 mL) pepper, or to taste.

(The compound butter can be made ahead, rolled tightly in parchment paper to form a log, and then wrapped in plastic; store in the refrigerator up to 1 week, or in the freezer up to 1 month.)

This article first appeared in the Calgary Herald. For more recipes and meal ideas, check out CalgaryHerald.com/food.

Continue Reading

Meanwhile, over at my day job

Recipes galore!

(But, full disclosure before we get any further, you’ll have to click through to read more and get the recipes. Think of it kind of like keeping church and state separate.)

Over at my day job, I’m a few months into a new column that has me keeping busy, but very happy.

It involves tackling some of the hundreds of cookbooks that come across my desk by reviewing them, cooking from them and photographing the results. My favourite part is the column name: Cooking the Books. (OK, reality check, my favourite part is getting paid to cook from cookbooks and take photos and eat the results. My life is pretty charmed these days.)

So far, I’ve made some pretty easy stuff and had some adventures with others, like Martha Stewart’s sticky buns, which made so much dough that I had no idea what to do with it all.

But good lord, were these tasty.
Sticky Buns II

Sticky Buns

Read the whole story and get the recipe over here.

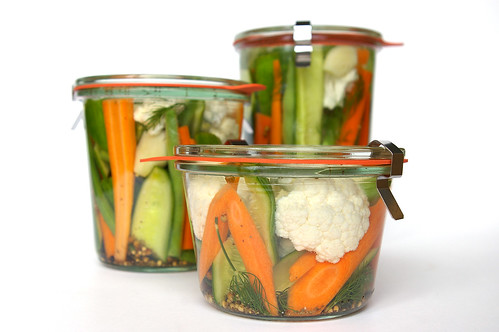
Something A LOT easier were these refrigerator pickles from Ted Allen’s cookbook. You know him from Queer Eye for the Straight Guy and Chopped.

I’ve come to realize that I really love a good pickle. (Especially these ones that I make with my Teriyaki Trout.)
Refrigerator Pickles

Feel like getting in a pickle? You can get the story and recipe by clicking through.

Love her or hate her, I have to admit that I appreciate Rachael Ray’s love for burgers.

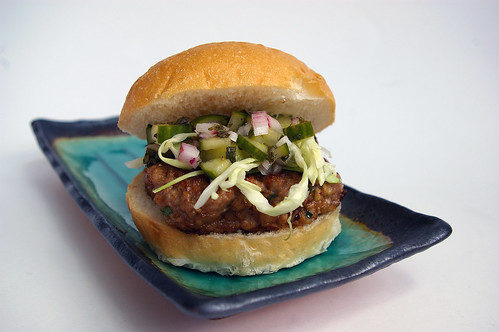
From her latest, The Book of Burger, I tried out a Satay Slider, topped with a cucumber-mint relish. It was good enough that I ignored the fact that I hate how she calls sandwiches, “sammies.”
Satay Slider

Check out my story and the recipe.

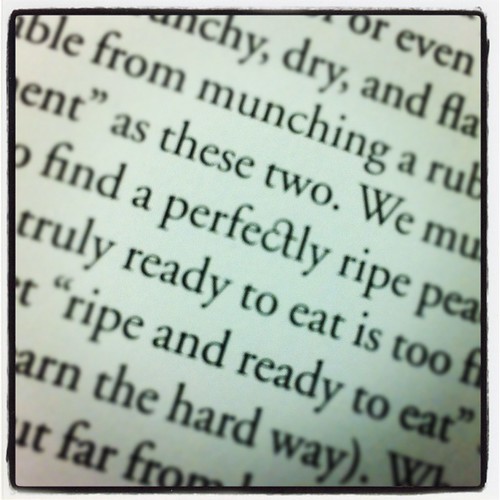
I completely fell in love with Nigel Slater’s Ripe: A Cook in the Orchard when it landed on my desk. It is just . . . gorgeous. The photographs, the writing, the fonts. Oh man, I love a beautiful font.

Beautiful Ts in this font

And the cover. Dreamy.

Nigel Slater's Ripe

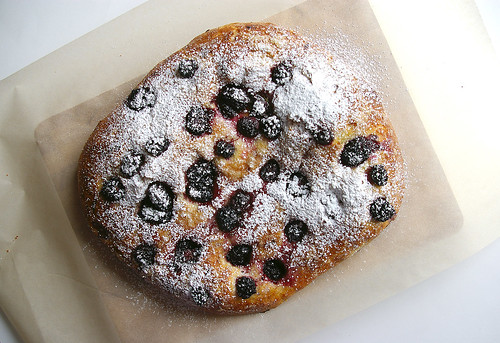
I made his Blackberry Focaccia and it was heavenly.

Blackberry Focaccia

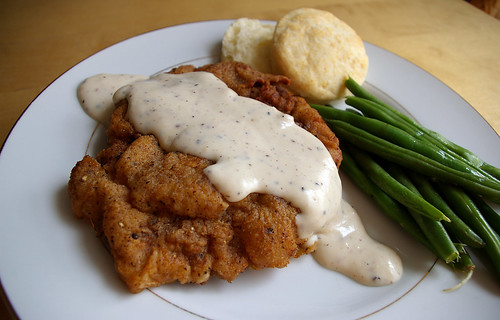
I have a not-so-secret love of southern food. Biscuits and gravy? Yes, please. Chicken and waffles? Order it up. And this, chicken-fried steak.
Chicken-fried Steak

Oh yes.

It didn’t look exactly like the photo in the cookbook, but I did not care.

Find the story and recipe here.

Probably one of the most hilarious ones so far (other than the dough fiasco of the sticky buns) was this one for Champagne-Strawberry Jell-O. Mostly because I was thinking to myself, “How on earth will the bubbles stay bubbly?” And then, I didn’t quite follow the instructions and they got over bubbled. Live and learn.
Strawberry Champagne Jell-O

Want to put some wiggle in your dessert? Head on over to check out the story.

Lastly, for the summer issue of HERS magazine, I blitzed up some Gazpacho. This is like salad in a soup bowl and as soon as it actually gets hot here, I’ll be whipping up another batch.
Gazpacho

As part of the Gazpacho package, you can watch me make it by clicking through. Warning, it will autoplay.

(And, if you really want to, you can check out videos of me making Lemon Bars and, *gasp*, a Souffle.)

I’ve got a few other posts in my back pocket, including some Szechuan Green Beans, Butterscotch Sauce and an easy, one-pan Roast Salmon. I promise to get them up in the next two weeks or so.

Promise.

Continue Reading

Vietnamese Chicken and Mint Salad

I love my cookbook collection. And I enjoy lazy weekend afternoons flipping through these books, searching for cooking projects and ideas.

Some I have flagged with Post-it Notes already – markers of past inspiration. Others I remember from past cooking adventures (successful and otherwise). And still more are like bumping into old friends.

It’s an instant reconnection to recipes I have loved, forgotten about and am instantly stumped as to why I don’t make them more often.

This salad falls into that last category.
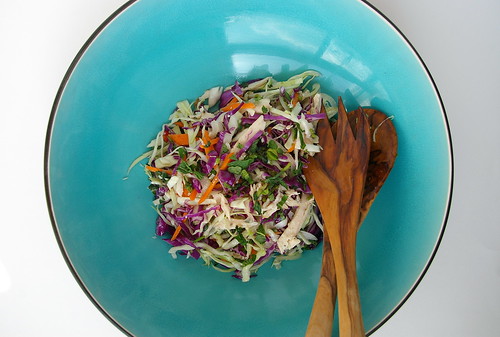
Vietnamese Chicken and Mint Salad II

The fact that it’s a salad speaks volumes.

But there’s something about this combination of cooling cabbage and mint with heat from the chili, sour of lime and salty fish sauce – with slices of chicken to make it all a bit more robust – that has me making this each time I rediscover it in Nigella Lawson’s Nigella Bites.

Bonus: It’s easy to put together.

Double bonus: Cabbage is really, really cheap.

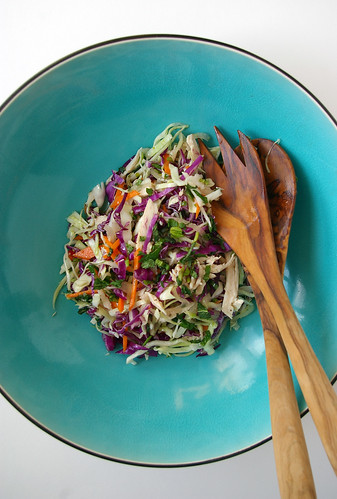
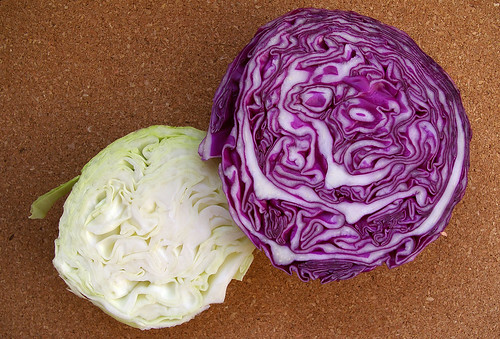
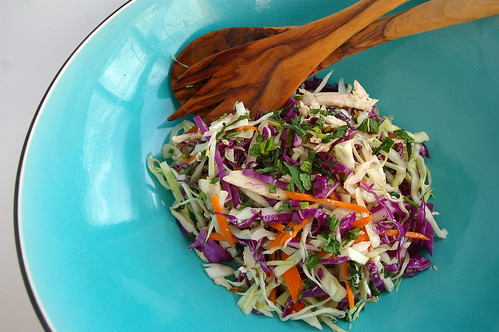
Although Lawson calls for white cabbage, I like to mix purple and green because the colours – against the bright orange carrot, the wisps of dark green mint and flecks of red chili – make it a dish that’s also tasty to the eyes.

Vietnamese Chicken and Mint Salad IV

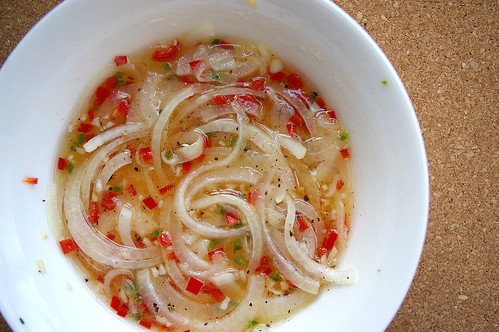
The onions get soft and lose some of their bite by marinating in the dressing – a trick of Lawson’s that she also uses in her very fine recipe for Greek salad. They mellow as they sit in the lime juice and rice wine vinegar, taking on some of the slight sweetness of the bit of sugar as well.

As they sit, it’s quick to pull the rest of the salad together.

Some quick slicing of the cabbage, grating or julienning the carrot, as well as chopping up the chicken and you just about have enough time to tidy up before the onions are ready.

It’s a great way to use up leftover cooked chicken, though I have been known to cook some just to make this salad.

And, with all due respect to Lawson who says this will serve two to four people, I have been known to eat the entire thing. (Though, arguably, there are worse things to fill up on.)

I look forward to bumping into this recipe again.

Maybe I should flag it, so it won’t take quite as long.

Cabbage

Vietnamese Chicken and Mint Salad Dressing

Vietnamese Chicken and Mint Salad I

Vietnamese Chicken and Mint Salad III

Vietnamese Chicken and Mint Salad

Fish sauce is quite salty, so resist the urge to add any salt before the salad has been tossed well. The dressing doesn’t always look like it will coat all that cabbage and chicken, but it will.

  • 1 chili, preferably a hot Thai one, seeded and minced
  • 1 fat garlic clove, peeled and minced
  • 1 tbsp (15 mL) sugar
  • 1 1/2 tsp (7 mL) rice vinegar
  • 1 1/2 tbsp (22 mL) lime juice
  • 1 1/2 tbsp (22 mL) fish sauce
  • 1 1/2 tbsp (22 mL) vegetable oil
  • 1/2 medium onion, finely sliced black pepper
  • 7 oz (200 g) cabbage, shredded
  • 1 medium carrot, shredded, julienned or grated
  • 7 oz (200 g) cooked chicken breast, shredded or cut into fine strips
  • 1 bunch mint, about 1 oz/30 g

In a bowl, combine the chili, garlic, sugar, vinegar, lime juice, fish sauce, oil, onion and black pepper to taste.

Put to one side for half an hour. Then, in a big plate or bowl, mix the cabbage, carrot, chicken and mint. Pour over the onion-soused, chili-flecked dressing and toss very well – slowly and patiently – so that everything is combined and covered thinly. Taste to see if you need salt or pepper.

Serve on a flat plate with maybe a bit more mint chopped on top.

Serves 2 to 4.

Continue Reading

Spring Green Risotto

Last Saturday, I had drinks on a patio. Sunglasses were a necessity, as was a tall glass of something cold, and good conversation with friends.

All along 17th Avenue, patios were cracked open for the first warm weekend day in March. Tables were jammed with people laughing, drinking and turning their faces skyward to bask in the warm sun.

It’s as sure a sign of the changing seasons as the fact we had to put our clocks forward that night. (Though one is very much preferable to the other.)

It’s nearly spring.

But we’re not quite there yet.

After all, there are still patches of snow and, it being Calgary, we can be assured of one last blast of winter before spring truly arrives.

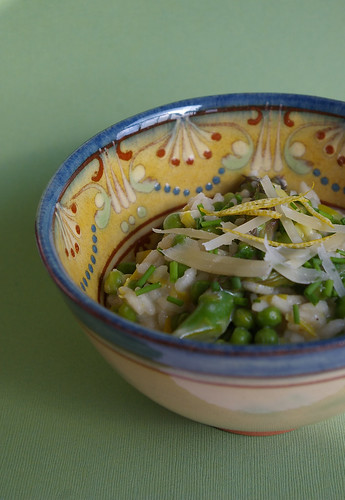
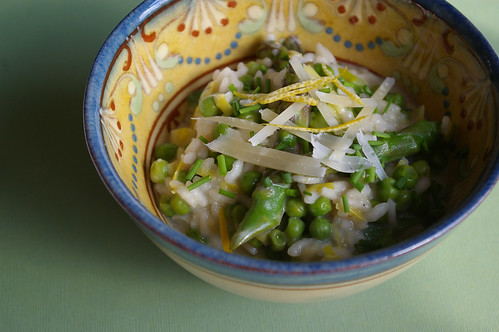
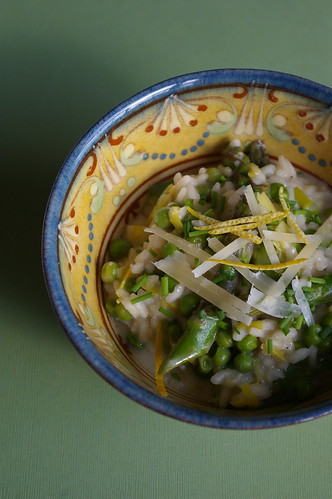
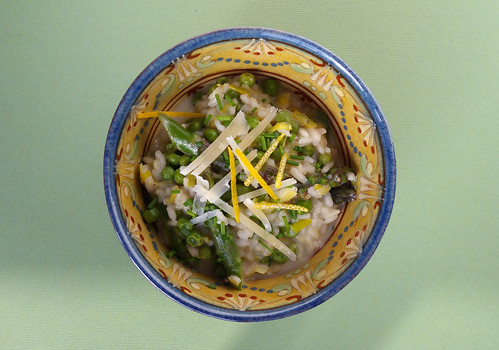
As I wait for those first green buds to appear, I find myself drawn to eating something that can at least remind me of spring. This Spring Green Risotto from the Barefoot Contessa is a good fit.

Spring Green Risotto I

The bright green of asparagus and peas, the bright flavour of lemon zest and juice are the tastes and sights of spring. The mascarpone (or, in my case, cream cheese as mascarpone was not to be found) brings a rich creaminess that’s a good last comfort-food hurrah as winter fades away.

Risotto is a bit fussier than other dishes because of the continual stirring, but I think it’s worth the effort. In my experience, you don’t have to be chained to the pot, constantly moving the grains of rice about. You just need to be nearby for frequent stirring.

(I’m sure someone is mentally scolding me right now for that statement, but if the thought of cooking a risotto has put you off because you believe it will be a major arm workout from stirring for 30 minutes non-stop, this is me suggesting you reconsider. No, you can’t walk away; yes, you can do light kitchen tidying at the same time. Or that’s what I did.)

The patience and frequent stirring is worth it. Especially with this recipe.

Spring Green Risotto III

Those little green peas popped with flavour, while the lemon juice made it bright and the cream cheese (see the recipe notes) added a smooth, creamy flavour without too much richness.

It’s enough to tide me over until spring finally does break through. Or at least until the next day warm enough for patio drinks.

Leeks and Arborio Rice

Spring Green Risotto II

Spring Green Risotto IV

Spring Green Risotto V

Spring Green Risotto

Adapted from Barefoot Contessa Back to Basics. I omitted the 1 cup (250 mL) of chopped fennel, since I don’t like the flavour. Add it in with the leeks if you’re more of a fan. If you can’t find mascarpone (which I couldn’t – and didn’t want to go searching for in another store), spreadable cream cheese is a decent substitute. It’s less authentic, but was creamy and tangy enough. Using light cream cheese will also cut some of the calories.

  • 1 1/2 tbsp (22 mL) olive oil
  • 1 1/2 tbsp (22 mL) unsalted butter
  • 3 cups (750 mL) chopped leeks, white and light green parts only (about 2 leeks)
  • 1 1/2 cups (375 mL) arborio rice
  • 2/3 cup (150 mL) dry white wine
  • 4-5 cups (1 to 1.25 L) simmering chicken stock
  • 1 lb (500 g) asparagus, cut diagonally in 1 1/2-inch (4 cm) lengths
  • 10 oz (300 g) frozen peas, defrosted
  • 1 tbsp (15 mL) freshly grated lemon zest (about 2 lemons)
  • kosher salt and freshly ground black pepper
  • 2 tbsp (25 mL) freshly squeezed lemon juice
  • 1/3 cup (75 mL) mascarpone cheese
  • 1/2 cup (125 mL) freshly grated Parmesan cheese, plus extra for serving
  • 3 tbsp (50 mL) minced fresh chives, plus extra for serving

Heat the olive oil and butter in a medium saucepan over medium heat. Add the leeks and saute for 5 to 7 minutes, until tender.

Add the rice and stir for a minute to coat with the leeks, oil and butter. Add the white wine and simmer over low heat, stirring often, until most of the wine is absorbed. Add the chicken stock, a soup ladleful or two at a time, stirring often.

Most of the stock should be absorbed before adding another ladleful. This should take between 25 and 30 minutes.

Meanwhile, blanch the asparagus in boiling salted water for a few minutes, until just tender. Drain and cool in ice water.

When the risotto has been cooking for about 20 minutes, drain the asparagus and add it to the risotto with the peas, lemon zest, 2 teaspoons (10 mL) salt and 1 teaspoon (5 mL) of pepper. Continue cooking and adding stock, stirring almost constantly, until the rice is tender but still firm.

In a small bowl, whisk together the lemon juice and mascarpone.

When the risotto is done, remove from the heat and stir in the mascarpone mixture, plus the Parmesan and chives. Taste and adjust seasonings as necessary.

Sprinkle with chives and more Parmesan to serve.

Serves 4 for dinner, 6 as an appetizer.

This article first appeared in the Calgary Herald. For recipe ideas and stories about food, check out the Herald’s food page.

Continue Reading

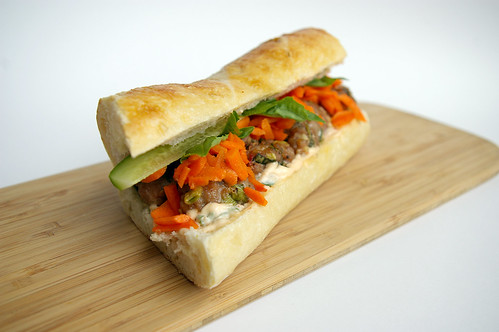
Pork Meatball Banh Mi

I had never even heard of a Vietnamese sub before I moved to Calgary.

But my introduction to banh mi came soon after I arrived, when I took that first bite of a sate beef version, topped with pickled carrots and various sauces, all nestled into a crusty baguette.

Pork Meatball Banh Mi

It was a Saturday afternoon and I was working a reporting shift at the Herald. We were working on a big story and there wasn’t much time to think about lunch, let alone leave the building to get it.

And that’s when a colleague said he was going on a Vietnamese sub run; did I want one?

Yes, yes, I did, though I had no idea what I was agreeing to.

The first few bites had me thankful for the perks of living in a new city.

Now I have my own favourite place to get subs from and I do so often enough that the girls behind the counter recognize me.

It’s that fabulous combination of spicy and sour, salty and sweet – the traditional flavours of Vietnamese cuisine, and others in Southeast Asia – that make these so appealing to me.

The chili heat of the beef, the sweet-sour of the pickled carrots, the slathering of rich mayonnaise, the crusty, chewy bread. It’s all the right flavours and textures coming together.

In the years since, I’ve eaten my fair share (and perhaps more), but never thought about making them at home until I stumbled upon a Bon Appetit recipe for a pork meatball version. It had all the things I was looking for with the benefit of using meatballs instead of slices of beef sate.

But, of course, I made a few adjustments.

I made my meatballs smaller, then jammed a lot of them in to make the sandwich really filling. Feel free to make them larger, though you’ll need to adjust the cooking time slightly. (Ground pork is cooked through when it reaches an internal temperature of 160F or 75C.)

The original recipe also calls for pan frying them first in some sesame oil before finishing them off in the oven. I was looking for something a little less fussy; cooking them in the oven completely left them slightly less golden, but gave me a chance to tidy up at the same time, which is a good thing in my books.

No Vietnamese sub I’ve seen has daikon on it, so I skipped that in favour of more pickled carrots.

The result: Flavourful meatballs, a spicy mayonnaise and a tangy tangle of carrots, topped with basil leaves, all wedged onto a chewy baguette I picked up from a bakery.

Heavenly. And I didn’t even have to work a Saturday shift to get it.

Pork Meatball Banh Mi

Pork Meatball Banh Mi

Pork Meatball Banh Mi

Adapted from Bon Appetit. Don’t be daunted by the list of ingredients and number of steps. Both the mayonnaise and the meatballs can be made a day ahead and kept in the fridge.

Hot Chili Mayo

  • 2/3 cup (150 mL) mayonnaise
  • 2 green onions, finely chopped
  • 1 tbsp (15 mL) hot chili sauce (like sriracha)

Stir all ingredients together, cover and chill until assembling sandwiches.

Meatballs

  • 1 lb (500 g) ground pork
  • 1/4 cup (50 mL) finely chopped fresh basil
  • 4 garlic cloves, minced
  • 3 green onions, finely chopped
  • 1 tbsp (15 mL) fish sauce
  • 1 tbsp (15 mL) hot chili sauce (like sriracha)
  • 1 tbsp (15 mL) sugar
  • 2 tsp (10 mL) corn starch
  • 1 tsp (5 mL) freshly ground black pepper
  • 1 tsp (5 mL) coarse kosher salt

Gently mix together all the ingredients in a large bowl. With moistened hands, roll scant tablespoonfuls of the mixture, forming them into 1-inch (2.5-cm) balls. Place on a rimmed baking sheet. (If doing the day before, line the baking sheet with plastic wrap, then cover the meatballs with more plastic and refrigerate.)

Preheat the oven to 400°F (200°C). Bake the meatballs until golden and cooked through, about 15 to 20 minutes.

Sandwiches

  • 1/4 cup (50 mL) unseasoned rice vinegar
  • 1/4 cup (50 mL) sugar
  • 1 tsp (5 mL) coarse kosher salt
  • 3 cups (750 mL) coarsely grated carrots
  • 4 10-inch (25-cm) baguettes (or 4 10-inch pieces of baguette, cut from 2 baguettes)
  • 16 basil leaves or cilantro sprigs
  • 1 cucumber (or 2 short ones), cut horizontally into 4 wedges thinly sliced jalapeno (optional)

In a bowl, mix together vinegar, sugar and salt. Add grated carrots and toss to combine. Set aside and let stand at room temperature for 1 hour, tossing occasionally.

To assemble sandwiches, slice the baguettes horizontally in half, and pull out some of the bread to make room for the filling. Spread hot chili mayo over each bread shell. Arrange 1/4 of the cooked meatballs, drained carrots, basil or cilantro, cucumber and jalapeno (if using) inside the bread.

Serves 4.

This article first appeared in the Calgary Herald. For more recipes and meal ideas, check out the Herald’s food page.

Continue Reading

Teriyaki Trout and Quick Japanese Pickles

When I’m nostalgic for Japan, there is one recipe I pull out.

Though, oddly, I didn’t find it in Japan nor use it when I was there.

Instead, this recipe for Teriyaki Trout was one I inherited from my family, who has been cooking it for years.

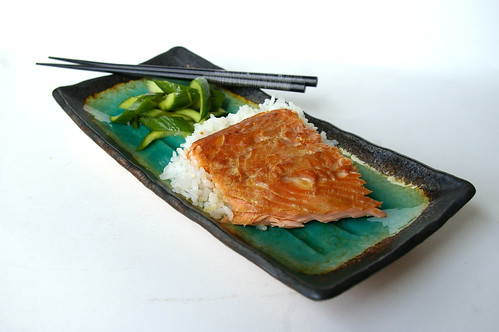
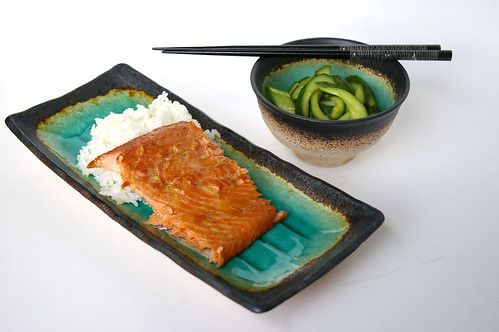
Teriyaki trout with quick pickles IV

Although only really a nod to a traditional teriyaki, it is my fallback recipe when I’m longing for the Land of the Rising Sun. There, I often made an authentic teriyaki salmon that I would serve with steamed rice and a selection of tsukemono (pickles).

But this tastes just as good and the ingredients are readily available, unlike the two types of soy and mirin that usually went into my marinade when I was overseas. (These can, of course, be found at Asian grocery stores, but this recipe is built on ingredients most people have readily available in their cupboards: soy, sugar and sherry.)

This is not the thick gloppy sauce you find on supermarket shelves. This is a thin marinade that infuses the fish with that salty-sweet teriyaki flavour.

A few cloves of smashed garlic perfume the marinade without overpowering the flavours. (And, bonus, they are easy to fish out when it’s time for the trout to go in the oven.)

In the beginning, my parents made this with salmon, as the original recipe calls for, but when the price of that got too dear, they started using steelhead trout. Now that’s what I grab as well.

Teriyaki trout with quick pickles II

My version is a photocopy of the original, with no notation of where it came from. Even the amount of fish called for is absent from the recipe.

But I’ve found the marinade is enough for about two pounds of fish. I prefer to do whole sides rather than individual fillets or steaks, though please use what you want.

Since it’s usually only me dining, I often make the full batch of marinade and divide it between two pieces of fish, throwing one into the freezer for dinner at a later date. I’ll pull it out in the morning and let it sit in the fridge. As it thaws, it continues to infuse the teriyaki flavour into the fish and by the time I get home from work, it’s ready to cook, which, some nights, is exactly the kind of meal I like to have around.

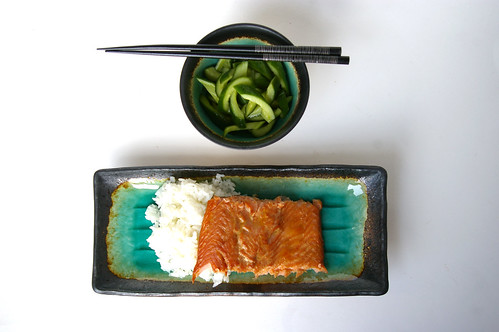
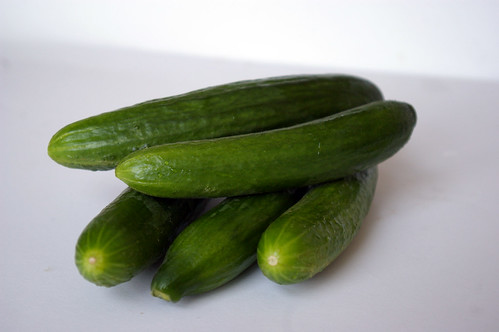
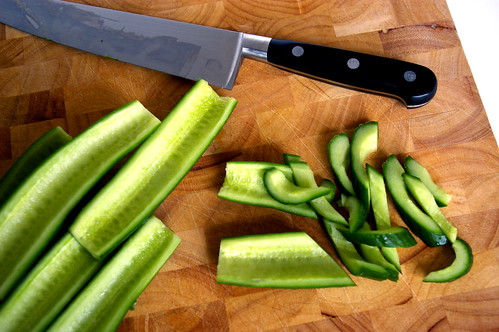
When I’m a little homesick for the rice paddies and stunted hills of the small town in Japan where I lived, I make this dish, serving it with rice and some steamed green vegetables. Sometimes, when I’m really feeling nostalgic, I also make quick pickles -thin slices of de-seeded cucumbers left to sit in a bath of rice vinegar, sugar and salt.

The tangy flavour is a nice balance to the rich fish.

Cucumbers

Sliced Cucumbers

Teriyaki trout with quick pickles

Teriyaki Trout

  • 2 pounds (1 kg) steelhead trout, side or steaks
  • 1 cup (250 mL) soy sauce
  • 1/4 cup (50 mL) sherry (drinking, not cooking)
  • 2 tablespoons (25 mL) sugar
  • 3 cloves garlic, crushed
  • 2 tablespoons (25 mL) grated ginger or ginger paste

Combine the soy, sherry, sugar, garlic and ginger in a bag or flat dish. Add the trout. Let marinate for at least 30 minutes or up to overnight.

Preheat oven to 450°F (230°C). Place fish in a casserole dish (if using steaks, grease the dish slightly so they can be easily removed) and bake until fish is cooked and flakes easily, about 12 to 20 minutes depending on the thickness of the fish.

Quick Japanese Pickles

The amount of salt and sugar can be easily adjusted for taste. I use Maldon flaked sea salt, which has a milder flavour. Sea salt can be easily substituted, but start with just 1 tsp (5 mL) and add more only if needed. The rice vinegar should be unseasoned.

  • 1 English cucumber (or 3-4 small cucumbers)
  • 1/2 cup (125 mL) rice vinegar
  • 1 tablespoon (15 mL) sugar
  • 1½ teaspoons (7 mL) flaked sea salt
  • 2 tablespoons (25 mL) water

Slice cucumbers in half and use a small spoon to scrape out seeds. Slice on a diagonal into ½-cm half-moons. Stir together vinegar, sugar, salt and water and mix until salt and sugar have dissolved. Add cucumber slices, tossing them with brine. Let rest in the fridge for at least an hour, tossing occasionally.

This originally ran in the Calgary Herald. For more recipes and food stories, head to the Calgary Herald’s Food page.

Continue Reading

Butter, onion, tomato sauce

My general approach to tomato sauce is simple: I wing it.

After years of watching my parents throw basic ingredients into a pot and letting it simmer for an hour or two to create a hearty and rich tomato sauce, and even more years of making it from scratch on my own – owing to a perhaps unnatural love of pasta – I don’t give too much thought to cooking up a decent red sauce.

I’m a big believer in the long-simmered sauce with a multitude of ingredients that all come together over a slow heat, melding and marrying into something that is so much greater as a whole than the sum of its parts.

But I can also turn around a very basic sauce in 15 minutes.

At the very least, my spaghetti sauce usually has garlic and diced onions, sauted in olive oil with a generous pinch of salt, canned plum tomatoes I roughly (and gently, using a butter knife) chop in my hand over the pot, fresh basil if I can get my hands on it, a little sprinkle of sugar if the whole mix is too acidic, and a Parmesan heel, which I stash in my freezer for just such occasions.

So, it takes an unusual tomato sauce recipe to catch my eye.

Like this one. It has three ingredients. (OK, four, if you count salt, which, in general, I don’t, since almost all recipes call for salt.)

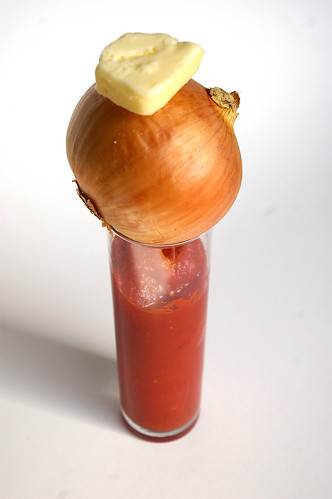
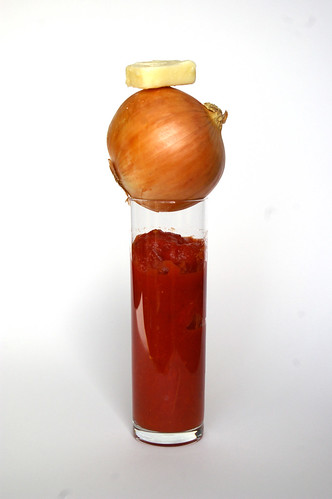
Canned tomatoes. A yellow onion. Butter.

That’s it.

Butter, onion, tomato II

Marcella Hazan’s recipe for tomato sauce with butter and onion has made appearances over the years on various food blogs I follow.

Each time I saw it, I thought I really should remember to give that a try.

And then I’d forget about it until someone else posted their love of this simple yet rich dish.

This seemed like a great weeknight dinner recipe since there is minimal fuss. No chopping or dicing, sweating or sauteing.

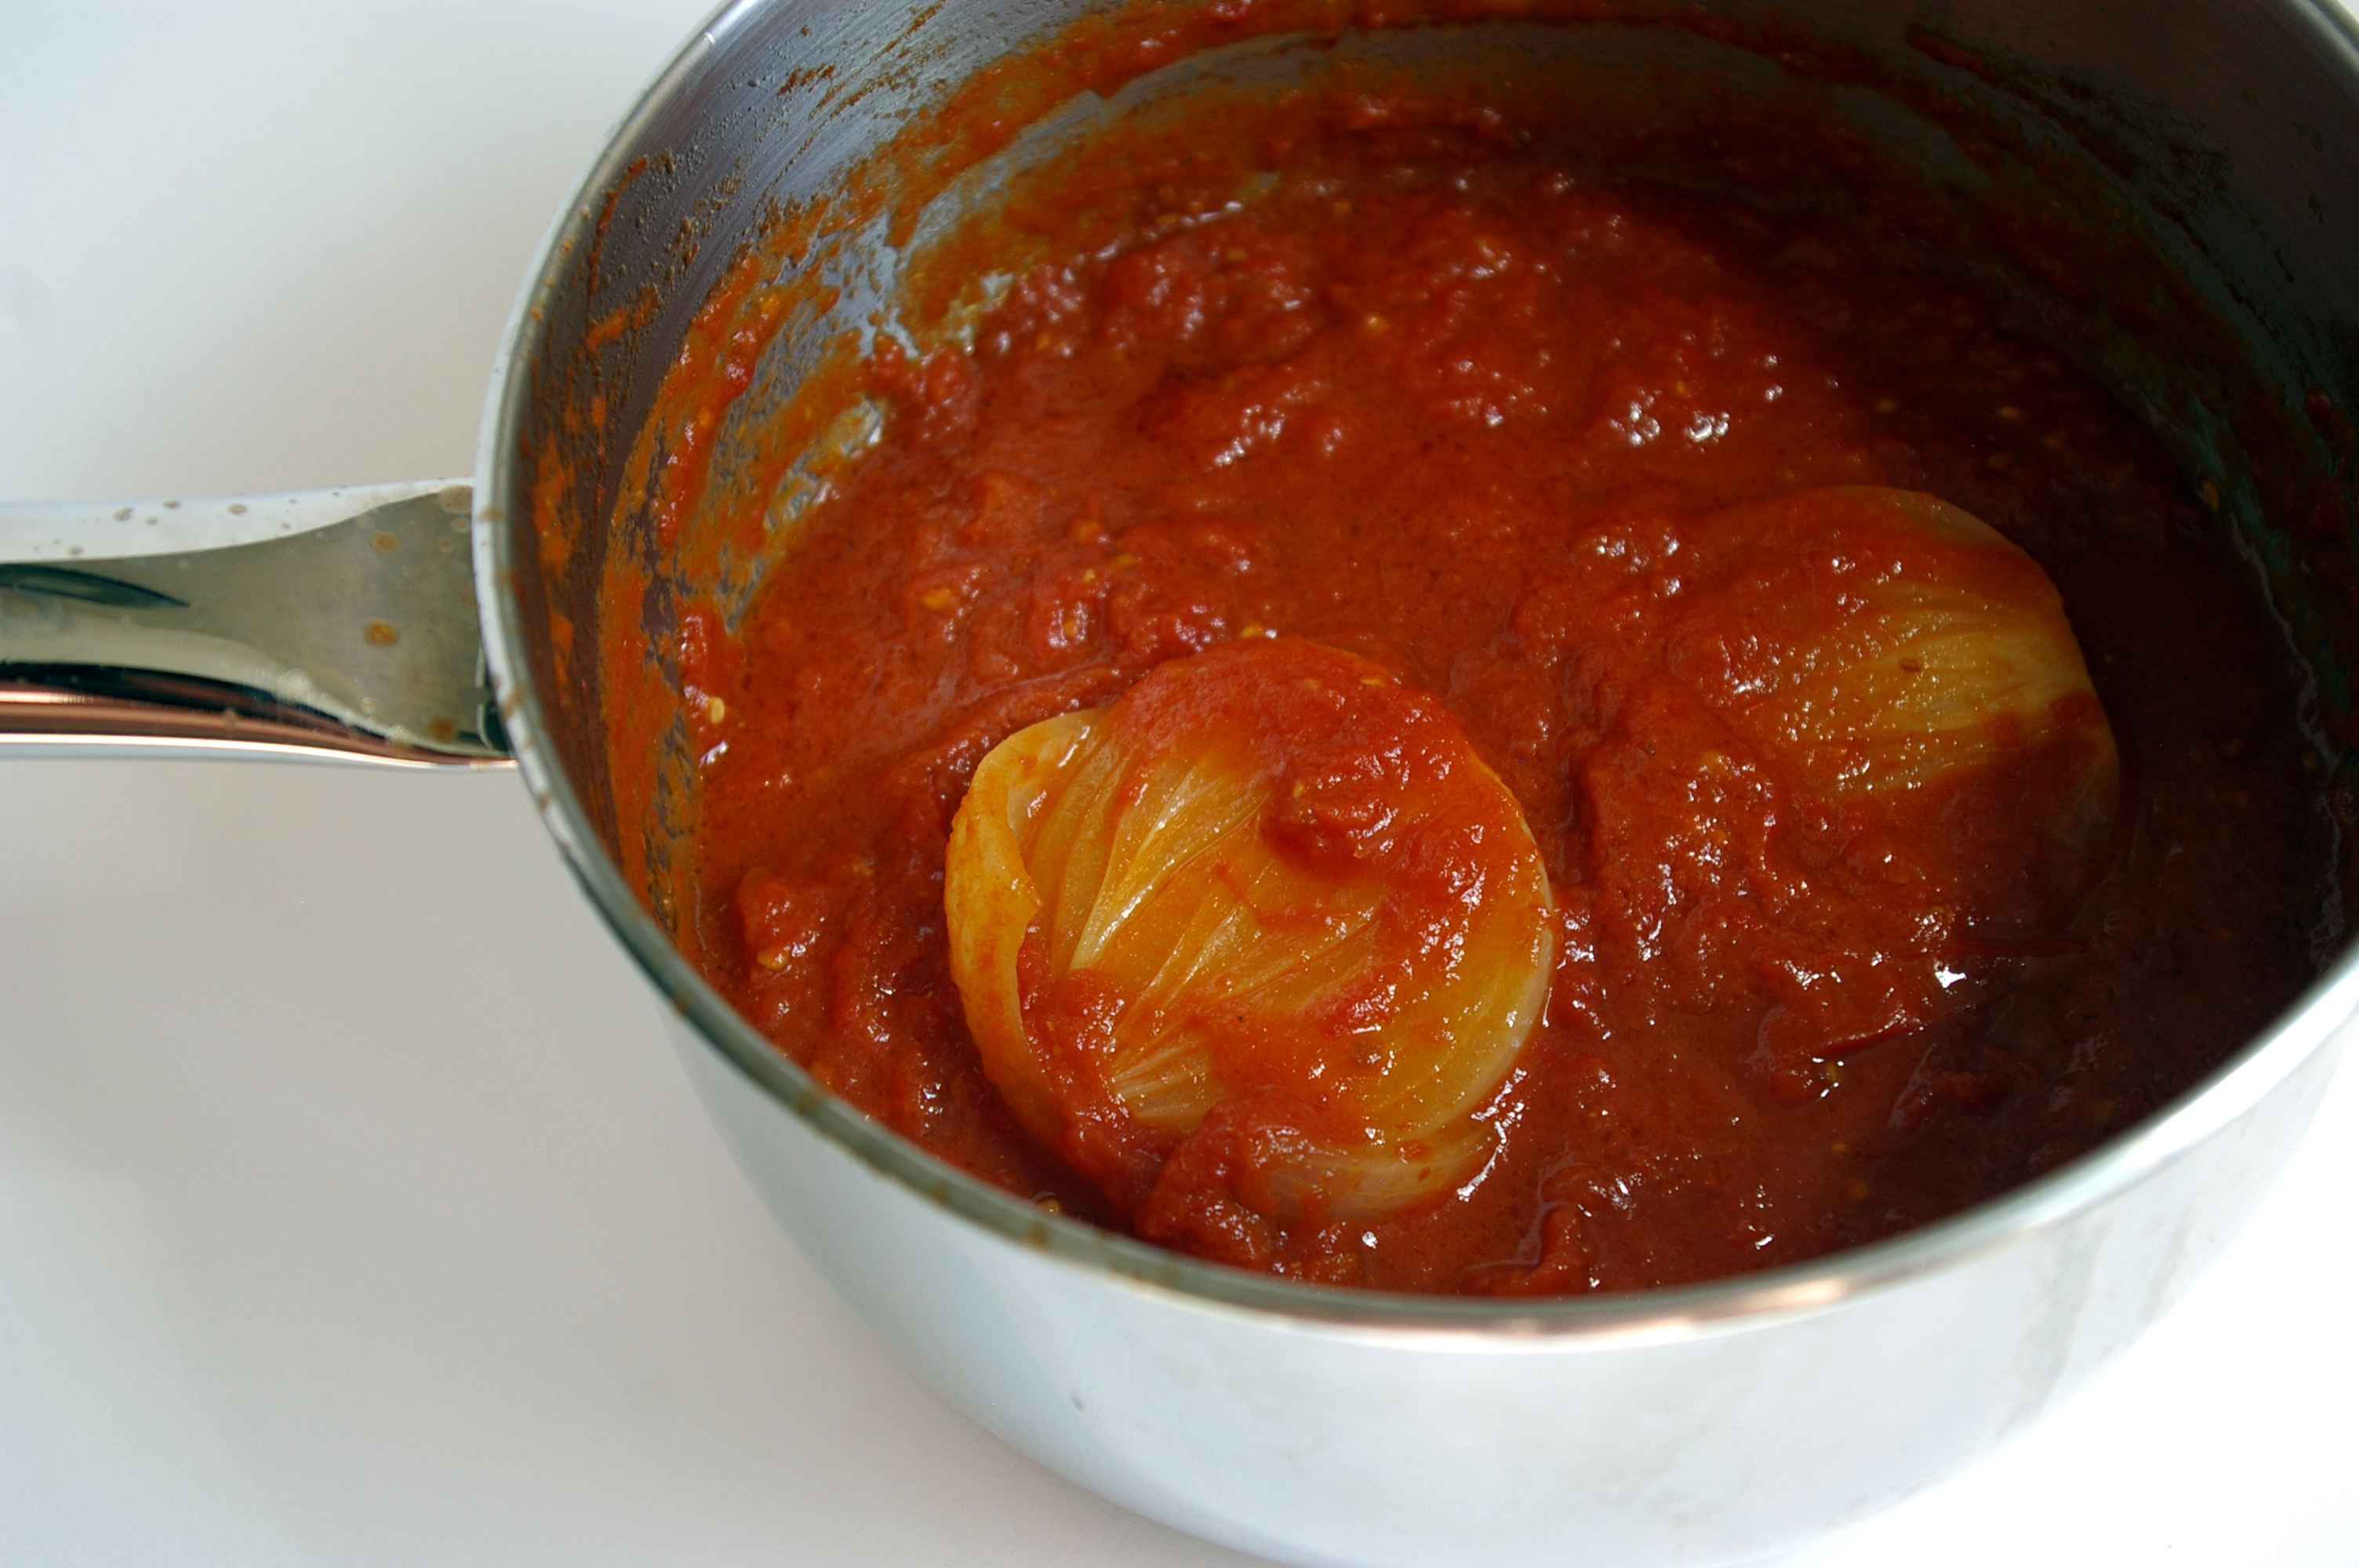
You dump it all into the pot, let it come to a simmer, reduce the heat, and go about things. In this case, a little laundry, some tidying and things that allowed for a quick wander past the pot to give the tomatoes a stir and squish against the side with a wooden spoon.

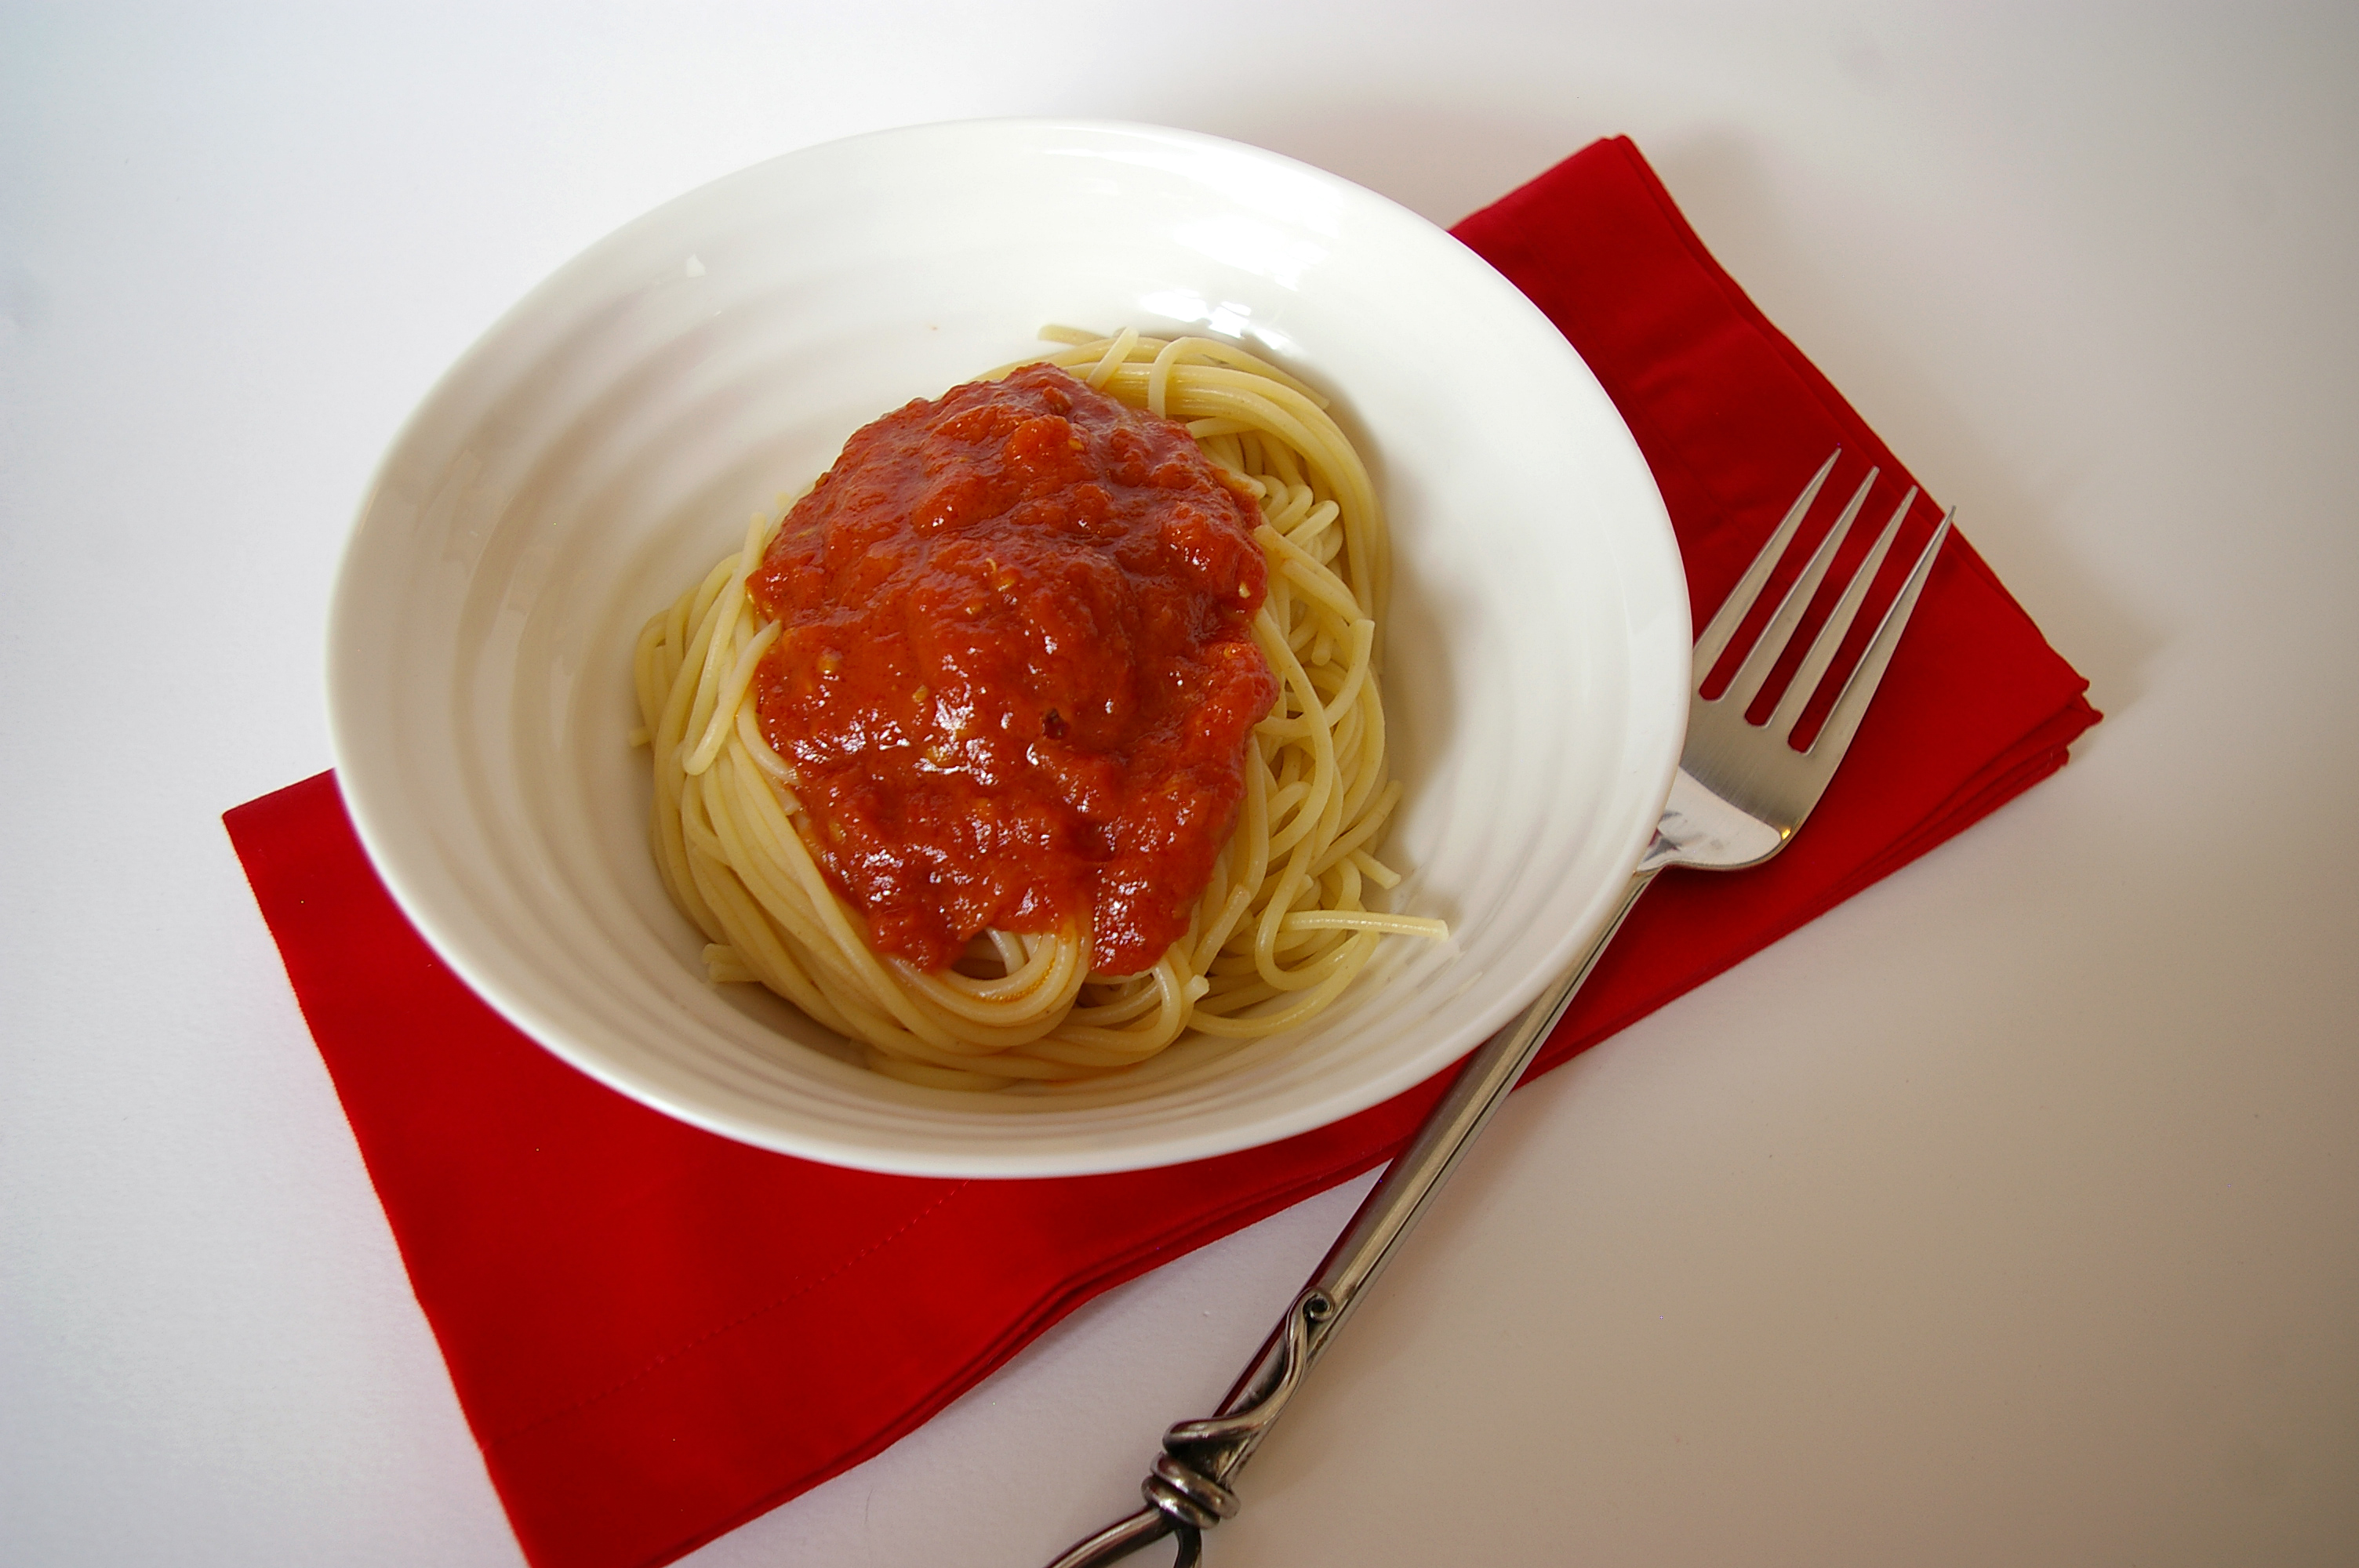
At the end of 45 minutes, all it needed was a small pinch of salt and to be dolloped over a nest of noodles.

Some have suggested sprinkling on Parmesan, but I opted not to. The sauce is rich and tasty without adornment, which is sort of the beauty of it.

The butter adds an almost unidentifiable creaminess and mellows out the acidity of the tomatoes.

And, luckily, such an easy recipe is simple enough that in the future I can pretty much wing it.

Butter, onion, tomato

Cooked sauce

Spaghetti and Sauce I

Spaghetti and sauce II

Marcella Hazan’s Tomato Sauce

This was adapted from Hazan’s The Essentials of Classic Italian Cooking by way of several food blogs. Since there are only three ingredients, I do recommend using San Marzano or San Marzano-style canned tomatoes, which are packed in tomato puree instead of water and have, therefore, a greater tomato flavour. You can find Marzano-style tomatoes in most grocery stores these days.

  • 1 28-oz (796-mL) can of whole tomatoes
  • 5 tbsp (75 mL) butter
  • 1 medium yellow onion, peeled and halved
  • 1 lb (500 g) spaghetti
  • salt to taste, if needed

Put the tomatoes, butter and onion in a pot over medium heat. Once the butter is melted, stir to combine, then reduce the heat to low or medium low – depending on how hot your element is; you’re looking for a slow but steady simmer – and cook for about 45 minutes. Stir occasionally, squishing the tomatoes against the side of the pot.

Cook pasta according to package instructions.

Remove sauce from heat, discard the onion and taste. Add salt if needed. Serve over cooked pasta.

This article first appeared in the Calgary Herald. For more recipes and meal ideas, head to the Calgary Herald’s food page.

Continue Reading

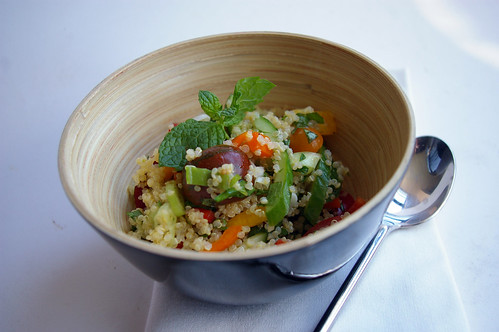
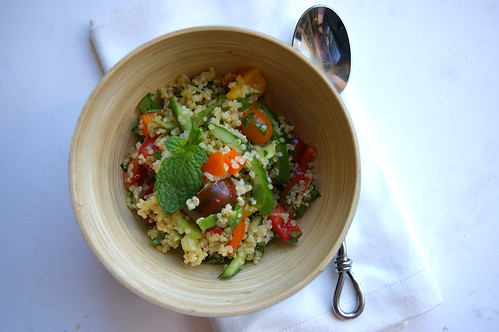
Quinoa Tabouleh

Some people impulse buy gum.

I impulse buy five-pound bags of quinoa.

Oh sure, I thought it was a lovely idea in that moment, romanced by all the things I could do with this versatile, healthy, nutritious ingredient chock full of protein and fibre.

Especially after I saw on the back of the hefty bag that I can cook quinoa in my rice cooker. (Cooking rice and rice-related ingredients? Not my forte. I blame it on a year living in Japan where my apartment came equipped with a rice cooker.)

And then I got the family-sized bag home, jammed it into my cupboard and kind of forgot about it as it occupied valuable real estate in my kitchen. I finally unearthed it many weeks later, concocting a biryani-style salad with currants, chickpeas and a curry-lime dressing.

And then I forgot about it again.

Since then, there has been a bit more experimenting with quinoa.

But there is also something to be said about going back to basics — honest-to-goodness classic dishes that remain in the cooking repertoire for a reason.

Things like tabouli.

Or tabbouli. Or even tabouleh.

Or however you want to spell it.

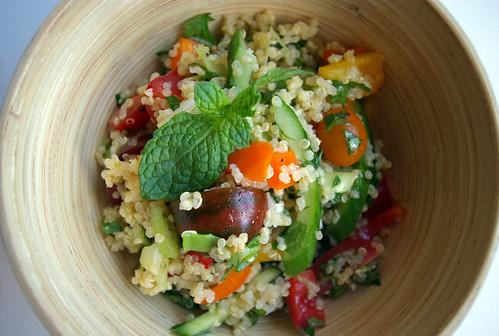
Quinoa Tabouleh III

In theory, this is a salad I should like. Mint and parsley, lemon juice, tomato and cucumber. All those herbs with that zip of acidic lemon, the crunch of cucumber and umami taste of tomato? I like all those things. A lot.

What I don’t like is bulgur, the grain traditionally used in tabbouleh salads.

I made a huge bowl of it once using a recipe that called for bulgur and then had to eat it for two days to get through it, hating it the entire time.

I didn’t like the taste or the chew and forcing myself to finish the thing, which had taken a bit of time and effort to prepare, did not help the situation.

So, as I was sorting through my cupboards the other day and stumbled across the still half-full bag of impulse quinoa, I was struck by a thought: why not make tabbouleh with a grain-like ingredient I actually enjoy?

And I pulled out my rice cooker and did exactly that.

Quinoa Tabouleh II

(As a result of cooking it this way, I can offer you no suggestions or guidelines for cooking quinoa, other than tell you what I was also told: give it a bit of a rinse or a soak – say about 10 minutes or so — before cooking, which should alleviate any of the bitterness you might taste otherwise.)

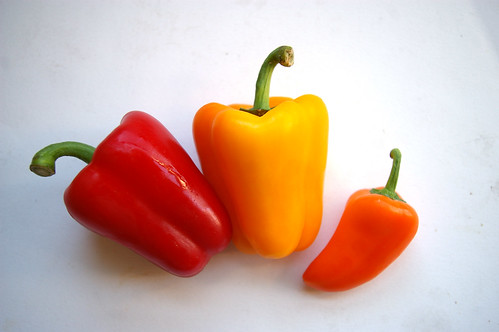
With the exception of using quinoa and the addition of a red (or orange or yellow) paper for a bit of additional colour and crunch, this recipe holds quite true to traditional tabbouleh.

It’s the abundance of herbs, slight onion bite from the green onions and generous amount of lemon juice that gives it such a refreshing and light taste.

It’s the substitution of quinoa for bulgur that makes it no hardship to finish it off pretty quickly.

And, thankfully, I still have plenty more quinoa to make this again.

A trio of peppers

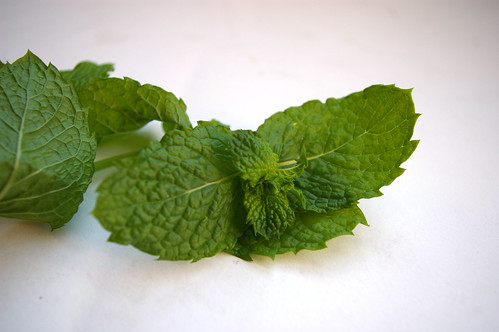
Mint

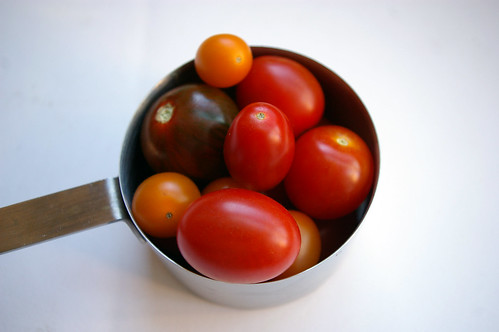
A Cup of Tomatoes

Quinoa Tabouleh I

Quinoa Tabbouleh

  • 4 cups (1 L) cooked quinoa
  • 1 red, orange or yellow pepper, diced
  • 1 cup (250 mL) cherry or grape tomatoes, halved or quartered
  • 2 to 4 green onions, sliced thinly
  • 2 mini cucumbers, halved, seeded and sliced
  • ¼ cup (50 mL) mint, chopped
  • ¼ cup (50 mL) parsley, chopped
  • 1/3 cup (75 mL) lemon juice (from about 2 lemons)
  • 1 tsp (5 mL) salt
  • freshly ground pepper
  • 1/3 cup (75 mL) extra virgin olive oil

Cook quinoa according to directions. Let cool and place in large bowl. Add red pepper, tomatoes, green onions, cucumbers, mint and parsley. In separate bowl, mix lemon juice, salt and pepper. Whisk to dissolve salt. While whisking, slowly drizzle in olive oil to emulsify. Pour about ¾ of the dressing over the salad and toss. Add the remaining dressing if the salad seems dry.

Serves 4.

This piece originally ran in the Calgary Herald. For more great recipes and stories, head to the Herald’s food page at CalgaryHerald.com/life.

Continue Reading

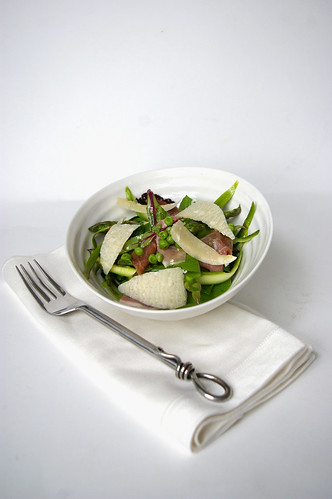
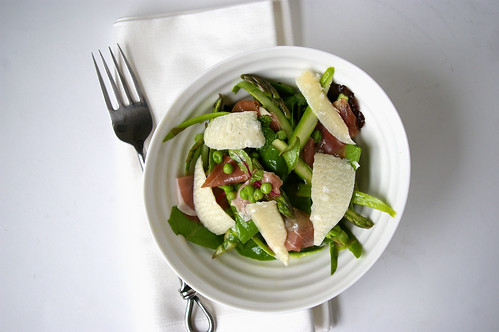
Asparagus and Pea Salad with Mint

You ever notice how one recipe can beget another?

Last summer when I was making my shaved asparagus pizza, I found myself snacking on the strands of asparagus that had been tossed with olive oil, salt and pepper. (I’m completely unable to resist “testing” ingredients as I go along.)

It made me wonder why so few recipes I have stumbled across call for raw asparagus, which, when lightly dressed, is lovely.

Now that the stalks are appearing again on grocery shelves, it got me thinking. And then I stumbled across a salad recipe, which combined asparagus shavings with some other great loves of mine: Parmesan, prosciutto, mint and lemon.

Asparagus and Pea Salad with Mint

This salad is kind of like six degrees of separation.

Mint goes well with peas, which are lovely with asparagus, a natural match to prosciutto.

Well, really, what doesn’t prosciutto go well with?

And a lemon-based dressing adds some refreshing tartness, while a little bit of honey brings out the natural sweetness of the peas.

Now, I am the first one to up the amounts of salad goodies — more Parmesan, more prosciutto, please and thank you.

But in this case, I’m going to, unexpectedly, advise restraint. Messing with the fine balance between salt and sweet, meat and cheese, mint and vegetables can upset the equilibrium.

Too much cheese and the salt overpowers the delicate flavours of asparagus and mint.

Too much prosciutto overwhelms the texture of the salad.

When the proportions are right, this salad is perfection.

Right after finishing the photo shoot, I inhaled a bowlful.

I loved the spring green flavour of the thinly shaved asparagus, the sweet peas and bright mint with the slight tang of the mustard and lemon dressing.

The prosciutto didn’t hurt either.

All the greens contrasted with the pink of cured ham and cream of Parmesan is quite pretty and makes this a great dish for entertaining.

Serve it out on the deck with some crusty bread and a nice bottle of wine.

Asparagus and Pea Salad with Mint II

Asparagus and Pea Salad with Mint

This salad is from Epicurious by way of Serious Eats.

If fresh peas are in season, feel free to use them instead of frozen peas. Frozen peas are perfectly tasty, though. Just defrost in a sieve with some hot water. To get nice Parmesan shavings, let the cheese sit out on the counter for 10 or 15 minutes and then use a vegetable peeler.

  • 1½ cups (375 mL) peas
  • 1 lb (500 g) asparagus
  • 6 cups (1.5 L) salad greens
  • 2 tbsp (25 mL) chopped mint
  • 1/4 cup (50 mL) shaved Parmesan
  • 8 slices prosciutto, cut in strips
  • 2 tbsp (25 mL) lemon juice
  • 2 tsp (10 mL) Dijon mustard
  • 1 tsp (5 mL) honey
  • salt and pepper to taste
  • 1/2 cup (125 mL) olive oil

Whisk together lemon juice, Dijon mustard, honey and salt and pepper.

Drizzle in the oil slowly while still whisking to emulsify the dressing.

Test the dressing and adjust seasonings as necessary.

Place salad greens in a large bowl, add chopped mint and peas.

Using the woody end as a handle, hold the asparagus against a cutting board and use a vegetable peeler to make long strips. (These will vary in thickness, which is fine.)

After shaving, you will be left holding the rough end, which can be discarded.

Repeat with all the asparagus and then add the shavings to the salad.

Add sliced prosciutto. Toss with dressing (start with only a portion of the dressing and add more as necessary; the salad may not need all of it).

Top with shaved Parmesan.

Serves 4.

This first appeared in the Calgary Herald. For more recipes and instructional videos, check out the Herald’s Food page.

Continue Reading

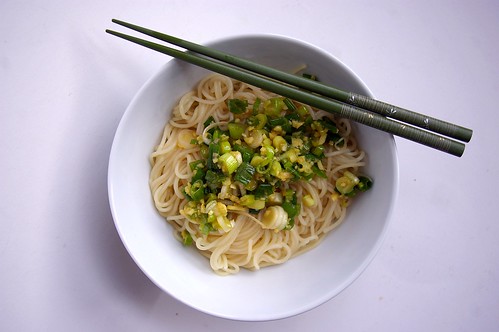
Momofuku Ginger Scallion Noodles

Last year I was lucky enough to travel to New York for a week.
Central Park

Fire Escapes

Brooklyn Bridge

And my friend, whom I was visiting, was open to all the restaurant suggestions I had. And there were plenty of them. But at the top of the list was Momofuku.

One of the first meals we enjoyed was at Momofuku Noodle Bar. And, towards the end, we had another amazing meal at . . . Momofuku Noodle Bar. Because even though I had wanted to go to the Noodle Bar and Ko during the trip, somewhere along the way things got confused and when I thought we were at Ko, we were at the Noodle Bar. Whoops.

We could have later gone to Ko when we realized the error, but I didn’t feel I could visit Momofuku and not have the ramen, which is one of those dishes that instantly transports me back to Japan (when it’s done right) and yearn for Japan (when it’s not).

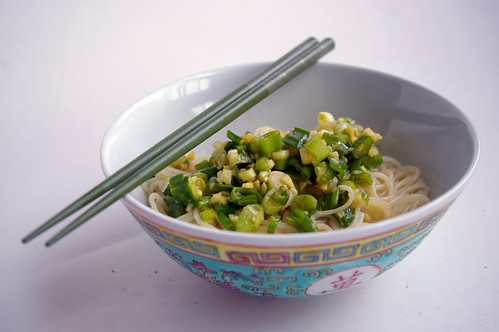
That first night at the Noodle Bar we ordered the pork buns (which I still daydream about sometimes; they were just unbelievable) and the Ginger Scallion Noodles. These, these were so good that I was almost tempted to order them the next time we went back. Chewy ramen noodles, doused in a mix of thinly sliced green onions with a pungent hit of ginger, a slight hint of salty soy. I don’t think we left a single slice of scallion in that bowl.

Ginger-Scallion Noodles

We ate a lot of amazing meals that week (and had some incredible experiences too: a Broadway show, an afternoon at the Met) but I found myself coming back to Calgary and thinking about the noodles. When I took the job as the Food Writer for the Calgary Herald, I was quietly ecstatic to discover I would have access to a fairly good library of cookbooks (for research purposes, of course), which included the Momofuku cookbook by David Chang and Peter Meehan. I may have pulled it off the shelf to flip through in my first week on the job (for research purposes, of course). And then I kind of put the idea of making the noodles on the backburner.

Until this week.

When, suddenly, all I wanted to do was make those noodles.

So I did.

The recipe is ridiculously simple and it’s really only mincing the ginger and slicing the onions that takes any amount of effort (and, in the end, not all that much).

But the cookbook also outlines how the restaurant serves up the dish that I had fallen in love with a year ago:

Cook six ounces of ramen noodles, drain and toss with 6 tablespoons of the ginger scallion sauce, then top with bamboo shoots (another recipe from the book), quick-pickled cucumbers (another recipe from the book), pan-roasted cauliflower (pretty much just like it sounds), more sliced scallions and a sheet of toasted nori.

Yup, that sounds delicious. But I just didn’t have the patience to do any of that.

Maybe next time.

(I wrote more about my trip over here, if you want to check out some of what I ate — hint: Crack pie! — and some hot shoes I bought.)

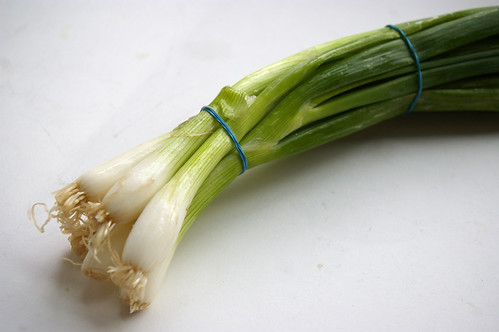
Scallions

Ginger

Ginger and Scallions

Ginger-Scallion Noodles II

Ginger Scallion Sauce

  • 2 1/2 cups thinly sliced scallions (greens and whites, from 1 to 2 large bunches)
  • 1/2 cup finely minced peeled fresh ginger
  • 1/4 cup grapeseed or other neutral oil
  • 1 1/2 teaspoons usukuchi (light soy sauce)
  • 3/4 teaspoon sherry vinegar
  • 3/4 teaspoon kosher salt (or more to taste)

Mix together the scallions, ginger, oil, soy , vinegar and salt in a bowl. Taste and check for salt, adding more if needed. Add several spoonfuls to cooked ramen noodles.

(You can find ramen noodles in most grocery stores these days, typically in the produce section by the fresh herbs and wonton wrappers.)

Continue Reading

White Pizzas with Arugula

That’s slush outside right now. Melting snow and ice are forming rivulets that wend their way along curbs, searching out drains, forming murky puddles. Patches of grass left exposed are at last revealed, mats of brown carpeting the landscape.

It’s that shoulder season between winter’s end and the birth of spring when everything is dirt-covered, mottled from months of being hidden under cold and damp and snow.

So, until those pops of green start to stand out in relief against the landscape, until those buds burst out along tree branches and from the once-frozen ground, the next best thing, as far as I’m concerned, is to eat like spring is already here.

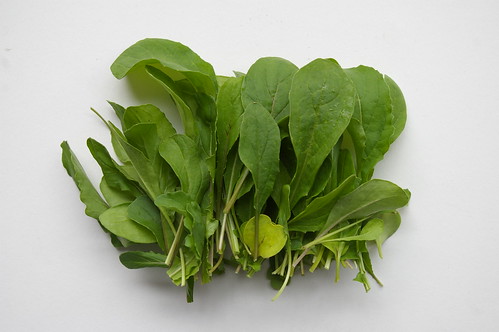
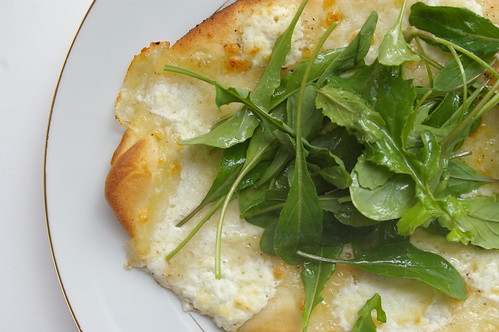
It’s time to shed the stews and soups of winter comfort and embrace herbs, baby lettuces, tender chard, pencil-thin stalks of asparagus and peppery arugula.

Well, in my kitchen at least.

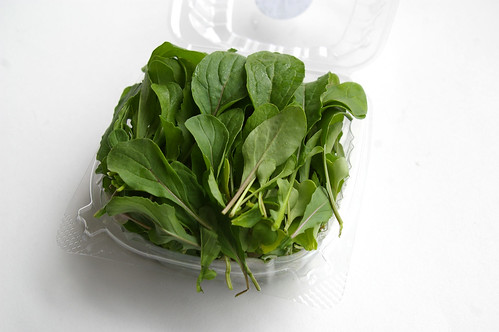
Arugula

There was something about this recipe for White Pizzas with Arugula that caught my eye at one point as I flipped through the Barefoot Contessa’s Back to Basics cookbook ages ago.

I like a good traditional pizza. And some of you may remember a version I did last year topped with shaved asparagus.

But this one appealed because I like the idea of garlic and cheese matched with an arugula salad that had been tossed in a lemon vinaigrette. It was like a salad and main dish combined to make something even better.

Arugula, which is also known as rocket, has a nice pepper bite to it, owed, apparently, to being a relative to radishes and watercress.

The lemon would add a nice bright kick, but the melted cheeses – Fontina, mozzarella and goat cheese – would lay a decadent foundation on the pizzas.

Oh, and garlic-infused olive oil? Well, that would take the whole thing over the edge.

Garlic and oil

The only thing that could have stood in my way was attempting to knead dough (a task that remains my culinary nemesis for now), but Ina Garten’s recipe calls for pretty much the entire thing to be done in a stand mixer.

Sold.

The pizzas are simple to put together and came out of the oven crisp, the cheese just starting to change to a soft golden colour. Topped with the arugula, they’re a food metaphor for the changing season: bright green emerging from white.

And the taste was a marriage between the comfort food of winter and the emerging flavours of spring: the peppery arugula and acidic zing of lemon vinaigrette played well against the rich pizza with its creamy cheeses and garlicky oil.

Don’t be intimidated by the rather lengthy recipe; it’s all pretty straightforward. And the result is worth it. Because even if this isn’t the last we see of winter -and, judging from the last several years here, I suspect it’s not – I can at least taste spring.

Dough ball

White pizzas

Arugula II

White pizza with arugula

White Pizzas with Arugula

This recipe comes from The Barefoot Contessa Back to Basics. To make all at six pizzas at once, you will need three parchment-lined sheet pans. But this recipe is easily halved if you want. She also calls for a few sprigs of thyme to steep in the olive oil with the garlic, but I didn’t have any on hand and I don’t think I missed out by not adding it.

I’ve found arugula at Lina’s Italian Market, at the farmer’s market and sometimes in clamshell-type packages at major grocery stores.

Pizza:

  • 1¼ cups (300 mL) warm water, 100?F to 110?F (38?C to 43?C)
  • 4½ tsp (22 mL) dry yeast
  • 1 tbsp (15 mL) honey
  • olive oil
  • 4 cups (1 L) all-purpose flour, plus extra for kneading
  • salt
  • 4 garlic cloves, sliced
  • 1/4 tsp (1 mL) crushed red pepper flakes
  • freshly ground pepper
  • 3 cups (750 mL) grated Italian Fontina
  • 1½ cups (475 mL) grated fresh mozzarella
  • 11 oz (300 g) creamy goat cheese

Salad:

  • 1/2 cup (125 mL) olive oil
  • 1/4 cup (50 mL) freshly squeezed lemon juice
  • 8 oz (250 g) baby arugula

For the dough, combine the water, yeast, honey and 3 tbsp (50 mL) olive oil in the bowl of an electric mixer fitted with a dough hook. When the yeast is dissolved, add 3 cups (750 mL) flour, then 2 tsp (10 mL) salt, and mix on medium-low speed. While mixing, add up to 1 more cup (250 mL) flour, or just enough to make a soft dough.

Knead the dough for about 10 minutes until smooth, sprinkling it with the flour as necessary to keep it from sticking to the bowl. When the dough is ready, turn it out onto a floured board and knead by hand a dozen times. It should be smooth and elastic. Place the dough in a well-oiled bowl and turn it to cover it lightly with oil.

Cover the bowl with a kitchen towel and allow the dough to rise at room temperature for 30 minutes.

Meanwhile, make the garlic oil. Place ½ cup (125 mL) oil, the garlic and red pepper flakes in a small saucepan and bring to a simmer over low heat. Cook for 10 minutes, making sure the garlic doesn’t burn.

Preheat the oven to 500F (260C). Dump the dough onto a board and divide into 6 equal pieces. Place them on a sheet pan lined with parchment paper and cover them with a damp towel. Allow the dough to rest for 10 minutes. Use immediately, or refrigerate for up to 4 hours.

Press and stretch each ball into an 8-inch (20cm) circle and place 2 circles on each parchment-lined sheet pan. (If you’ve chilled the dough, take it out of the refrigerator approximately 30 minutes ahead to let it come to room temperature.) Brush the pizzas with the garlic oil, and sprinkle each one liberally with salt and pepper.

Sprinkle the pizzas evenly with Fontina, mozzarella and goat cheese. Drizzle each pizza with 1 tbsp (15 mL) more of the garlic oil and bake for 10 to 15 minutes, until the crusts are crisp and the cheeses begin to brown.

Meanwhile, for the vinaigrette, whisk together ½ cup (125 mL) oil, the lemon juice, 1 tsp (5 mL) salt, and ½ tsp (2 mL) pepper. When the pizzas are done, place the arugula in a large bowl and toss with just enough lemon vinaigrette to moisten. Place a large bunch of arugula on each pizza and serve immediately.

Makes 6 pizzas.

This originally ran in the Calgary Herald. For more recipes, check out the Herald’s online food section.
Bonus pizza: Homemade pesto topped with tomatoes.

Bonus pizza: Pesto with tomatoes

Bonus pizza: Pesto with tomatoes

Continue Reading

Cheddar Corn Chowder

It’s cold. Ergo, I want soup.

Cheddar Corn Chowder - close crop

For one thing, it’s warm and soothing. And for a second, it doesn’t need to take much time to put together, which means I’m back under a blanket eating it without much fuss.

Soup for me often means throwing in random vegetables from the crisper, potatoes, onions and garlic, a Parmesan heel (the leftover rind, which I save in a tightly sealed bag in the freezer) if I have it, fresh herbs if there are any to be found and a few handfuls of a small pasta or rice. It’s about creativity and frugality. Emphasis equally on both.

Other times, I want a bowl of soup that requires no real thought on my part, but delivers with soothing flavour.

I want comfort in a bowl.

Without much hassle.

The Barefoot Contessa’s Cheddar Corn Chowder delivers.

Cheddar Corn Chowder - blue napkin

“It tastes like Thanksgiving,” a friend once said when she tried some.

It’s an apt description. The corn and potatoes, combined in the unexpectedly rich, chicken-y broth is a nod to the family holiday.

The turmeric adds a nice golden colour, while the addition of flour cooked in a decadent combination of bacon fat, olive oil and butter, thickens the soup to an almost gravy-like consistency. The sweetness of the corn works nicely in the savoury broth with the soft potatoes, and a few handfuls of white Cheddar.

Cheddar Corn Chowder - ingredients

And yet for a mid-week meal, it’s a good choice. The chowder is relatively quick to make — especially since you can easily substitute frozen corn for fresh, as I have done here, and the potatoes require no peeling. Paired with a salad, it can be a full, well-rounded meal.

Frankly, on its own, it’s quite filling.

And fairly fast.

From start to finish, this took less than 45 minutes. That could be partly because I prepped as I went along. Tossing the bacon into the pot, I started chopping onions. Onions starting to saute, and I moved on to dicing the potatoes. (I use baby potatoes, which need little more attention than cutting into quarters, so even less work this way.) Once the potatoes were cooking in the soup, I got on with grating the cheddar. And so on.

(That even includes the inevitable 30-second break I have to take after chopping onions to deal with my intensely watering eyes. Aside: I seem to have lost any immunity to raw onions. Sad but true.)

There are enough gaps between adding ingredients and letting them cook that there’s even a bit of time to tidy up before the soup is served.

That means when it’s ready, there’s less guilt about pouring a bowl and getting back under the blanket for some soup sipping.

And with temperatures slipping back down to the negative double digits this week, that’s exactly what I’m looking for.

Cheddar Corn Chowder - red napkin

Cheddar Corn Chowder

I cut this recipe from The Barefoot Contessa Cookbook (Clarkson Potter, 1999) in half because the original serves 10 to 12 people. Even halved it makes a lot of soup, which is great for leftovers.

Need more? Doubling it is easy. In the summer and fall, substitute frozen corn with fresh (from about 5 ears) by cutting off the kernels and cooking them for 3 minutes in boiling salted water.

  • 1/4 lb (125 g) bacon, chopped
  • 2 tbsp (25 mL) olive oil
  • 3 cups (750 mL) chopped yellow onions (about 2 large)
  • 2 tbsp (25 mL) unsalted butter
  • 1/4 cup (50 mL) allpurpose flour
  • 1 tsp (5 mL) salt
  • 1/2 tsp (2 mL) freshly ground black pepper
  • 1/4 tsp (1 mL) ground turmeric
  • 6 cups (1.5 L) chicken stock
  • 3 cups (750 mL) medium-diced white boiling or baby potatoes, unpeeled
  • 5 cups (1.25 L) corn kernels
  • 1 cup (250 mL) half-and-half
  • 1/4 lb (125 g) sharp white cheddar cheese, grated

In a large stockpot on medium-high heat, cook the bacon and olive oil until the bacon is crisp, about 5 minutes. Remove the bacon with a slotted spoon and reserve.

Reduce the heat to medium, add the onions and butter to the fat, and cook for 10 minutes, until the onions are translucent.

Stir in the flour, salt, pepper, and turmeric and cook for 3 minutes. Add the chicken stock and potatoes, bring to a boil and simmer uncovered for 15 minutes, until the potatoes are tender.

Add the corn to the soup, then add the half-and-half and cheddar. Cook for 5 more minutes, until the cheese is melted. Season to taste with salt and pepper.

Serve hot with a garnish of bacon.

Serves 5 to 6.

This originally ran in the Calgary Herald. For more recipes, check out the Herald’s online food section.

Bonus: I took a shot of the set up I used to make this photo work. Since it was earlier in the day than usual (I typically shoot in the afternoon), I needed to get the dish up even closer to the window. So, that’s why there’s a stool on the table. That’s a laptop sleeve propping up the edge of the white cardboard. Classy, right? Sometimes I have to also hold up the edge of the cardboard to ensure it’s a plain white background. This gets particularly tricky when dealing with things like soup. It’s really time to invest in a tripod.

This is how I shoot photos

Continue Reading

Warm Lentil Salad

I can barely close my staples cupboard.

Between the lentils, couscous, pasta, and at least five types of rice, the shelves are jammed with an overabundance of ingredients. I’ve squeezed half-eaten packages of rice noodles over near-empty bags of Arborio and sushi rice. I have two types of couscous (regular and Israeli) and two of quinoa (regular and black). And there are at least three bags of lentils: one I bought on impulse because I liked the look of the green disks, mottled like tiny pebbles, a freezer bag of several cups my parents gave me during a visit because I expressed interest in eating more lentils and a third bag I inherited from a friend when she was moving away and was purging her cupboards of all foodstuffs.

The trouble is, I had no idea what to do with them.

Lentil Swirl

One of my New Year’s resolutions — which, I will admit, I’m not really fastidious about, though I like the idea of setting goals, even if I don’t always accomplish them. It’s like how I love to make lists and then check off tasks when I get them done – was to start attacking the staples cupboard in an effort to reduce the volume of ingredients in there.
Lentils, I decided, were to be the first challenge.

I must have read somewhere about warm lentil salads because that was the first thing that come to mind when I decided to tackle this. I have no recollection of when or where I would have stumbled across such a recipe. But I had such a firm idea in my mind of what I was looking for: cooked lentils studded with slightly sautéed carrot, celery and onion and then tossed in a French-style vinaigrette and served up still warm.

Warm Lentil Salad II

Most of the ones I found while searching called for goat cheese, bacon and sausage. I’m certainly not against the idea of adding any of those to a salad. (In fact, I would count those three things among my top favourite foods; certainly they are things that would improve a lot of salads.) But this was about using up what I already have in my kitchen. And the few ingredients in the recipe I finally found on Molly Wizenberg’s blog, Orangette, were all things I had on hand.

It comes together quickly, especially if you time it so you are chopping and then cooking the vegetables while the lentils quietly simmer away with a bay leaf. Drain them and toss into the pan of onions, carrots and celery, then slosh over the vinaigrette and stir. Sprinkle with parsley, some crunchy flaked sea salt and it’s ready.

After patiently photographing the dish in the last few moments of daylight, I took that first bite.

The earthy lentils combined with the slightly softened vegetables and the mustard-spiked dressing, along with the fresh green taste of parsley was perfect. The crunch of sea salt and the small sprinkle of vinegar for added tang put the dish over the top.

I polished off the entire bowl. And then scooped myself another one.

The simplicity of all the flavours came through, but together created a homey dish, perfect for a winter afternoon.
After eating this, I could see getting through the rest of the lentils won’t be a problem.

(Edited to add that I made this again less than a week later. That is how good it is. Go forth, make it. It’s easy and so delicious!)

Lentils

Mirepoix

Mirepoix with thyme

Warm Lentil Salad I

Warm Lentil Salad III

French-Style Warm Lentil Salad
This recipe comes frrom Molly Wizenberg of Orangette, which she had adapted from Epicurious.com. She says it is even better the second day, though I would add the caveat, “if you have any left.”

  • 1 cup (250 mL) French green (also known as “Puy”) lentils, picked over and rinsed
  • 3 cups (750 mL) water
  • 1 Turkish bay leaf
  • ½ teaspoon (2 mL) salt, divided
  • 1 small onion, finely chopped
  • 1 medium carrot, finely chopped
  • 1 celery stalk, finely chopped
  • 2 medium garlic cloves, minced
  • 1 teaspoon (5 mL) finely chopped fresh thyme
  • 5 tablespoons (65 mL) olive oil, divided
  • 2 tablespoons plus ½ tsp (27 mL) red wine vinegar
  • ½ tablespoon (7 mL) Dijon mustard
  • Crunchy sea salt, for serving
  • 2 tablespoons (25 mL) finely chopped Italian parsley, for serving

In a medium saucepan, bring the lentils, water, and bay leaf to a boil over medium-high heat. Reduce the heat and simmer, covered, until almost tender, about 15 minutes. Stir in ¼ teaspoon (1 mL) salt, and then simmer, covered, for another 3 to 5 minutes, until tender but not falling apart.

While the lentils simmer, warm 1 tablespoon (15 mL) of the oil in a 12-inch skillet over medium-low heat. Add the onion, carrots, celery, garlic, thyme, and 1/8 teaspoon (0.5 mL) salt, and cook, stirring occasionally, until the vegetables are just softened, about 7 to 9 minutes.

Meanwhile, make the vinaigrette. In a small bowl, whisk together 2 tablespoons (25 mL) vinegar, mustard, and remaining 1/8 teaspoon (0.5 mL) salt. Add the remaining 4 tablespoons (50 mL) olive oil, and whisk to emulsify.

When the lentils are ready, drain them in a colander or sieve, and discard the bay leaf. Dump them into the skillet with the vegetables, and add the vinaigrette. Cook over low heat, stirring gently, until heated through. Stir in the remaining ½ tsp (2 mL) vinegar, and serve warm, with crunchy salt and parsley for sprinkling.
Makes 4 side-dish servings

This originally ran in the Calgary Herald. For more recipes, check out the Herald’s online food section.

Continue Reading