The actual title of this blog post would have been far too long:
Fettucine with Roasted Tomato Sauce and Balsamic Reduction, as well as testing out the new KitchenAid pasta attachment.
It’s a bit of a double barreled post, really. Call it multi-tasking.
Actually, that’s a bit of a lie too. The actual, actual title of this post should have been:
Fettuccine with Roasted Eggplant and Tomato Sauce and Balsamic Reduction, as well as testing out the new KitchenAid pasta attachment.
But I’ve realized I really don’t like eggplant when I cook it and, in the end, did not end up eating any of it. You will notice its absence in the final photos, but had to include a photo of the palm-sized eggplants because they were just so darn cute.

Which pretty much illustrates the fact that I make the worst impulse food buys known to man.
At any rate, a couple of months ago I was approached by a marketing company asking if I’d be interested in reviewing the KitchenAid pasta kit on my blog. As a huge pasta fan, I was definitely intrigued.
I’ve typically shied away from making it homemade, even though the boxed stuff pales in comparison to the tender noodles that come from real pasta.
The real issue here is my inability to knead properly. Unsure if that’s because I’m impatient, don’t have a feel for it, or just generally have no idea what I’m doing. But whether one of these reasons or a combination of all three, it basically adds up to me never quite reaching the smooth, elastic stage needed to make bread or pasta.
Full disclosure: I was sent the KitchenAid pasta kit, as well as the mixer required to run the attachments, by the marketing firm in order to review them. This is my unbiased review of the kit. I am not required to return the items (which, really, makes sense. I mean, what are they going to do with a used mixer, pasta roller and cutter?).
The mixer and kit arrived a few weeks after some back-and-forth emailing and I set aside an afternoon to give it a whirl.
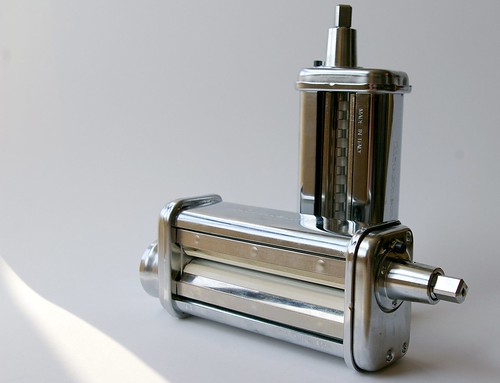
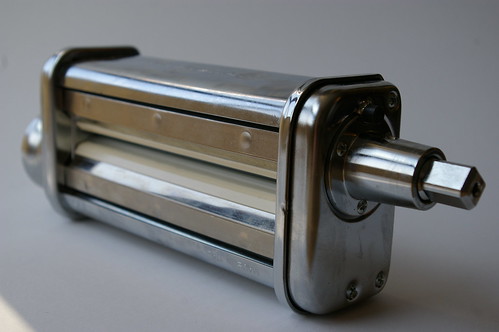
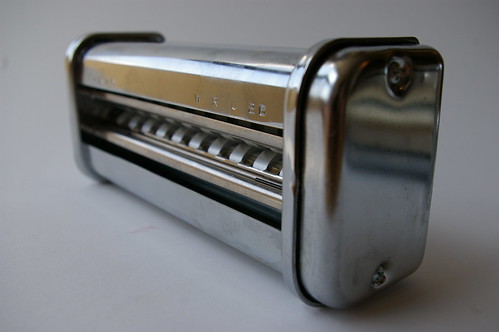
The kit itself includes two boxes of pasta dough mix (just add water), a pasta roller, fettucine cutter, cleaning brush and cooking utensils. The roller and cutter attach to the front of the stand mixer and are powered by the appliance.


Making the dough was pretty simple. Add water, mix, produce crumbly dough and mush it together.
As always, I was nervous from the get-go that I had done something wrong. But I divided the dough into about eight pieces and then gave them each a quick knead before powering up the roller attachment and letting the dough slide through.
On its widest setting, the roller can actually be used to knead the dough. I sent one chunk through, then folded it in half and let it run through the rollers again. I did this about five or six times until the dough was shiny and elastic and stretched out into a long rectangle. Then I started on the next chunk of dough.
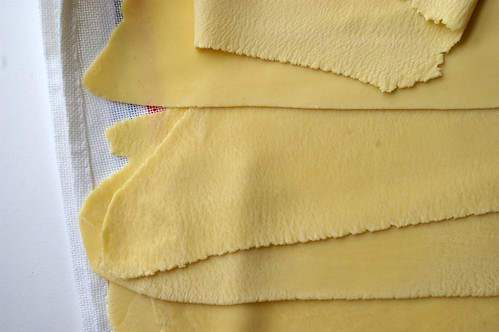
Once that was all done. I then put the roller onto a thinner setting and ran them all through again. And then again on a thinner setting. And so on.
When it was thin enough, I exchanged the roller attachment for the fettucine cutter and watched as the flat sheets of pasta were cut into perfect (albeit extremely long) ribbons.

It was, all in all, astonishingly easy. And a bit hypnotic.
I liked that I could forego all the annoying kneading and with relative ease make a batch of homemade pasta. I liked the chew of the noodles I made and how quickly it cooked.
The next test, of course, will be to make my own actual dough.
While I loved the roller and cutter, I was initially not 100 per cent sure I would have been tempted to buy the entire kit. Most food lovers are already going to have their own slotted spoon and pasta server and probably would enjoy the challenge of making their own dough rather than using a boxed mix, I reasoned.
I would, however, definitely be tempted to buy the roller and cutter separately.
Then after a bit of research, I found the kit is not a bad deal considering a pasta roller, motorized drive and a fettucine cutter is going to cost roughly the same as the KitchenAid’s kit, which comes with the utensils, dough mix and cleaning brush. If you already have the stand mixer, it’s not a bad way to go.
The pasta kit retails for about $180.
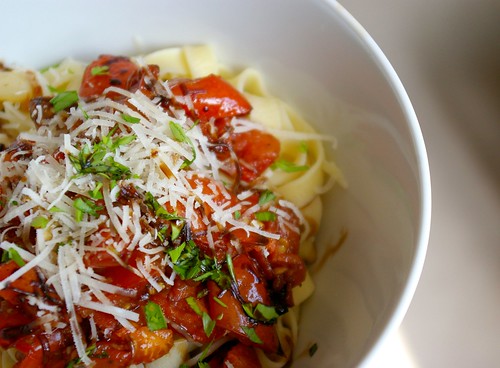
And here’s what I did with the noodles. The recipe is not so much a recipe as much as me just fiddling around, but, since it turned out so well, I’m going to recommend it anyway.
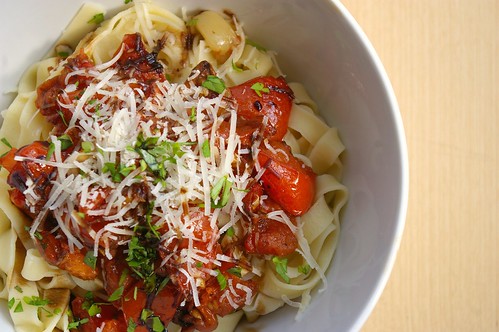
Fettucine with Roasted Tomato Sauce
- 1 pound tomatoes, cut into 1 or 1/2″ chunks
- 3 cloves garlic, whole, unpeeled
- olive oil
- balsamic vinegar
- salt
- pepper
- pasta
- parmesan
- balsamic reduction
Set oven to 375. Chop tomatoes into roughly 1/2″ to 1″ pieces (depending on how chunky you want the sauce to be), place in baking dish, scatter in unpeeled garlic cloves, then drizzle with olive oil, balsamic and sprinkle on kosher or sea salt and pepper. Bake for about 30 to 45 minutes until tomatoes are starting to carmelize and break down.
Cook pasta according to directions or, if using fresh, cook in boiling, salted water for just a few minutes until al dente. (Depending on the thickness of noodle, this can take anywhere from about three minutes and up.)
Slip cloves of garlic out of their peels and then mush with fork into tomatoes. Scoop sauce onto cooked pasta, sprinkle with grated parmesan and fresh chopped parsley (if you have any). Drizzle lightly with extra virgin olive oil and balsamic reduction.