Chocolate Cupcakes with Peanut Butter Icing

Most smart bakers know to make sure everything is ready to go in advance of getting started. I am, apparently, not a smart baker.

Chocolate cupcake with peanut butter icing

We were celebrating a (much belated) birthday for a good friend. Some wiggling around with the schedule had the celebration moved from brunch to Sunday night dinner and I volunteered (most willingly — any excuse to bake) to bring the birthday dessert. All week I Googled for moist, rich chocolate cake recipes and then sat there trying to decide which would be better: mayo-based or buttermilk; white icing or chocolate; cupcakes or layer cake. Finally, when I shared my dilemma with a friend, she queried why I wasn’t using a Barefoot Contessa recipe. Indeed! Why wasn’t I?

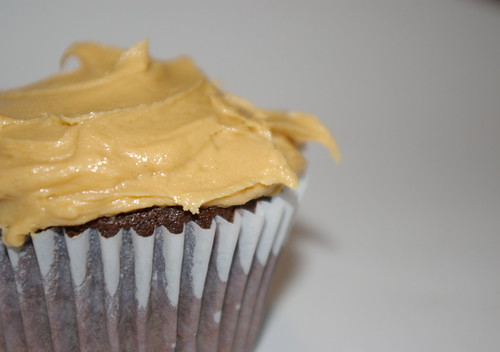
She has two recipes in her books and one online at Food & Wine. Since I already bought the books, I figured I may as well try one of those and, at last, settled on the Chocolate Cupcakes with Peanut Butter Icing. My love of this combination knows no bounds, so I’m kind of surprised I didn’t think of this recipe immediately.

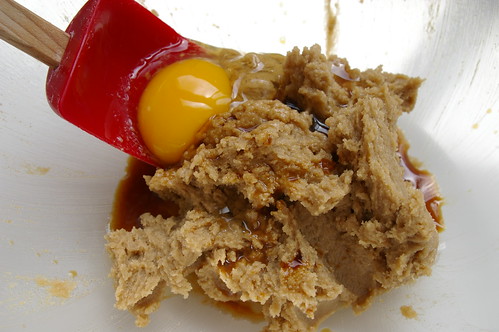
Initially, it was all going very well. I ran out to the store to buy sour cream, buttermilk and coffee, along with whipping cream for the icing, then returned to begin. There was butter to soften and dry ingredients to sift (and, boy did I sift those. I learned my lesson from the Red Velvet cake when not sifting the cocoa with the flour led to brown swirls through the cake.) and, of course, photos to take to document my progress.

Cakes still make me a bit nervous. I’m worried I’ll overmix and make a tough cake and that is not eased by the fact most recipes have this whole “mix in thirds” step. What if it’s not exactly thirds? Also, I think a lot of recipes these days assume people have stand mixers, which makes this step (among others) much easier, then when trying to hold the mixer while pouring in a third of the dry mixture and not end up covered in cocoa and flour dust.

Butter and sugar and eggs, oh my!

The batter trifecta

Chocolate cupcake better

Chocolate cupcakes ready to bake.

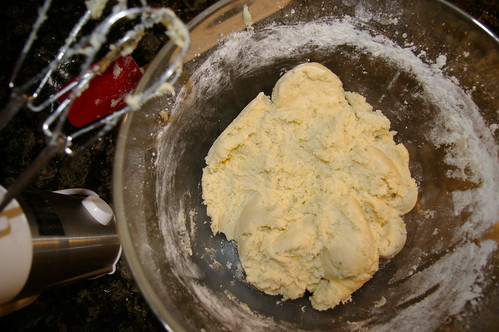
But, for the most part, it all went really well. The batter seemed incredibly light at the end (Okay, and, yes, it did taste good.) and I was all ready to put the batter into the tins. I pulled out my cupcake liners and found I only had five left. Gah! Thankfully, there’s a grocery store a little over a block away, so I turned off the oven and bolted down there where I bought some liners and then raced back. I was really worried that extra time would ruin the batter somehow.

In the end, it was only a 15-minute delay and I don’t think it affected the cupcakes. They baked up perfectly, though for less time than the recipe suggested owing, I suspect, to the fact that my muffin tins are more shallow and took less batter to fill. (I used a 1/8 cup scoop, which worked perfectly. No spillage.)

Chocolate Cupcakes

Solo chocolate cupcake

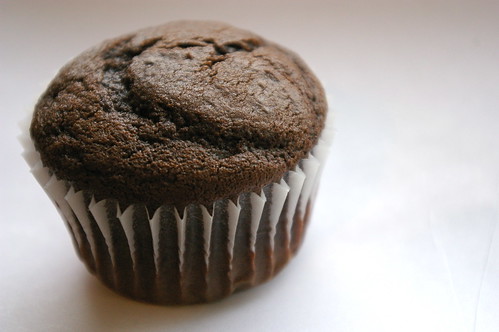
The cupcakes are not overly sweet, which was a nice counterpoint to the rich peanut butter icing.

Peanut butter icing

Row of cupcakes

This recipe is from Barefoot Contessa at Home.

Chocolate Cupcakes with Peanut Butter Icing

  • 12 tbsp. unsalted butter, at room temperature (that’s 3/4 cup for those of us that don’t use sticks of butter)
  • 2/3 cup granulated sugar
  • 2/3 cup light brown sugar, packed
  • 2 extra-large eggs, at room temperature
  • 2 tsp. pure vanilla extract
  • 1 cup buttermilk, shaken, at room temperature
  • 1/2 cup sour cream, at room temperature
  • 2 tbsp. brewed coffee (Full disclosure: I don’t drink coffee. I made a cup of instant and it tasted awful to me, so I only threw in less than a tablespoon. I suspect good coffee may be a great addition.)
  • 1 3/4 cups all-purpose flour
  • 1 cup good cocoa powder
  • 1 1/2 tsp. baking soda
  • 1/2 tsp. kosher salt

Preheat oven to 350 degrees. Line cupcake pans with paper liners.

In the bowl of an electric mixer fitted with a paddle attachment, cream the butter and two sugars on high speed until light and fluffy, approximately five minutes. (For those of us without a stand mixer, a handheld is just fine. It just makes it a bit trickier when mixing in the wet and dry ingredients.) Lower the speed to medium, add the eggs one at a time, then add the vanilla and mix well. In a separate bowl, whisk together the buttermilk, sour cream and coffee. In another bowl, sift together the flour, cocoa, baking soda and salt. On low speed, add the buttermilk mixture and the flour mixture alternately in thirds to the mixer bowl, beginning with the buttermilk mixture and ending with the flour mixture. Mix only until blended. Fold the batter with a rubber spatula to be sure it’s completely blended.

Divide the batter among the cupcake pans (one rounded standard ice cream scoop per cup is the right amount). Bake in the middle of the oven for 20 to 25 minutes, until a toothpick comes out clean. Cool for 10 minutes, remove from the pans, and allow to cool completely before frosting.

Frost each cupcake with peanut butter icing and sprinkle with chopped peanuts, if desired.

Kathleen’s Peanut Butter Icing

  • 1 cup confectioners’ sugar
  • 1 cup creamy peanut butter
  • 5 tbsp. unsalted butter, at room temperature
  • 3/4 tsp. pure vanilla extract
  • 1/4 tsp. kosher salt
  • 1/3 cup heavy cream (I used whipping cream)

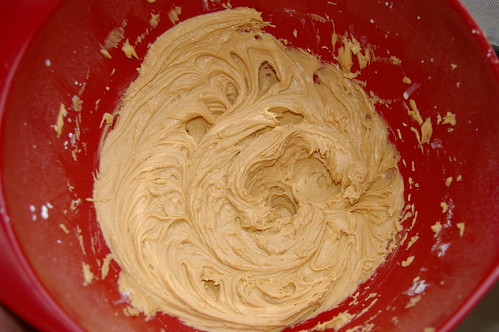
Place the confectioners’ sugar, peanut butter, butter, vanilla and salt in the bowl of an electric mixer fitted with a paddle attachment. Mix on medium-low speed until creamy, scraping down the bowl with a rubber spatula as you work. Add the cream and beat on high speed until the mixture is light and smooth.

Continue Reading

Carrot-Rosemary Scones

I love scones. I like sweet ones with devonshire cream and jam. I like savoury ones with a little butter.

But scones don’t seem to feel quite the same way about me.

Or maybe they sense fear.

Ready to eat

One of the last times I remember making scones was when I was living in a small town in southern Japan. While I was the only foreigner in my community of 10,000, I was eagerly welcomed by many of the locals, including my next door neighbour who preferred to be called Susan. She was married to one of the teachers at the high school where I also taught and they had a young son. (We lived in a rather unattractive triplex — is that what a set of three townhouse-type homes is called, if a duplex means two? — that was teachers’ housing, along with the school’s vice-principal.) She was a very sweet woman who often had me over for dinner and hosted a pretty large (when one considers the relatively tiny size of her living room) dinner party when my then-boyfriend, mum and little sister came over to visit. At any rate, she signed us up for a cooking lesson with a women from the U.S. Naval base, stationed in nearby Sasebo. The subject was, of course, scones.

So, here I was, the lonely foreigner amongst a group of Japanese housewives learning to bake scones from some southern U.S. navy wife. Truly one of the stranger experiences.

Susan and I followed all of the directions faithfully, or so I believed. But our lovely little scones were nothing more than dough rocks by the time they came out of the oven. The instructor was convinced we had done something wrong (and I guess we must have), but I was so confident we had followed the recipe exactly.

I didn’t bother to attempt scones again for several years. Mostly, I suspect, because it’s one thing to bake cookies for a crowd and quite another to show up at work with a pile of scones. And also likely because deep down I harboured some anxiety that I would put in all that effort and still come out with flavoured rocks.

And then I saw a recipe for Carrot and Rosemary Scones.

I love rosemary. And carrots. And dijon mustard. And garlic. And parmesan cheese. The fact that all of these things were combined into a flaky scone was enough to jolt me out of my scone slump.

But it wasn’t going to be a breeze.

When I first attempted these, I found the mixture unbearably dry, but was nervous to add more liquid since I know making a light and fluffy scone requires some delicate baking chemistry. In the end, I did add some more cream, but it was still quite a dry dough. Once baked, the scones were still quite flat and not very brown. That’s not to say they weren’t tasty; they were. But not scone perfection.

The next time I called my mum (to whom I turn for all baking advice, her being a stellar baker and, I suspect, slightly amused by my ongoing need for guidance) and she said to not fear the addition of even more cream as the lack of liquid may have contributed to the rather flat outcome of the first attempt. Take two on the scones was slightly more successful — they were, at least, a little more golden and the dough had come together more easily — but only just. They were still flattish, though.

I sent the recipe along to my mum in advance of a visit out to Vancouver so that we could have a hands-on attempt together. (Baking, I feel, is best learned by participating at the side of an expert.) Not only did we almost double the amount of liquid, but, in the end, they still didn’t rise as much as other scone recipes. We eventually concluded the weight of the carrots was likely the culprit.

On the next attempt, I used my food processor to cut in the butter (justifying it as that I had to pull it out for grating the carrots anyway) and then added much more cream (a mixture of whipping and half-and-half because I wanted to use up the heavier cream) than originally called for. I also accidentally forgot the parmesan. So, I’m unsure which, if either, of those decisions played a role in the outcome, but these scones were beautiful.

They rose! They were tasty! They were flaky!

They still didn’t rise as much as other scone recipes; I blame it on the carrots.

carrots and rosemary

rosemary goes in to the dough

grated carrots

cutouts

ready to bake

Ready to eat II

While this recipe originally comes from Clotilde at Chocolate and Zucchini, I have made some adjustments. Below is the recipe as I make it.

Carrot and Rosemary Scones

  • 2 cups all-purpose flour
  • 1 1/4 tsp. baking powder
  • 1 1/4 tsp. salt
  • 9 tbsp. chilled, unsalted butter (this is a little more than 1/2 cup if that helps)
  • 1 1/2 cups grated carrots
  • 2 tbsp. fresh rosemary, chopped
  • 2 cloves garlic, peeled and finely minced (I use my handy rasp for this.)
  • 2 tbsp. Dijon mustard
  • 3/4 cup cream (whipping, half-and-half or a mixture of the two, it doesn’t really matter.)
  • 1 cup grated parmesan (I’d go with optional for this because they were so tasty even without the cheese)

Preheat the oven to 350. In a mixing bowl, combine the flour, baking powder and salt. Add the butter and rub it into the flour mixture with your fingers or using a pastry blender or in a food processor, if you have one. It should resemble coarse crumbs when it’s blended enough. Add the carrots, rosemary and cheese if you’re using it.

Mix together the mustard, cream and garlic (I find this distributes the garlic better, but you can also add it when you mix in the carrots) and then add to the dry ingredients. Mix together gently until the dough comes together and then empty out onto floured counter. Pat together into a ball and then roll out until the dough is about a half-inch thick. Cut out using biscuit cutter or whatever is handy. (I used a narrow drinking glass and that worked fine.)

The original recipe calls for 20 minutes in the oven. Mine baked for 17 before they were nice and golden. Cool on a rack. And then try to keep yourself from eating too many.

Continue Reading

Guacamole

When the cravings for Guacamole come, they must be answered.

I love avocados. The pale green flesh, the rich buttery taste, the thwack sound the pit makes when I hit it with my knife. I like it sliced in salads or spread between two pieces of buttered toast with a little salt and pepper. But I really love it in guacamole with a handful of salty chips on the side.

The Ingredients

Sure, it’s high in fat, but I’m slightly mollified by the fact it’s a good fat and there are lots of vitamins and potassium in avocados. I also need that information to justify my decision to eat guacamole for dinner. (It’s flimsy justification, but justification nonetheless.)

The Ingredients

I like to make mine by cubing the avocados while still in their skins and then scooping the chunks out with a spoon before gently stirring with the other ingredients, so the meaty fruit retains some of its bite instead of becoming a paste. (You’ll see below that the instructions are slightly different. Obviously, do as you feel is best.)

Dicing the avocado

Red Onion

Ready to serve

It should come as no surprise that this recipe comes from my mentor, the Barefoot Contessa.

Guacamole

  • Four ripe Haas avocados (I just buy whatever is in the store)
  • 3 tbsp. freshly squeezed lemon juice — one lemon
  • 8 dashes Tabasco sauce
  • 1/2 cup small-diced red onion
  • 1 large clove garlic, minced (I use a rasp — best kitchen gadget ever — so there are no large chunks of garlic)
  • 1 tsp. kosher salt
  • 1 tsp. freshly ground black pepper
  • 1 medium tomato, seeded and small-diced

Cut the avocados in half, remove the pits, and scoop the flesh out of their shells into a large bowl. (I use my hands.) Immediately add the lemon juice, Tabasco, onion, garlic, salt and pepper and toss well. Using a sharp knife, slice through the avocados in the bowl until they are finely diced. Add the tomatoes. Mix well and taste for salt and pepper.

Continue Reading

Lime Sugar Cookies

Is it ridiculous that I bought a recipe book solely for a basil salad dressing?

Does it make it better if I explain that the salad dressing goes on one of my all-time favourite salads from a vegetarian/vegan restaurant in Victoria that I must visit each time I’m back in that city? (Especially interesting considering my carnivore ways.)

Nevermind, it was because of the cookbook that I was led to this fabulous cookie. The sweetness of sugar and tang of lime in neat cookie form. I love all things citrus and these certainly satisfy the craving.

IMGP2190

Oddly, I never went to Rebar while I lived in Victoria, which I now realize is a huge shame. Still, I get back to the capital city twice a year, so I can keep my cravings for their salad relatively in check. (Hmmm. Perhaps I should blog about the salad dressing….)

Anyway, when I found their recipe book in a store one day, I bought it immediately. When I got home (as I tried to justify the unnecessary purchase of *yet another* cookbook), I started to flip through and inevitably found a bunch of recipes I wanted to try, including the one for the Lime Sugar Cookies.

Sure, it calls for pepitas (pumpkin seeds) and, sure, there was no way I was going to have those on hand and there was no way I was going to buy them. (Surely, the whole point of cookies is that, in general, there is nothing healthy in the mix?) So, I forewent that step and moved ahead.

Then, on the second time making them, I made a very happy mistake. I doubled the recipe, but then didn’t fully double the amount of flour. As a result, the cookies came out a bit denser and with a nice chew, as opposed to the somewhat cake-y versions previously. I now purposely make that mistake. (And, yes, I still don’t bother with the pepitas.)

The one thing to really be aware of with these cookies is that they probably won’t look fully baked, even if they’re ready to be pulled out of the oven. They’ll look puffed, but still very pale with only a hint of golden at the edges. Once you pull them out and they start to cool, they’ll fall slightly and get the nice sort of cracked top to them.

It was raining today when I made these before going in to work. The grey skies made me a bit homesick for Vancouver. But this light and tangy cookies were cheerful, a little taste of summer.

IMGP2120

IMGP2134

IMGP2150

IMGP2155

IMGP2165

IMGP2183

Here is the recipe as printed in the Rebar Modern Food Cookbook. My notes and changes are in italics.

Lime Sugar Cookies

  • 1 cup granulated sugar
  • 1/4 cup unsalted butter
  • 1 tbsp. vegetable oil
  • zest of 1 lime
  • 1 large egg
  • 2 tbsp. lime juice
  • 1 3/4 cups unbleached flour (I use all purpose)
  • 1/4 cup pepitas (pumpkin seeds), toasted and roughly chopped
  • 1/2 tsp. baking soda
  • 1/2 tsp salt

Preheat the oven to 350F. Cream the sugar, oil, butter and lime zest until light and fluffy. Add egg and lime juice, and beat together to incorporate.

In a separate bowl, mix the flour, pepitas, baking soda and salt. Add the dry mix to the wet mix and stir together well.

Using a 2 oz. ice cream scoop or forming 3 tbsp balls (or, in my case, a big rounded soup spoon), drop the batter onto a cookie sheet, leaving space in between to allow the cookies to spread during baking. Flatten each slightly and sprinkle with granulated sugar. Bake for eight minutes. Cool on a wire rack.

As I said above, I always double this recipe (11 cookies is not enough), but instead of using 3 1/2 cups of flour, I only use 3. Feel free to try it both ways.

Continue Reading

Green Beans with Garlic

What is it about other people’s versions of the same recipe that inevitably turn out better than yours? I call it Other People’s Salad Syndrome, or Salad Syndrome, for short. I can put the same baby lettuce, grape tomatoes and grated carrot in a bowl, make a basic vinaigrette and it will be fine. My Mum will make it or a friend will whip one together and it will still taste better than one I’ve made.

When I was back in Vancouver a few weeks ago, my Mum made a dinner that included Green Beans with Garlic. In a nutshell, it’s steamed green beans, doused with olive oil that has had chunks of garlic cooked in it, then sprinkled with salt and pepper. We’ve had this many times over the years, and I’m sure I remember a few versions that had long strips of sweet red pepper for colour and flavour contrast.

Still craving another hit of that garlicky, summery taste, I picked up a huge bag of green beans earlier this week. Then, this morning as I was procrastinating (surely, this is one of the top reasons I bake and cook), I thought it would be the perfect time to cook up some beans.

Green Beans with Garlic

I had double checked the “recipe” with my Mum the night before. (“So, it’s just beans and garlic in oil and salt and pepper, right?” I messaged her in the middle of our online Scrabble game. “Yup.” Alrighty, then.) So, I was good to go.

Oh, except for the fact that for some unknown, unexplained and super annoying reason, the water to my apartment was cut off for several hours today. But, never one to shy away from a challenge, I proceeded anyway. (I can be particularly stubborn and, subsequently, pretty creative.) I had just enough water in my Brita to make three cups of rice (for the other part of my lunch) and to steam the green beans. Thank god I refilled that thing.

Green beans

Owing to my overwhelming supply of shallots, I thought I’d adjust the recipe slightly and slice up one of those and add it at the last minute to the olive oil. I really liked this touch, as the shallot was a sweet addition, and will do it again in the future. But if you don’t have any lying around, I wouldn’t worry about it.

Shallots and garlic

The idea here is to cook the garlic until it’s tender and has lost its bite in favour of a slightly nutty taste sort of akin to roasted garlic. If the oil’s temperature is too high, the garlic could burn and it will taste very acrid. The key is to watch the amount of bubbling after throwing in the garlic. I also occasionally lift the pot off and swirl the oil around to keep the garlic moving. If you’re going to add some shallot, add it towards the end because it will cook more quickly than the thick-cut garlic.

Garlic and olive oil

Shallots and garlic in olive oil

Anyway, I steamed the beans, cooked the garlic in the oil, added the (what I believe to be) inspired choice of a shallot, tossed it all together with some salt and pepper and sat down to enjoy lunch.

And was disappointed.

It’s not that it wasn’t good. Mmmmm garlic. Mmmmmm slightly sweetened shallot. Mmmmm grean beans. And yet, it still wasn’t as tasty as the version I had just two weeks earlier.

I’m blaming it on Salad Syndrome.

But I’m going to keep working on it because this summery, salad-ish recipe is too good to give up on.

For this recipe, I use Maldon flaked salt. I like the slight crunch of the crystals and that it’s not an overpoweringly salty taste.

Lunch is served

Green Beans with Garlic

  • 1 pound green beans
  • 1/2 cup olive oil, extra virgin preferable for it’s more intense flavour
  • 4 cloves garlic, sliced thickly
  • 1 or 2 shallots, sliced thickly in rings and then separated
  • salt
  • pepper

Steam the green beans. (I do it on the stove using a steamer, but only because I’m not sure how to do it in the microwave.) When they are still slightly crisp (I think the technical term is “tender crisp”) and bright green, throw them in a bowl of ice cold water to shock them — stop the cooking process and keep them a nice colour. Strain and throw in a bowl. While the beans are steaming, set a small pot with the olive oil onto a burner set to medium heat. Add the garlic and cook until slightly golden. Toss over beans and then add salt and pepper to taste.

P.S. When all the beans are eaten and there is still all that lovely, garlicky oil left over, it’s pretty delicious with chunks of french bread.

P.P.S. Hmmmm. Having just had another round of beans that have been sitting out since I made them (about two hours ago) and are now about room temperature, I’d say they are even better this way. Maybe *that’s* the trick. When my Mum made them, my sister and I kept picking away at them while the rest of dinner cooked, so they probably were more at room temperature by the time we all sat down.

So, you may want to make them slightly ahead of time and let them cool before enjoying.

Continue Reading