Microwave Lime Cheesecake

Under normal circumstances, microwave cheesecake would be an ideal summer dessert for the sole reason that it doesn’t require you to turn on your oven.

However, this summer has been anything but normal.

So, instead, I’m going to tell you that these little cheesecakes are ridiculously easy, super tasty and highly transportable and those are three very fine reasons to consider trying it out. And, hey, if the forecasters are right and we’re going to sail through the rest of August on a heat wave, then feel free to use not wanting to turn on your oven as an excuse, too.

The more rationale, the better, I say.

Not that cheesecake should require any rationale.

These ones certainly don’t.

Microwave Lime Cheesecake I

Now, I’m not going to lie. If you’re looking for a silky smooth cheesecake with nary a crack marring the surface, lovingly cooked in a water bath and chilled overnight in the fridge, this isn’t the recipe for you.

If you’re looking for something you can whip up in seven minutes — including cooking time — that sits in the fridge for an hour and then can be devoured, giving you the same tart lime cheesecake taste as the regular kind with almost the same amount of smoothness, then this is the recipe for you.

It was for me.

The hardest part was waiting for it to chill enough.

And the best part was because I used mason jars, I could just slap on a lid and take it with me, which would be ideal for picnicking or making an office lunch a little more luxurious.

I used two one-cup (250 mL) mason jars to make the cheesecakes and had a little bit of batter left over. In hindsight, I can tell you I filled the jars a bit too full.

At some point, I may want to sit down and reexamine the subject of portion control. At the time, though, it seemed like a good idea. After all, the recipe said it makes two to four cheesecakes, so two seemed more than reasonable.

Please take my suggestion and make at least three, for a few reasons: 1: These jars are pretty giant and the cheesecake is, naturally, a bit rich and may be better in a slightly smaller dose. 2: Three or four cheesecakes means you can share more easily with more people. That or you can spread them out over several sittings.

3: You won’t be watching anxiously through the microwave door as the cheesecake mixture souffles up and over the jars’ edges, threatening to spill all over the rotating tray.

As it was, all that fretting was for nothing. They didn’t spill, but I think it would have been better without the panic.

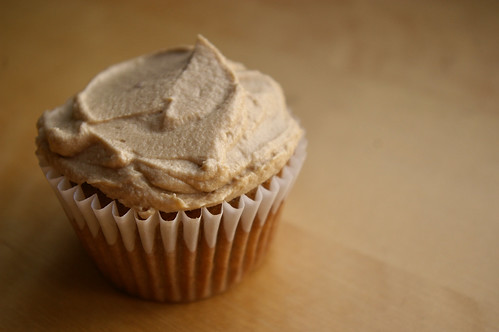
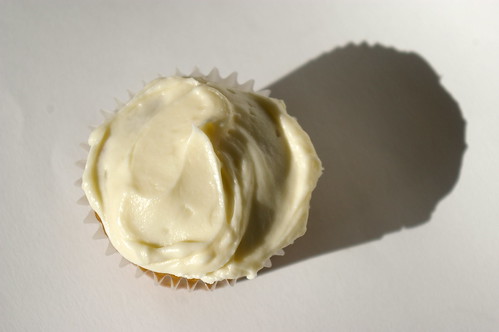
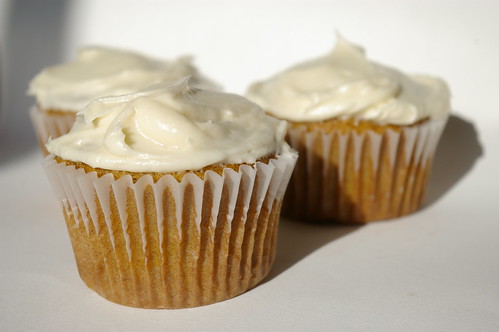
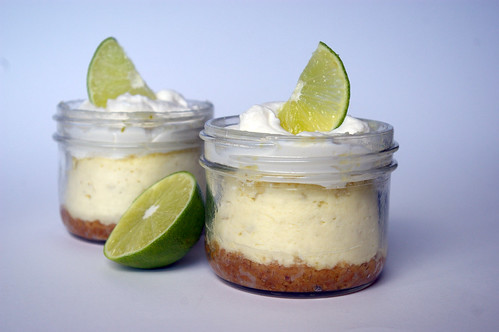
Out of the microwave, they settled nicely into a slightly concave top.

I filled that with whipped cream — purely for esthetic reasons, of course. But later I thought some fresh fruit would have been nice.

I liked the slightly tart taste of limes countering the richness of cheesecake, but suspect this recipe can be easily adjusted to suit other flavours, such as lemon (by switching the zest and juice to that fruit) or a straight-up vanilla cheesecake by omitting the citrus and adding a teaspoon or so of vanilla extract. That would be particularly delicious topped with summer berries or a fruit compote.

After all, it only takes about seven minutes to try a new variation. The tricky part will be waiting the hour to see how it tastes.

Limes

Microwave Lime Cheesecake II

Microwave Lime Cheesecake

Adapted from TheKitchn.com

  • 3 tbsp (50 mL) butter, melted
  • 1/2 cup (125 mL) graham cracker crumbs
  • 1 tbsp (15 mL) sugar
  • 8 oz (250 g) cream cheese, softened
  • 1/3 cup (75 mL) sugar
  • zest of one lime
  • 2 tbsp (25 mL) fresh lime juice
  • 1 egg

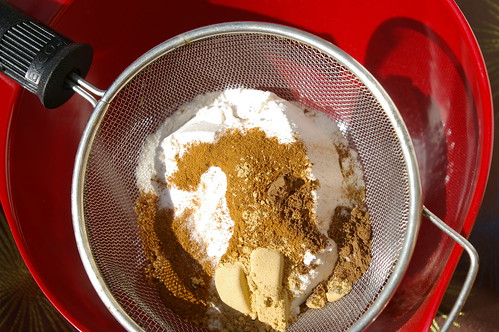
Combine the graham cracker crumbs with melted butter and 1 tbsp (15 mL) sugar. Divide between two to four 1-cup (250 mL) jars or ramekins and press into the bottom.

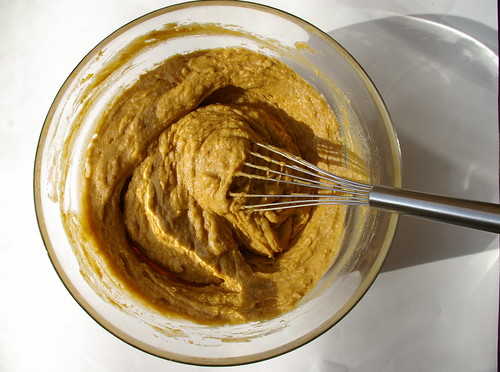
Mix the rest of the ingredients until smooth. Divide evenly into jars or ramekins with crumbed bottoms.

Place in microwave for 2 minutes. The top of the cheesecake should appear dry when cooked. If it doesn’t look quite done, microwave at 30-second intervals until the tops appear dry. (For my extremely full jars, I needed 2 minutes and 30 seconds.) If you don’t have a rotating microwave tray, cook for 1 minute then turn the jars or ramekins and microwave for another minute.

Chill in refrigerator for 1 hour. Garnish with whipped cream or fresh berries and serve.

This story first appeared in the Real Life section in the Calgary Herald. For more delicious recipes, visit CalgaryHerald.com/life.

Continue Reading

Applesauce Spice Cupcakes

I felt like making cupcakes. That’s pretty much the reason for the post.

Iced Cupcake

So, I was flipping through my cupcake cookbook (impulse buy, of course. Sigh.) and found this recipe for Applesauce Spice Cupcakes with Brown Sugar Cream Cheese Frosting. (Aren’t you glad I didn’t make all of that the title of the post?) The only reason I paused was because I noticed that it called for unsweetened applesauce and I just happened to have some in my cupboard. Not something I’d normally have hanging around but when I made my Applesauce Cake a few weeks ago, I didn’t look closely at the recipe before going shopping. When looking at the choice between unsweetened and sweetened applesauce, I figured it was only logical that the applesauce cake would call for unsweetened because there was sugar in the recipe.

Duh.

This is why I need to be more explicit with my lists.

I came home to find I bought the wrong kind and had to go back to the grocery store for the right kind of applesauce. I would have returned the unsweetened but was too lazy to go all the way back to the store where I bought it (there are none of that chain close to me; I had picked it up while running other errands). Plus, I guess I figured at some point I would find a way to use it up.

And, lo, I did.

Like every other time I’ve made a Martha Stewart cupcake recipe, I ended up with way more than she predicted. I don’t know if my muffin tin is much smaller than hers or if I’m underfilling the cups, but I ended up with 21 or 22 cupcakes, where she said I would end up with 18. And, people, this was after consuming some batter. (*Hangs head in shame.*)

Spiced batter

But having extras was no big deal, really, because they were good and they all got eaten anyway.

The cupcakes are not overly sweet, which is nice against the cream cheese icing. But I think I actually preferred my mum’s recipe for Applesauce Cake. It just seemed . . . I don’t know. Lighter? Better? And it could be just as easily converted into a cupcake recipe by putting the batter into muffin tins and decreasing the baking time. (Start checking at about 15 minutes. They should probably take about 20.)

One more thing. The recipe calls for 1 1/2 cups of unsweetened applesauce. That’s 375 mL. A can or jar of applesauce here in Canada is 398 mL, so I just dumped the whole thing in. And it was totally fine, so if you’re worried about that last little bit, just chuck it in.

Cooling

Frosting

Cupcake trio

Applesauce Spice Cupcakes

  • 2 cups all-purpose flour
  • 1 teaspoon baking soda
  • 3/4 teaspoon salt
  • 2 teaspoons ground cinnamon
  • 1/2 teaspoon freshly grated nutmeg
  • 1/8 teaspoon ground cloves (I didn’t have any and the recipe was just as tasty)
  • 1/2 cup unsalted butter, room temperature
  • 1 cup granulated sugar
  • 1/2 cup packed brown sugar
  • 4 large eggs, room temperature
  • 1 1/2 cups unsweetened applesauce
  • 1 cup pecans, toasted and chopped (I didn’t put these in because my friend is allergic and I really wanted her to eat one)

Preheat the oven to 350. Line standard muffin tins with paper liners. Whisk together flour, baking soda, salt, cinnamon, nutmeg and cloves.

With an electric mixer on medium-high speed, cream butter and both sugars until pale and fluffy. Add eggs, one at a time, beating until each is incorporated, scraping down sides of bowl as needed. Reduce speed to low. Add applesauce and then flour mixture, beating until just combined after each. Stir in pecans by hand.

Divide batter evenly among lined cups, filling each three-quarters full. Bake, rotating tins halfway through, until a cake tester inserted in centers comes out clean, about 20 minutes. Transfer tins to wire racks to cool completely before removing cupcakes. Cupcakes can be stored overnight at room temperature, or frozen up to two months, in airtight containers.

To finish, use a small offset spatula to spread cupcakes with frosting. Frosted cupcakes can be refrigerated up to three days in airtight containers; bring to room temperature before serving.

Brown-Sugar Cream-Cheese Frosting

  • 1/2 cup unsalted butter, room temperature
  • 8 ounces cream cheese, room temperature
  • 1 cup packed brown sugar

With an elecrtic mixer on medium-high speed, beat butter, cream cheese and brown sugar until smooth. Use immediately, or refrigerate up to three days in an airtight container. Before using, bring to room temperature, and beat on low speed until smooth.

Continue Reading

Guinness Chocolate Cupcakes

I don’t like beer.

I was absent the night in university when my friends went to the grungy student pub, bought a pitcher and sat down, determined to acquire a taste for the stuff.

No idea where I was–I like to think I was responsibly studying somewhere–but it seems my decision means I will never really love beer the way I might have if I had sat in that smoky room with them.

Around St. Patrick’s Day, food bloggers were raving about cupcakes that included a rather unexpected ingredient: Guinness. Given my distaste for beer, I passed those entries by.

Frankly, the only thing that intrigues me about Guinness is the hypnotic rolling where the head meets the dark liquid in the pint glass just after it’s been poured. But I kept thinking about the recipes.

Cupcakes in profile

I think I was intrigued because they were so boldly unusual. Beer and chocolate? Really? Would the taste of stout be overpowering?Would it mellow into the background to add a perhaps unidentifiable richness? Or would it just be a chocolate cupcake with a good storyline?

It should come as no surprise this recipe comes from a British chef — Nigella Lawson — considering the other culinary oddities that have sprung from the United Kingdom. I mean, consider the blood sausage.

Her version makes an entire cake, though, and I prefer the idea of cupcakes, I suppose, for their portability. It is also much easier to pass them along to friends than a slice of cake. Leaving an entire cake in my fridge is not an option.

And she has paired it with a cream cheese icing, which creates a sort of play on the stout itself, with its creamy white head balancing atop the velvet dark drink.

Three whole cupcakes

I don’t believe in skimping on the icing. The original cream cheese icing recipe suggested adding more whipping cream to thin it out, but I reined in the extra liquid to ensure I had a nicely thick, spreadable topping. As a result, I also didn’t have enough. Given that I ate two cupcakes before even making the icing (quality control–OK, that’s a lie, I was dying of curiosity) and I still had four cupcakes left at the end that went unadorned, I suggest doubling the icing recipe. That way, there will be more than enough to coat all of the cupcakes.

The original recipe called for a half cup of whipping cream. I only used two tablespoons. If you’d like a thinner icing, feel free to add more cream.

My first bite made me realize –again–that Nigella certainly knows her stuff. These cupcakes are rich and dark with only a hint of their secret ingredient –certainly not enough to turn me off the idea of eating several more. Combined with the icing, the Chocolate Guinness cupcakes were heavenly. The icing, perhaps ironically, cuts some of the darkly chocolate flavour.

Bitten

A friend graciously offered to buy the remaining five bottles of Guinness from me, knowing full well they would simply gather dust next to my wine rack. But, having given these a shot, I think I will hang on to them. After all, I think I’d like to make the cake version next. Apparently, all it took for me to like beer was to add chocolate.

Bitten and whole

Bitten profile

Chocolate Guinness Cupcakes

Excerpted from Feast by Nigella Lawson (Hyperion Books, $39.95, 2006)

  • 1 cup (250 mL) Guinness
  • 4 oz (1/2 cup or 125 mL) unsalted butter, cut into chunks
  • 3/4 cup (175 mL) unsweetened cocoa powder
  • 2 cups (500 mL) granulated sugar
  • 3/4 cup (175 mL) sour cream
  • 2 large eggs, room temperature
  • 1 tbsp (15 mL) vanilla extract
  • 2 cups (500 mL) all-purpose flour
  • 2½tsp (12 mL) baking soda

Icing

  • 8 oz (250 g) cream cheese
  • 1 cup (250 mL) icing sugar
  • 2 tbsp (25 mL) whipping cream

Preheat oven to 350°F (180°C). Line two 12-cup muffin pans with paper liners.

Pour the Guinness into a large saucepan, add butter and heat at medium-low until melted. Whisk in the cocoa powder and sugar, then remove from heat. In a small bowl, beat together the sour cream, eggs and vanilla. Pour into the slightly cooled Guinness-butter mixture. Whisk in the flour and baking soda.

Spoon batter into cupcake pan, so each liner is about three-quarters full. Bake for 15 to 18 minutes or until a tester comes out clean. Let cool in the pan, then remove to a rack to cool completely.

Once completely cooled, make the icing.

Beat cream cheese and icing sugar until smooth. Add the whipping cream and beat again until it is thoroughly mixed and spreadable. Add more cream if you want a thinner icing. Spread onto cooled cupcakes.

Makes 24 cupcakes.

This story first appeared in the Real Life section in the Calgary Herald. For more delicious recipes, visit CalgaryHerald.com/life.

Continue Reading

Red Velvet Cake

It was a year ago that I embarked on a very special relationship. It has, at times, been hard work. And, other times, very rewarding.

Yes, that’s right. It’s my first blogiversary. Yay!

I felt the best way to celebrate was to take another stab at a Red Velvet Cake. The first attempt was, well, less than stellar. And my fascination with this southern U.S. specialty hasn’t waned in the intervening months. Plus, there is something so appealing about ritual, no?

Red Velvet Slice III

There are about 800 million different red velvet cake recipes on the Internet.* (*Slight exaggeration possible.) And I have a collection of about seven that I’m slowly working my way through. One day I will find the perfect recipe. This one is certainly a step closer.

Take two was far and away better than my first attempt, though, troublingly, not perfect. Friends disagreed. Of course, when you layer that much cream cheese icing on anything it’s going to taste good.

Red Velvet Slice IV

Even though I created a paste using the liquid food colouring and cocoa, I still got faint chocolate-coloured swirls in the batter. I suspect I was overly cautious when it came to mixing the paste in. But this time was definitely more red than the hot pink version from last year. Still, not quite the deep red I was looking for.

I also, decadently, decided to go with a triple layer cake instead of the usual double. (Anything to acquire new baking equipment; I am the worst when it comes to wanting new kitchen things. Single handedly fighting through the recession with baked goods and the stuff in which they are baked!)

And I ate the first piece with a lovely antique silver fork I bought a few days earlier during an antiquing trip with my friend Sherri Zickefoose to Nanton — a little town about an hour south of Calgary that has a handful of very fine shops. Because, when it is a celebration, even if you are alone, it should be done right.

Red Velvet Slice II

Red Velvet Slice

The next day I took the rest of the cake into work. So, on a Sunday morning, three of us sat around listening to the police scanner eating cake with plastic forks at our desks, hours before noon. A rather decadent weekend shift, to be sure.

Lining the cake pans

Cocoa and colouring

Cocoa and colouring

Empty bottle

Batter stained

Cake batter

Dye spot

Icing dollop

Icing the layers

All iced up

Red Velvet Cake

  • 2 1/2 cups sifted cake flour
  • 1 teaspoon baking powder
  • 1 teaspoon salt
  • 2 tablespoons unsweetened cocoa
  • 2 oz. red food colouring (I used two bottles, which I think were 1 oz. each)
  • 1/2 cup unsalted butter, room temperature
  • 1 1/2 cups sugar
  • 2 eggs, room temperature
  • 1 teaspoon vanilla extract
  • 1 cup buttermilk, room temperature
  • 1 teaspoon white vinegar
  • 1 teaspoon baking soda

Preheat oven to 350.

Butter and flour three 8″ cake pans. (Or, butter and line base with parchment.) Sift together cake flour, baking powder and salt in bowl, then set aside. In a small bowl, mix food colouring and cocoa powder until there are no lumps. Set aside.

In a large bowl, using a mixer, beat butter and sugar until light and fluffy. Beat in eggs one at a time, then add vanilla and cocoa-colouring mix. Add one-third of the flour mixture to the batter, beat well, then add half of the buttermilk. Beat in another third of the flour, then the rest of the buttermilk. End with the last third of the flour mix. Beat until just combined, making sure to scrape down the sides.

In a small bowl, mix vinegar and baking soda, then add straight to cake batter and stir well. Quickly divide batter between three pans and put in oven. Bake for 25 to 30 minutes. Cakes are baked when a toothpick inserted in the center comes out clean.

Let cakes cool in their pans on a wire rack for 10 minutes, then remove and let them cool completely. Frost with cream cheese icing.

Cream Cheese Frosting

  • 16 oz. cream cheese (2 packages), softened
  • 1/2 cup unsalted butter, room temperature
  • 1 teaspoon vanilla extract
  • 2 1/2 cups icing sugar, sifted
  • pinch of salt

Using a mixer, blend cream cheese and butter until smooth. Blend in salt, vanilla and then powdered sugar. Beat until light and fluffy and then ice cake.

Continue Reading

Pumpkin Cupcakes with Cream Cheese Icing

Hello fall!

Um, actually, that would have been more accurate about a month ago during the exactly two-day period that it was autumnal here.

Fall here leaves me wanting. One day the leaves are amber, gold, red; the next, they are brown, scattered, shredded on the ground. I want more time when there is only a slight nip in the air, when watery sunlight filters through the increasingly bare trees, when there is a crunch underfoot from those already fallen.

But, at least I can taste fall.

Lone cupcake

Pumpkin and squash and warm spices: cinnamon, nutmeg, cloves, allspice, ginger. Roasting and baking, soups and stews and pots simmering on the stove.

I went a little crazy at the grocery store, inspired by a host of pumpkin recipes I wanted to try out: pumpkin cinnamon rolls, chicken enchiladas with pumpkin sauce, pumpkin cookies, pumpkin pies. I walked out of there with six cans of pumpkin. Why do I always buy things like I am part of a family of six instead of a single girl in a tiny apartment with no discernable cupboard space?

(And, as an aside, why do all American recipes call for 15-ounce cans of pumpkin? They don’t appear to exist on this side of the border. I can only find 14 ounces or 28 ounces. Are we Canadians stingy with our pumpkin supplies?)

And which of all these recipes would have me cracking open the first can? It wasn’t much of a struggle to decide. I am increasingly drawn to cupcake recipes. I like individual desserts (perhaps I have sharing issues?) and cupcakes are so darn cute. So, when a friend invited me over for dinner, I shamelessly offered to make dessert. (One does not willingly make cupcakes when one lives alone. It is, literally, a recipe for disaster.)

So, Pumpkin Cupcakes with Cream Cheese Icing it was.

These were lovely and moist, full of flavour and ridiculously easy. I give two thumbs up to any recipe that doesn’t require me to soften the butter first. Sometimes I just can’t quite plan that far ahead. Since this one calls for melted butter, you can impulse bake these puppies. A dangerous thought indeed. And the icing was a breeze, even if you do need to pull out the butter and cream cheese early to make it whippably soft.

When I arrived at my friend’s house, she put the cupcakes up on the counter, but not far enough out of reach from her young son, who managed to swipe a finger over the icing of one cupcake. I agree, Erik, the icing is irresistible!

Cupcake from the top

I used the same recipe from my Red Velvet Cake (hot pink velvet cake?) for the icing. It’s foolproof and ridiculously good.

The batter was a little too delicious, though. This recipe, according to Martha Stewart, will give you 18 cupcakes. (Find hers here.) I don’t know what size of pan Ms. Stewart is using, but this easily made two batches in my 12-cupcake pan. Or, more accurately, it made 23 cupcakes. It would have made 24 had I not eaten so much batter. Good lord.

Mmmm spices

Mixing it up

Pumpkin Cupcake Batter

Pumpkin Cupcake Batter

Cream Cheese Icing

Pumpkin Cupcakes with Cream Cheese Icing

Pumpkin Cupcakes with Cream Cheese Icing

  • 2 cups all-purpose flour
  • 1 teaspoon baking soda
  • 1 teaspoon baking powder
  • 1 teaspoon coarse salt
  • 1 teaspoon ground cinnamon
  • 1 teaspoon ground ginger
  • 1/4 teaspoon freshly grated nutmeg (I doubled this because I love nutmeg.)
  • 1/4 teaspoon ground allspice
  • 1 cup packed brown sugar
  • 1 cup granulated sugar
  • 1 cup unsalted butter, melted and cooled
  • 4 large eggs, lightly beaten
  • 1 can (15 ounces) pumpkin puree (I used a 14-ounce can and it was still lovely and pumpkin-y)

Preheat oven to 350. In a medium bowl, whisk together flour, baking soda, baking powder, salt and the spices. In another bowl, whisk together the butter, brown sugar, granulated sugar and eggs. Add dry ingredients and whisk until smooth. Then whisk in pumpkin puree.

Line the cupcake pan with liners and fill each about halfway with batter. Bake until tops spring back when touched and a cake tester comes out clean, about 20 to 25 minutes. Rotate the pans if needed. (I have one pan, so did not bother with that step.) Transfer to wire rack and let cool completely before icing.

Cream Cheese Icing

  • 8 oz. cream cheese, room temperature
  • 1/2 cup butter, room temperature
  • 3 cups icing sugar, sifted
  • 1 tsp. pure vanilla extract

Beat butter and cream cheese until light and fluffy. Add vanilla and sugar.

Continue Reading

Southern Comfort

Red Velvet Cake is a southern U.S. tradition that is so popular it can even be found in the cake mix aisle. I can’t date when my obsession with this cake began, though I think it first came to my attention while watching Steel Magnolias where the groom’s cake was shaped like an armadillo and it looked like it was bleeding when someone cut into it.

And I’m also not sure what the reason behind this obsession is. Must be something about the virginal white icing hiding the slutty red interior and all its metaphors.

Essentially, it’s a chocolate layer cake infused with red food colouring that turns the cake into a shade of crimson that plays against the white, cream cheese icing.

Red Velvet Cake

But I had no idea what I was getting myself into when I decided to take this on for a dinner party Sunday night.

1) It’s the first cake I’ve ever baked that did not involve me opening a box and praising Betty Crocker.

2) It involved at least 30 minutes worth of research on dutch processed cocoa vs. natural cocoa. (Nutshell: dutch processed is treated to neutralize its acidity, so has to be used in recipes that call for baking powder as it may not react with baking soda.)

3) It also involved a further 30 minutes of research to figure out whether the cocoa I bought for this (Fry’s) was or was not dutch processed, since it was not indicated anywhere on the can. For the record, it is.

On the upside, attempting this cake also gave me an excuse to buy some new toys for my kitchen: an offset spatula and two new cake pans.

I was initially hesitant to make this cake, having never baked one that didn’t come out of a box. This hesitation was amplified after I went out on a blind date with a man who considered himself quite a baker. While the meringues he brought to munch on over coffee were good, I thought it was a bit presumptuous when he tried to talk me out of my red velvet plan.

“You’ve never made a cake?”

And then: “You should make brownies. There’s a great recipe by Alton Brown, just cut back the sugar to half a cup.”

Brownies, he said, were good and easy and hard to screw up.

“You don’t want to make your friends your guinea pigs,” he added.

That was pretty much the end of the date. There won’t be a second one.

And, after that, I was much more determined to master the Red Velvet.

I won’t call it a resounding success — as kind as my friends are for saying it was delicious — but it was a worthy first effort. And, frankly, anything coated in that much cream cheese frosting can’t be all bad. I learned a few things, including the need to sift all the dry ingredients together or suffer the consequences. In this case, that meant cocoa swirls throughout the not-quite-flaming red layers; and that a crumb coat is definitely the way to go when dealing with such an intensely coloured batter.

The Ingredients


Red Velvet Cake with Cream Cheese Icing

  • 2 1/2 cups sifted cake flour
  • 1 tsp. baking powder
  • 1/2 tsp. salt
  • 2 tbsp. Dutch-processed cocoa powder
  • 1/2 cups unsalted butter, room temperature
  • 1 1/2 cups white sugar
  • 2 large eggs
  • 1 tsp. vanilla extract
  • 1 cup buttermilk
  • 2 tbsp. liquid food colouring
  • 1 tsp. white distilled vinegar
  • 1 tsp. baking soda

Preheat oven to 350 degrees F. Butter two 9″ round cake pans and line the bottom with parchment paper

Sift together flour, baking powder, salt and cocoa powder. (And ensure the cocoa is evenly distributed.)

Beat butter until soft, then add sugar and beat until light and fluffy. Add the eggs one at a time, beating well each time. Add vanilla.

In a measuring cup whisk the buttermilk and red food colouring. (I used food colour gels here, so added two tbsp. of water and mixed in the gel, adding more and more until the desired colour.)

Alternately add the flour mixture and the buttermilk mixture to the butter and eggs, ending on the flour.

Mix in small cup the vinegar and baking soda. Watch it fizz, then add to the batter.

Pour the batter into the two pans and bake for 25 – 30 minutes. Let cool in wire rack in the pans for 10 minutes, then out of the pans until cool.

  • 8 oz. cream cheese, room temperature
  • 1/2 cup butter, room temperature
  • 3 cups icing sugar, sifted
  • 1 tsp. pure vanilla extract

Beat butter and cream cheese until light and fluffy. Add sugar and vanilla. (Prepare to be coated in icing sugar cloud.) Beat to combine.

Continue Reading