Welsh Scones

Growing up, I had a thing for the Royal family.

I had coffee table books all about Princess Diana, her wedding to Charles, her boys, William and Harry, along with a video of Andrew and Sarah Ferguson’s wedding.

I was one of those girly-girls with a penchant for dressing up, wanting to wear twirly skirts (that whirled out when I spun in circles; I called them turn-y skirts), put on lipstick. I always wanted a tiara.

So, although the inundation of countdowns and articles and television specials and photo galleries leading up to the wedding between Prince William of Wales and Kate (I’m sorry, Catherine) Middleton has been a bit much, my inner eight-year-old girl is kind of loving it. What will the dress look like? What diamond-encrusted tiara will adorn her lovely dark locks? What will the bridesmaids wear? Will they have turn-y skirts?

Outside of the fantasy world, I don’t envy Kate. I’m happy for her and William because they do some genuinely in love, something so clearly missing in the relationship between his parents (though I couldn’t see that as a child). But I wonder too at what she’s giving up for that love. Yes, there are jewels and gorgeous clothes, first-class trips, brushes with celebrity. And there is the paparazzi, the pomp, the expectations, the constantly public life.

No matter, I will be indulging that inner child and tuning in to the wedding.

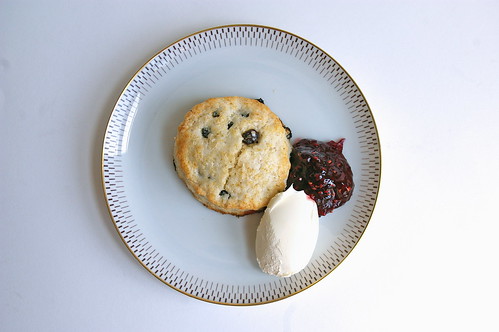
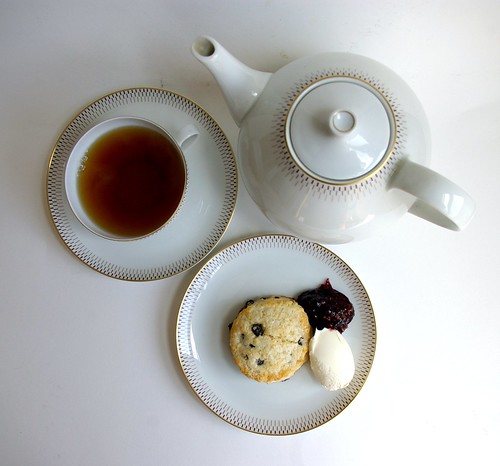
In honour of that, I’ll be eating scones (and drinking some champagne, of course — though not at 3 a.m. I’m not so devoted that I will wake up that early. That’s why I have a PVR.) as Kate walks down the aisle.

"Welsh Cake" scone

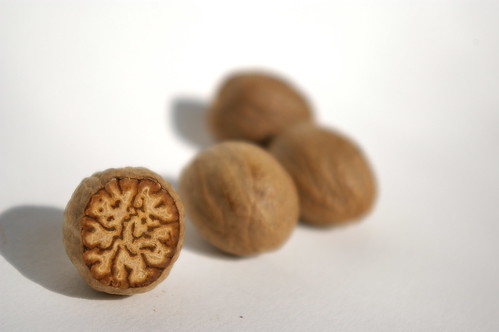
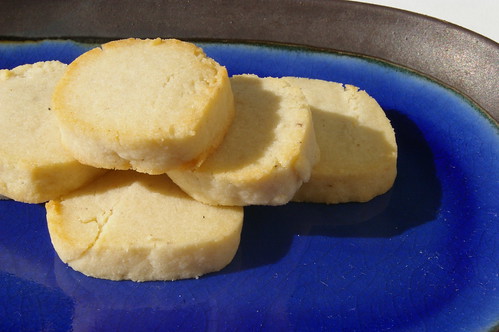
I could eat any version of scones, but I decided to create a recipe that would combine a basic scone with a Welsh cake (which share some similarities with scones, though they are fried instead of baked). My stepfather, who is of Welsh descent, often made these as a Sunday treat when we were kids. (A tradition, thankfully, that continues when I visit my parents.) They have a distinctive flavour that comes from nutmeg and currants. Basically, I wanted to use those flavours. Not just because I love them, but it’s just so fitting.

Afternoon Tea

He is Prince William of Wales, of course. And the couple will start their life as newlyweds in Anglesey, an island off the northwest coast of Wales.

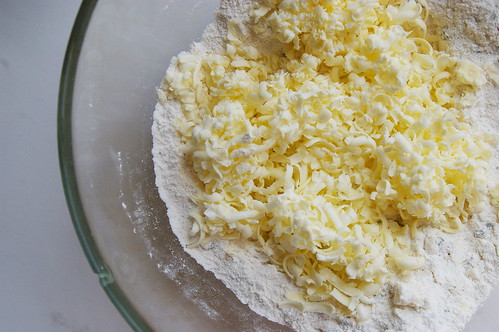
I have to give credit where it’s due, so I will say that Nigella Lawson has changed the way I make scones. Her trick of grating frozen butter is just . . . perfection. I cannot recommend it enough. No matter what scone recipe I use these days, I always, always, always use this technique. Please, try it, I implore you.

This is based on her strawberry shortcake recipe, but has been adjusted.

Butter curls

Egg in Cream

Rolled and Cut

"Welsh Cake" Scones

Welsh Scones

  • 1½ cups flour
  • ½ teaspoon salt
  • 1 tablespoon baking powder
  • 1/4 cup sugar
  • 1/2 cup currants
  • 1/2 teaspoon nutmeg (I may go with a tad more next time)
  • 1/2 cup unsalted butter, frozen
  • 1 large egg
  • ½ cup half-and-half or whipping cream (you may need slightly more)
  • 2 tablespoons whipping cream
  • 2 tablespoons sugar (regular or natural cane sugar), optional

Preheat the oven to 425°F.

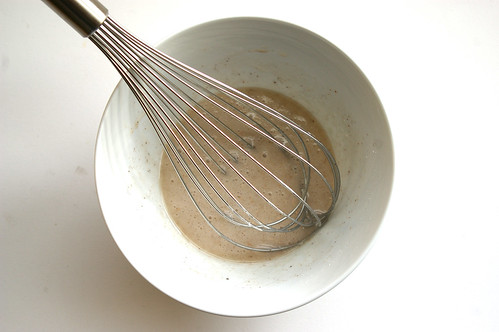
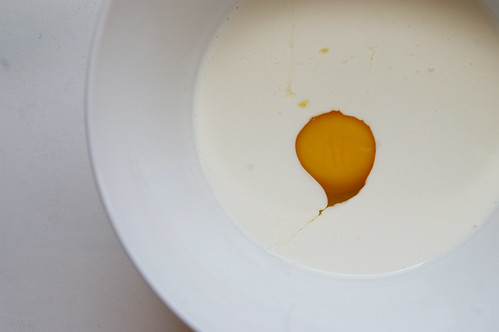
Mix together the flour, salt, baking powder, sugar, currants and nutmeg in a bowl. Grate the frozen butter into the dry ingredients and use your fingertips to lightly toss all together. Whisk the egg into the half-and-half cream and pour into the flour mixture a little at a time, using a fork to mix. (I often need another tablespoon or two; I chalk it up to that dry Calgary weather.)

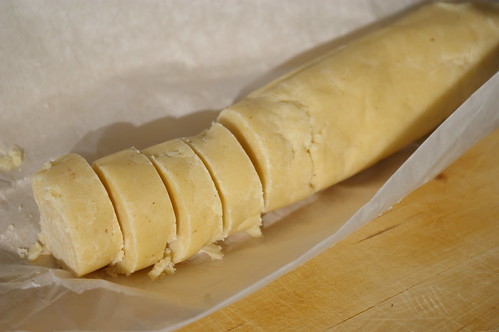
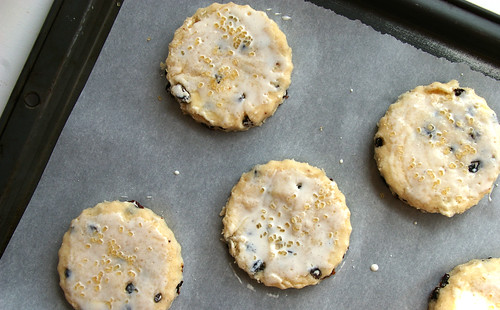
Turn the dough out onto a lightly floured surface, then roll gently to about ¾-inch thick. Dip a cutter in flour and cut out as many scones as possible. (Small ones are cute, but sometimes you just want a large scone with lots of room for Devonshire cream and jam.) Work the scraps back together, re-roll and cut more. (Nigella suggests using a 3-inch/6½-cm round cutter to make 8; I used a smaller one and got about 14.) Place on a baking sheet, brush the tops with the 2 tablespoons whipping cream and sprinkle with the remaining sugar, if desired. I used natural cane sugar, which has larger grains.

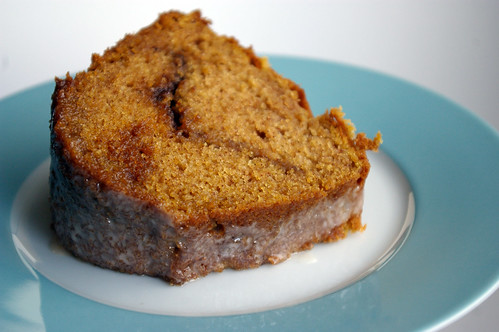
Bake until golden. Between 10 and 15 minutes for larger scones. Cutting them smaller? Check earlier. Mine took about 9 minutes. Remove to wire rack to cool.

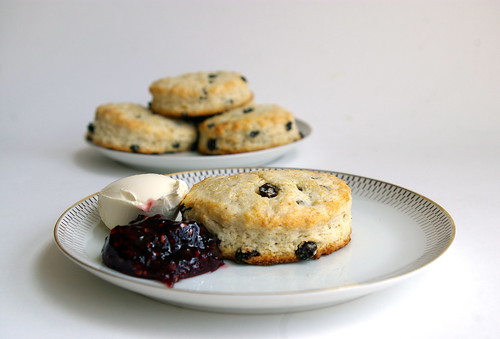
Eat with copious amounts of jam and Devonshire cream. Or butter and jam. Or just jam.

Continue Reading

Applesauce Spice Cupcakes

I felt like making cupcakes. That’s pretty much the reason for the post.

Iced Cupcake

So, I was flipping through my cupcake cookbook (impulse buy, of course. Sigh.) and found this recipe for Applesauce Spice Cupcakes with Brown Sugar Cream Cheese Frosting. (Aren’t you glad I didn’t make all of that the title of the post?) The only reason I paused was because I noticed that it called for unsweetened applesauce and I just happened to have some in my cupboard. Not something I’d normally have hanging around but when I made my Applesauce Cake a few weeks ago, I didn’t look closely at the recipe before going shopping. When looking at the choice between unsweetened and sweetened applesauce, I figured it was only logical that the applesauce cake would call for unsweetened because there was sugar in the recipe.

Duh.

This is why I need to be more explicit with my lists.

I came home to find I bought the wrong kind and had to go back to the grocery store for the right kind of applesauce. I would have returned the unsweetened but was too lazy to go all the way back to the store where I bought it (there are none of that chain close to me; I had picked it up while running other errands). Plus, I guess I figured at some point I would find a way to use it up.

And, lo, I did.

Like every other time I’ve made a Martha Stewart cupcake recipe, I ended up with way more than she predicted. I don’t know if my muffin tin is much smaller than hers or if I’m underfilling the cups, but I ended up with 21 or 22 cupcakes, where she said I would end up with 18. And, people, this was after consuming some batter. (*Hangs head in shame.*)

Spiced batter

But having extras was no big deal, really, because they were good and they all got eaten anyway.

The cupcakes are not overly sweet, which is nice against the cream cheese icing. But I think I actually preferred my mum’s recipe for Applesauce Cake. It just seemed . . . I don’t know. Lighter? Better? And it could be just as easily converted into a cupcake recipe by putting the batter into muffin tins and decreasing the baking time. (Start checking at about 15 minutes. They should probably take about 20.)

One more thing. The recipe calls for 1 1/2 cups of unsweetened applesauce. That’s 375 mL. A can or jar of applesauce here in Canada is 398 mL, so I just dumped the whole thing in. And it was totally fine, so if you’re worried about that last little bit, just chuck it in.

Cooling

Frosting

Cupcake trio

Applesauce Spice Cupcakes

  • 2 cups all-purpose flour
  • 1 teaspoon baking soda
  • 3/4 teaspoon salt
  • 2 teaspoons ground cinnamon
  • 1/2 teaspoon freshly grated nutmeg
  • 1/8 teaspoon ground cloves (I didn’t have any and the recipe was just as tasty)
  • 1/2 cup unsalted butter, room temperature
  • 1 cup granulated sugar
  • 1/2 cup packed brown sugar
  • 4 large eggs, room temperature
  • 1 1/2 cups unsweetened applesauce
  • 1 cup pecans, toasted and chopped (I didn’t put these in because my friend is allergic and I really wanted her to eat one)

Preheat the oven to 350. Line standard muffin tins with paper liners. Whisk together flour, baking soda, salt, cinnamon, nutmeg and cloves.

With an electric mixer on medium-high speed, cream butter and both sugars until pale and fluffy. Add eggs, one at a time, beating until each is incorporated, scraping down sides of bowl as needed. Reduce speed to low. Add applesauce and then flour mixture, beating until just combined after each. Stir in pecans by hand.

Divide batter evenly among lined cups, filling each three-quarters full. Bake, rotating tins halfway through, until a cake tester inserted in centers comes out clean, about 20 minutes. Transfer tins to wire racks to cool completely before removing cupcakes. Cupcakes can be stored overnight at room temperature, or frozen up to two months, in airtight containers.

To finish, use a small offset spatula to spread cupcakes with frosting. Frosted cupcakes can be refrigerated up to three days in airtight containers; bring to room temperature before serving.

Brown-Sugar Cream-Cheese Frosting

  • 1/2 cup unsalted butter, room temperature
  • 8 ounces cream cheese, room temperature
  • 1 cup packed brown sugar

With an elecrtic mixer on medium-high speed, beat butter, cream cheese and brown sugar until smooth. Use immediately, or refrigerate up to three days in an airtight container. Before using, bring to room temperature, and beat on low speed until smooth.

Continue Reading

Applesauce Cake

The original copy of this recipe is a decrepit piece of scrap paper with a lone hole punch that has been reinforced. It is battered, splattered and stained.

It has been typed on an old typewriter using a cloth ribbon, a large series of Xs cancelling out the erroneous title of Nanaimo Bars, while the correct name of Applesauce Cake has been underlined in red.

And there, in my mum’s bubbled handwriting, are the adjustments she has made over the almost four decades she has carried this recipe around. It has travelled from one kitchen to the next, slowly yellowing with age, garnering new splotches as time has passed by.

The original recipe

But the flavour of this applesauce cake — warmly spiced, slightly sweet and oh-so-apple — remains a constant. A taste of childhood and home and family.

The original still resides in my mum’s kitchen, tucked away among her other recipes, typed by her or clipped from the newspaper, newer ones printed from the Internet or photocopied from magazines. But with the technology of a scanner and e-mail, I now have my own digital copy of the beloved Applesauce Cake recipe, complete with brown stain and wrinkled edges.

At its heart, it is a simple loaf cake flavoured with applesauce, nutmeg and cinnamon. But it is also a trigger for childhood memories: trying to wait for it to be cool enough to eat as it sat on the wire baking rack; running little fingers under the rack glaze that had drizzled off the edge of the cake; finally getting a slice and eating it from the bottom up so the last few bites were coated with icing.

Applesauce Cake I

The apple flavour comes through well, but it is the cinnamon and nutmeg that make the cake a little more extraordinary. I’m not a food snob by any stretch, but I will say that there is no comparison between pre-grated nutmeg in a spice jar and the taste imparted by the freshly grated stuff.

These days whole nutmegs are not that hard to find and are well worth the effort for the improved flavour alone. Not to mention, they are gorgeous when grated: cream-coloured with darker brown veins, like marble.

(A fine grater will work, but my family is devoted to the rasps scoop up from Lee Valley Tools, which make quick work of nutmeg and are ideal for zesting citrus, mincing garlic and making fluffy clouds out of Parmesan.)

While the original version made one loaf in a 9.5-by 5-inch pan (24-by 12-centimetres), it left the baker with leftover applesauce. In her wisdom, my mum amended the measurements–writing them neatly down the side of the paper– so it would use up a full can, rather than leaving her to try to deal with roughly a half-cup of the stuff. Plus, in her words, it means “more cake!”

This comes together very quickly–especially if you have the forethought to pull out the butter or margarine early. Patience must come, though, with the hour-long baking time and the dreaded cooling period, which was such a source of frustration as a kid.

My glazing skills apparently need work, but, while unattractive, it tasted just as good as when I ate it in my mum’s kitchen.

Applesauce Cake II

And yes, when I had finally waited long enough for it to be glazed and I could slice off the first piece, I ate it starting at the bottom so the last bite would be the perfect combination of cake and glaze. After all, some things never change.

Applesauce Cake III

Applesauce Cake IV

Applesauce Cake

  • ¾ cup (175 mL) margarine or butter, softened
  • 1½ cups (375 mL) sugar
  • 3 eggs
  • 2¾ cups (675 mL) sifted flour
  • 1½ tsp (7 mL) salt
  • 1½ tsp (7 mL) baking powder
  • ¾ tsp (3 mL) baking soda
  • ¾ tsp (3 mL) nutmeg
  • ¾ tsp (3 mL) cinnamon
  • 1 14 oz (398 mL) can sweetened applesauce

Preheat oven to 350°F (180°C).

Cream together margarine and sugar until light and fluffy. Blend in eggs. Sift together dry ingredients. Add to creamed mixture, alternating with applesauce, beating after each addition.

If you like, stir in ¾ cup (175 mL) chopped walnuts before pouring batter into loaf pans.

Pour into two prepared (sprayed or rubbed with a bit of butter or margarine) 8-by 4-in. (20-by 10-cm) loaf pans. Bake for 1 hour or until done. (Start checking at the 50-minute mark.)

Remove and let cool for about 10 minutes before removing from pans and putting on rack to cool completely.

Sugar Glaze:

Combine ½ cup (125 mL) sifted icing sugar with 1 tbsp. (15 mL) water. Pour over cake.

This story first appeared in the Real Life section in the Calgary Herald. For more delicious recipes, visit CalgaryHerald.com/life.

Continue Reading

Sour Cream Pumpkin Streusel Bundt Cake

I bought a bundt pan about a year ago and it’s been wasting away in my cupboard since then, unwashed, unused, unloved. The whole reason for buying it was because i wanted to start making bundt cakes (duh), but I constantly found myself getting pulled towards cupcakes (I love individual desserts) and layer cakes (so pretty).

Bundt Pan

But when I saw a recipe for a Sour Cream Pumpkin Streusel Bundt Cake, I was smitten. Pumpkin? I love pumpkin! Streusel? Yes, please! And a chance to finally crack open my poor bundt pan? What could be better?

The first thing I noticed was that it called for a 12-cup bundt pan. Um, they have more than one size? I felt a bit silly, but I really wanted to avoid some big mistake halfway in, so I poured 12 individual cups of water into the clean pan just to make sure I really did own a 12-cup pan. (I do; And I now know that without a doubt.)

I thought that would be the only potential disaster and I felt satisfied knowing that I had nipped that little thing in the bud.
I shouldn’t have tempted fate.

I really hate kitchen disasters. I know I have a small perfectionism problem and it’s really stupid, but I like it when things come out they way they’re supposed to. Or, in this case, when they actually come out. As in, physically out of the pan.
But I’ll get to that in a second.

For me, it’s not a pumpkin recipe unless there’s nutmeg. Yes, cinnamon and allspice are yummy, but nutmeg and pumpkin are an inseparable pairing, as far as I’m concerned. (OK, maybe not for savoury recipes.) So, I made a couple of adjustments to the original recipe, which didn’t call for this lovely warm spice.

Also, this makes a serious amount of batter. When I had finished it and was about to put it in the bundt pan, I wasn’t actually convinced it was all going to fit. It did. Thankfully.

To the brim

So, the recipe makes it clear not to let any of the streusel layer touch the edges of the pan. I made an effort, but, well, some of the brown sugar-butter mixture may have made its way up against the tin. Later, when only 3/4 of the cake came out of the pan, I wondered if part of the reason was because the streusel layer weakened the cake at the edges. Making it easy for it to separate out when gravity took over as I upended it onto a rack to cool. Either that or I had not prepared my pan well enough. I had sprayed liberally with cooking spray, but have had problems with it in the past. As in, other cakes have not always made their entire way out of the pan either. This isn’t usually a problem because the bottom of a layer cake or loaf cake stays on the bottom of the plate or whatever and no one ever knows that you had a bit of a problem. The issue with a bundt cake is that the bottom of the cake is actually the top part, which you present, of course.

Whatever the reason, the damn thing didn’t turn out (in both definitions) properly. I was too proud to photograph the crater in the cake where the nicely rounded bundt edges should have been. Though, in hindsight, it may have been good therapy just to show that not everything works out all the time and that I can be OK with that.

I’m not even going to get into the fact that I am inept when it comes to glaze. But it sure was not, in the end, a very attractive cake.

Nevertheless, it was damn tasty! And that glaze? Spicing it up with a little nutmeg, cinnamon and allspice made a huge difference.

In all, a dreamy, autumnal cake. Even if it was ugly as all get out.

Sour cream pumpkin batter

Streusel layer

Full bundt pan

Spiced Icing Sugar

Spiced glaze

Sour Cream Pumpkin Bundt Cake with Streusel

Sour Cream Pumpkin Streusel Bundt Cake
adapted from Mommy? I’m Hungry (go here for a photo of what the thing should actually look like. Sigh.)

Streusel:
1/2 cup packed brown sugar
1 teaspoon ground cinnamon
1/4 teaspoon ground allspice
1/4 teaspoon nutmeg
2 teaspoons butter, cold

Cake:
3 cups all-purpose flour
1 tablespoon ground cinnamon
1/4 teaspoon nutmeg
2 teaspoons baking soda
1 teaspoon salt
2 cups granulated sugar
1 cup butter, softened
4 large eggs
1 cup canned pumpkin
1 cup sour cream
2 teaspoons vanilla extract

Glaze:
1 1/2 cups sifted icing sugar
dash cinnamon
dash allspice
dash nutmeg
splash of milk

Preheat oven to 350. Butter and flour (or spray, though we know how well that turned out for me) a 12-cup bundt pan.
For the streusel, combine the sugar and spices in a small bowl. Cut in butter with pastry blender or two knives until the mixture is crumbly. Set aside

For the cake, mix together flour, spices, baking soda and salt in a bowl and set aside. Beat together sugar and butter until light and fluffy. Add eggs, one at a time, beating each thoroughly after each is added. Add pumpkin, sour cream and vanilla. Mix well, Gradually beat in flour mixture.

To assemble, spoon half of the batter into the bundt pan. Sprinkle in streusel, not letting it touch the sides of the pan. Top with remaining batter, making sure the batter layer touches the edges of the pan.

Bake for 55 to 60 minutes or until a toothpick (this is a tall cake, I used a wooden skewer) inserted into the middle comes out clean. Cool for 30 minutes in pan on wire rack, then invert onto rack to cool completely.

When cool, combine icing sugar with spices and splash of milk to make glaze. Stir thoroughly until well mixed and drizzle over cake.
Continue Reading

Nutmeg Shortbread

I am completely addicted to other food blogs and find my need for a quick fix completely appeased by Foodgawker and Tastespotting. No, no, go on, take a look. I’ll wait. (Although, some of you, hopefully have just come from there.)

As a result, an ever-growing list of recipes to try is starting to clog up my bookmarks folder and I’m realizing that I have to actually start making some of things rather than just drooling over images of what other bloggers have made.

Which leads me to Nutmeg Shortbread.

These had been advertised as “tea cookies” at Apple Pie, Patis and Pate, but as I made them I realized they were shortbread. (Is “tea cookies” a common alternative name for shortbread?) This was kind of funny because I don’t love shortbread. But I really liked this recipe. I suspect using granulated sugar instead of powdered sugar gave them a slight chew I don’t find in other recipes.

Since there are so few ingredients, I have to say that this recipe really requires freshly grated nutmeg. Like other spices, pre-ground nutmeg loses something. I don’t think you will regret buying fresh nutmeg. These little nuggets are so innocuous at first appearance, but are beautiful marbled loveliness on the inside and the smell and taste is intoxicating.

Nutmeg

When I wrote out the recipe, I only copied the ingredients, the oven temperature and the time the cookies should be in the even, believing the method would be the same as other cookies. So, I used my hand-held mixer to add in the flour and the dough seemed to shatter into granules. And that’s when I really began to freak out. Apparently, I was supposed to mix the flour in by hand. Whoops. But I thought I’d see it through anyway. It’s not really a disaster, I figured, until they come out of the oven as a disaster. So I packed the dough into logs, wound them up in parchment and threw them in the fridge overnight.

When I unwound the packages the next afternoon, the dough had formed into nice logs and, for the most part, were easily cut into slices. There were the odd pieces that crumbled a bit when I tried to cut off a slice — mostly, I suspect, because this is where I had joined the lumps of dough and I guess it was not quite as seamless as it looked..

Still, they baked beautifully and were super tasty. My love of intense flavours, however, was still left wanting. Next time, more nutmeg.

Nutmeg shortbread dough

Nutmeg Shortbread

Nutmeg Shortbread

  • 1 cup butter, softened
  • 3/4 cup granulated sugar
  • 1 teaspoon vanilla
  • 1 large egg
  • 2 1/2 cups flour
  • pinch of salt
  • 1/4 teaspoon freshly grated nutmeg (But you may want to consider adding more if you really like the taste of this spice.)

Cream the butter and sugar until light and fluffy. Beat in vanilla and the egg. In a separate bowl, stir together flour, salt and nutmeg. Add the dry ingredients to the butter mixture by hand until just combined.

Divide the dough in four and roll into logs about 8″ long and 1″ in diameter. Wrap in wax paper, plastic wrap or parchment and chill until firm, from two hours to overnight.

To bake, preheat the oven to 350. Cut each log into pieces 1/2″ thick and space evenly on baking sheet. Bake for 10 minutes or until just golden.

Continue Reading