Goat Cheese with Herbed Olive Oil

We have few Christmas traditions in my family. With all us kids grown up and no new generation to take our place, there are only a few activities we cling to during the holiday season. Gone are the days when we wrote letters to Santa and put out a plate of cookies. And we were never the type that gathered around the fire to listen to a parent read The Night Before Christmas.

But over the years we have created a few rituals that we still hold dear when the season finally arrives. The first is listening to Amahl and the Night Visitors – an opera about a poor widow and her lame son who are visited by the Three Kings en route to Bethlehem – while doing some Christmas baking.

A second, more recent, is watching the YouTube video of a house whose Christmas lights are coordinated to the operatically rock-and-roll Trans Siberian Orchestra’s Wizards in Winter – a song my mum and I both acquired permanently last year. This video, with its perfectly timed display of lighted Christmas trees and wreaths, never fails to bring on the giggles.

And third, and perhaps most important, we sit down on Christmas Eve and eat goat cheese doused in herb-and-garlic infused olive oil. With a lot of bread. And a glass or two of wine.

Goat Cheese in Herbed Olive Oil

This custom is so tied to our Christmas, in fact, that when I made it once for friends at some point outside of the holiday season, my little sister got mad at me. The word ‘sacrilegious’ may have even been used.

Like all good traditions, it is unclear when exactly it started or why.

What I do know is that the only reason we even discovered the recipe in the You Asked For It section of Gourmet Magazine was because we wanted the cookie recipe on the same page. At some point later, my mum thought to try out the goat cheese one as well.

It is almost too much to call it a recipe since the most taxing part appears to be gathering the spices and slicing the bread that goes with it. Heating olive oil with some rosemary, garlic and a few other goodies for five minutes is hardly cooking. And yet the combination of slightly grassy oil, softened garlic and the sharp heat of peppercorns mixed with rich goat cheese is so perfect. Add a slice of chewy baguette – making sure to scoop up a bit of each component – and it’s almost heaven.

Garlic, herbs and spices

Having read the recipe over before writing this, I see that it says to slice the goat cheese into eight rounds and then pour the herbed oil over top. I have no idea why we have never done this, but decided to stick to tradition – as we have so few – and leave the cheese in log form.

After all, what are the holidays without some traditions?

Flavouring the oil

Goat Cheese in Herbed Olive Oil II

Goat Cheese with Herbed Olive Oil
Adapted from Gourmet Magazine, January 1994

1 small bay leaf
4 garlic cloves, cut into thin slivers
1 tbsp. (15 mL) fresh rosemary leaves
¼ tsp. (1 mL) coriander seeds, crushed lightly
¼ tsp. (1 mL) fennel seeds, crushed lightly
10 whole black peppercorns
¼ cup (50 mL) extra-virgin olive oil
½ pound (250g) log of soft mild goat cheese
Sliced bread as an accompaniment

In a small saucepan simmer bay leaf, garlic, rosemary, coriander seeds, fennel seeds and peppercorns in oil for 5 minutes. Arrange goat cheese on a platter and spoon oil mixture over. Serve goat cheese with bread.

This story first appeared in the Real Life section in the Calgary Herald. For more delicious recipes, visit CalgaryHerald.com/life.

Continue Reading

Roasted Chickpeas with Chard

I can’t say I’ve ever gone out of my way to buy/cook/eat chard. But there was something about Julie’s entry during her year-long, post-a-day, blog-a-thon involving roasted chickpeas and chard that, for some unknown reason, really appealed to me. I filed it away, figuratively, for a future date and carried on with things.

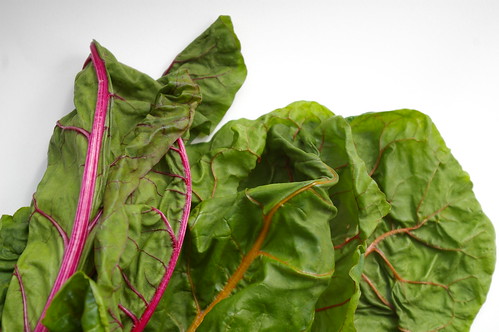
Chard II

So, when a friend at work was extolling the virtues of her chard crop, I was immediately reminded of my plan to try out this dish. And, very fortuitously, she was happy to provide me with a large bunch of chard to use in my attempt.

Bundled Chard

Oh chard! Why have I foresaken thee for so many years? You are quick to prepare and delicious! And I’m pretty sure you’re good for me too!

Chard I

I’m just sad now that the chard season (at least in my friend’s garden) is over for another year. Most of the generous bunch she gave me went into the dish with the roasted chickpeas. But I held back a few stalks that I sauteed quickly with garlic and topped with a fried egg for breakfast one day.

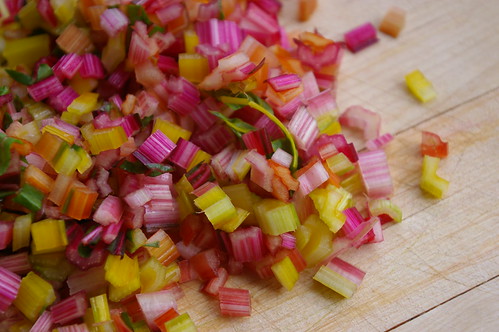
The original recipe just calls for the leaves from what I can tell. But I liked the rainbow stalks so much that I diced them finely and fried them for a few minutes before adding the leaves to the mixture.

I can only hope that next year my friend’s chard crop is even bigger and she is as giving as this time around with it….

This recipe has been adapted ever so slightly from the original, as seen here. Mostly because I didn’t have enough garlic to do it properly and, as mentioned before, because I used up the stalks too.

Chickpeas, garlic, shallots and bay leaves

Chard III

Chopped chard stalks

Roasted chickpeas with garlic and bay leaves

Roasted Chickpeas with Chard

Roasted Chickpeas with Chard

For the chickpeas
1 19 oz.  can chick peas, rinsed and drained
3 cloves garlic, peeled (original calls for entire head; will try this next time)
2 shallots, roughly chopped
2 bay leaves
1/3 cup olive oil

For the chard:
2 tablespoons olive oil
1 large bunch Swiss chard, center stems removed and chopped finely, and leaves coarsely torn
2 garlic cloves, crushed
1/2 cup vegetable, chicken or beef broth

Preheat oven to 400. In a baking dish, combine chickpeas, garlic, shallots, bay leaves and oil. Roast for about 45 minutes, shaking the pan at least once (twice is probably even better) until everything is golden. Remove from oven and set aside.

In a frying pan on the stove, add olive oil and heat until hot. Saute garlic for about 30 seconds until it is fragrant, add chard stems and saute for a minute or two until tender. Add chard and continue cooking until it has wilted — about five minutes. Pour over stock, cover and cook for another 10 minutes. Remove lid and drain excess liquid. Add chickpea mixture, season with salt and pepper and mix until heated through. Add a little more olive oil if desired.

Continue Reading

Pesto

The smell of basil is the smell of summer.

basil

And not just because it is readily available in the months when the sun is out more often than not and the days are long.
It’s also because I will forever associate the smell of basil with my grandfather and summer afternoons in his studio when we would make pesto.

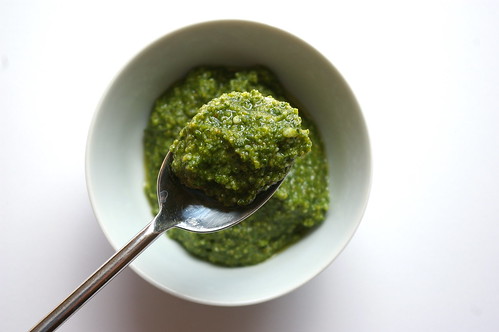
Pesto

He had a greenhouse that somehow managed to produce a never-ending supply of this fragrant herb. (Along with peppers and tomatoes that tasted like tomatoes. I loved eating them when their skins were still warm from being inside the hothouse; their taste was unparalleled.) So pesto was not just a treat that could be made with basil, it was a way of harvesting and putting to use mass quantities of the stuff.

The remaining ingredients, he always had on hand. Heads of papery garlic always sat in a bowl on the work table that separated the kitchen from the rest of the studio. Parsley was harvested from a large pot on the front deck. As a man who wished he was Italian, olive oil and parmesan were always part of the pantry.

He would store the pesto in baby jars in the freezer, sending a few home with me at the end of my visits to the island.

I started making my own pesto a couple of years ago, though in infinitely smaller batches since I have no garden nor greenhouse and must depend on the bags of basil from the farmer’s market. But I, like him, freeze what I don’t think I’ll quickly consume. Then, in the depths of winter, when the sun goes down before I get home from work and the wind can chill me to the bones, I can pull it out. I add it to soups or pasta sauces or cook it with a little cream and pour over pasta with a fresh few grates of Parmesan. In these small ways, I bring back the summer, and the smells and sounds of being with my grandfather.

Olive Oil

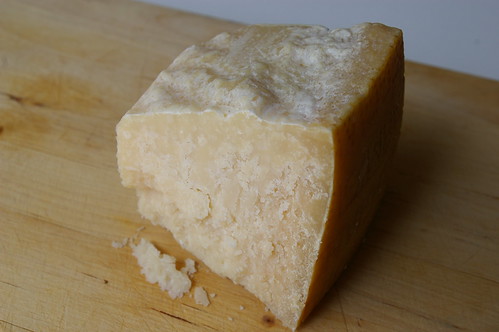
Parmesan

Pesto pre-blending

Pesto II

There are a million variations on pesto recipes. This is one I like, which I adapted from two recipes.

Pesto

  • 2 cups packed basil
  • 1/2 cup parsley
  • 3 cloves garlic
  • 1/2 cup pine nuts, toasted and cooled
  • 1/2 cup grated Parmesan
  • 1/2 teaspoon salt
  • pinch or two pepper (I just do a few grinds)
  • 1/2 cup olive oil

Place all ingredients except oil in a food processor. Blitz two or three times to get it going, then turn on and let run while drizzling oil in. Stop when all the oil is incorporated but before it gets too thin. I like mine to still have a slightly chunky feel to it.

Continue Reading

Lemon Rosemary Olive Oil Cake

OK.

It’s official.

I need an intervention.

My love of rosemary and lemon have reached new levels of ridiculousness.

Cake slice

And here’s how I know that.

As some of you may know, I write for the Calgary Herald’s Real Life section on occasion. I like to pitch the topic in advance, just in case it’s going to clash with any of the other upcoming articles the editor may have planned.

Me: Here’s what I’m thinking: Lemon Rosemary Olive Oil Cake

(Pause)

Her: Lemon?

Me: (confused) …Yes…?

Her: Wasn’t your last thing on lemon? And, um, the one before that?

Me: Okey-dokey. I’ll figure something out. Maybe I should do a boozy recipe….

Her: Good idea.

It was only when I got back to my desk and looked up the drink recipe I had added to my to-do list that I realized I may have a problem: Vodka Rosemary Lemonade Fizz.

Damn you, lemon, why do I love you so? And, uh, rosemary too.

Lemon and Rosemary

But, just because I couldn’t write it for the Herald didn’t mean this bad boy (and, at some point down the road, the vodka recipe too) wasn’t going to get made. After all, one can only deny their love for lemon desserts for so long. And, let’s face it, it was raining and snowing and sleeting out at the time, so what was a girl to do? Bake.

This is adapted slightly from Julie’s recipe (over at Dinner with Julie). Her original recipe calls for a finely chopped or grated pear. I omitted it this time around, but will be tempted to throw one in next time.

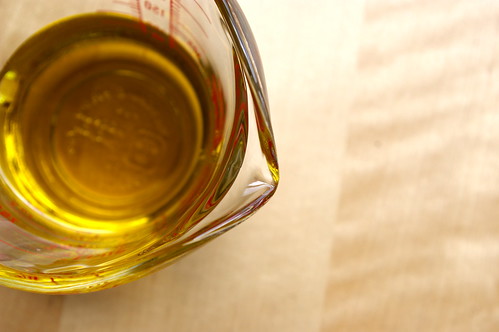
Olive Oil

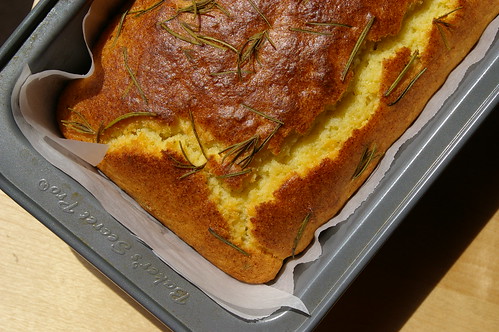
Studded with rosemary

Golden cake

Lemon Rosemary Olive Oil Cake

  • 4 large eggs
  • 3/4 cup sugar
  • grated zest and juice of a lemon
  • 1/2 cup regular or extra virgin olive oil or canola oil
  • 1 1/2 cups all-purpose flour
  • 2 tsp. baking power
  • 1/4 tsp. salt
  • 2 sprigs of rosemary, leaves stripped off and chopped
  • a couple more sprigs of rosemary to decorate the top (optional)

Preheat oven to 350. In large bowl, beat eggs for about a minute until frothy. Add sugar and beat for a few minutes until mixture is thick and pale. Add lemon zest, juice and olive oil and beat again.

Combine flour, baking powder, rosemary and salt in another bowl, then add to egg mixture. Stir by hand until just combined.

Pour into prepared loaf pan (sprayed or lined with parchment). Lay decorative rosemary on top. Bake for 45 minutes, until golden. (Mine was done in a little less, so you may want to check earlier if your oven runs a bit hot.

Continue Reading

Fresh Corn Salad

A group of friends and I were talking about things we like to make for dinner a couple of weeks ago, when one mentioned her relatively recently acquired love of all things barbecue. And that, inevitably, led to a discussion about side dishes.

There has been a lot of recipes lately for grilled corn, which sounds delicious (especially when there is also talk about chili-lime butter to spread on after), but I am a sad city dweller with no patio/balcony/deck and, subsequently, no hibachi/grill/barbecue. But that doesn’t mean that I miss out when corn is in season.

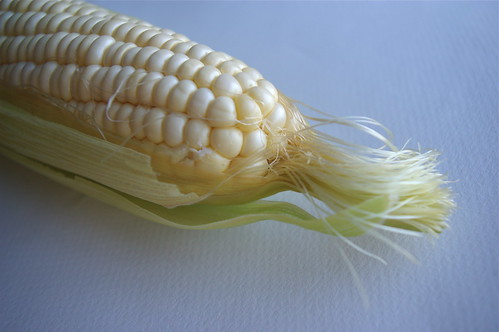
Corn on the cob

Every summer I make a few rounds of Fresh Corn Salad, when corn on the cob is ripe and basil is plentiful at the Farmer’s Market. There are only seven ingredients in this salad, and that includes the dressing.

This is really easy to throw together and well worth the effort. (Okay, maybe the actual cutting-the-corn-off-the-cob is a bit messy.) (I recently saw this gadget that strips the kernels from the cob and while I love all things gadgety, even I feel that’s a bit much.)

I did initially have a tough time finding cider vinegar, but then found some at my local Safeway (along with another much-loved Barefoot Contessa ingredient: champagne vinegar. Um, actually, I just looked and mine is “champagne style.” What can I say? I’m a champagne girl on a “champagne-style” budget.) They come in pretty small bottles, but I don’t use cider vinegar all that often, so it works out.

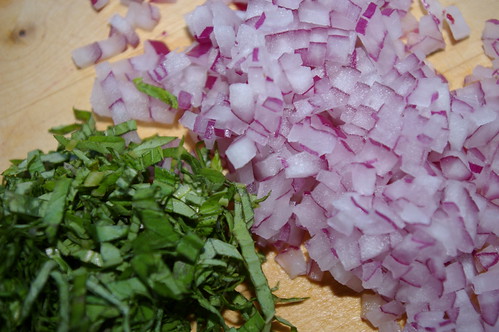
basil and red onion

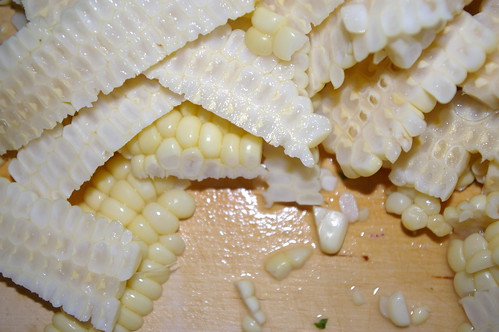
Corn off the cob

Fresh Corn Salad

This recipe is from The Barefoot Contessa Cookbook.

Fresh Corn Salad

  • 5 ears corn, shucked
  • 1/2 cup small-diced red onion (1 small onion)
  • 3 tbsp. cider vinegar
  • 3 tbsp. good olive oil
  • 1/2 tsp. kosher salt
  • 1/2 tsp. freshly ground black pepper
  • 1/2 cup chiffonade fresh basil leaves

In a large pot of boiling salted water, cook the corn for 3 minutes until the starchiness is just gone. Drain and immerse it in ice water to stop the cooking and set the colour. When the corn is cool, cut the kernels off the cob, cutting close to the cob.

Toss the kernels in a large bowl with the red onions, vinegar, olive oil, salt and pepper. Just before serving, toss in the fresh basil. Taste for seasonings and serve cold or at room temperature.

Continue Reading

Green Beans with Garlic

What is it about other people’s versions of the same recipe that inevitably turn out better than yours? I call it Other People’s Salad Syndrome, or Salad Syndrome, for short. I can put the same baby lettuce, grape tomatoes and grated carrot in a bowl, make a basic vinaigrette and it will be fine. My Mum will make it or a friend will whip one together and it will still taste better than one I’ve made.

When I was back in Vancouver a few weeks ago, my Mum made a dinner that included Green Beans with Garlic. In a nutshell, it’s steamed green beans, doused with olive oil that has had chunks of garlic cooked in it, then sprinkled with salt and pepper. We’ve had this many times over the years, and I’m sure I remember a few versions that had long strips of sweet red pepper for colour and flavour contrast.

Still craving another hit of that garlicky, summery taste, I picked up a huge bag of green beans earlier this week. Then, this morning as I was procrastinating (surely, this is one of the top reasons I bake and cook), I thought it would be the perfect time to cook up some beans.

Green Beans with Garlic

I had double checked the “recipe” with my Mum the night before. (“So, it’s just beans and garlic in oil and salt and pepper, right?” I messaged her in the middle of our online Scrabble game. “Yup.” Alrighty, then.) So, I was good to go.

Oh, except for the fact that for some unknown, unexplained and super annoying reason, the water to my apartment was cut off for several hours today. But, never one to shy away from a challenge, I proceeded anyway. (I can be particularly stubborn and, subsequently, pretty creative.) I had just enough water in my Brita to make three cups of rice (for the other part of my lunch) and to steam the green beans. Thank god I refilled that thing.

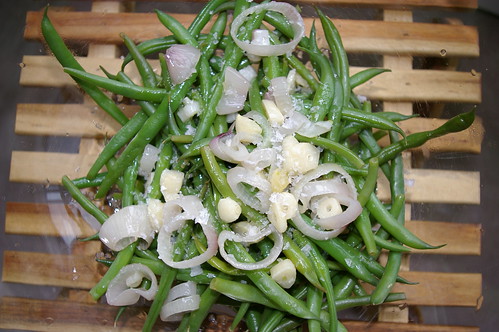
Green beans

Owing to my overwhelming supply of shallots, I thought I’d adjust the recipe slightly and slice up one of those and add it at the last minute to the olive oil. I really liked this touch, as the shallot was a sweet addition, and will do it again in the future. But if you don’t have any lying around, I wouldn’t worry about it.

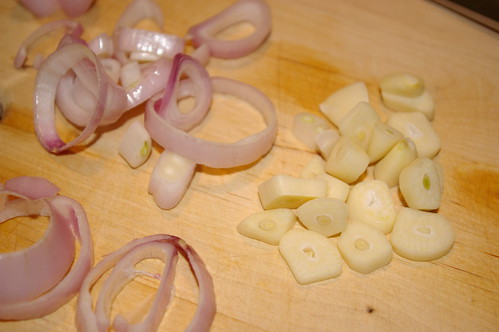
Shallots and garlic

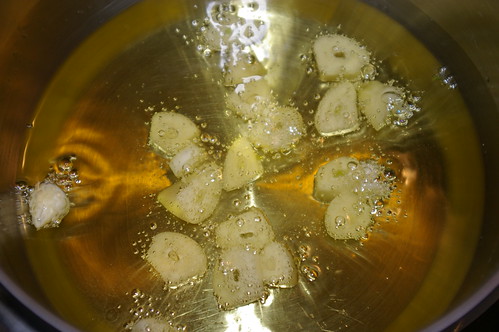
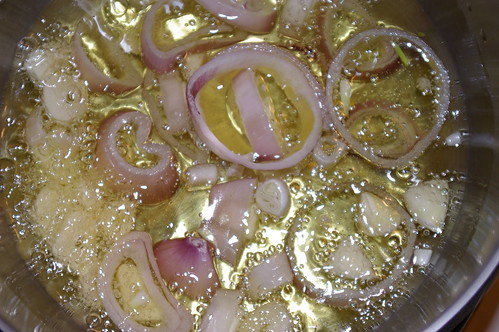
The idea here is to cook the garlic until it’s tender and has lost its bite in favour of a slightly nutty taste sort of akin to roasted garlic. If the oil’s temperature is too high, the garlic could burn and it will taste very acrid. The key is to watch the amount of bubbling after throwing in the garlic. I also occasionally lift the pot off and swirl the oil around to keep the garlic moving. If you’re going to add some shallot, add it towards the end because it will cook more quickly than the thick-cut garlic.

Garlic and olive oil

Shallots and garlic in olive oil

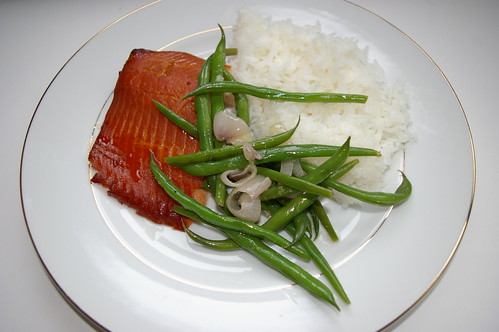
Anyway, I steamed the beans, cooked the garlic in the oil, added the (what I believe to be) inspired choice of a shallot, tossed it all together with some salt and pepper and sat down to enjoy lunch.

And was disappointed.

It’s not that it wasn’t good. Mmmmm garlic. Mmmmmm slightly sweetened shallot. Mmmmm grean beans. And yet, it still wasn’t as tasty as the version I had just two weeks earlier.

I’m blaming it on Salad Syndrome.

But I’m going to keep working on it because this summery, salad-ish recipe is too good to give up on.

For this recipe, I use Maldon flaked salt. I like the slight crunch of the crystals and that it’s not an overpoweringly salty taste.

Lunch is served

Green Beans with Garlic

  • 1 pound green beans
  • 1/2 cup olive oil, extra virgin preferable for it’s more intense flavour
  • 4 cloves garlic, sliced thickly
  • 1 or 2 shallots, sliced thickly in rings and then separated
  • salt
  • pepper

Steam the green beans. (I do it on the stove using a steamer, but only because I’m not sure how to do it in the microwave.) When they are still slightly crisp (I think the technical term is “tender crisp”) and bright green, throw them in a bowl of ice cold water to shock them — stop the cooking process and keep them a nice colour. Strain and throw in a bowl. While the beans are steaming, set a small pot with the olive oil onto a burner set to medium heat. Add the garlic and cook until slightly golden. Toss over beans and then add salt and pepper to taste.

P.S. When all the beans are eaten and there is still all that lovely, garlicky oil left over, it’s pretty delicious with chunks of french bread.

P.P.S. Hmmmm. Having just had another round of beans that have been sitting out since I made them (about two hours ago) and are now about room temperature, I’d say they are even better this way. Maybe *that’s* the trick. When my Mum made them, my sister and I kept picking away at them while the rest of dinner cooked, so they probably were more at room temperature by the time we all sat down.

So, you may want to make them slightly ahead of time and let them cool before enjoying.

Continue Reading