Eggs in Purgatory

Necessity is the mother of invention.

True in the world of technological advances. True also in the world of the kitchen.

Because, on those nights when there doesn’t appear to be anything in the cupboards and the fridge is down to just the basics, there are still meals to be made.

Such was the case the other night when I found myself hungry and with only the very basics in my cupboards and fridge. (Eclectic basics due to my bizarre impulse grocery shopping skills, but basics nevertheless.)

Among them, a can of diced tomatoes I’m sure I bought for a Bolognese that never ended up getting cooked, a chunk of Parmesan, part of a red onion, some rapidly wilting herbs and eggs.

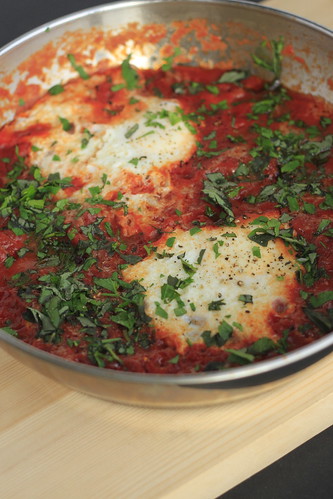
In short, all the ingredients for a dish known as Eggs in Purgatory.

(It’s sometimes also known as Eggs in Hell, though I’d argue that’s for a spicier version than I can handle.)

Eggs in Purgatory II

There are millions of variations for this recipe, but they all start with the basic concept of cooking eggs in a tomato sauce. Beyond that, it can be as creative as one wants or dependent on what one has on hand: wilt in some greens like spinach or kale, add sausage, spicy chorizo or strips of prosciutto, sauté onions and garlic to give the sauce more flavour. Make a more “hellish” version by throwing in some chopped jalapenos or chilies while sautéing the onions. The options are limitless.

With my limited supplies, however, I kept it pretty basic. Thankfully, basic doesn’t mean boring.

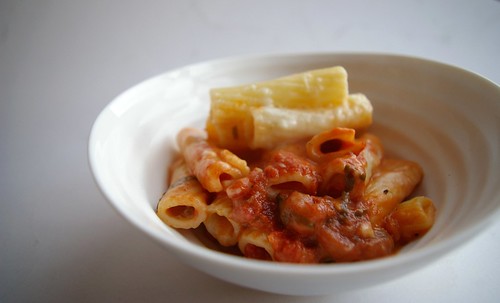
With only 10 minutes and a very small amount of effort, I had a flavourful and filling dinner. The rich eggs with slightly runny yolks are a nice foil to the spicy tomato sauce. I mopped it all up with a crusty piece of bread slathered with some butter.

Using just one pan to make a meal means this dish is near perfection.

Next time, I probably won’t wait until necessity forces me to make this for dinner; I’ll make sure I have the ingredients for Eggs in Purgatory.

Eggs in Purgatory I

Eggs in Purgatory

For a spicier version, add more red pepper flakes or add some diced jalapeno. For some more green, wilt spinach or kale just as the onions have softened before adding the diced tomatoes.

  • 1 tbsp (15 mL) olive oil
  • 2 tbsp (30 mL) diced onion, about ¼ of a small onion
  • 1 clove garlic, diced
  • ¼ tsp (1 mL) red pepper flakes
  • 1 13.5-oz (398 mL) can diced tomatoes
  • ¼ tsp (1 mL) salt
  • freshly ground pepper
  • 2 eggs
  • ¼ cup grated Parmesan
  • ¼ cup chopped herbs

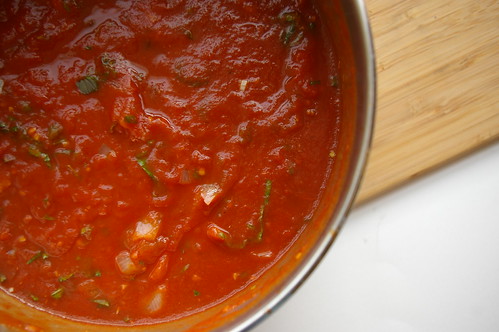
In a pan over medium heat, warm the oil and then add the onion, letting it sauté until softened and slightly transluscent. Add the garlic and red pepper flakes and sauté until fragrant, about a minute longer. Pour in the diced tomatoes and juice, stir and let come to a simmer. Add the salt and a few grinds from the pepper mill, then let the tomato sauce cook until the liquid reduces and the sauce thickens slightly. Taste for seasonings, adding more salt or pepper as needed.

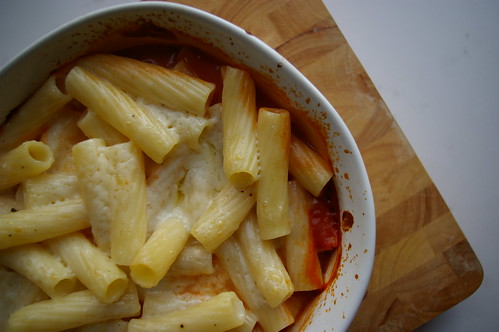
Using the back of a spoon, make two divots in the sauce and crack the eggs into the spaces. Sprinkle the parmesan over the sauce and egg whites.

Cover with a lid and let the eggs cook until the whites are set and the yolk is slightly runny (or to your desired doneness).

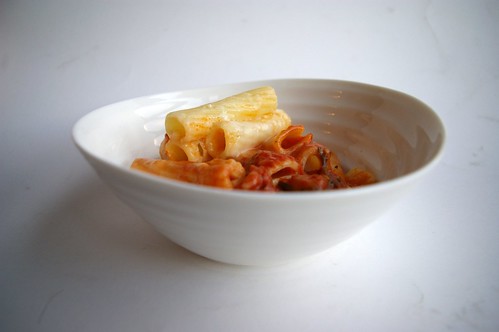
Remove from the heat, then sprinkle with the chopped herbs.

Serve immediately.

Serves 1 to 2.

Continue Reading

Quinoa Tabouleh

Some people impulse buy gum.

I impulse buy five-pound bags of quinoa.

Oh sure, I thought it was a lovely idea in that moment, romanced by all the things I could do with this versatile, healthy, nutritious ingredient chock full of protein and fibre.

Especially after I saw on the back of the hefty bag that I can cook quinoa in my rice cooker. (Cooking rice and rice-related ingredients? Not my forte. I blame it on a year living in Japan where my apartment came equipped with a rice cooker.)

And then I got the family-sized bag home, jammed it into my cupboard and kind of forgot about it as it occupied valuable real estate in my kitchen. I finally unearthed it many weeks later, concocting a biryani-style salad with currants, chickpeas and a curry-lime dressing.

And then I forgot about it again.

Since then, there has been a bit more experimenting with quinoa.

But there is also something to be said about going back to basics — honest-to-goodness classic dishes that remain in the cooking repertoire for a reason.

Things like tabouli.

Or tabbouli. Or even tabouleh.

Or however you want to spell it.

Quinoa Tabouleh III

In theory, this is a salad I should like. Mint and parsley, lemon juice, tomato and cucumber. All those herbs with that zip of acidic lemon, the crunch of cucumber and umami taste of tomato? I like all those things. A lot.

What I don’t like is bulgur, the grain traditionally used in tabbouleh salads.

I made a huge bowl of it once using a recipe that called for bulgur and then had to eat it for two days to get through it, hating it the entire time.

I didn’t like the taste or the chew and forcing myself to finish the thing, which had taken a bit of time and effort to prepare, did not help the situation.

So, as I was sorting through my cupboards the other day and stumbled across the still half-full bag of impulse quinoa, I was struck by a thought: why not make tabbouleh with a grain-like ingredient I actually enjoy?

And I pulled out my rice cooker and did exactly that.

Quinoa Tabouleh II

(As a result of cooking it this way, I can offer you no suggestions or guidelines for cooking quinoa, other than tell you what I was also told: give it a bit of a rinse or a soak – say about 10 minutes or so — before cooking, which should alleviate any of the bitterness you might taste otherwise.)

With the exception of using quinoa and the addition of a red (or orange or yellow) paper for a bit of additional colour and crunch, this recipe holds quite true to traditional tabbouleh.

It’s the abundance of herbs, slight onion bite from the green onions and generous amount of lemon juice that gives it such a refreshing and light taste.

It’s the substitution of quinoa for bulgur that makes it no hardship to finish it off pretty quickly.

And, thankfully, I still have plenty more quinoa to make this again.

A trio of peppers

Mint

A Cup of Tomatoes

Quinoa Tabouleh I

Quinoa Tabbouleh

  • 4 cups (1 L) cooked quinoa
  • 1 red, orange or yellow pepper, diced
  • 1 cup (250 mL) cherry or grape tomatoes, halved or quartered
  • 2 to 4 green onions, sliced thinly
  • 2 mini cucumbers, halved, seeded and sliced
  • ¼ cup (50 mL) mint, chopped
  • ¼ cup (50 mL) parsley, chopped
  • 1/3 cup (75 mL) lemon juice (from about 2 lemons)
  • 1 tsp (5 mL) salt
  • freshly ground pepper
  • 1/3 cup (75 mL) extra virgin olive oil

Cook quinoa according to directions. Let cool and place in large bowl. Add red pepper, tomatoes, green onions, cucumbers, mint and parsley. In separate bowl, mix lemon juice, salt and pepper. Whisk to dissolve salt. While whisking, slowly drizzle in olive oil to emulsify. Pour about ¾ of the dressing over the salad and toss. Add the remaining dressing if the salad seems dry.

Serves 4.

This piece originally ran in the Calgary Herald. For more great recipes and stories, head to the Herald’s food page at CalgaryHerald.com/life.

Continue Reading

Mac-Raff n’ Cheese

This is one of my favourite all-time childhood meals.

Mac-Raff n' Cheese I

I loved coming home to find a pot of Mac-Raff n’ Cheese bubbling away in the oven. My stepdad, Sean, would make it in our giant Corning Vision Ware pot (Do you guys remember those? The glass pots that came in a couple of colours? Ours was brown.), so if I peered through the oven door I could see the tomato sauce simmering up to mingle with the cheese-coated pasta.

For a long time I thought it was a creation of Sean’s, him being the head chef in our blended family. And what a chef he was! We were well-fed kids because that man knows his way around a kitchen. Lamb and mint sauce, chicken and rice with cream gravy, roast beef with all the fixings. There’s a reason I love to go home, even today. But when I was home a few months ago, my mum revealed that she was actually the mastermind behind the recipe.

She’s a Macdonald; he’s a Rafferty. So we were the Mac-Raff household. Hence the name of this dish.

It is a smart meal from a parent’s perspective. Quick, filling and can be assembled during the day and left at the ready to bake closer to dinner time when everyone is home and getting hungry. As an adult, I’ve also found it to be fantastic as a freezer meal. Since I generally make enough for a family of six (apparently, I am incapable of cooking for one or two like a normal singleton. But it’s OK because I love leftovers.) I have got into the habit of splitting the mac n’ cheese into two casserole dishes and jamming one into my freezer for later.

Mac-Raff n' Cheese III

I made it a couple of months ago when the days were still crisp and cold. Then it warmed up and I wondered if people’s appetites for hearty, homemade macaroni and cheese had waned, so I kind of put it on the back burner (nyuk nyuk). And then we had another, delayed, blast of winter. Oh! I thought, a second chance! And then, uh, well, let’s just say I lost track of time.

But I think this is a good recipe to have on hand. Although there is no official recipe. I, like my parents, kind of make it up as I go along each time depending on what I have lying around. But, fundamentally, it is macaroni and cheese with tomato sauce on the bottom that is all baked together in a casserole dish with a layer of cheese on top.

And it is far greater than the sum of its parts. Tomato sauce = good. Pasta doused in cheese sauce = good. That layer where the two mix = perfection.

I like to take a couple of big spoonfuls and top with some cracked black pepper, then eat it with a spoon.

But the real beauty of this is that it is infinitely adaptable. Don’t like the cheeses suggested? Use what you’ve got or what you like. Don’t have fresh herbs? Use a pinch of dried basil. Use your family’s own secret tomato sauce recipe for that matter. This is about using what you’ve got and experimenting with what you think it will taste good.

Tomato Sauce I

Tomato Sauce II

Grated Cheese

Pasta and Cheese

Oven ready

Hot from the oven

Mac-Raff n' Cheese II

Mac-Raff n’ Cheese

Tomato Sauce base:

  • 1 tablespoon olive oil
  • 1 onion, diced
  • 3 cloves garlic, minced
  • 1 28 oz. can whole tomatoes
  • 1 14 oz. can crushed tomatoes
  • 1 tablespoon balsamic vinegar
  • pinch sugar
  • 1/4 cup basil (or combination of mostly basil and some parsley), roughly chopped.
  • salt and pepper to taste

Heat oil in a pot over medium heat. When hot, add onion and saute until transluscent. Add garlic and stir for about a minute until fragrant. Using the can lid, drain the tomato liquid from the can of whole tomatoes into the pot. Let the liquid reduce by half and then add in the tomatoes. I dice them one by one in my palm using a basic dinner knife as I like small chunks of tomato. Another trick is to use kitchen scissors and just cut them up in the can. Add to the pot. Then add the crushed tomatoes. Stir in sugar and balsamic and let simmer until it has reduced and thickened. You don’t want it too thick because it will reduce further in the oven. Add salt and pepper to taste. Stir in herbs.

Macaroni and cheese:

  • 500 grams pasta (penne, macaroni or whatever tubular pasta you have sitting around)
  • 1/4 cup butter
  • 1/4 cup flour
  • 5 cups grated cheese, divided (I like a combination of asiago, cheddar, provolone and a bit of Parmesan; but I’m not afraid to use what’s already in the fridge.)
  • 3 cups milk
  • salt and pepper to taste

Cook pasta according to package directions. As the pasta boils, start on the cheese sauce. Melt butter over medium-low heat in a pot. When frothy and bubbling, add flour and mix with a whisk until well blended. Continue cooking for a couple of  minutes to cook out the raw flour taste. Slowly add milk, whisking constantly to prevent lumps. After it has thickened slightly, add 4 cups of the grated cheese. (I usually switch to a wooden or plastic spoon at this point.) Stir until melted, then add salt and pepper to taste. (If it is too thick, splash in a bit more milk.) Remove from heat.

Drain cooked pasta and return to pot. Top with cheese sauce and mix together.

Assembly:

Preheat oven to 425F.

Put tomato sauce in base of casserole dish. Top with macaroni and cheese and then sprinkle over remaining one cup of cheese. Bake covered for 45 minutes to an hour (depending on the size of your casserole dish). Remove lid and bake another 10 to 20 minutes until cheese is bubbling on top.

This is fantastic with a nice green salad.

Note: To make ahead, assemble the entire dish but stop just before baking it. Wrapped in plastic wrap and aluminum foil, this can be stored in the freezer. To cook later, let thaw and then bake as directed.

Continue Reading