Strawberry Scones with Strawberry-Black Pepper Butter

It’s hard to be creative when it’s this hot and my laptop is cooking my thighs.

It’s probably even too hot to be turning on the oven, but I did it today anyway. The idea of fresh scones overpowered my hatred for the heat. Especially the idea of scones studded with fresh and sweet strawberries.

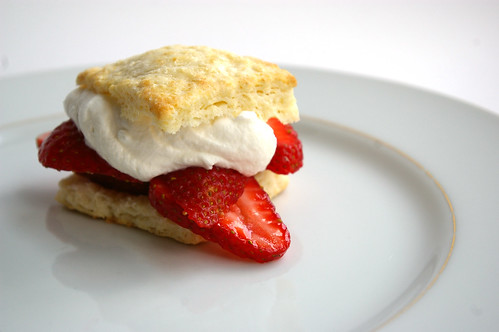
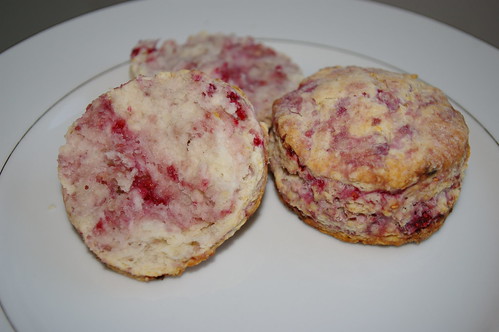
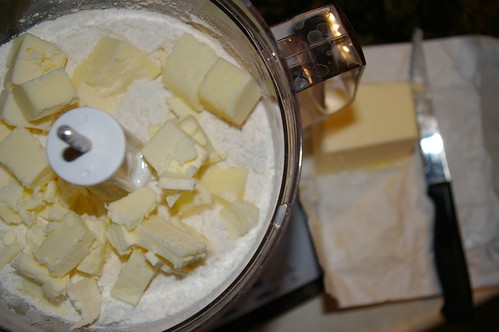
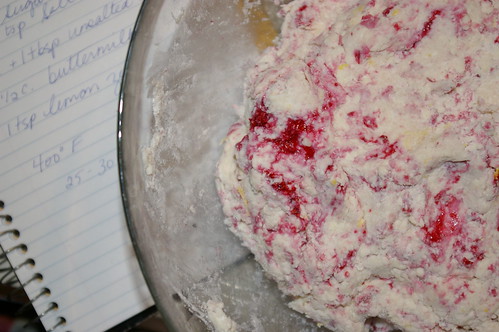
I had bought the strawberries yesterday for no reason other than I wanted that taste of summer. As I lay in bed last night, I was thinking Strawberry Shortcakes would be the perfect vehicle. And then I started to think about some scones where the strawberries are actually baked into them instead of being served on the side. Cream scones, I thought. Playing with the whole idea of strawberries and cream. And also, not dealing with trying to keep cold butter actually cold on a hot day.

The idea isn’t original; there are a lot of recipes out there on the web for Strawberry Scones. But I also thought of putting a twist on them by serving alongside some compound butter made from strawberries and a bit of freshly cracked black pepper.

It was tempting enough to turn on the oven.

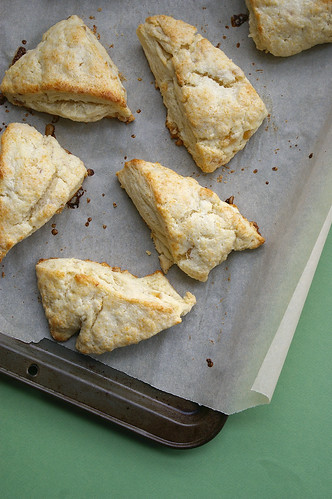
The beauty of cream scones is how quickly they come together and how little forethought is needed. The dangers of cream scones are exactly the same.

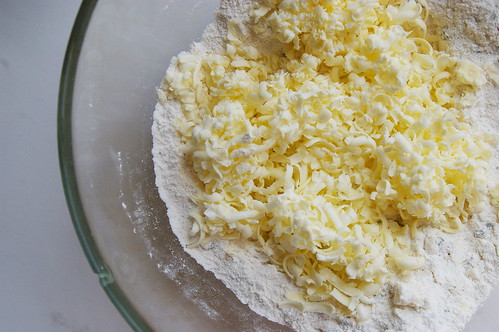
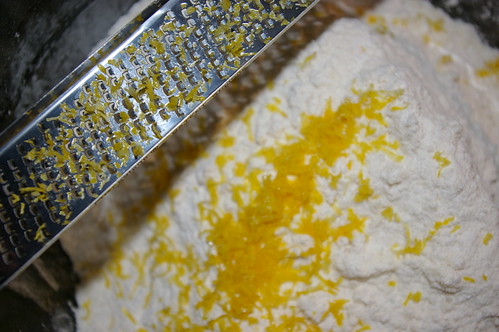
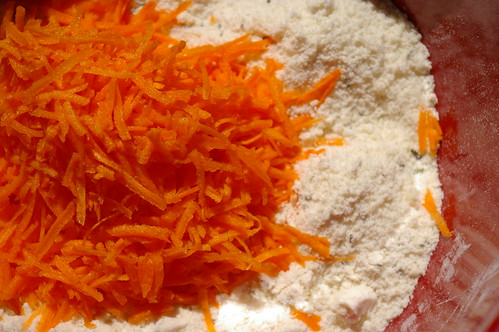
But when you don’t want to put in the kitchen for very long, they are ideal. Stir together flour, baking powder, sugar and salt. Add cream. Stir. Pat together. Cut and bake. Done.

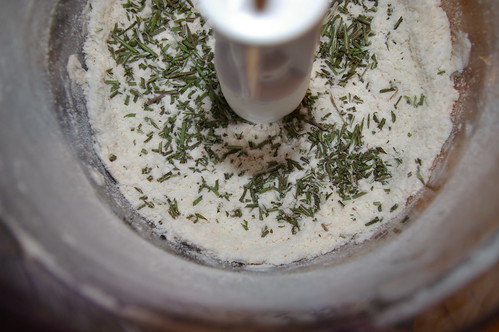
Compound butter is just about as easy. Mix softened butter with herbs, zest, bits of fruit, spices or whatever else and then refrigerate.

So, as baking projects go, this one couldn’t be much more straightforward.

When I started trying to figure out what to say about these recipes, I joked on twitter that I should just write, “Makes these, they’re tasty.”

But, really, make these, they’re tasty.

Strawberry Cream Scones

Adapted slightly from Joy the Baker who, in turn, adapted them slightly from King Arthur Flour.

  • 3 cups all-purpose flour
  • 1 tablespoon baking powder
  • 1 teaspoon salt
  • 1/3 cup granulated sugar, plus more for sprinkling
  • 1 1/2 cups whipping cream (approximately), plus more for the egg wash
  • 1 teaspoon vanilla
  • 1 cup strawberries, cored and chopped
  • 1 egg

Preheat the oven to 425F and line a baking sheet with parchment paper.

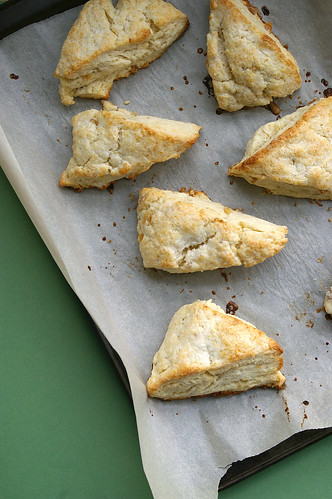
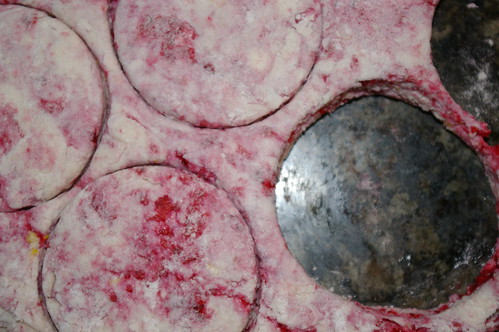
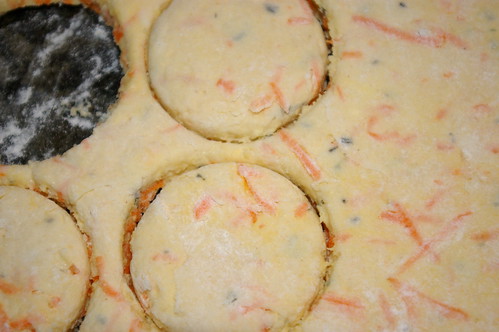
In a medium bowl, whisk the flour, baking powder, salt and sugar. Add the chopped strawberries. Pour over the whipping cream and then drizzle in the vanilla before gently stirring it all together. If there are a lot of dry patches, add another tablespoon or two of cream — just enough to create a dough. Scrape the dough out onto a clean surface and gather it together, kneading slightly until it all comes together. Pat into a circle about 1 inch thick and cut into eight wedges. (Or, alternatively, use a biscuit cutter to cut out circles of the dough.)

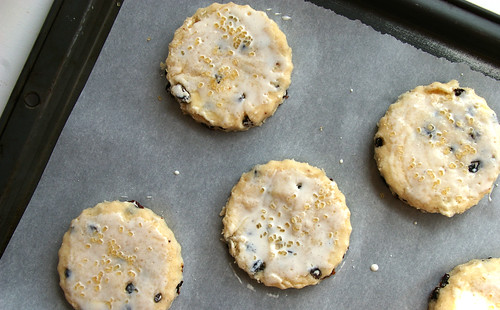
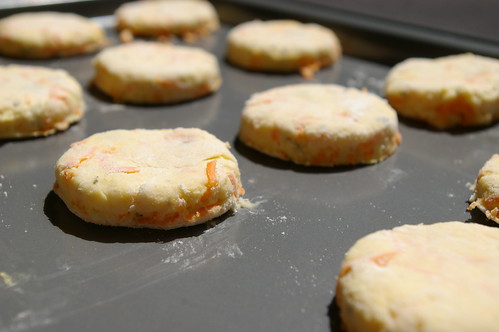
Place the wedges on the baking sheet.

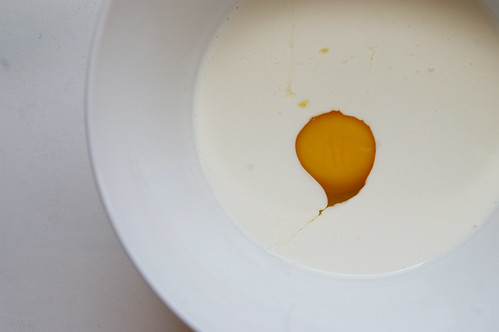
In a small bowl, whisk together the egg and a splash of whipping cream. Brush over the top of the dough wedges and sprinkle with sugar.

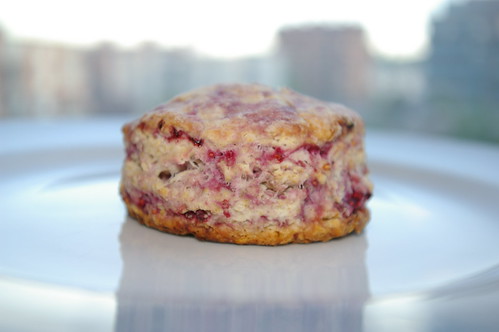
Bake until golden and cooked through, about 14 to 18 minutes.

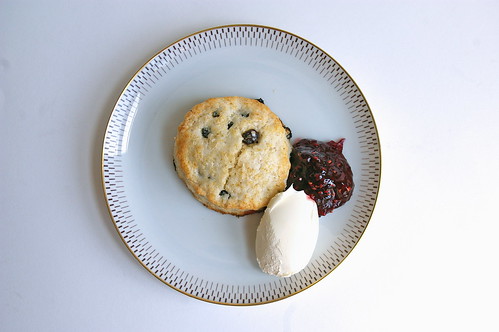
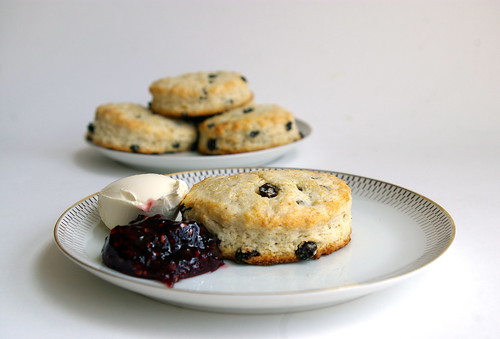
Serve as is or with the Strawberry-Black Pepper Butter (recipe below).

Strawberry-Black Pepper Butter

  • 1/4 cup butter, softened
  • 1 large strawberry, minced (approximately 2 tablespoons)
  • 1/8 teaspoon freshly ground black pepper
  • Pinch sea salt
  • Pinch or two of sugar

In a small bowl, mix together the butter, strawberry pieces, black pepper, salt and sugar. While stirring, press bits of the strawberries against the side of the bowl to squish them and release some of their juice. Taste for seasonings, adding more sugar, pepper or salt.

Refrigerate until ready to serve.

Continue Reading

Candied Ginger Scones

I keep butter in my freezer at all times for scone baking emergencies.

They used to intimidate me; one bad batch – which would have been flattered to be called hockey pucks – had me thinking I would never make a successful scone.

Learning Nigella Lawson’s trick of grating frozen butter into the flour was a game changer and now I find them to be one of the easiest, and fastest, things to bake when suddenly craving something sweet to eat with a bit of jam or butter.

Candied Ginger Scones I

They are also one of the most adaptable things to bake: lemon zest and glaze for a spring scone, chocolate or spices for fall, cheese and herbs for a savoury version.

This also makes them perfect for bits and pieces one may find in their baking cupboard.

So, when I discovered a handful of candied ginger leftover from a cupcake project and an uncracked jar of Devonshire cream at the back of the fridge (who impulse buys Devonshire cream? Me, apparently.), it was clearly time to make some scones.

Even if it was 11 at night.

After quickly whisking together the dry ingredients, grate in the frozen butter. This creates the perfect little nuggets of butter easily incorporated in the rest of the dough. When they hit the heat of the oven, they melt, creating the flaky layers that make scones so tender and light.

Sometimes I will cut out my scones, in circles or squares, using biscuit cutters or an upended glass. But other times, I like to just pat the dough into a circle and cut it into wedges for something a bit more rustic . . . and fewer things to wash.

Candied Ginger Scones II

Candied Ginger Scones

  • 2 cups (500 mL) flour
  • 1/3 cup (80 mL) sugar
  • 1 tbsp (15 mL) baking powder
  • ¼ tsp (1 mL) salt
  • ¼ to ½ cup (60 to 125 mL) candied ginger, chopped
  • ½ cup (125 mL) butter, frozen
  • ¾ cup (180 mL) cream, plus more for brushing the scone tops.
  • 1 egg

 
Preheat oven to 400F (200C).

In a large bowl, mix together flour, sugar, baking powder, salt and chopped ginger. Using the large holes on a box grater, grate the frozen butter into the dry ingredients. With your fingertips, gently toss the flour and butter until thoroughly combined. In a small bowl, mix together egg and cream. Pour into the butter-flour mix and stir until just combined. (Sometimes an extra tablespoon or two of cream is necessary, but the mixture should not be very wet.)

Turn the dough out onto a clean surface and squish together, patting it into a circle about an inch (2.5-cm) thick.

Cut the circle into eight wedges and place on a parchment-lined baking sheet, leaving space between them to grow.

Brush lightly with cream.

Bake for 12 to 15 minutes until golden.


Continue Reading

Welsh Scones

Growing up, I had a thing for the Royal family.

I had coffee table books all about Princess Diana, her wedding to Charles, her boys, William and Harry, along with a video of Andrew and Sarah Ferguson’s wedding.

I was one of those girly-girls with a penchant for dressing up, wanting to wear twirly skirts (that whirled out when I spun in circles; I called them turn-y skirts), put on lipstick. I always wanted a tiara.

So, although the inundation of countdowns and articles and television specials and photo galleries leading up to the wedding between Prince William of Wales and Kate (I’m sorry, Catherine) Middleton has been a bit much, my inner eight-year-old girl is kind of loving it. What will the dress look like? What diamond-encrusted tiara will adorn her lovely dark locks? What will the bridesmaids wear? Will they have turn-y skirts?

Outside of the fantasy world, I don’t envy Kate. I’m happy for her and William because they do some genuinely in love, something so clearly missing in the relationship between his parents (though I couldn’t see that as a child). But I wonder too at what she’s giving up for that love. Yes, there are jewels and gorgeous clothes, first-class trips, brushes with celebrity. And there is the paparazzi, the pomp, the expectations, the constantly public life.

No matter, I will be indulging that inner child and tuning in to the wedding.

In honour of that, I’ll be eating scones (and drinking some champagne, of course — though not at 3 a.m. I’m not so devoted that I will wake up that early. That’s why I have a PVR.) as Kate walks down the aisle.

"Welsh Cake" scone

I could eat any version of scones, but I decided to create a recipe that would combine a basic scone with a Welsh cake (which share some similarities with scones, though they are fried instead of baked). My stepfather, who is of Welsh descent, often made these as a Sunday treat when we were kids. (A tradition, thankfully, that continues when I visit my parents.) They have a distinctive flavour that comes from nutmeg and currants. Basically, I wanted to use those flavours. Not just because I love them, but it’s just so fitting.

Afternoon Tea

He is Prince William of Wales, of course. And the couple will start their life as newlyweds in Anglesey, an island off the northwest coast of Wales.

I have to give credit where it’s due, so I will say that Nigella Lawson has changed the way I make scones. Her trick of grating frozen butter is just . . . perfection. I cannot recommend it enough. No matter what scone recipe I use these days, I always, always, always use this technique. Please, try it, I implore you.

This is based on her strawberry shortcake recipe, but has been adjusted.

Butter curls

Egg in Cream

Rolled and Cut

"Welsh Cake" Scones

Welsh Scones

  • 1½ cups flour
  • ½ teaspoon salt
  • 1 tablespoon baking powder
  • 1/4 cup sugar
  • 1/2 cup currants
  • 1/2 teaspoon nutmeg (I may go with a tad more next time)
  • 1/2 cup unsalted butter, frozen
  • 1 large egg
  • ½ cup half-and-half or whipping cream (you may need slightly more)
  • 2 tablespoons whipping cream
  • 2 tablespoons sugar (regular or natural cane sugar), optional

Preheat the oven to 425°F.

Mix together the flour, salt, baking powder, sugar, currants and nutmeg in a bowl. Grate the frozen butter into the dry ingredients and use your fingertips to lightly toss all together. Whisk the egg into the half-and-half cream and pour into the flour mixture a little at a time, using a fork to mix. (I often need another tablespoon or two; I chalk it up to that dry Calgary weather.)

Turn the dough out onto a lightly floured surface, then roll gently to about ¾-inch thick. Dip a cutter in flour and cut out as many scones as possible. (Small ones are cute, but sometimes you just want a large scone with lots of room for Devonshire cream and jam.) Work the scraps back together, re-roll and cut more. (Nigella suggests using a 3-inch/6½-cm round cutter to make 8; I used a smaller one and got about 14.) Place on a baking sheet, brush the tops with the 2 tablespoons whipping cream and sprinkle with the remaining sugar, if desired. I used natural cane sugar, which has larger grains.

Bake until golden. Between 10 and 15 minutes for larger scones. Cutting them smaller? Check earlier. Mine took about 9 minutes. Remove to wire rack to cool.

Eat with copious amounts of jam and Devonshire cream. Or butter and jam. Or just jam.

Continue Reading

Strawberry Shortcakes

I suppose my scone anxiety started about 10 years ago when I was doing a stint teaching English in Japan.

My next-door neighbour invited me to a cooking class being hosted by one of the American wives who lived on a nearby U. S. naval base. Every so often they would run these courses and local housewives in my small town would sign up, looking for a chance to learn some foreign cooking and perhaps practise English.

I’m sure I paid attention. I’m also sure we put in all the ingredients. I’m confident we didn’t overmix.

But pulling our tray from the oven, it was painfully obvious something, somewhere had gone wrong.

The navy wife clucked her tongue and kindly suggested we forgot to add the baking powder.

To say they were hockey pucks would have been polite.

To add to that anxiety was the confusion I suffered when attempting to make scones again: how best to mix the butter with the flour to ensure even incorporation while the butter remains cold.

Pastry blender? Fingertips? Food processor?

It was all a bit much for this would-be perfectionist to handle.

I understood the logic behind it. If the butter stays cold and is perfectly mixed in with the rest of the ingredients, it will melt in the heat of the oven, creating light layers in the scone. But I just didn’t know which method was best.

Still, one can only be afraid of scones for so long.

And it’s strawberry season.

And if those two things aren’t enough to make this girl face down her anxiety with a round of strawberry shortcakes, I’m not sure what would be. After all, the thought of a light, golden scone-like shortcake, topped with slightly sweetened strawberries and a healthy dollop of whipped cream is enough to make me do things much worse than attempt a recipe while bracing for failure.

Within reason, of course.

As hoped for, my anxiety completely melted away when the recipe came together quickly and the shortcakes out of the oven were the requisite golden colour, pulling apart neatly to display all their lovely inner layers.

Strawberry Shortcake II

It may have been thanks to chef Nigella Lawson’s approach to the butter conundrum, which is to grate frozen butter into the dry ingredients. It seems so ridiculously smart, now that I think about it. After all, if the goal is even distribution, what better tool to use than something that will conveniently portion the butter out into tiny pieces? Not to mention the fact that because the butter is frozen, it’s difficult for it to warm up too much before the mixture goes into the oven anyway.

It may also have been that I made absolutely sure to add the leavening.

And it may have been that sometimes anxieties just need to be confronted.

After all, the rewards to be reaped here will carry on and on.

And, in the immediate moment, there are shortcakes to enjoy.

Strawberry Shortcake I

Strawberry Shortcakes

Adapted slightly from chef Nigella Lawson’s How to Be a Domestic Goddess.

For the shortcakes:

  • 1½ cups (325 ml) flour
  • ½ tsp (2 ml) salt
  • 1 tbsp (15 ml) baking powder
  • 5 tbsp (75 ml) sugar, divided
  • 1/2 cup (125 ml) unsalted butter, frozen
  • 1 large egg
  • ½ cup (125 ml) half-and-half cream
  • 2 tbsp (25 ml) whipping cream
  • 2 tbsp (15 ml) sugar, divided
  • 1 cup (250 ml) whipping cream

for the filling:

  • 1 pound (500 g) strawberries, hulled and sliced
  • mix the sliced strawberries with 1 tbsp (15 ml) sugar and set aside in the fridge.

Preheat the oven to 425°f (220°c).

Mix together the flour, salt, baking powder and 3 tbsp (50 ml) of the sugar in a bowl. Grate the frozen butter into the dry ingredients and use your fingertips to lightly toss all together. Whisk the egg into the half-and-half cream and pour into the flour mixture a little at a time, using a fork to mix. (Nigella notes you may not need all the cream; I needed another tablespoon or so.)

Turn the dough out onto a lightly floured surface, then roll gently to about ¾-inch (2 centimetres) thick. Dip a cutter in flour and cut out as many shortcakes as possible. Work the scraps back together, re-roll and cut more. (Nigella suggests using a 3-inch/6½-cm round cutter to make 8; I used a much smaller square one and subsequently got 15 shortcakes.) Place on a baking sheet, brush the tops with the 2 tbsp (25 ml)whipping cream and sprinkle with the remaining sugar.

Bake for 10 to 15 minutes (because mine were significantly smaller than suggested, they only took 8 minutes) until golden. Remove to wire rack to cool.

Whip the whipping cream with the remaining 1 tbsp (15 ml) sugar-and a splash of vanilla extract if desired.

Split the shortcakes through the middle, top with a spoonful of strawberries and dollop of whipped cream and then put the top back on.

These are best served slightly warm.

This story first appeared in the Real Life section in the Calgary Herald. For more delicious recipes, visit CalgaryHerald.com/life.

Continue Reading

Berry Scones

I’m behind on my blogging due to many reasons, including the fact that I am unsure what I’ve even been subsisting on for the last two weeks. (Well, that’s not completely true; I had about four days’ worth of mustard-butter broccoli pasta to get through.) And I guess I was also hesitating to post these scones for several reasons, not the least of which is that they were only mostly successful. I mean, who wants to read a cooking blog by someone who keeps making mistakes? It doesn’t scream confidence.

Finished scone

That’s not to say these Berry Scones weren’t light and flaky and fully of raspberry deliciousness. It’s just that I really should have moved the oven rack up about two levels so the bottoms didn’t bake (um, brown) quite as quickly as they ended up doing. However, perhaps we can all use this as a lesson about making sure your oven rack is in the middle of the oven when it comes to baking and not being lazy about moving it when you discover it’s a bit low.

So, this really all began because I had this extra buttermilk lying around and I really didn’t want to waste it. And I was on a bit of a scone kick because I do believe that practice makes perfect. Oh, and because I believe in full disclosure, it was also a bit because I had just bought my first set of biscuit cutters — a lovely batch of three varying sizes that nest inside each other. So, really, a buttermilk scone made perfect sense. And, bless the Internet, I found a nice recipe.

All went surprisingly well, though it did get a bit messy because I broke apart the frozen raspberries as I wanted them to be a little more well distributed. I now have a pink-stained rolling pin, but it was worth it. I’d much rather have raspberries in every bite than just one or two in an entire scone.

Thankfully, because they were pretty tall and flaky, it was easy to just cut the less-than-desirable bottoms off and continue to enjoy.

In future, I would add more lemon zest because I love all things lemon and I feel it would have perked these up even more, adding to the summery flavour.

Cutting in the butter

Adding the zest

Scone dough

Scone cutouts

Solo scone

Berry Scones

  • 4 3/4 cups flour
  • 1 cup, 1 tbsp. unsalted butter
  • 1 tbsp. baking powder
  • 3/4 tsp. baking soda
  • 1/2 cup sugar
  • 3/4 cup fruit (fresh or dried)
  • 1 1/2 cups buttermilk
  • 1 tsp. lemon zest

Preheat oven to 400. Mix together flour, baking powder, baking soda, salt and sugar. Using a food processor, a pastry blender or two knives, cut the butter into the flour until it looks like coarse oatmeal. Add the lemon zest and fruit and mix to combine. Add all of the buttermilk at once, then stir just until the dough comes together. Topple out onto floured counter and form into a ball before rolling out until it’s about an inch thick. Cut out using cutters or into rustic triangles using a knife.

Bake for 25-30 minutes, though I would start checking sooner.

Eat. Especially if you can find devonshire cream somewhere.

Continue Reading

Carrot-Rosemary Scones

I love scones. I like sweet ones with devonshire cream and jam. I like savoury ones with a little butter.

But scones don’t seem to feel quite the same way about me.

Or maybe they sense fear.

Ready to eat

One of the last times I remember making scones was when I was living in a small town in southern Japan. While I was the only foreigner in my community of 10,000, I was eagerly welcomed by many of the locals, including my next door neighbour who preferred to be called Susan. She was married to one of the teachers at the high school where I also taught and they had a young son. (We lived in a rather unattractive triplex — is that what a set of three townhouse-type homes is called, if a duplex means two? — that was teachers’ housing, along with the school’s vice-principal.) She was a very sweet woman who often had me over for dinner and hosted a pretty large (when one considers the relatively tiny size of her living room) dinner party when my then-boyfriend, mum and little sister came over to visit. At any rate, she signed us up for a cooking lesson with a women from the U.S. Naval base, stationed in nearby Sasebo. The subject was, of course, scones.

So, here I was, the lonely foreigner amongst a group of Japanese housewives learning to bake scones from some southern U.S. navy wife. Truly one of the stranger experiences.

Susan and I followed all of the directions faithfully, or so I believed. But our lovely little scones were nothing more than dough rocks by the time they came out of the oven. The instructor was convinced we had done something wrong (and I guess we must have), but I was so confident we had followed the recipe exactly.

I didn’t bother to attempt scones again for several years. Mostly, I suspect, because it’s one thing to bake cookies for a crowd and quite another to show up at work with a pile of scones. And also likely because deep down I harboured some anxiety that I would put in all that effort and still come out with flavoured rocks.

And then I saw a recipe for Carrot and Rosemary Scones.

I love rosemary. And carrots. And dijon mustard. And garlic. And parmesan cheese. The fact that all of these things were combined into a flaky scone was enough to jolt me out of my scone slump.

But it wasn’t going to be a breeze.

When I first attempted these, I found the mixture unbearably dry, but was nervous to add more liquid since I know making a light and fluffy scone requires some delicate baking chemistry. In the end, I did add some more cream, but it was still quite a dry dough. Once baked, the scones were still quite flat and not very brown. That’s not to say they weren’t tasty; they were. But not scone perfection.

The next time I called my mum (to whom I turn for all baking advice, her being a stellar baker and, I suspect, slightly amused by my ongoing need for guidance) and she said to not fear the addition of even more cream as the lack of liquid may have contributed to the rather flat outcome of the first attempt. Take two on the scones was slightly more successful — they were, at least, a little more golden and the dough had come together more easily — but only just. They were still flattish, though.

I sent the recipe along to my mum in advance of a visit out to Vancouver so that we could have a hands-on attempt together. (Baking, I feel, is best learned by participating at the side of an expert.) Not only did we almost double the amount of liquid, but, in the end, they still didn’t rise as much as other scone recipes. We eventually concluded the weight of the carrots was likely the culprit.

On the next attempt, I used my food processor to cut in the butter (justifying it as that I had to pull it out for grating the carrots anyway) and then added much more cream (a mixture of whipping and half-and-half because I wanted to use up the heavier cream) than originally called for. I also accidentally forgot the parmesan. So, I’m unsure which, if either, of those decisions played a role in the outcome, but these scones were beautiful.

They rose! They were tasty! They were flaky!

They still didn’t rise as much as other scone recipes; I blame it on the carrots.

carrots and rosemary

rosemary goes in to the dough

grated carrots

cutouts

ready to bake

Ready to eat II

While this recipe originally comes from Clotilde at Chocolate and Zucchini, I have made some adjustments. Below is the recipe as I make it.

Carrot and Rosemary Scones

  • 2 cups all-purpose flour
  • 1 1/4 tsp. baking powder
  • 1 1/4 tsp. salt
  • 9 tbsp. chilled, unsalted butter (this is a little more than 1/2 cup if that helps)
  • 1 1/2 cups grated carrots
  • 2 tbsp. fresh rosemary, chopped
  • 2 cloves garlic, peeled and finely minced (I use my handy rasp for this.)
  • 2 tbsp. Dijon mustard
  • 3/4 cup cream (whipping, half-and-half or a mixture of the two, it doesn’t really matter.)
  • 1 cup grated parmesan (I’d go with optional for this because they were so tasty even without the cheese)

Preheat the oven to 350. In a mixing bowl, combine the flour, baking powder and salt. Add the butter and rub it into the flour mixture with your fingers or using a pastry blender or in a food processor, if you have one. It should resemble coarse crumbs when it’s blended enough. Add the carrots, rosemary and cheese if you’re using it.

Mix together the mustard, cream and garlic (I find this distributes the garlic better, but you can also add it when you mix in the carrots) and then add to the dry ingredients. Mix together gently until the dough comes together and then empty out onto floured counter. Pat together into a ball and then roll out until the dough is about a half-inch thick. Cut out using biscuit cutter or whatever is handy. (I used a narrow drinking glass and that worked fine.)

The original recipe calls for 20 minutes in the oven. Mine baked for 17 before they were nice and golden. Cool on a rack. And then try to keep yourself from eating too many.

Continue Reading