Cinnamon Rolls for Michelle

This has taken more than a year to write.

Because although I’ve composed this dozens of times in my head, when it came down to actually sitting at the laptop words have completely escaped me.

And, I guess, the timing just wasn’t right.

This is for my friend Michelle.

Me and Michelle

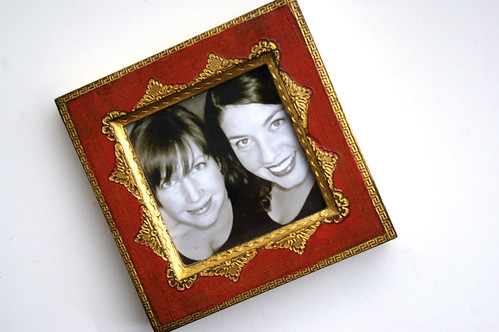
On Dec. 30, 2009, Michelle Lang was in a two-LAV convoy returning to the Canadian Forces base in Kandahar when they hit an IED. She and four soldiers — Garrett Chidley, George Miok, Zachery McCormack and Kirk Taylor — were killed in the blast. Five others were injured.

Three weeks earlier, we were out celebrating my birthday. It was her final weekend before she flew out to Afghanistan for what was expected to be a two-month stint reporting on the conflict in that country for Canwest News. Despite the fact she was less than 72 hours from taking off and had myriad errands to run and things to organize before leaving, she came out for dinner and then drinks, staying out well past bedtime. Friends always came first; that’s just the sort of girl she was.

And she was from the start.

When I moved to Calgary I had arranged for a couple of places to stay in those first few weeks, but there was a four-day gap where I had no plan, hoping to depend on the kindness of another reporter with whom I had a mutual friend. Instead, Michelle stepped in, offering up her couch to me — a virtual stranger — for as much time as I needed. She apologized it wasn’t nicer.

I live in that apartment now. On the night before I was to move in, Michelle stayed up until the early morning to get it into tip-top shape for me because she knew I wasn’t happy about giving up my old place. That’s also the sort of girl she was.

She was a huge supporter of this blog, she wasn’t afraid to scold me over my ever-growing shoe collection or dish out the tough love when it was needed. She offered up praise for a good story or kitchen victory; she listened when things were going sideways; she was my sushi-and-Buffy buddy (take-out and DVDs for a mid-week pick-me-up).

On the day before she left, I called her quickly to say I was going to miss her, to have fun, tell good stories and that I would see her in January. And then I said I would bake whatever she wanted when she was back in Calgary.

“What’s your favourite thing?” I asked.

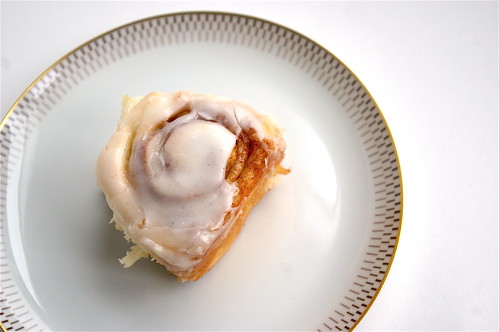
“Cinnamon rolls,” she replied.

And I promised they would be hers when she returned.

A few weeks after her death, after the repatriation ceremony at CFB Trenton, the funeral in Vancouver and memorial service in Calgary, after the media coverage quieted, I set out to make the cinnamon buns. The fog of grief was still thick and I wanted to do something, some tiny thing, some personal thing, to honour her and follow through on my promise.

I set out to make the cinnamon rolls.

They were a complete failure. As in, the dough didn’t rise at all. Frustrated and angry — at more than just a baking misstep — I threw the hard lump of dough away and broke down. I didn’t attempt them again.

(Yeast-based goods are a downfall for me anyway, hence my love of all things no-knead. Although I did make some no-knead pumpkin cinnamon rolls that were successful, for some reason I feel this neither fulfilled nor broke my promise to make some for Michelle. I guess I figured the fact they were pumpkin made them a different kind of cinnamon bun altogether.)

Leading up to the one-year anniversary of losing Michelle, I started thinking again about those cinnamon rolls and my promise. But I wasn’t ready.  I dug my heels in trying to fight against the approaching day — a futile task.

And when it passed I knew it was time.

Michelle, this one is for you.

Lone bun

xo

gwendolyn

(Immense gratitude for the Pioneer Woman who had a recipe that was easy to work with and delicious. Thank you, I needed that.)

The dough rises

Rolled up

Naked buns

Geometric buns

Geometric buns - close-up

Powdered sugar and lemon zest

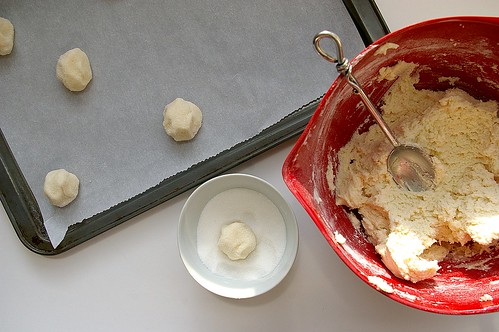
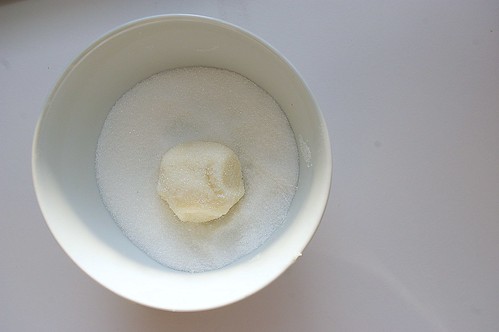
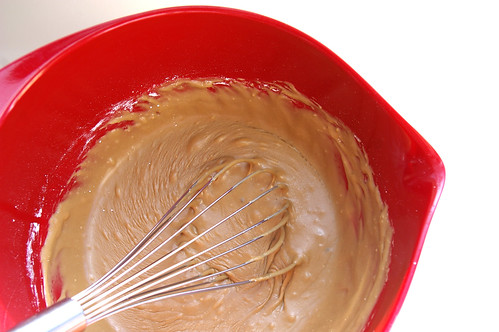
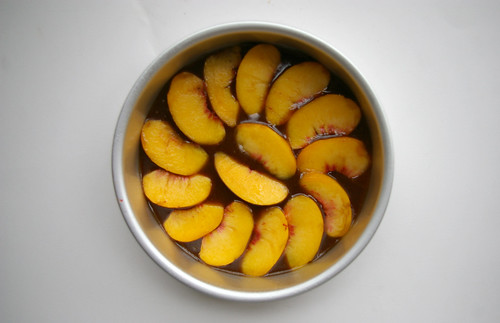
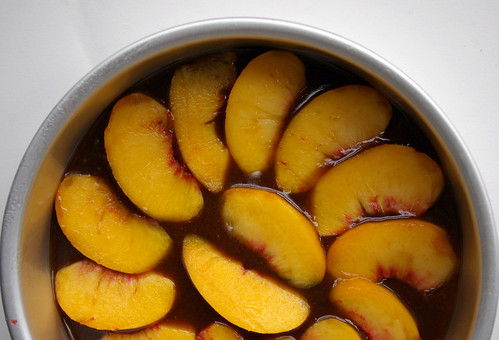
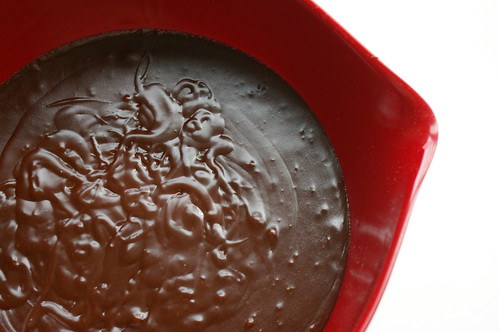
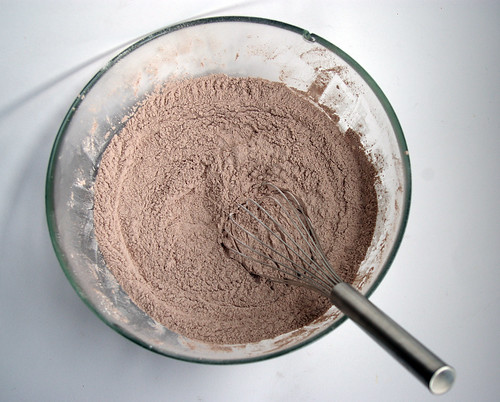
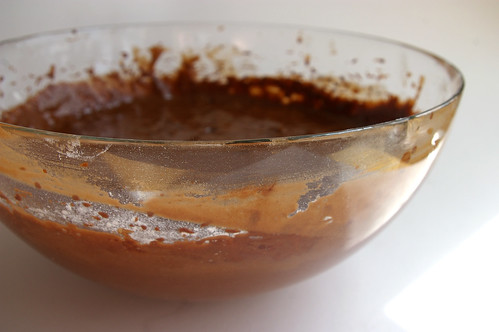
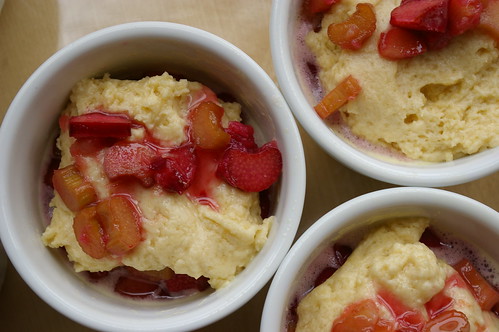
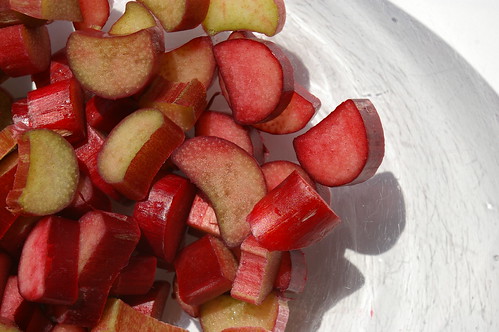
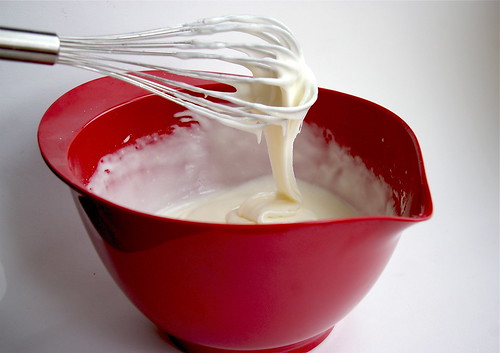
Incidentally, these red bowls were a birthday present from Michelle a few years ago. Now, when I pull them out (which I do a lot, since they are awesome ones from Williams-Sonoma), I always think of her.

Glaze

Glazed and ready to go

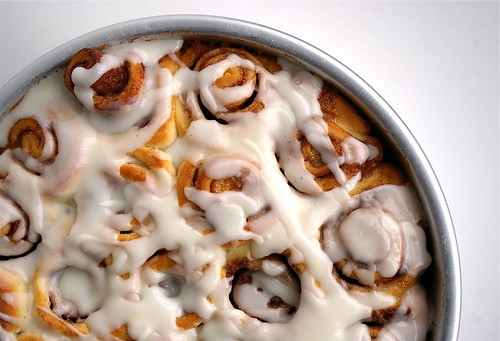
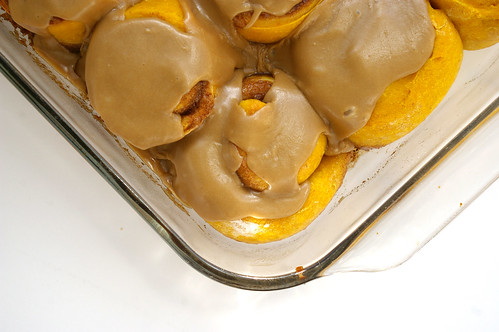
Pioneer Woman’s Cinnamon Rolls

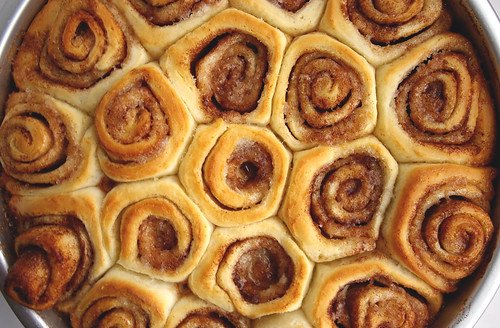
I have halved this recipe, which still made an insane amount of rolls, as in two 9-inch cake pans’ worth and they were jammed full. This is as I made it, but you can easily double it if you want to feed an army. The glaze/frosting recipe is loosely based on hers, but I changed it quite a bit because I wanted something lemon-y.
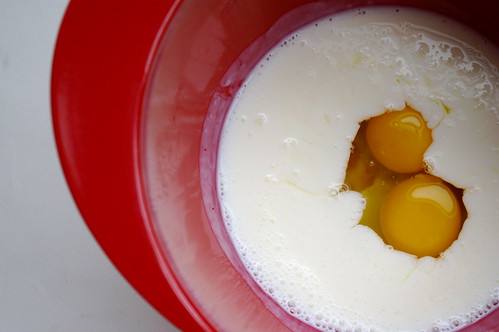
  • 2 cups milk
  • 1/2 cup vegetable oil
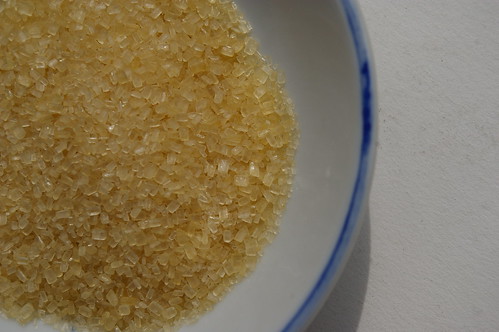
  • 1/2 cup sugar
  • 2 1/2 teaspoons (1 package) active dry yeast
  • 4 1/2 cups all-purpose flour, divided
  • 1/2 teaspoon, heaping, baking powder
  • 1/2 teaspoon, scant, baking soda
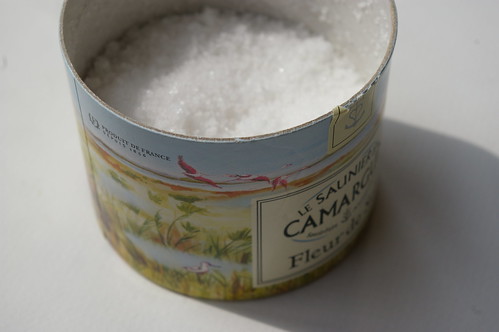
  • 1 1/2 teaspoons salt
  • 1 cup sugar
  • 1/2 cup melted butter, plus 2 tablespoons for the pans
  • cinnamon

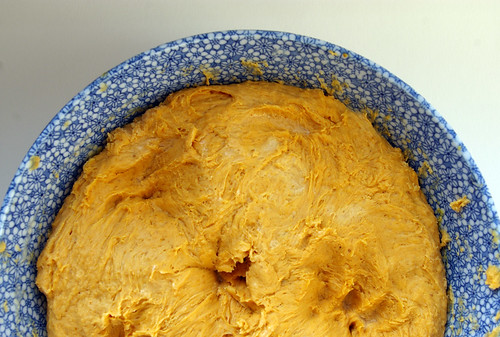
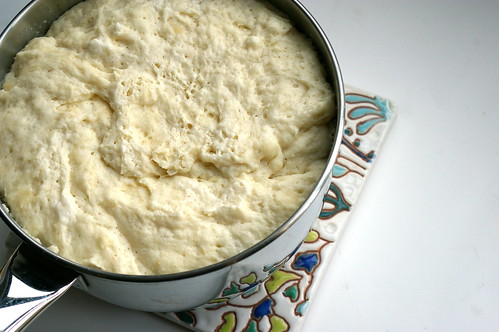
In a large pot, mix the milk, oil and sugar and heat until scalded, just before boiling. Remove from the heat and let it cool until lukewarm, about 45 minutes to 1 hour. Sprinkle over yeast and let sit for a minute. Add in the 4 cups of flour and stir. Cover and let it rise for at least an hour until doubled (or more).

Add the remaining 1/2 cup of flour, baking powder, baking soda and salt. Stir together. (I had to knead it a little bit to get all the remaining dry ingredients worked in.)

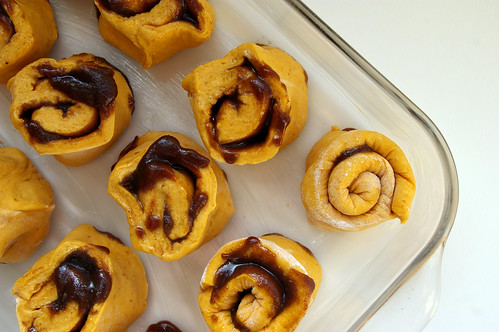
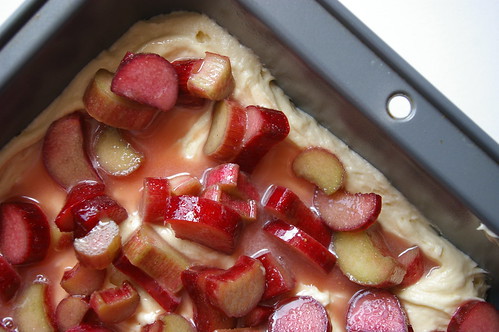
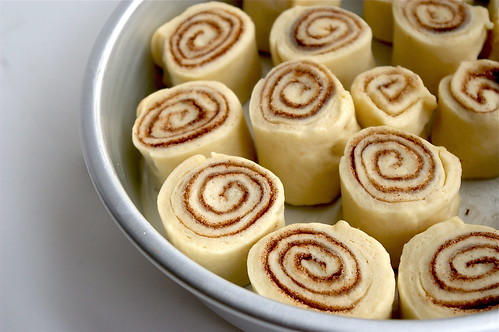
Sprinkle the area where you’re going to roll out the dough generously with flour. Divide the dough in half and roll it thin into a rough rectangle. Drizzle half the melted butter over the dough and then sprinkle half of the sugar and a generous dose of cinnamon. (I went too easy on it and wish I had used more. Don’t be afraid!) Roll the dough in a neat, tight line and then pinch the seam together to seal it. Slice the rolls into even pieces, about 1-inch wide. (Mine were probably closer to 1 1/2-inches.)

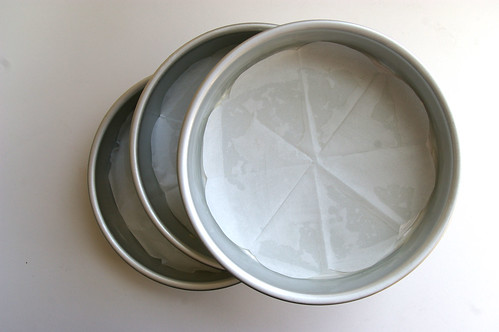
Spread 1 tablespoon of melted butter into a cake or pie pan (she calls for 7-inch pans; I used 9-inch ones) and lay in the rolled dough slices. Let them rise for 20 to 30 minutes.

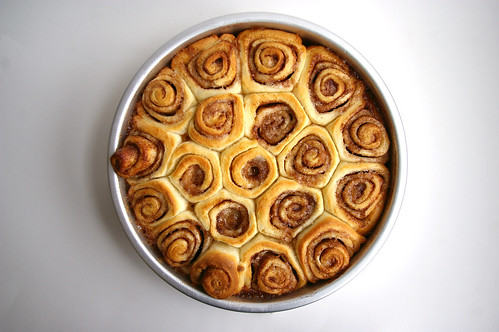
Preheat oven to 375.

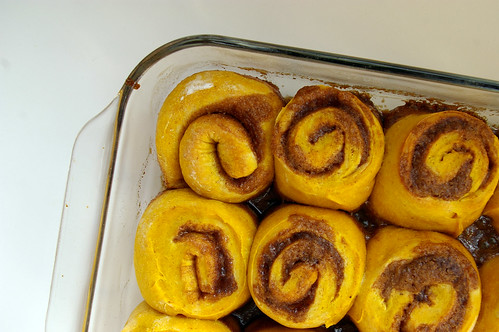
Bake rolls until light golden brown, about 15 to 18 minutes.
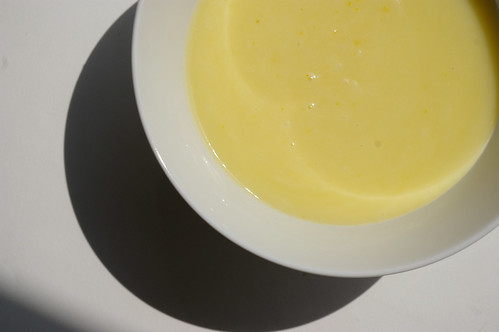
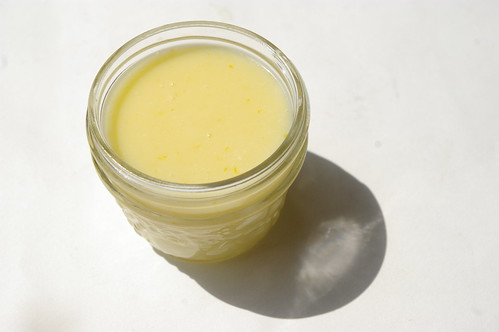
Lemon Glaze

  • 1/2 bag powdered (icing) sugar
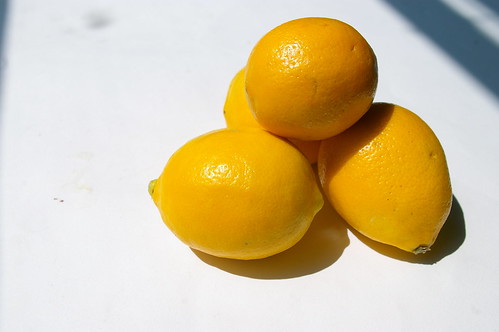
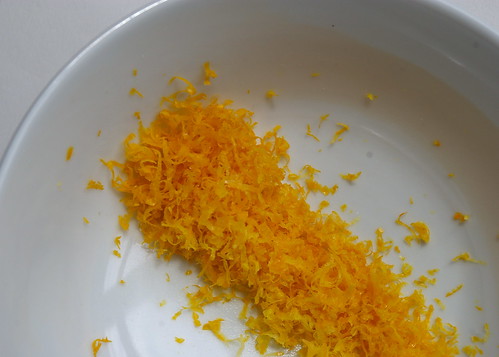
  • zest and juice of 1 lemon
  • pinch or two of salt
  • 1/4 – 1/2 cup milk
  • 2 tablespoons melted butter

Mix all the ingredients together. Add more milk if the mixture is too thick or more sugar if it is too runny.

Pour over the rolls when they are still slightly warm.

Continue Reading

Eggnog Sugar Cookies

Can I just admit something pretty embarrassing (for bloggers anyway) here?

I made these a year ago. And then I procrastinated (It’s a curse!). And then, well, the window closed for holiday baking.

And that was that.

Until now.

However, in the intervening year (!), I have completely forgotten why I wanted to make these and what I was going to say about them. I mean, cookies = good. Eggnog = good. Eggnog cookies = good x 2.

And, really, do they need any other explanation?

I think not.

Eggnog Sugar Cookies

Icing Sugar Dusting

Iced and Sugared

Thanks to Dinner with Julie for the recipe, of course.

Eggnog Sugar Cookies

  • 3/4 cup butter, softened
  • 1 cup sugar
  • 1 egg
  • 1 teaspoon vanilla
  • 1/4 teaspoon rum extract
  • 2 1/2 cups all-purpose flour
  • 1/2 teaspoon baking powder
  • 1/2 teaspoon nutmeg
  • 1/4 teaspoon cinnamon
  • pinch salt

In large bowl, beat butter with sugar until light and fluffy. Beat in egg, vanilla and rum extract. Combine flour, baking powder, nutmeg, cinnamon and salt ; with wooden spoon, stir into butter mixture in 3 additions. Divide in half; flatten each slightly. Wrap in plastic wrap and refrigerate for at least 1 hour or until chilled. (Make ahead: Refrigerate for up to 1 day.)

On lightly floured surface, roll out each half of dough to 1/4-inch (5 mm) thickness. Use a cookie cutter to cut out shapes.

Bake in top and bottom thirds of 375°F (190°C) oven, rotating and switching pans halfway through, for about 10 minutes or until golden on bottom and edges. Let cool for 1 minute on pans. Transfer to racks; let cool completely. Decorate with icing or sprinkle with icing sugar.

Continue Reading

Chewy Lemon Cookies

I’m practically laid out on the couch, cosying up to an ice pack right now (Thank god for laptops.) having done something again to my back. Stretch, ice, advil, repeat. Needless to say, the weekend has not been very active. One errand yesterday and brunch with a friend today before I had to make nice with my back and hang out on the living room floor staring at the ceiling. You know what lying on the floor shows me? That I really need to vacuum more.

So, no baking or cooking today, but luckily I have saved up this little chewy lemon cookie recipe for a rainy day (of sorts). If you’ve been on this blog long enough, you know how much I love lemon. In fact, some may say it’s an addiction.

And that means when I see a good-looking lemon-centric recipe, like this one for Chewy Lemon Cookies, it isn’t long before I’m making it. I was also intrigued by the idea because I absolutely adore the Lime Sugar Cookies I often make. There are very few things these two recipes have in common, other than a citrus focus. But they’re both fantastic in their own way.

I loved these cookies for the chew and crackled top. Plus, of course, the lemon-y flavour.

I baked them off on a Saturday and shipped about a dozen off to the Sunday crew at the Herald because even though I’m not there on the weekends anymore, it doesn’t mean I can’t take care of my girls. Their grateful tweets made it totally worthwhile.

As some of you know, I’m a terrible procrastinator and have been sitting on this recipe for two weeks. A friend has been gently reminding me to get it up because she wants to make them herself — that’s how good they are.

Lemon Sugar Cookies - process

Rolling in sugar

Lemon Sugar Cookies I

Lemon Sugar Cookies II

Chewy Lemon Cookies

from MyBakingAddiction.com

  • 2 3/4 cups all-purpose flour
  • 1 teaspoon baking soda
  • 1/2 teaspoon baking powder
  • 1/2 teaspoon salt
  • 1 cup butter, softened
  • 1 1/2 cups white sugar
  • 1 egg
  • 1/2 teaspoon vanilla extract
  • zest of one large lemon
  • 4 tablespoons fresh lemon juice
  • 1/2 cup sugar for rolling cookies

Preheat oven to 350F. Line cookie sheets with parchment paper.

In a small bowl, whisk together flour, baking soda, baking powder and salt.

In a larger bowl, beat together butter and sugar until light and fluffy. Beat in egg, vanilla, lemon zest and juice.

Add in dry ingredients, beating until just combined. Roll rounded spoonfuls of dough into balls and then roll in sugar. Place on lined cookie sheets, about 1 or 2 inches apart.

Bake for 8 to 10 minutes. (Mine needed barely 8 minutes; they were not yet golden but I wanted them still pale and tender.) Remove from oven and let stand on cookie sheet for 2 minutes before removing to cook on wire racks.

Makes 24 – 36 cookies.

Continue Reading

Stephen Duckett’s Oatmeal Raisin Cookies

If you live in Alberta, chances are good you’ve heard about “cookiegate.”

Stephen Duckett's Oatmeal Raisin Cookies II

If you don’t, there’s still a chance you may have heard about it. (Even DListed caught wind.)

Here it is in a nutshell: after a week that saw harsh criticism levelled at Alberta Health Services, the board’s chief executive Stephen Duckett spent the day Friday in a meeting examining Alberta’s emergency care crisis. At the end, he came out to find three reporters looking for comment.

And what did he say? “I’m eating my cookie.”

Repeatedly.

You can see the entire exchange on YouTube here, though I also quite enjoyed this Cookie Monster/Duckett mash-up that someone later posted.

I’m not saying he had to stop and give a quote. My point is merely that this is a highly-paid official and a professional. It would have been much easier to simply stop, say he would not be giving a comment but that there was a media availability in 30 minutes if the reporters wanted a quote. To wave the cookie in a reporter’s face was rude. To continue for two minutes going on about eating the cookie was just comical. And not in an endearing way.

Anyway, I’m not here to wax on about politics. This is a food blog and I’m a baker at heart, so for me the curiousity became increasingly about the cookie at the heart of the controversy.

On Monday, I tweeted that I wondered what type of cookie Duckett had been eating. Turns out I’m not the only one that thought that way. The Edmonton Journal’s political columnist, Paula Simons, tracked down the chef behind the now-infamous cookie and he supplied the recipe. And all I could think after that was, I have to bake these things.

Turns out, he is Emmanuel David of La Persaud catering, a man who believes the secret to a chewy and soft oatmeal cookie lies in using lots of butter and sugar. And this recipe has it in spades. In fact, I was a bit surprised when I saw the ingredient list because it seemed to consist solely of those two ingredients. (Turns out there was some misinformation initially, which the chef later corrected. Below is the corrected version of the recipe.)

Still, only 1 teaspoon of baking powder didn’t seem to be enough leavening to give these cookies some height when competing against all that butter. And a complete absence of salt seemed strange.

But this chef must know what he’s doing, I figured and I confidently moved ahead, creaming together the copious amounts of butter and granulated sugar, beating in the four eggs one at a time and then gently folding in the dry mixture of flour, oatmeal, chopped raisins and the tiny amount of baking powder. (I love the idea of chopping the raisins first so you get little bits of them rather than just complete ones every once in a while.)

OK, I threw in two pinches of salt. It seemed crazy not to have some. Yes, even though I used salted butter.

I threw a tray of six rounded balls of dough in the oven and then set the timer for 10 minutes. (The recipe doesn’t specify how long they go in for, just to bake until “golden.”) When the timer went off, the edges were verging past golden and into “crisp” territory, but the tops of the cookies, while cooked, were almost as pale as snow. I would let them bake for another minute, but just don’t like burnt cookies, so I pulled them out and tried again. For the second batch, I moved the rack in the oven up a rung so it was in the top third and not in the middle. These cookies fared a little better.

I tried making them smaller; I tried making them bigger.

But nothing I did made them look the same colour as the cookie Duckett brandishes in the video.

Perhaps the best thing I did was sprinkle a scant pinch (just a few grains really) of sea salt on top of the last few batches to try to even out the sweetness.

It was only halfway through as I was trying to puzzle out why they weren’t working (the perfectionist in me was absolutely beyond annoyed) when I began to wonder if David meant brown sugar when he just wrote “sugar” in the recipe. That certainly would have changed the colour and given them a bit more heft. It’s too late now, but I may revisit this later and make that swap. Or do half granulated and half brown to see what happens.

Because, ultimately, these are very light, soft cookies and worth a second attempt.

As the last tray came out of the oven, news began to trickle out over twitter that Duckett had been given the boot.

I guess that’s the way the cookie crumbles.

Chopped Raisins

Dough

Oatmeal Raisin Dough balls

Stephen Duckett's Oatmeal Raisin Cookies

Stephen Duckett’s Oatmeal Raisin Cookies

from Emmanuel David, converted into imperial measurements by me. The instructions are exactly how he gave them on Simons’ blog.

  • 500g butter (about 2 1/8 cups. One block of butter is 454g, so it’s more than that)
  • 450g sugar (2 cups)
  • 4 large eggs
  • 200g organic oatmeal (2 cups)
  • 100g California Golden Raisins, chopped (scant 3/4 cup and I used purple ones because that’s what I could find.)
  • 400g flour (2 3/4 cups)
  • 5 mL baking powder (1 teaspoon)
  • Dash cinnamon, optional

Method:

1. Cream Butter & Sugar Until Fluffy. Add Egg Gradually

2. Fold Flour, Oatmeal & Raisins Mix Well

3. Shape cookies into small round balls. Do not flatten – place on cookie sheets as balls.

4. Bake 180 degrees C until golden brown.

(Gwendolyn’s note here: Most of mine baked for about 12 minutes to get a golden edge and bottom. They were fully cooked, though still pale.)

Yield: Makes approx. 30- 90g Cookies

(Mine made more than 30, for sure. Somewhere closer to 45.)

Continue Reading

No-knead Pumpkin Cinnamon Rolls

Last day of October and I’ve got a pumpkin recipe in just under the wire.

Though, truth be told, I made these a couple of weeks ago and took them in to the newsroom for election night, hoping the sugar rush would keep us all going through the tight deadlines and late night. With so many people voting and such a crazy race right up until the end, most of us stayed later than we ever have for an election. I can’t remember ever covering one as interesting and found myself watching the results roll in live as if it was some sort of TV show.

Anyway, back to the rolls.

They’re no-knead. Sensing a theme here? First no-knead pizza dough (if you haven’t tried this, please bookmark it, so very worth it) and then no-knead bread and now no-knead cinnamon rolls. God only knows what will be next, but I am loving this trend.

Once again, it takes some planning since it takes more time for these to rise. The recipe suggests, though, you can let them rise then refrigerate overnight and continue the next day, which is exactly what I did and it worked like a charm. Sure, there were some paranoid moments, like when I cut them into slices and let them rise in the pan prior to baking but couldn’t discern they actually rose a second time. I didn’t have much hope when I put them into the hot oven, but they came out all fat and puffy, shouldering each other in neat little rows.

I gave two to some friend who had popped by with her new baby since she was in the ‘hood and she texted me seemingly minutes after leaving to say she had eaten them both already and was tempted to lick the plastic wrap. That, my friends, is a pretty good endorsement.

The dough is beyond sticky and please learn from my misstep by using a really big bowl. I had a difficult time incorporating all the flour in my small-ish bowl (which felt big before I combined the wet and dry ingredients) and eventually had to dive in with my hands. Let me repeat: beyond sticky. (But, you know, kind of fun at the same time.)

But beyond that, it was pretty easy to work with once it came time roll out and, uh, roll up again. Some of my filling leaked out the edges. Obviously, I’m no expert at cinnamon rolls. But I’ll take ugly and tasty any day. And man are these tasty. I mean, really, how can you go wrong? pumpkin, cinnamon, brown sugar, butter, glaze? Yeah, it’s all good.

So, this is kind of short and sweet but if I don’t post this soon, I’m going to miss my Oct. 31 deadline.

In short: these are good, pumpkin-y and easy. Enjoy.

No-knead pumpkin dough

Misshapen rolls

Pumpkin cinnamon rolls

Glaze

Glazed pumpkin cinnamon rolls

This comes from the folks over at the Kitchn, like quite a few recipes I’ve posted here. It’s almost to the point where I’m wondering if I need to create a tag for them . . . .

The only change I made was I omitted the pecans. I’ve got nothing against them but was just too lazy to get them out of the freezer, toast and chop them. Oh, and I didn’t use as much milk in the glaze which is why, I’m pretty sure, it’s so much thicker. Not that anyone was complaining.

No-Knead Pumpkin Rolls with Brown Sugar Glaze
Makes 16-18 rolls

For the dough:

  • 1/4 cup water
  • 1 scant tablespoon yeast (1 package)
  • 1 cup milk
  • 1/2 cup butter
  • 1/2 cup sugar
  • 1 15-ounce can pumpkin puree
  • 1 1/2 teaspoons kosher salt
  • 5 1/2 cups all-purpose flour

For the filling:

  • 1/2 cup butter
  • 1 cup packed brown sugar
  • 2 teaspoons cinnamon
  • 1/2 teaspoon ginger
  • 1/2 teaspoon nutmeg
  • 2 cups pecans – toasted, chopped, and divided in half (optional)

For the glaze:

  • 1/4 cup butter
  • 1/2 cup milk
  • 1 cup brown sugar
  • pinch salt
  • 2 1/2 cups powdered sugar

Sprinkle the yeast over the water and let it sit a few minutes until the yeast is dissolved.

Meanwhile, warm the milk and butter in a small saucepan on the stove top until the butter is melted. Combine this with the sugar in a large heat-proof mixing bowl and stir until the sugar is completely dissolved.

Let the milk mixture cool until it is just warm to the touch – NOT HOT. Then stir in the yeast and the pumpkin. Add the salt and five cups of the flour all at once, stirring until all the flour has been absorbed. Squish it between your hands if you’re having trouble incorporating the last of the flour. The dough will be sticky, but should come together in a shaggy ball. If it’s still more the consistency of cookie batter, work in an additional 1/2 cup of flower.

Cover the dough and let it rise for 1-3 hours. During this time, it should double in bulk. At this point, you can punch the dough down and refrigerate it overnight or continue shaping the rolls.

To shape the rolls (either immediately or with the refrigerated dough), sprinkle your work surface with a little flour and dump the dough on top. Pat it down into a rough rectangle and then use a floured rolling pin to roll it into a rectangular shape about a half an inch thick, longer than it is wide. If the dough gets sticky, sprinkle a little more flour on the dough’s surface and on your hands.

Melt the butter in the microwave and stir in the brown sugar and the spices. Spread this over the rectangle of dough, leaving an inch of bare dough at the top. Sprinkle one cup of the toasted pecans over the dough, if using. Starting at the edge closest to you, roll the dough into a cylinder and pinch it closed at the top.

Rub a tablespoon of soft butter into the bottom of two 9×13 baking dishes, two 9-inch cake pans, or a combination. Using a bench cutter or a sharp knife, cut the cylinder into individual rolls 1 – 1 1/2 inches thick. Place them into your baking dishes so they have a little wiggle room on all sides to rise. Cover them with a clean kitchen towel and let them rise until they fill the pan and look puffy, 30 minutes for already-warm dough and 1 hour for dough that’s been refrigerated.

About 20 minutes before baking, begin heating the oven to 375°. When the rolls are ready, bake them for 20-25 minutes, until the tops are golden and starting to look toasted around the edges. Rotate the pans halfway through cooking.

While they are baking, prepare the glaze. In a small saucepan over medium heat, combine the milk and butter. When the butter has melted, add the brown sugar and salt. Stir until the brown sugar has melted. Remove from heat and strain into a mixing bowl to remove any sugar clumps. Stir in the powdered sugar. This should form a thick but pourable glaze.

Let the baked rolls cool for about five minutes and then pour the glaze on top. Sprinkle the remaining cup of pecans over the top, if more nuttiness is desired. Eat them immediately. Leftovers will keep for several days and are best reheated for a minute in the microwave.

Continue Reading

Fruit Cobbler Cake

Look! It’s more peach-related baking.

Actually, that’s not entirely true. I only had one peach by the time I finally got around to this cake from Julie over at Dinner with Julie, so I had to get a little creative with the other fruit I had bought from the Farmer’s Market the weekend before, adding a nectarine and some blackberries to the mix.

(And I feel a little bit badly posting this since peach season is just about over for the year. Sorry!)

Julie’s version used rhubarb (and I kind of wish I had thought of this recipe when that fruit was still available. Must keep in mind for next year), but pretty much any fruit will work. The only adjustment that needs to be made is to the amount of sugar you sprinkle on over top. Rhubarb, with it’s tart flavour, needs more sugar. These needed barely any. And in an effort to get creative, I actually used large-grained raw sugar, which probably gave it a much more caramel-like flavour on top.

As you can see in the photo, it, uh, caramelized the edges of the cake. Actually, truth be told, I was freaking out the whole thing was going to burn before the centre was finally cooked. But people seemed to like it quite a bit (favouring the edges where it hit more of the batter and less of the fruit), but next time I’d like to try it with straight-up sugar to see what kind of difference it makes.

I liked the idea of this cake, the way it bakes up around the fruit, enveloping it even. And it didn’t disappoint.

Peaches and Nectarines

Scattered Fruit

Fruit Cobbler Cake

Fruit Cobbler Cake Slice

It’s definitely one to keep in mind when next summer gets going or, even better, when you are craving a taste of summer and the fruit isn’t exactly ripe and delicious enough to eat on its own. Baking it into this cake will elevate it, I swear.

This recipe, like so many good ones, comes from Julie over at Dinner with Julie. (And hey, while you’re over there, check out her peach bran muffins recipe, which I also made and was fabulous.)

Fruit Cobbler Cake

  • 1/2 cup butter, at room temperature
  • 1 1/2 cup sugar
  • 4 large eggs
  • 1 teaspoon vanilla
  • 2 cups all-purpose flour
  • 2 teaspoon baking powder
  • pinch salt
  • 2 – 4 cups assorted fruit (rhubarb, strawberries, peaches, plums, nectarines, blackberries etc. I used a peach, a nectarine and a scattering of blackberries in my version)
  • 1/8 to 1/2 cup sugar (depending on the tartness of the fruit; rhubarb, for example, would need a greater amount of sugar)

Preheat the oven to 350F.

In a large bowl, beat together the butter and sugar until well combined and starting to get fluffly. Add the eggs one at a time, beating after each, then beat in the vanilla.

Add the flour, baking powder and salt and stir by hand or beat on low speed just until combined; the batter will be thick. Spread into a 9″x13″ pan that has been sprayed with nonstick spray, and scatter the fruit over top. Sprinkle with sugar and bake for 45-50 minutes, until the cake is golden and the cakey parts springy to the touch.

Makes one large cake.

Continue Reading

Peach Upside Down Cake

In a rash move, I bought a whole bunch of peaches a couple of weeks ago. And then, when those had run out, I bought some more. Some of you may have already enjoyed the Peach, Prosciutto, Rosemary and Goat Cheese flatbread, which resulted from this sudden and inexplicable need to purchase peaches. But, wait, there’s more! Since it became clear I was going to need to bake with some of them, as they all began to ripen at once, I became fascinated by the idea of making a Peach Upside Down Cake.

I never really understood the love affair with pineapple upside down cakes (maybe it’s my aversion to maraschino cherries), but I do like the idea of fruit getting baked into the bottom of a cake and then being turned out so it becomes the decorative topping. They’re just so darn pretty.

Peaches on the bottom

Peach Upside Down Cake

Now would be a good time to praise my digital kitchen scale because, well, this recipe is almost completely in weights, with the exception of the eggs and vanilla.

That said, I absolutely do love my digital kitchen scale, which was a gift from my mum one Christmas. It is, by far, one of the most used gadgets in my kitchen. It’s super handy for measuring butter (since I always have to cut mine to measure because we don’t have “sticks” of butter up here and it gets tricky sometimes trying to carve off the appropriate amount from the blocks we have up here) and I now use it exclusively when making no-knead bread (post coming soon) because I can just tare it off before adding the next ingredient. And, of course, a lot of European recipes only use weights, which makes the scale essential.

I don’t usually encourage people to purchase additional things for the kitchen (cough, cough, except for the clearly essential rasp, which I have talked often about; mine is from Lee Valley Tools), but I do believe this is a useful tool. Ok, moving on.

This cake was seriously delicious and oh-so-pretty. The brown sugar and butter-topping created a moist, topping and the peaches were perfect. The cake was relatively light and nicely spiced, so the perfect complement to the rich topping and cooked fruit.

And, perhaps more importantly, it was really quiet easy. But the gorgeous presentation doesn’t suggest that at all, making it an ideal cake for sharing with friends. (Which I did!)

Peaches on the bottom - closer

Peach Upside Down Cake II

Peach Upside Down Cake III

Peach Upside Down Cake slicef

I have no idea how I stumbled on to this recipe, but it came from Kerrisdale Design Inc.

Peach Upside Down Cake

  • 3 ounces brown sugar
  • 4 tablespoons unsalted butter
  • 2 peaches, peeled and cut into 1/2″ slices
  • 6 ounces unsalted butter
  • 3.5 ounces brown sugar
  • 3.5 ounces white sugar
  • 2 teaspoons vanilla
  • 2 eggs
  • 6.5 ounces all-purpose flour
  • 1/2 teaspoon cinnamon
  • 1/4 ounce baking powder
  • 1/4 teaspoon salt
  • 7.5 ounces buttermilk

Heat the oven to 350 F and spray an 8-inch cake pan with non-stick spray. In the microwave or in a small pot on the stove, melt together the butter with brown sugar, mixing well. Pour the butter mixture into the prepared pan and layer the sliced peaches on top. Set aside.

In a medium bowl, cream the butter and sugars until well combined. Add the vanilla and eggs, one at a time, mixing well between additions. In a separate bowl sift the flour, cinnamon, baking powder, and salt.  Add the dry ingredients, alternating with the buttermilk, starting and finishing with the flour. Pour the batter over the peaches and spread to the edges of the pan.

Bake for 40 to 50 minutes, or until the center of the cake springs back when lightly pressed and the edges begin to pull away from the sides of the pan.  Cool for 10 minutes in the pan then turn out onto your serving platter.  Allow to cool for an additional 30 minutes before slicing.

Continue Reading

Microwave Lime Cheesecake

Under normal circumstances, microwave cheesecake would be an ideal summer dessert for the sole reason that it doesn’t require you to turn on your oven.

However, this summer has been anything but normal.

So, instead, I’m going to tell you that these little cheesecakes are ridiculously easy, super tasty and highly transportable and those are three very fine reasons to consider trying it out. And, hey, if the forecasters are right and we’re going to sail through the rest of August on a heat wave, then feel free to use not wanting to turn on your oven as an excuse, too.

The more rationale, the better, I say.

Not that cheesecake should require any rationale.

These ones certainly don’t.

Microwave Lime Cheesecake I

Now, I’m not going to lie. If you’re looking for a silky smooth cheesecake with nary a crack marring the surface, lovingly cooked in a water bath and chilled overnight in the fridge, this isn’t the recipe for you.

If you’re looking for something you can whip up in seven minutes — including cooking time — that sits in the fridge for an hour and then can be devoured, giving you the same tart lime cheesecake taste as the regular kind with almost the same amount of smoothness, then this is the recipe for you.

It was for me.

The hardest part was waiting for it to chill enough.

And the best part was because I used mason jars, I could just slap on a lid and take it with me, which would be ideal for picnicking or making an office lunch a little more luxurious.

I used two one-cup (250 mL) mason jars to make the cheesecakes and had a little bit of batter left over. In hindsight, I can tell you I filled the jars a bit too full.

At some point, I may want to sit down and reexamine the subject of portion control. At the time, though, it seemed like a good idea. After all, the recipe said it makes two to four cheesecakes, so two seemed more than reasonable.

Please take my suggestion and make at least three, for a few reasons: 1: These jars are pretty giant and the cheesecake is, naturally, a bit rich and may be better in a slightly smaller dose. 2: Three or four cheesecakes means you can share more easily with more people. That or you can spread them out over several sittings.

3: You won’t be watching anxiously through the microwave door as the cheesecake mixture souffles up and over the jars’ edges, threatening to spill all over the rotating tray.

As it was, all that fretting was for nothing. They didn’t spill, but I think it would have been better without the panic.

Out of the microwave, they settled nicely into a slightly concave top.

I filled that with whipped cream — purely for esthetic reasons, of course. But later I thought some fresh fruit would have been nice.

I liked the slightly tart taste of limes countering the richness of cheesecake, but suspect this recipe can be easily adjusted to suit other flavours, such as lemon (by switching the zest and juice to that fruit) or a straight-up vanilla cheesecake by omitting the citrus and adding a teaspoon or so of vanilla extract. That would be particularly delicious topped with summer berries or a fruit compote.

After all, it only takes about seven minutes to try a new variation. The tricky part will be waiting the hour to see how it tastes.

Limes

Microwave Lime Cheesecake II

Microwave Lime Cheesecake

Adapted from TheKitchn.com

  • 3 tbsp (50 mL) butter, melted
  • 1/2 cup (125 mL) graham cracker crumbs
  • 1 tbsp (15 mL) sugar
  • 8 oz (250 g) cream cheese, softened
  • 1/3 cup (75 mL) sugar
  • zest of one lime
  • 2 tbsp (25 mL) fresh lime juice
  • 1 egg

Combine the graham cracker crumbs with melted butter and 1 tbsp (15 mL) sugar. Divide between two to four 1-cup (250 mL) jars or ramekins and press into the bottom.

Mix the rest of the ingredients until smooth. Divide evenly into jars or ramekins with crumbed bottoms.

Place in microwave for 2 minutes. The top of the cheesecake should appear dry when cooked. If it doesn’t look quite done, microwave at 30-second intervals until the tops appear dry. (For my extremely full jars, I needed 2 minutes and 30 seconds.) If you don’t have a rotating microwave tray, cook for 1 minute then turn the jars or ramekins and microwave for another minute.

Chill in refrigerator for 1 hour. Garnish with whipped cream or fresh berries and serve.

This story first appeared in the Real Life section in the Calgary Herald. For more delicious recipes, visit CalgaryHerald.com/life.

Continue Reading

Goodbye Cake

I have a new job!

After more than a dozen years of covering news at newspapers all over hell’s half acre in B.C. before finally making it to the big leagues — the Vancouver Sun, the Globe & Mail and, now, the Calgary Herald — I have just taken over as the new full-time, permanent food writer for the Herald.

In my time as a news reporter, I’ve written about the birth of a baby beluga, health care, education, dinosaurs in Tumbler Ridge, BC, the deaths of three women killed by men they once loved even after reporting their safety concerns to RCMP. I’ve spoken with ministers and a minor celebrity or two. I’ve sat through heartbreaking testimony and watched people break down in courtrooms. I’ve cried with the family members of homicide victims.

I’ve loved it and hated it, been moved by stories and frustrated by them too.

And now I’m trading covering crime and calamity for cake, the seedy underbelly of the city for pork belly and so on.

It is, no doubt, a dream job and I’m excited. But it wasn’t without some sadness that I left the great team of city reporters. (OK, yes, I basically just moved my stuff about 20 feet from my old desk and I’m still sitting right next to my city peeps, but it’s a whole different world.) Most of all, I miss the camaraderie of so-called Civilized Sundays when I’d bring in baking, like red velvet cake, which we would eat while listening to the police scanner. It’s not so much that I miss working Sundays (because I think I could really get used to this Monday-Friday thing), it’s the ritual of it all.

So, of course, on my last city shift, I had to bring in a cake!

Iced Cake II

I did a really informal twitter poll and people voted for a vanilla cake with chocolate frosting. So, I found a recipe for both and got to work a few weekends ago. And, once it was baked, I thought it would be even better to slice the cake layers in half, double the icing and go for a quadruple-layer cake. For the most part that went well, barring some uneven slicing that led to some repair work to one of the layers. I hoped for the best cutting into it that I would bypass where things had gone sideways, but luck isn’t usually on my side. And it wasn’t this time around. So the beauty shot of the slice isn’t as good as it could be. (No doubt also because I didn’t let it cool down after putting on the icing, which would have made for a cleaner cut. But I was impatient (as usual) and just wanted to try a piece of the damn thing.

Barring that one piece, I gave half to some friends who just had a baby and took the rest in to work. Yes, we ate it for breakfast. And that made it perfect.

The cake recipe comes from Rock Recipes (though I have no idea how I stumbled on it originally), while the icing is from Joy of Baking.

Though both were fantastic, I wish I had tried something a little less overwhelming with the cake, like a lemon or basic buttercream. I have a feeling the chocolate icing overpowered the extremely vanilla cake instead of letting them better each other together.

Both are fantastic, though, and well worth trying on their own.

Vanilla Cake batter

Chocolate icing

Whipped chocolate icing

Iced Cake

Cake slice

Slice of cake

Vanilla Cake

  • 1 1/2 cups cake and pastry flour
  • 1 1/4 cups all-purpose flour
  • 2 1/2 teaspoons baking powder
  • 1/4 teaspoon salt
  • 1 cup unsalted butter, at room temperature
  • 2 cups sugar
  • 4 eggs at room temperature
  • 4 teaspoons vanilla extract
  • 1 cup undiluted evaporated milk

Preheat oven to 325.

Sift together flours, baking powder and salt. Cream the butter and sugar until fluffy and pale. Add, one at a time, the eggs, beating well after each to make sure they are fully incorporated. Beat in vanilla. Gently fold in the dry ingredients, alternating with the evaporated milk, in three parts, starting and ending with the dry ingredients.

Divide batter evenly between 2 well greased 9-inch cake pans. (I also put parchment circles on the bottom to ensure a good release.) Bake in oven for about 35 to 40 minutes or until an inserted toothpick comes out clean. Let cake rest in pans for 5 minutes before turning out onto a wire rack to cool completely.

Chocolate Frosting
(I doubled this recipe to have enough for a quadruple-layer cake. This is the recipe in its original measurements.)
  • 8 ounces bittersweet or semisweet, chopped
  • 1/4 cup cocoa powder
  • 3/4 cup milk
  • 1/2 cup unsalted butter, cut into pieces
  • 3 cups icing sugar, sifted to remove lumps
  • 1 1/2 teaspoons pure vanilla extract

In a stainless steel bowl placed over a saucepan of simmering water, put the chopped chocolate, cocoa, milk, and butter.  Stir until the chocolate has melted and the mixture is smooth.  Remove from heat and beat in, with a hand mixer or wire whisk, the confectioners sugar and vanilla extract.  If the frosting is lumpy, strain through a strainer to remove any lumps.  Cover and place the frosting in the refrigerator until it is firm (this may take a few hours).  Once the frosting is firm remove from refrigerator and place in your mixing bowl.  Beat the frosting for a minute or two or until it is nice and smooth and of spreading consistency.

Continue Reading

French Silk Pie

I love Jason Segel.

He meets most of my criteria for ideal man: tall, not overly thin nor athletic and oh-so-funny. (Or, as my friend once described as “tall, broad, goofy guy.”) You can have your pretty boys, girls. Give me a man who can make me laugh and I’m a smitten kitten.

I know this isn’t really the place for romantic confessions, you know, being a food blog and all. But, sigh. And, I swear, it’s relevant.

Chilled and ready

I missed the first season of How I Met Your Mother because I couldn’t figure out when the program was on. Some kind friends lent me it and season 2 on DVD. I’m not admitting anything but I may have watched them both in just a handful of days. That started a lovely tradition of discussing each episode on Tuesdays over email and getting together for season finales.

My crush on Segal started there and has continued through Forgetting Sarah Marshall and then I Love You, Man. (Even though his hair in I Love You, Man was beyond ridiculous and, unfortunately, spilled over into HIMYM because I guess they were filming bits of both at the same time.) (And, may I add, my love of him has absolutely nothing to do with the full-nude scene in Sarah Marshall. Ahem.)

This year, my friends and I set up the date as soon as we knew when the finale was going to air. I, naturally, offered to bring dessert. But, while Dawn and I are fans of anything lemon, Chris is less than interested in citrus desserts. For him, it’s chocolate all the way. I’m not against broadening my horizons away from lemon and I felt like it would be nice to cater to someone else’s tastes for once. Plus, c’mon, chocolate pie? I’m still all over that.

I thought this would be great with a straight-up pie crust and tried that vodka pastry recipe from Cook’s Illustrated that set the baking world on fire. (It’s a wet, easily workable dough that uses part water and part vodka. The vodka evaporates leaving this stunningly flaky crust without all the fuss.) Yes, it was easy to work with and I think it would have been fantastic if I hadn’t rolled it so thin that the bottom got a little too brown. Not burnt, but brown enough that I just couldn’t bring myself to serve it to friends. Yes, I’m a perfectionist.

So, I then went with a graham cracker crust because
a) I had the ingredients
b) It’s a lot harder to screw up.

I loved photographing how this came together, especially the part where I got to mix in the chopped chocolate to the custard base, watching the cream and brown swirl together.

Mixing it in

The only hitch in all of it was this thing seriously took forever to set. That’s why there are no photos of slices because it was still setting while I was driving over to my friends’ house. I had set the tart tin on a baking sheet on the floor of my car and was freaking out every time I had to come to a stop as I watched the chocolate goo ripple slightly. We immediately put it in the fridge when I got there and let it chill for another three hours. It was perfect when it came time to cut in, but it was far too late for pictures. And, frankly, we just wanted to eat the damn thing.

It was so good.

Richly chocolate, smooth without being gloppy. It slumped ever-so-slightly in that perfectly decadent way. As if it was so full of goodness that it couldn’t contain itself.

I have it on good authority (OK, he was dimed out by his wife) that another slice or two went down after I left before bed time.

Yeah, it’s that good.

Yolks

Weighing the chocolate

Chopped chocolate

Custard and chocolate

Time to chill

Chilled and ready II

French Silk Pie

For crust:

  • 1 1/3 cups graham cracker crumbs
  • 5 tablespoons unsalted butter, melted
  • 1/4 cup sugar

For filling:

  • 2/3 cup sugar
  • 1/4 cup cornstarch
  • 1/2 teaspoon salt
  • 4 large egg yolks
  • 3 cups whole milk
  • 5 oz fine-quality bittersweet chocolate, finely chopped
  • 2 oz unsweetened chocolate, finely chopped
  • 2 tablespoons unsalted butter, softened
  • 1 teaspoon vanilla

For topping:

  • 3/4 cup chilled heavy cream
  • 1 tablespoon sugar
  • 1 tablespoon cocoa powder, for dusting OR a small chunk of dark chocolate, shaved with a grater or rasp

Crust:
Put oven rack in middle position and preheat oven to 350°F.

Stir together crumbs, butter and sugar and press into 9″ pie plate or tart tin. Bake until slightly golden, about 15 minutes. Let cool on a rack.

Filling:

In a heavy-bottomed pot, whisk yolks, sugar, cornstarch and salt until well combined. Add milk in a stream, while still whisking. Over medium heat, while still whisking, bring to a boil. Reduce heat and simmer, still whisking, for about a minute. The filling will be quite thick.

Sieve the filling into a large bowl. Whisk in chocolates, butter and vanilla and stir until everything is melted together and fully incorporated. Cover with plastic wrap, pressing it against the custard mixture to keep it from forming a skin. Let cool completely, about two hours.

Spoon filling into cooled crust and then chill all together in the fridge for at least six hours. (Mine took more like eight.)

When ready to serve, beat whipping cream with sugar until it hold soft peaks. Cover pie and dust with cocoa powder or chocolate shavings.

Continue Reading

Flourless Chocolate-Walnut Cookies

There is often debate among brownie fans on whether it is better to be fudge-y or cake-y. I have mostly stayed away from this because I’m not enough of a brownie enthusiast to really care one way more than the other.

Besides, the only thing that really matters when it comes to the brownie is the slightly crisped edges and the crackled top. For me, that is where the beauty of the brownie lies.

But, let’s face it, unless you have one of those special “all edge” pans with their labyrinthine shape, someone is getting stuck with the middle bits.

And that’s how I thought things would always be, until I tried these flourless chocolate-walnut cookies.

Flourless Chocolate Cookies

OK, they are not brownies. For someone like me, they are even better. They are cookies that taste like the crinkled surface layer of a brownie with its slight chew and crackle goodness, studded with chunks of walnuts.

To be honest, flourless chocolate cookies were not high on my list of things to bake when I stumbled across the recipe. But I came upon it after I had put some egg whites in the freezer, unsure what to do with them after using up the yolks.

I could have saved them for a pavlova, but figured it was worth trying out something new.

The list of ingredients was straightforward, if not a bit puzzling. I’ve never measured out three cups of icing sugar for a cookie recipe before.

Nor was I actually convinced that the airy ingredients would transform in the oven to some sort of cookie delight.

However, it did have a few things going for it: I already had egg whites ready to go and the recipe reminded me of a package of cookies I bought from a chain store grocery store once.

I served them to friends with a dollop of vanilla ice cream sandwiched between: a gourmet version of the childhood treat. It seemed worthwhile to see if these could compare. Or, as the case ended up being, improve on the store bakery version. The chocolate chew and nuts in a tender cookie package were so right. And they were light and not overly sweet. (Though, that was dangerous too, as it was easy to eat more than one or two and feel I still had room for another.) Mine did not get as shiny as I have seen in other people’s photos of the same type of cookies.

Normally I’d get a bit worried. Or envious.

Why do mine look different?

But after sampling one — OK, several — of the cookies, I realized I didn’t care what they looked like. They were fantastic.

I have since found myself trying to find recipes that use up only yolks so that I can take advantage of this cookie recipe again.

Toasted walnuts

Cocoa and Icing Sugar

Cocoa Sugar mix

Flourless chocolate cookie batter

Cookie dough puddles

Chewy goodness

Francois Payard’s Flourless Chocolate-Walnut Cookies

from New York magazine

  • 2¾ cups (675 mL) walnut halves
  • 3 cups (750 mL) confectioners/ icing sugar
  • 1/2 cup plus 3 tbsp (170 mL) unsweetened Dutch process cocoa powder
  • 1/4 tsp (1 mL) salt
  • 4 large egg whites, at room temperature
  • 1 tbsp (15 mL) pure vanilla extract

Preheat oven to 350°F (180°C). Spread the walnut halves on a large-rimmed baking sheet and toast in the oven for about 9 minutes, until they are golden and fragrant. Let cool slightly, then move the walnut halves to a work surface and coarsely chop them.

Position two racks in the upper and lower thirds of the oven and lower temperature to 320°F (160°C). Line two large-rimmed baking sheets with parchment paper.

In a large bowl, whisk (or use an electric mixer on low speed) the confectioners’ sugar with the cocoa powder and salt followed by the chopped walnuts. While whisking (or once you change the speed to medium), add the egg whites and vanilla extract and beat just until the batter is moistened. Do not overbeat or it will stiffen.

Spoon the batter onto the baking sheets in 12 evenly spaced mounds, and bake for 14 to 16 minutes, until the tops are glossy and lightly cracked; shift the pans from front to back and top to bottom halfway through to ensure even baking.

Slide the parchment paper (with the cookies) onto 2 wire racks. Let cookies cool completely, and store in an airtight container for up to 3 days.

This story first appeared in the Real Life section in the Calgary Herald. For more delicious recipes, visit CalgaryHerald.com/life.

Continue Reading

Dolly Bars

I like my blog stats. I’m always interested to see where people are coming from or what search words have led them to my little site. I am usually grateful to anyone and everyone who has linked up to my blog and I am quick to investigate a referrer when I’m getting more than a handful of hits coming in from a particular place.

So, when I saw I was getting visitors from a bulletin board on the America’s Test Kitchen website, I got curious.

I wish I hadn’t.

It was a discussion linking back to my rhubarb crumb cake post (which seemed odd, how did they even find that one particular post) with the subject of: Okay, guys, am I the only one who thinks this photo is great?

At first I thought she was referring to my rhubarb and/or cake photos, but it turned out she was referring to my blog’s header. Me and my red patent shoes and my red mixing bowl.

There were a few nondescript responses. And then the original poster said something that left me feeling like ice. I think it’s a good thing that I don’t have a photographic memory because it’s probably best I don’t remember the comment exactly. Instead, I’ll give you a summary: It looks as if this woman and her “pleasantly plump” calves (because that I do remember) has eaten everything before it could go in the oven and has had to lie down to digest it all.

And then, further down, another comment that struck even deeper.

No (Original Poster), when I opened the link and saw that across the top, I thought “Wa-huh? Did she get murdered while she was stirring her cookie dough? Or did she go into a diabetic coma from too much sugar? Or is she trying to look alluring with that red plastic bowl from Target and the red plastic shoes from Payless?” I couldn’t quite figure out the point of the picture.

It certainly does not make me want to eat….her cooking.

I felt ill to read that.

I have long known the Internet to be a place where meanness spreads easily. After all, I’ve read the comments on some of my articles for the Herald. People are quick to criticize or make mean comments. Anonymity, no doubt, plays a significant role in how people choose to comport themselves online.

And I know there is a valuable lesson in here about paying attention to the 99 people who like you and ignoring the one critic.

But here’s the problem.

These comments from these women confirmed all the things I feared people thought about me.

The original poster later took down her comments, editing the first post to say she had never intended to offend anyone. My initial reaction was to be appreciative that she seemed sorry. But, after a few minutes, I realized that her edited comment was just as strange. How did she not think people would be offended? Did she believe her comments were being made in a vacuum and the object of her criticisms would not find out? Likely, yes. But she was mistaken.

More than 60 people visited my site because of that bulletin board discussion. I have no idea what the others thought, but I can safely say that I’d prefer to get my traffic some other way.

And yes, a small part of me thinks they would probably be less mean if they had a nice slice of cake once in a while.

So, on that note, (she says, clapping her hands together), that is enough time wasted on that. Let’s eat something delicious!

Dolly Bars I

For elective choices in Grade 8 at high school (because there was no junior high in Vancouver and I’ll spare you the woes of being a 12-year-old girl going to school with 18-year-old boys who would never look at a kid like me) one could decide between food/wood/metal and home ec (food and sewing). I had no interest in working around giant saws that would probably take my finger off, so I chose home ec.

I don’t remember many recipes worth saving, except baby cheesecakes that used vanilla wafers for a crust and these things called Dream Bars. I kept the cheesecake recipe but have no idea where the one for the bars went, which is too bad because I think about them pretty often. (As in, more often than really is reasonable to reminisce about a baked good.) They were sort of chewy-gooey with a shortbread type crust and a sweet layer on top. I think there were pecans involved. And chocolate chips. And that’s about all I remember. I’ve googled until the cows come home, but nothing that calls itself a “dream bar” is actually what I remember.

And then I saw Dolly Bars. They seemed a reasonable facsimile and, therefore, worth a try.

I found this recipe on Smitten Kitchen who adapted it from Homesick Texan. I didn’t notice the discrepancy in the amount of sweetened condensed milk until after it became clear this recipe was a bit of a failure for me. A little more online research showed that almost every recipe calls for an entire can of the stuff, while the one I used called for about 1/3 of a cup. My toppings didn’t really stay stuck to the graham cracker base as a result. Still tasty, but a bit of a failure. So, I’m going to try this again and use the entire can.

All the toppings

Condensed Milk II

Condensed Milk II

Dolly Bars before baking

IMGP1327

Dolly Bars II

Dolly Bars

  • 1/2 cup (1 stick) salted butter, cut into large pieces
  • 1 1/2 cups graham crackers crumbs (about 8 graham crackers, pulsed in a food processor)
  • 1 1/2 cups chocolate chips
  • 1 cup butterscotch chips
  • 1 cup shredded coconut
  • 1 cup pecans, coarsely chopped
  • 1 14 oz. can sweetened condensed milk

Preheat oven to 350 degrees.

Melt butter in microwave in heatproof bowl until just melted when stirred. Add graham cracker crumbs. Mix and then press evenly into the bottom of 8×8 baking pan.

Layer coconut, pecans, butterscotch and chocolate chips on top of graham cracker base. Pour sweetened condensed milk over whole mixture.

Bake in oven for 25 to 30 minutes, or until the top is light brown.

Continue Reading

Strawberry Shortcakes

I suppose my scone anxiety started about 10 years ago when I was doing a stint teaching English in Japan.

My next-door neighbour invited me to a cooking class being hosted by one of the American wives who lived on a nearby U. S. naval base. Every so often they would run these courses and local housewives in my small town would sign up, looking for a chance to learn some foreign cooking and perhaps practise English.

I’m sure I paid attention. I’m also sure we put in all the ingredients. I’m confident we didn’t overmix.

But pulling our tray from the oven, it was painfully obvious something, somewhere had gone wrong.

The navy wife clucked her tongue and kindly suggested we forgot to add the baking powder.

To say they were hockey pucks would have been polite.

To add to that anxiety was the confusion I suffered when attempting to make scones again: how best to mix the butter with the flour to ensure even incorporation while the butter remains cold.

Pastry blender? Fingertips? Food processor?

It was all a bit much for this would-be perfectionist to handle.

I understood the logic behind it. If the butter stays cold and is perfectly mixed in with the rest of the ingredients, it will melt in the heat of the oven, creating light layers in the scone. But I just didn’t know which method was best.

Still, one can only be afraid of scones for so long.

And it’s strawberry season.

And if those two things aren’t enough to make this girl face down her anxiety with a round of strawberry shortcakes, I’m not sure what would be. After all, the thought of a light, golden scone-like shortcake, topped with slightly sweetened strawberries and a healthy dollop of whipped cream is enough to make me do things much worse than attempt a recipe while bracing for failure.

Within reason, of course.

As hoped for, my anxiety completely melted away when the recipe came together quickly and the shortcakes out of the oven were the requisite golden colour, pulling apart neatly to display all their lovely inner layers.

Strawberry Shortcake II

It may have been thanks to chef Nigella Lawson’s approach to the butter conundrum, which is to grate frozen butter into the dry ingredients. It seems so ridiculously smart, now that I think about it. After all, if the goal is even distribution, what better tool to use than something that will conveniently portion the butter out into tiny pieces? Not to mention the fact that because the butter is frozen, it’s difficult for it to warm up too much before the mixture goes into the oven anyway.

It may also have been that I made absolutely sure to add the leavening.

And it may have been that sometimes anxieties just need to be confronted.

After all, the rewards to be reaped here will carry on and on.

And, in the immediate moment, there are shortcakes to enjoy.

Strawberry Shortcake I

Strawberry Shortcakes

Adapted slightly from chef Nigella Lawson’s How to Be a Domestic Goddess.

For the shortcakes:

  • 1½ cups (325 ml) flour
  • ½ tsp (2 ml) salt
  • 1 tbsp (15 ml) baking powder
  • 5 tbsp (75 ml) sugar, divided
  • 1/2 cup (125 ml) unsalted butter, frozen
  • 1 large egg
  • ½ cup (125 ml) half-and-half cream
  • 2 tbsp (25 ml) whipping cream
  • 2 tbsp (15 ml) sugar, divided
  • 1 cup (250 ml) whipping cream

for the filling:

  • 1 pound (500 g) strawberries, hulled and sliced
  • mix the sliced strawberries with 1 tbsp (15 ml) sugar and set aside in the fridge.

Preheat the oven to 425°f (220°c).

Mix together the flour, salt, baking powder and 3 tbsp (50 ml) of the sugar in a bowl. Grate the frozen butter into the dry ingredients and use your fingertips to lightly toss all together. Whisk the egg into the half-and-half cream and pour into the flour mixture a little at a time, using a fork to mix. (Nigella notes you may not need all the cream; I needed another tablespoon or so.)

Turn the dough out onto a lightly floured surface, then roll gently to about ¾-inch (2 centimetres) thick. Dip a cutter in flour and cut out as many shortcakes as possible. Work the scraps back together, re-roll and cut more. (Nigella suggests using a 3-inch/6½-cm round cutter to make 8; I used a much smaller square one and subsequently got 15 shortcakes.) Place on a baking sheet, brush the tops with the 2 tbsp (25 ml)whipping cream and sprinkle with the remaining sugar.

Bake for 10 to 15 minutes (because mine were significantly smaller than suggested, they only took 8 minutes) until golden. Remove to wire rack to cool.

Whip the whipping cream with the remaining 1 tbsp (15 ml) sugar-and a splash of vanilla extract if desired.

Split the shortcakes through the middle, top with a spoonful of strawberries and dollop of whipped cream and then put the top back on.

These are best served slightly warm.

This story first appeared in the Real Life section in the Calgary Herald. For more delicious recipes, visit CalgaryHerald.com/life.

Continue Reading

Triple Layer Chocolate Cake

It’s my Blogiversary!

Two years ago I decided it was time for me to finally join the blogging world and I started up Patent and the Pantry as a way of celebrating my love of food and photography. But, let’s face it, mostly because of my love of food.

Chocolate Cake slice II

And I got a nice little present just in time for it. I just had my 200,000th page view. I never thought it would grow this much and I am so grateful to all my readers who have bookmarked my blog, forwarded recipes along and faithfully kept up with all my updates even if half of them have involved lemon recipes. Thanks too must go to all my friends and family, which have supported me in this little project.

Any good celebration requires cake. Or at least as far as I’m concerned.

I found this recipe while getting my hair done a few weeks back. Flipping through Bon Appetit, I came across this Chocolate Mayonnaise Cake and immediately wrote it all down with an eye of making it sooner rather than later. Although Red Velvet Cake was fun for the first entry and first anniversary, I wanted to switch things up this time around. And you can never go wrong with chocolate.

I took half over to Andree’s house to share with her. She has been a big supporter of P&P since I launched, offering tips, advice and gently encouraging me to do less baking, more cooking. So, I thought she might like it if she tasted some of the fruits of my baking labours.

The other half went in to work for my “Civilized Sunday” girls who are kind enough to eat all the baking I can’t keep at the house out of fear I will consume it all. Then we all sit around the desk at work eating goodies and reading our horoscopes . . . . And then, yes, we do get down to serious work because otherwise how would we fill the Monday paper?

The cake went over well, but I’m not entirely convinced it was as good as it could be. My main concern here is that the recipe indicates to beat the cake until well blended after each of the four additions of flour. I’ve always been told to go gently when adding flour to a cake and mix (not beat) only until blended because you don’t want to develop the gluten. I wish I had followed my instincts; I’m convinced this cake would have been even more tender. Not that anyone was complaining . . . .

So, if I attempt this again, I’m going to go gentle on the batter. I’m sure it will only improve things.

However, all that said, it was still a good little cake for a special little day.

Prepared pans

Melted chocolate and cocoa

Chocolate Cake Batter

Chocolate beaters

Chips and chunks for chocolate icing

Melted chocolate for the icing

Two layers

All iced up

Sky high cake

Chocolate Cake slice I

Chocolate Cake

  • 2 ounces bittersweet chocolate (do not exceed 61% cacao), chopped
  • 2/3 cup unsweetened cocoa powder
  • 1 3/4 cups boiling water
  • 2 3/4 cups all purpose flour
  • 1 1/4 teaspoons baking soda
  • 1/4 teaspoon baking powder
  • 1 cup sugar
  • 1 cup (packed) dark brown sugar
  • 1 1/3 cups mayonnaise (do not use reduced-fat or fat-free)
  • 2 large eggs
  • 1 teaspoon vanilla extract

Chocolate Frosting

  • 10 ounces bittersweet chocolate (do not exceed 61% cacao), chopped
  • 1 1/2 cups (3 sticks) unsalted butter, room temperature
  • 3 cups powdered sugar
  • 1 tablespoon vanilla extract
Preheat oven to 350°F.

Butter and flour three 8″ diameter cake pans with 1 and 1/2-inch-high sides. Combine chopped chocolate and cocoa powder in medium metal bowl. (I used a plastic bowl and it appeared to work just as well.) Add 1 and 3/4 cups boiling water and whisk until chocolate is melted and mixture is smooth. Sift flour, baking soda, and baking powder into another medium bowl. Using electric mixer, beat both sugars and mayonnaise in large bowl until well blended, 2 to 3 minutes. Add eggs 1 at a time, beating until well blended after each addition. Beat in vanilla. Add flour mixture in 4 additions alternately with chocolate mixture in 3 additions, beating until blended after each addition and occasionally scraping down sides of bowl. (Again, I’d take it easy here and only mix until just blended instead of beating it.) Divide batter among prepared cake pans (about 2 1/3 cups for each).

Bake cakes until tester inserted into center comes out clean, 30 to 32 minutes. Cool cakes in pans on racks 20 minutes. Run small knife around sides of cakes to loosen. Carefully invert cakes onto racks and let cool completely.

For the frosting, place chopped chocolate in medium metal bowl; set bowl over saucepan of simmering water and stir until chocolate is melted and smooth. Carefully remove bowl from over water; let melted chocolate cool until lukewarm, stirring occasionally.

Using electric mixer, beat butter in large bowl until smooth and creamy. Sift powdered sugar over butter and beat until well blended, about 2 minutes. Beat in vanilla. Add melted chocolate and beat until well blended and smooth, occasionally scraping down sides of bowl.

Place 1 cake layer on platter. Spread 3/4 cup frosting over top of cake layer to edges. Top with second cake layer; spread 3/4 cup frosting over. Top with third cake layer. Spread remaining frosting decoratively over top and sides of cake.

Cut cake into wedges and serve.

Continue Reading

Applesauce Spice Cupcakes

I felt like making cupcakes. That’s pretty much the reason for the post.

Iced Cupcake

So, I was flipping through my cupcake cookbook (impulse buy, of course. Sigh.) and found this recipe for Applesauce Spice Cupcakes with Brown Sugar Cream Cheese Frosting. (Aren’t you glad I didn’t make all of that the title of the post?) The only reason I paused was because I noticed that it called for unsweetened applesauce and I just happened to have some in my cupboard. Not something I’d normally have hanging around but when I made my Applesauce Cake a few weeks ago, I didn’t look closely at the recipe before going shopping. When looking at the choice between unsweetened and sweetened applesauce, I figured it was only logical that the applesauce cake would call for unsweetened because there was sugar in the recipe.

Duh.

This is why I need to be more explicit with my lists.

I came home to find I bought the wrong kind and had to go back to the grocery store for the right kind of applesauce. I would have returned the unsweetened but was too lazy to go all the way back to the store where I bought it (there are none of that chain close to me; I had picked it up while running other errands). Plus, I guess I figured at some point I would find a way to use it up.

And, lo, I did.

Like every other time I’ve made a Martha Stewart cupcake recipe, I ended up with way more than she predicted. I don’t know if my muffin tin is much smaller than hers or if I’m underfilling the cups, but I ended up with 21 or 22 cupcakes, where she said I would end up with 18. And, people, this was after consuming some batter. (*Hangs head in shame.*)

Spiced batter

But having extras was no big deal, really, because they were good and they all got eaten anyway.

The cupcakes are not overly sweet, which is nice against the cream cheese icing. But I think I actually preferred my mum’s recipe for Applesauce Cake. It just seemed . . . I don’t know. Lighter? Better? And it could be just as easily converted into a cupcake recipe by putting the batter into muffin tins and decreasing the baking time. (Start checking at about 15 minutes. They should probably take about 20.)

One more thing. The recipe calls for 1 1/2 cups of unsweetened applesauce. That’s 375 mL. A can or jar of applesauce here in Canada is 398 mL, so I just dumped the whole thing in. And it was totally fine, so if you’re worried about that last little bit, just chuck it in.

Cooling

Frosting

Cupcake trio

Applesauce Spice Cupcakes

  • 2 cups all-purpose flour
  • 1 teaspoon baking soda
  • 3/4 teaspoon salt
  • 2 teaspoons ground cinnamon
  • 1/2 teaspoon freshly grated nutmeg
  • 1/8 teaspoon ground cloves (I didn’t have any and the recipe was just as tasty)
  • 1/2 cup unsalted butter, room temperature
  • 1 cup granulated sugar
  • 1/2 cup packed brown sugar
  • 4 large eggs, room temperature
  • 1 1/2 cups unsweetened applesauce
  • 1 cup pecans, toasted and chopped (I didn’t put these in because my friend is allergic and I really wanted her to eat one)

Preheat the oven to 350. Line standard muffin tins with paper liners. Whisk together flour, baking soda, salt, cinnamon, nutmeg and cloves.

With an electric mixer on medium-high speed, cream butter and both sugars until pale and fluffy. Add eggs, one at a time, beating until each is incorporated, scraping down sides of bowl as needed. Reduce speed to low. Add applesauce and then flour mixture, beating until just combined after each. Stir in pecans by hand.

Divide batter evenly among lined cups, filling each three-quarters full. Bake, rotating tins halfway through, until a cake tester inserted in centers comes out clean, about 20 minutes. Transfer tins to wire racks to cool completely before removing cupcakes. Cupcakes can be stored overnight at room temperature, or frozen up to two months, in airtight containers.

To finish, use a small offset spatula to spread cupcakes with frosting. Frosted cupcakes can be refrigerated up to three days in airtight containers; bring to room temperature before serving.

Brown-Sugar Cream-Cheese Frosting

  • 1/2 cup unsalted butter, room temperature
  • 8 ounces cream cheese, room temperature
  • 1 cup packed brown sugar

With an elecrtic mixer on medium-high speed, beat butter, cream cheese and brown sugar until smooth. Use immediately, or refrigerate up to three days in an airtight container. Before using, bring to room temperature, and beat on low speed until smooth.

Continue Reading

Rhubarb Pudding Cakes

I guess you could call me a fruit purist.

I’m not really interested in your bumbleberry mixes, your apple-cherry pies or any strawberry-rhubarb co-mingling.

I like my rhubarb straight up, please, with a little crisp topping, a flaky crust or simply folded in with whipped cream. Or, in this case, in the form of a pudding cake.

Rhubarb Pudding Cake II

Rhubarb, to me, is the quintessential summer dessert. The ruby-ish stalks with slight green tint always made at least one appearance a summer when I was growing up. Usually it was in the form of Rhubarb Fool, a stewed fruit and whipped cream dessert that always tasted like more work went into it than really had.

So, I was excited to see the slim stalks make their first appearance at the farmers’ market.

The decision was not whether or not to buy them. It was: how do I narrow down the recipes I want to try? Rhubarb custard tart. Rhubarb scones. Rhubarb crumb cake. My recipe folder is brimming with possibilities. But I had recently come across a recipe for Rhubarb Pudding Cakes baked in ramekins. And, if nothing else, I am a sucker for individual desserts.

Rhubarb Pudding Cake I

This recipe comes together quickly and easily. A quick chop of the rhubarb, a little simmer on the stove, some stirring of wet and dry ingredients. I didn’t even pull out a mixer. And while you do have to turn on the oven for a bit, I promise the payoff is worth the extra heat in the kitchen.

These are moist little cakes, slightly studded with softened and sweetened rhubarb on top and another layer of the fruit on the bottom. The cake-to-rhubarb ratio is perfect and I like eating it right out of the ramekin, sweeping my spoon around the bottom to scrape up all the pinkish syrup.

The original recipe calls for one cup (250 mL) of strawberries–taking the place of one of the cups of rhubarb–and only 1/3 cup (75 mL) of sugar for slightly stewing the fruit. Feel free to make that adjustment.

But I’ll be keeping mine strictly rhubarb, thank you.

Rhubarb and sugar

Slightly stewed rhubarb

Rhubarb and ramekins

Rhubarb and Batter

Rhubarb Pudding Cake III

Rhubarb Pudding Cakes

Adapted from Gourmet, April 2007

  • 1/4 cup (50 ml)water
  • 1½ tsp (7 ml) cornstarch
  • 1 cup (250 ml) sugar divided
  • 3 cups (750 ml) chopped fresh rhubarb stalks
  • 1 cup (250 ml) all-purpose flour
  • 1¾ tsp (8 ml) baking powder
  • 1/2 tsp (2 ml) salt
  • 1 large egg
  • 1/2 cup (125 ml) milk
  • 1/2 cup (125 ml) unsalted butter, melted and cooled slightly
  • 1 tsp (5 ml) pure vanilla extract

Preheat the oven to 400°f (200°c), ensuring the rack is in the middle. Butter 4 individual 1-cup (250-ml) ramekins.

Mix together water, cornstarch and half of the sugar in a small pot, then add the rhubarb. Simmer, stirring constantly for about three minutes. Remove from heat.

In a bowl, whisk together flour, baking powder, salt and the remaining sugar.

In a second bowl, whisk the egg, milk, melted butter and vanilla. Add the wet ingredients to the dry and whisk until just combined. It will make a thick batter.

Reserving ½cup (125 ml) of the rhubarb mixture, divide the rest of the fruit and syrup among the ramekins. Spoon the batter evenly into each dish over the rhubarb. Top each ramekin with a portion of the remaining rhubarb syrup mix.

Bake until a tester inserted in the middle comes out clean and the tops are slightly golden, about 25 to 30 minutes. Cool slightly and then serve.

Note: mine took less time than this. Start to keep an eye on them at the 20-minute mark.

This story first appeared in the Real Life section in the Calgary Herald. For more delicious recipes, visit CalgaryHerald.com/life.

Continue Reading

Meyer Lemon Curd

A few years ago I started reading all these articles and blog posts and forums about the loveliness that are Meyer Lemons. Excited writers posted about them coming into season and all their delicious plans. Others wrote about acquiring the fruit and then, essentially, hoarding it, only using them sparingly to make them last.

Of course, none of them talked about where to get them in Canada.

It was only after a physiotherapy appointment one day that I discovered you could get them right here in Calgary.

As a treat for being subjected to the torture that is fixing my ongoing back problems (painful, but necessary and my physiotherapist is a miracle worker), I often wander over to Mercato for a little Italian pick-me-up in the form of a panini or crusty baguette sandwich full of arugula and prosciutto. Then I peruse the gourmet food store side of this market/restaurant to look at the pretty tomatoes on the vine, the big bunches of herbs and the shelves of balsamic and olive oil. And it was during one of these wanderings that I found they had a giant basket of Meyer Lemons.

They look to have a slight orange tinge to them, but are otherwise indistinguishable.

Meyer Lemons

Apparently, it’s believed to be a cross between a lemon and a mandarin orange, so that would explain the slightly darker hue. And perhaps the slightly sweeter taste often attributed to this fruit.

So, I was intrigued. Scooped up four, came home and realized I had no idea what to do with them.

Then I remembered lemon curd.

Dreamy, smooth, lemony. That seemed like a logical — and delicious — application.

And it was.

Not to mention ridiculously easy. Zest, squeeze, crack eggs, add butter, and beat all over double boiler. Done.

In fact, it’s frighteningly easy and I now have to resist making another batch. At least for another few weeks.

Meyer lemon zest

Meyer Lemon Curd I

Meyer Lemon Curd II

Meyer Lemon Curd Drop

Meyer Lemon Curd

  • 1 pound medium Meyer lemons (I used four)
  • 1/2 cup sugar
  • 2 large eggs
  • 1/2 cup unsalted butter, cut into four pieces

Zest the lemons to gather 2 teaspoons, then squeeze out 1/2 cup of juice. Whisk together zest, juice, eggs and sugar in a metal bowl or double boiler. Add butter, then set over a pot of simmering water. Whisk continually until thickened and smooth. (Some recipes suggest an instant-read thermometer should read 160F. I didn’t bother with that, just eyeballed it when it was thick.) It should take about five or six minutes. Force through a fine sieve to ensure the curd is smooth. Serve warm or store in the fridge.

Continue Reading

Big Crumb Rhubarb Coffee Cake

Holy crap, how is summer halfway over already?

I have, like, eight recipes for rhubarb stuff on my delicious (warning: about 80 lemon-related recipes ahead) and rhubarb season is already starting to slip away. Gah.

Rhubarb

At least I got this one out of the way.

Sadly, though, procrastination got the better of me and I’m only posting it now . . . about five weeks after making it. This is bad for several reasons.

1) Rhubarb season is slipping away quickly.

2) Now I am craving a piece of this cake and there is none to be had.

OK. Two reasons.

I love crumb cakes. And I love rhubarb. So, really, there was no debate on whether or not I’d be giving this recipe a shot.

Sadly, my crumb topping didn’t turn out quite as nicely. In fact, I had to kind of manipulate the crumb topping into actual “crumbs” (I suspect I needed a little more butter), but it was still delicious. A nice layer of sweetened rhubarb slices through the middle was a good contrast to the cake and sweetened crumble topping.

Normally, I’d meditate more on the failures of this attempt, but, let’s face it, it was cake, with rhubarb, topped in a mixture of sugar and butter. Even if the crumb topping was kind of crummy, it was still going to be fantastic.

Update: I just went back to Smitten Kitchen’s recipe and found that I’m not the only one who had problems with the crumb topping. Apparently, it’s all about the order in which you mix the crumb ingredients… (Instructions below the recipe will outline the correct way.) Yay! Now I’m ready to try this again and hope for much better results.

Sliced rhubarb

Cake pre-crumb

Big Crumb Rhubarb Coffee Cake

This is courtesy of Smitten Kitchen, which she apparently adapted from the New York Times.

‘Big Crumb’ Coffeecake with Rhubarb

Rhubarb filling

  • 1/2 pound rhubarb, trimmed
  • 1/4 cup sugar
  • 2 teaspoons cornstarch
  • 1/2 teaspoon ground ginger

Crumb topping

  • 1/3 cup dark brown sugar
  • 1/3 cup granulated sugar
  • 1 teaspoon ground cinnamon
  • 1/2 teaspoon ground ginger
  • 1/8 teaspoon salt
  • 1/2 cup butter, melted
  • 1 3/4 cups all-purpose flour

Cake

  • 1/3 cup sour cream
  • 1 large egg
  • 1 large egg yolk
  • 2 teaspoons vanilla extract
  • 1 cup all-purpose flour
  • 1/2 cup sugar
  • 1/2 teaspoon baking soda
  • 1/2 teaspoon baking powder
  • 1/4 teaspoon salt
  • 6 tablespoons softened butter, cut into 8 pieces.

Preheat oven to 325. Butter an 8-inch-square baking pan.

Slice the rhubarb into 1/2″ thick pieces, then toss with sugar, ginger and cornstarch.

In a large bowl, whisk together the sugars, spices and salt into melted butter until smooth. THEN, add flour with spatula or wooden spoon. It (should) will look and feel like a solid dough. Set aside.

Stir together sour cream, egg, yolk and vanilla. Using a mixer, stir together flour, sugar, baking soda, baking powder and salt. Mix in butter and a spoonful of the sour cream mixture until flour is moistened. Increase speed for 30 seconds. Add the rest of the sour cream mixture in two batches, beating for 20 seconds each time. Scoop out about 1/2 cup of the batter and set aside. Put the rest of the batter into the prepared pan.

Spoon rhubarb mix over the batter, then top with dollops of the 1/2 cup of batter set aside.

Using your fingers, break topping mixture into big crumbs — 1/2″ to 3/4″.  Sprinkle over cake.

Bake for between 45 and 55 minutes — until a toothpick inserted in the centre comes out clean.

Continue Reading

Lemon Rosemary Olive Oil Cake

OK.

It’s official.

I need an intervention.

My love of rosemary and lemon have reached new levels of ridiculousness.

Cake slice

And here’s how I know that.

As some of you may know, I write for the Calgary Herald’s Real Life section on occasion. I like to pitch the topic in advance, just in case it’s going to clash with any of the other upcoming articles the editor may have planned.

Me: Here’s what I’m thinking: Lemon Rosemary Olive Oil Cake

(Pause)

Her: Lemon?

Me: (confused) …Yes…?

Her: Wasn’t your last thing on lemon? And, um, the one before that?

Me: Okey-dokey. I’ll figure something out. Maybe I should do a boozy recipe….

Her: Good idea.

It was only when I got back to my desk and looked up the drink recipe I had added to my to-do list that I realized I may have a problem: Vodka Rosemary Lemonade Fizz.

Damn you, lemon, why do I love you so? And, uh, rosemary too.

Lemon and Rosemary

But, just because I couldn’t write it for the Herald didn’t mean this bad boy (and, at some point down the road, the vodka recipe too) wasn’t going to get made. After all, one can only deny their love for lemon desserts for so long. And, let’s face it, it was raining and snowing and sleeting out at the time, so what was a girl to do? Bake.

This is adapted slightly from Julie’s recipe (over at Dinner with Julie). Her original recipe calls for a finely chopped or grated pear. I omitted it this time around, but will be tempted to throw one in next time.

Olive Oil

Studded with rosemary

Golden cake

Lemon Rosemary Olive Oil Cake

  • 4 large eggs
  • 3/4 cup sugar
  • grated zest and juice of a lemon
  • 1/2 cup regular or extra virgin olive oil or canola oil
  • 1 1/2 cups all-purpose flour
  • 2 tsp. baking power
  • 1/4 tsp. salt
  • 2 sprigs of rosemary, leaves stripped off and chopped
  • a couple more sprigs of rosemary to decorate the top (optional)

Preheat oven to 350. In large bowl, beat eggs for about a minute until frothy. Add sugar and beat for a few minutes until mixture is thick and pale. Add lemon zest, juice and olive oil and beat again.

Combine flour, baking powder, rosemary and salt in another bowl, then add to egg mixture. Stir by hand until just combined.

Pour into prepared loaf pan (sprayed or lined with parchment). Lay decorative rosemary on top. Bake for 45 minutes, until golden. (Mine was done in a little less, so you may want to check earlier if your oven runs a bit hot.

Continue Reading

Salt-kissed Buttermilk Cake

One of the more baffling mysteries of grocery shopping is how certain ingredients disappear into the ether exactly when I want to cook with them.

Baked cake closer

For weeks and weeks there were punnets of raspberries in the produce section. Velvety little rubies in their clamshell packages. So, of course, I just assumed there would be some there when I decided I actually needed to buy some to make Heidi Swanson’s Salt-kissed Buttermilk Cake. And, of course, there wasn’t.

Damn.

I waited another couple of days in the hope they would miraculously return. And then I gave up and figured blackberries would work just as well.

And they did.

Blackberries

It should come as no surprise I was attracted to the very idea of this cake. Sweet and salty? Yes, please! I love it when there is a tinge of saltiness to my desserts, in the same way that I love a slight sweet to my savoury dishes. I mean, look at the rosemary cashews, the rosemary-pine nut shortbread…. (Wow, apparently I have a serious thing for rosemary.)

Sugar

Sea salt

I bought my little cannister of sea salt during a trip to France. I am led to believe it is gathered from the Camargue — a river delta just off the Mediterranean and near the Canal du Midi, which I was barging along at the time I bought the salt. Of course, you can get it here (I just saw it in Safeway the other day), but I like that my little bit of salt traveled around with me during my last week in France. Pulling it from the cupboard reminds me of lazy afternoons on the barge, a glass of rose in hand following lunch and the joy that can come from being away.

As a sea salt, it has a definitive burst of saltiness on the tongue. The slightly larger flake tends not to melt away into food. So, it makes a good counterpart to the large grains of sugar that I sprinkled on top of the cake before putting it in to bake.

I’ve only made some very minor adjustments to the original recipe, mostly around the fact that I just don’t have natural cane sugar lying around the house and, therefore, took her suggestion to use brown sugar instead. While she calls for raspberries, I’m sure almost any berry would do. I quite liked the blackberries actually, but will give raspberries a go the next time I come across them. (Actually, saw golden ones at the farmer’s market on the weekend. Tempted. Very tempted.)

Eggs and buttermilk

Before the oven

Before the oven II

Baked cake

Baked cake overhead

Slice of cake

Heidi says this serves 12. Um, OK. Only if people like dainty slices….

Slice of Cake II

Salt-kissed Buttermilk Cake

  • 2 1/2 cups whole wheat pastry flour
  • 1 tablespoon baking powder
  • 1/2 cup brown sugar
  • 1/2 teaspoon salt
  • 2 eggs
  • 1 cup buttermilk
  • 1/4 cup butter, melted and cooled a bit
  • zest of 2 lemons
  • 1 cup of raspberries (blackberries, in my case. And I probably used more than a cup.)
  • 3 tablespoons large grain sugar
  • 1 teaspoon large grain salt (Sea salt works well here.)

Preheat oven to 400. Grease and flour (or line bottom with parchment paper) one 11″ tart pan. (I used a pie dish that I just buttered. It worked fine.)

Combine flour, baking powder, sugar and salt in a large bowl. In a separate smaller bowl whisk eggs and buttermilk, then melted butter and zest. Pour the buttermilk mixture over the flour mixture and stir until just combined. Don’t overmix.

Spoon batter into prepared pan, pushing out to edges. Drop berries across the top. (I squished them in a bit too.) Sprinkle with large grain sugar and then salt. Bake for about 20 to 25 minutes until cake is set and slightly golden.

Continue Reading