Peanut Butter, Sambal, Lime, Cilantro Toast

For the better part of a year, I’ve been nattering on about how I’ve become addicted to a Bon Appetit recipe for toast.

Yes, toast. Though, also yes, Bon Appetit.

I’ve tweeted about it, told friends they have to try it and posted it (more than once) on Instagram.

Peanut Butter-Cilantro-Sambel Olek Toast I

I think Bon Appetit just posted a photo and description to their Twitter account and at the time I sort of thought, huh, and then carried on. I guess it stuck with me? Because at some point after that, I realized I had all the ingredients to make it: good bread, peanut butter, cilantro, lime and sriracha. (Actually, I now make it with sambal oelek, which I prefer to sriracha as it has a more well-rounded spicy kick than sriracha. The only real downside to this is you can’t squiggle sambal the way you can with sriracha. A minor disappointment.) So, I made it. I toasted a thick slice of Sidewalk Citizen sourdough, slathered on peanut butter (not even a fancy one), squeezed over some lime and then spread out a blob of sambal oelek and sprinkled roughly chopped cilantro on top.

Oh. My. God.

Peanut Butter-Cilantro-Sambel Olek Toast II

This is definitely one of those things that is far greater than the sum of its parts. And yet, it’s really good because each ingredient shines through, that tangy lime, rich peanut butter, hit of chile heat and brightness from cilantro – which also adds requisite colour.

After a year of making it, I’ve learned a few things.

This is not the place for wimpy white bread. You need something with heft, with significant crisp, crunch and chew to stand up to the flavours. I’ve tried it with all sorts of bread and find that a good loaf of sourdough, or its equivalent, is best. Trust me. A basic loaf of white bread just leads to sadness in this case.

Don’t underestimate the amount of lime to make it right. A quarter wedge is about right.

Also, it’s just not the same without cilantro. (I used to hate the stuff. I am completely baffled as to how I’ve come around on this herb. I understand I’m an anomaly on this front. For those who find it tastes like soap, I’m sorry, I haven’t yet experimented with other herbs. Maybe Thai basil would work?)

Peanut Butter-Cilantro-Sambel Olek Toast III

I’ve tried with both crunchy and smooth peanut butter and admittedly prefer smooth. But it’s worth experimenting.

So, this has been added to my toast rotation, along with tomatoes (few things are finer than a really good toasted tomato sandwich, I would suggest) and avocado (trend be damned).

That’s saying a lot because, frankly, I’ve been eating a lot of toast lately.

Toast is delicious, so that’s not necessarily a bad thing. Except it’s not really a sustainable way of eating.

The truth is, I’ve lost some of my passion for cooking. I know it’ll come back eventually, but for now it’s a lot of salads and toast and charcuterie plates. (I know, it’s sometimes really awesome to live alone so you can have any of those, or cereal, for dinner.)

So, forgive me for talking about toast for a minute?

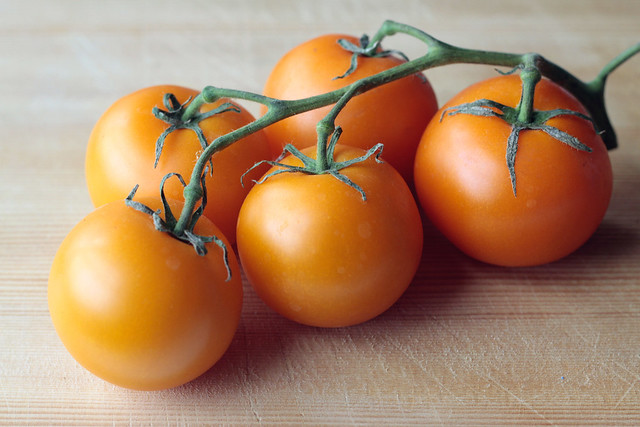
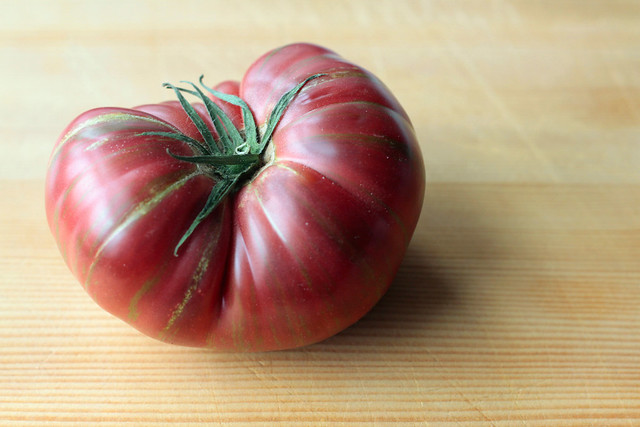
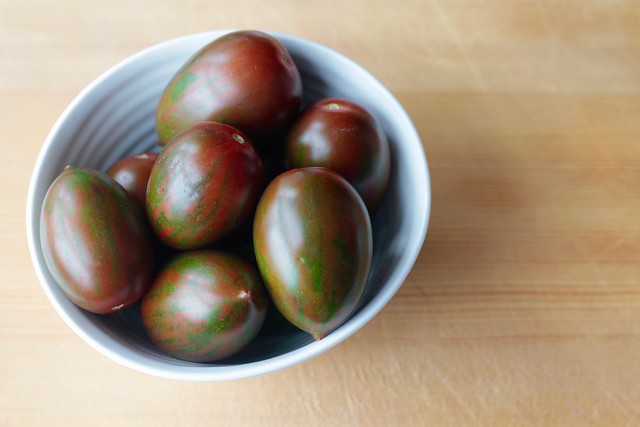
Summer is the best time for toasted tomato sandwiches as tomatoes actually have flavour and come in some many lovely shapes and colours and sizes. I sometimes like to slice up a variety to put on my buttered toast as it looks so beautiful and because each of the varieties does have a variation in flavour.

Orange tomatoes

Heirloom tomato

For a full sandwich, I like a nice homestyle white bread, toasted – even though my family would argue I actually like “warm bread” – to a deep gold. But for open-face sandwiches, it’s sourdough all the way. Sidewalk Citizen bread is an excellent vehicle for open-faced tomato sandwiches. Sturdy enough to not let a little tomato juice wilt it and with lots of nooks and crannies for melted butter to seep. That is, of course, if you have enough of a loaf left after getting it home from the bakery. I am surprised at how often I manage to resist just tearing into the loaf with bare hands and slathering on some nicely salted butter. Ahem.

Tomato Toast I

Tomato Toast II

As for avocado toast, I don’t think the Internet needs any more words spent on it, so I’ll only add a few.

No, I don’t make it into roses. Yes, sometimes I kind of mash it into the toast. But most of the time I like it just in slices overtop.

Avocado Toast II

I’ve experimented with squeezing over a bit of lime and a dusting of cilantro, if I have it. That’s quite nice, though not entirely necessary. Salt and pepper, though, are required. I found some lemon-infused salt once and that’s absolutely fantastic on avocado – though I would never suggest buying a salt just for this. (I have a weirdly large salt collection; most of them I bought on travels – I do love a food souvenir.)

Speaking of salt, if you ever come across a bottle of Jane’s Krazy Mixed-up Salt (known in my family simply as Crazy Jane’s), snap it up. It is the best on tomatoes and avocados.

Krazy Jane's

Tomatoes and avocados have been my toast go-tos for some time. And now I’ve added this peanut butter one.

Just on Saturday, I woke up and realized that I had some cilantro hanging out in my fridge.

(Aside: Did you know the best way to keep it? Put it in a glass filled with water, like a bouquet, with the fringed leaves poking out the top, and then cover loosely with a plastic bag. Boom. That cilantro has lasted without browning or wilting for more than a week.)

I cannot quite explain how delighted I was when I made that realization and knew some peanut butter-lime-sambal-cilantro toast was in my future.

Continue Reading

Grilled Zucchini with Feta and Lemon, and Grilled Panzanella

It’s been summer for all of one day this year – and by that I mean that we’ve had, cumulatively, about one full day of hot, sunny, bright, lovely weather.

The next storm is rolling in as I type, grey clouds muting the sky.

I can smell the dampness in the air, that fresh greenness that announces the rain about to fall.

No matter, I ate summer for dinner, even if the weather wasn’t cooperating.

Despite the near-daily storms, hail and thunder, the markets and grocery stores are at least full of seasonal bounty: corn, zucchini, basil and a medley of tomatoes.

Tomatoes

Judging from Instagram, people are also having a banner year for zucchini, which always prompts questions of what to do with it all.

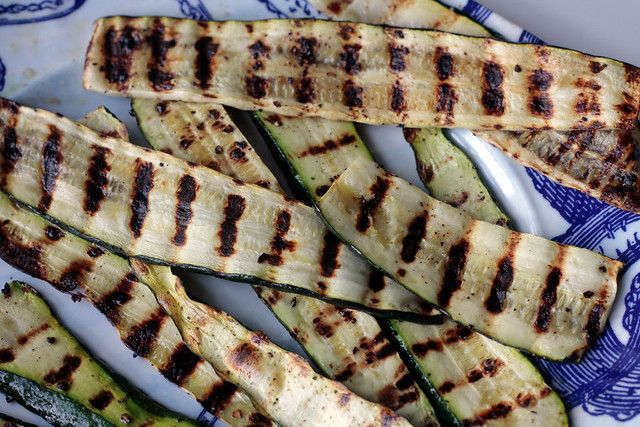
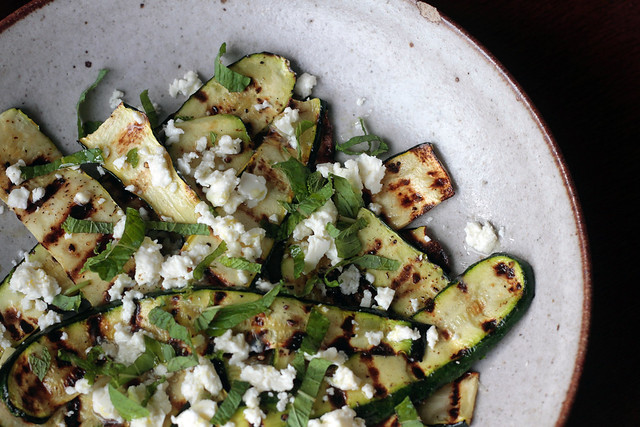
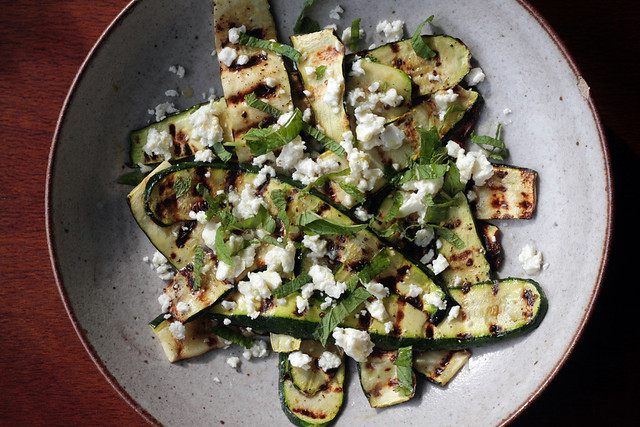
Sure, you can make chocolate zucchini loaf, but I like to celebrate them in all their natural – un-cake-like – glory. I had been bandying around grilled zucchini ideas the other day and came up with a plan to play off that flavour with some salty feta and oh-so-summery mint.

Grilled Zucchini

I actually can’t even quite bring myself to call this a recipe; it’s more like a suggestion of things that go well together. Want more feta on top? Go for it. Think some pine nuts might be nice? You’re probably right; try that too.

Grilled Zucchini with lemon and feta I

Grilled Zucchini with lemon and feta II

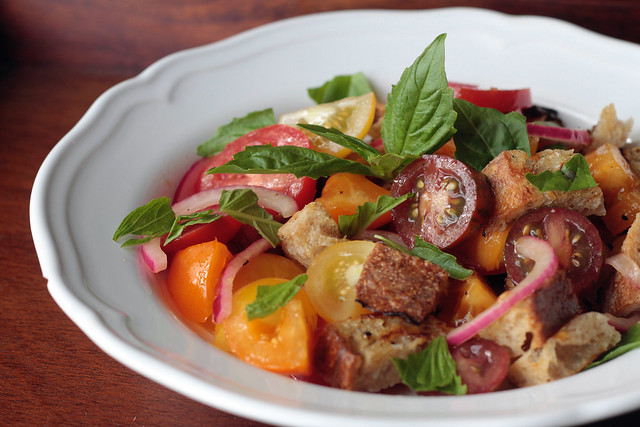
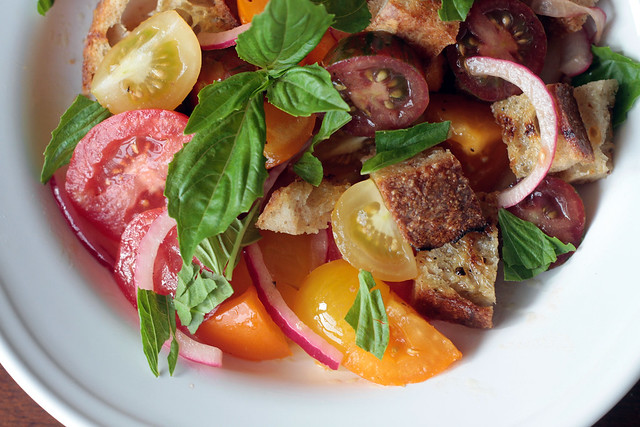
And since I was going to be grilling, and I have oodles of tomatoes because I just can’t resist buying so many when they’re finally in season, I thought I’d do a riff off a traditional Panzanella salad.

I’ve been joking a lot that this has been the summer of salad and toast. Well, this is basically the combination of those two things.

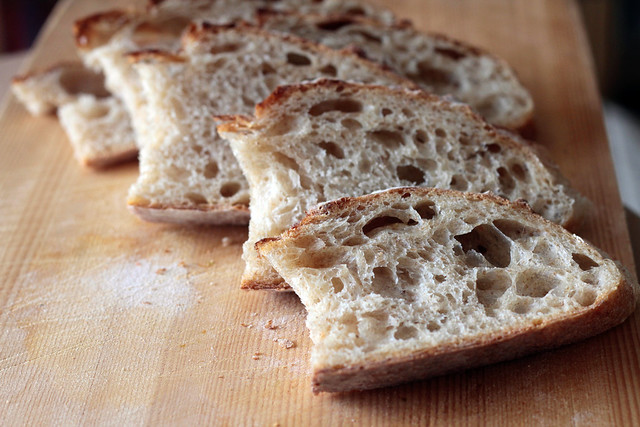
Though, instead of actual toast, I brushed slices of really good sourdough with some olive oil and then grilled them so they had those delicious char marks, which adds just a hint of summery smokiness.

Bread slices

Panzanella is one of those dishes that is really best in the summer months when tomatoes are in all their glory and you want to eat as many as possible because they actually taste like they’re supposed to and they arrive in stores in a rainbow of colours.

Traditionally, this salad is made with stale bread, but I’ve found I’ve preferred to roast roughly ripped up bits of bread in the oven or, now, this method. The roasting and grilling helps the bread retain a slight crunch and chewiness, even when soaking up the tomato juices and simple dressing.

Panzenella I

Panzenella II

(Don’t have a grill? No problem. Grill pans will mimic this quite well, just set one over medium-high heat and then follow either of these recipes the same way. Except, with the bread, weighting down the slices with something – I have used a can of cranberries wrapped in aluminum foil, so, really, anything goes – helps get those grill marks just right.)

With any luck, we’ll get an actual summer in the next few weeks – and hopefully into September. However, even if we have to stick indoors in the evenings, at least the eating can be seasonal.

Grilled Zucchini with Lemon and Feta

Think of this more as guidelines for a great side dish; you may find you want more lemon or cheese – or less, though I’m not sure how that would be possible. Don’t fret about making the zucchini slices perfectly the same thickness, just watch them on the grill and turn when they’ve got nice grill marks.

  • 1.5 pounds of small zucchini, about four or so
  • Olive oil
  • Salt
  • Freshly ground pepper
  • 3 to 4 tablespoons feta, crumbled
  • Juice of 1/2 a lemon
  • 3 tablespoons fresh mint
  • Good extra-virgin olive oil for drizzling, optional

Preheat the grill to medium-high.

Remove the ends and then slice the zucchini lengthwise as thinly as possible.

Brush one side with olive oil and sprinkle over a scant amount of salt and then freshly ground pepper. (The feta is also salty, so you don’t want to add too much to the zucchini.)

When the grill is hot, place the zucchini strips on the grate, oil side down, and then brush the tops with a little more oil and sprinkle with salt and pepper. Grill until they have nice char marks have gone soft. Remove to a serving dish or platter.

Scatter over the crumbled feta. Squeeze the 1/2 lemon overtop, cut side up to keep the seeds from ending up on the plate.

Stack the mint leaves on top of each other and then roll into a cigar. Thinly slice them into ribbons and then scatter over the zucchini and feta.

If desired, use some good extra-virgin olive oil to do a very light drizzle over top.

Serve immediately.

Panzanella

Traditionally, stale bread is used for this, but I love grilling the bread (or roasting it in the oven when it’s not summer). You can use all the same types of tomatoes, but I love to grab all sorts of colours to make this really stand out.

For the grilled bread:

  • 1/2 lb (250 g) ciabatta, sourdough or hearty bread, sliced 1/2-inch thick
  • Olive oil
  • Salt
  • Freshly ground pepper

For the salad:

  • 1/2 small red onion, thinly sliced
  • 3 tbsp (45 mL) red wine vinegar
  • 2 lb (1 kg) tomatoes
  • 1 garlic clove, peeled and minced
  • Salt
  • Freshly ground pepper
  • Pinch or two of sugar
  • 1/4 to 1/3 cup (60 to 80 mL) extra-virgin olive oil
  • 1/2 cup fresh basil leaves

Turn on the grill to medium-high heat.

In a small bowl, pour the red wine vinegar over the onion slices and let sit, stirring occasionally, while you prepare the rest of the recipe.

Brush the sliced bread with the olive oil and then sprinkle with some salt and pepper. When the grill is hot, place the slices, oil side down, on the grates. Grill until the bread has nice char lines. Remove from the grill and set aside.

Core and slice or dice large tomatoes – smaller ones can be halved or quartered – and add to a large bowl. Strain the onion slices, reserving the vinegar for the dressing, and add them to the tomatoes. In a jar or small bowl, combine the vinegar, garlic, salt, pepper and sugar. Shake or whisk until the salt and sugar have dissolved.

Add 1/4 cup (60 mL) of the olive oil and shake or whisk again until the vinaigrette is emulsified. Taste for seasonings, adding more oil if the dressing tastes too acidic.

Pour most of the dressing over the salad and toss until well mixed.

Cut the bread into rough, bite-sized squares.

Add the bread pieces to the tomatoes and toss again, making sure they get saturated with the vinaigrette. Add more dressing as necessary. The bread pieces will soak up some of dressing.

Let sit for about 5 minutes and then toss again.

Tear the basil leaves roughly, add to the salad and mix until combined.

Serve immediately.

Serves 4 to 6.


Continue Reading

Quinoa Tabouleh

Some people impulse buy gum.

I impulse buy five-pound bags of quinoa.

Oh sure, I thought it was a lovely idea in that moment, romanced by all the things I could do with this versatile, healthy, nutritious ingredient chock full of protein and fibre.

Especially after I saw on the back of the hefty bag that I can cook quinoa in my rice cooker. (Cooking rice and rice-related ingredients? Not my forte. I blame it on a year living in Japan where my apartment came equipped with a rice cooker.)

And then I got the family-sized bag home, jammed it into my cupboard and kind of forgot about it as it occupied valuable real estate in my kitchen. I finally unearthed it many weeks later, concocting a biryani-style salad with currants, chickpeas and a curry-lime dressing.

And then I forgot about it again.

Since then, there has been a bit more experimenting with quinoa.

But there is also something to be said about going back to basics — honest-to-goodness classic dishes that remain in the cooking repertoire for a reason.

Things like tabouli.

Or tabbouli. Or even tabouleh.

Or however you want to spell it.

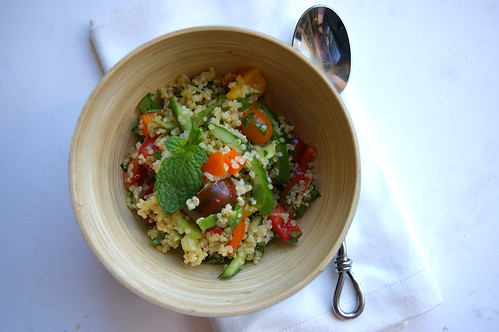
Quinoa Tabouleh III

In theory, this is a salad I should like. Mint and parsley, lemon juice, tomato and cucumber. All those herbs with that zip of acidic lemon, the crunch of cucumber and umami taste of tomato? I like all those things. A lot.

What I don’t like is bulgur, the grain traditionally used in tabbouleh salads.

I made a huge bowl of it once using a recipe that called for bulgur and then had to eat it for two days to get through it, hating it the entire time.

I didn’t like the taste or the chew and forcing myself to finish the thing, which had taken a bit of time and effort to prepare, did not help the situation.

So, as I was sorting through my cupboards the other day and stumbled across the still half-full bag of impulse quinoa, I was struck by a thought: why not make tabbouleh with a grain-like ingredient I actually enjoy?

And I pulled out my rice cooker and did exactly that.

Quinoa Tabouleh II

(As a result of cooking it this way, I can offer you no suggestions or guidelines for cooking quinoa, other than tell you what I was also told: give it a bit of a rinse or a soak – say about 10 minutes or so — before cooking, which should alleviate any of the bitterness you might taste otherwise.)

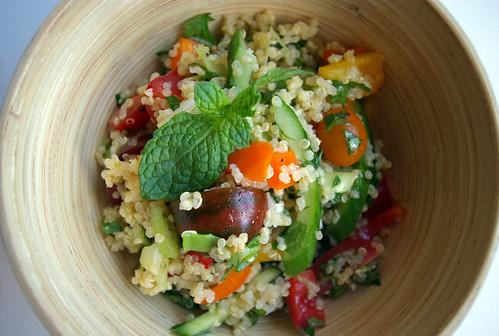
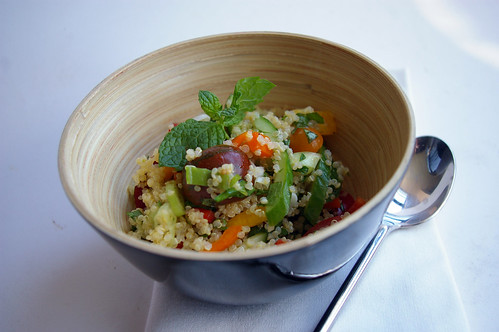
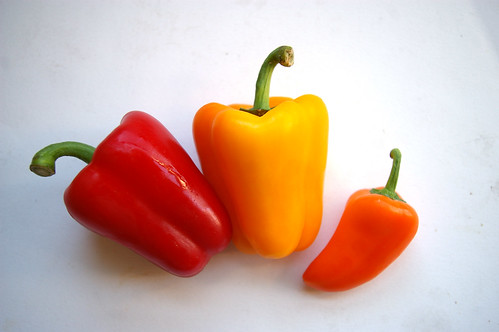
With the exception of using quinoa and the addition of a red (or orange or yellow) paper for a bit of additional colour and crunch, this recipe holds quite true to traditional tabbouleh.

It’s the abundance of herbs, slight onion bite from the green onions and generous amount of lemon juice that gives it such a refreshing and light taste.

It’s the substitution of quinoa for bulgur that makes it no hardship to finish it off pretty quickly.

And, thankfully, I still have plenty more quinoa to make this again.

A trio of peppers

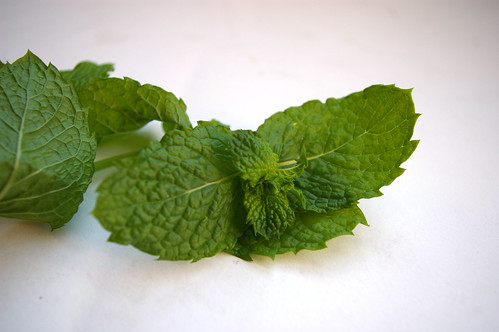
Mint

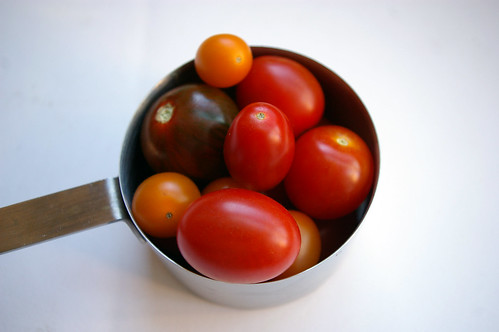
A Cup of Tomatoes

Quinoa Tabouleh I

Quinoa Tabbouleh

  • 4 cups (1 L) cooked quinoa
  • 1 red, orange or yellow pepper, diced
  • 1 cup (250 mL) cherry or grape tomatoes, halved or quartered
  • 2 to 4 green onions, sliced thinly
  • 2 mini cucumbers, halved, seeded and sliced
  • ¼ cup (50 mL) mint, chopped
  • ¼ cup (50 mL) parsley, chopped
  • 1/3 cup (75 mL) lemon juice (from about 2 lemons)
  • 1 tsp (5 mL) salt
  • freshly ground pepper
  • 1/3 cup (75 mL) extra virgin olive oil

Cook quinoa according to directions. Let cool and place in large bowl. Add red pepper, tomatoes, green onions, cucumbers, mint and parsley. In separate bowl, mix lemon juice, salt and pepper. Whisk to dissolve salt. While whisking, slowly drizzle in olive oil to emulsify. Pour about ¾ of the dressing over the salad and toss. Add the remaining dressing if the salad seems dry.

Serves 4.

This piece originally ran in the Calgary Herald. For more great recipes and stories, head to the Herald’s food page at CalgaryHerald.com/life.

Continue Reading

Roasted Tomato Tart

(I am so proud of this post because it marks my first food article in the Herald’s revamped Sunday edition. My photo of my little roasted tomato tart was on the cover of the ‘mix’ section. For those that haven’t seen the new Sunday edition, that means the photo was the entire front of the ‘mix’ section. Yay! And a warning, this post is photo heavy! What can I say? I had a hard time paring it down.)

And now, back to the article.

I have an unabashed love of tomatoes. Meaty slices of them wedged between two pieces of buttered toast with a sprinkle of salt and pepper is my idea of comfort food. Roma tomatoes drizzled with a little balsamic vinegar and good olive oil make a simple side dish. And I love that burst of seeds and flavour that comes when biting into a plain cherry tomato.

Tomatoes II

I once bought a perfume called Tomato because it smelled like the aroma given off after brushing up against the green stalks of a tomato plant — that verdant scent of heat and summer. A few spritzes on my wrist could transport me back to being a kid and visiting my grandparents on one of the Gulf Islands where I sometimes helped in the garden.

Enclosed in chicken wire to protect it from ravenous deer, the garden produced sweet tiny carrots I ate straight from the ground after a quick rinse from the hose, grape vines that tangled their way along trellises, and rows of tomato plants.

I would use a plastic watering can to fill the coffee tins with water, from which my grandfather had removed the bottoms, nestled into the earth next to the plants — a trick that allowed the water to get right at the plant’s roots. And I would brush up against the stalks, filling the air with that distinct smell.

If any were ripe, I’d pull them sun-warmed from the dark green plants and eat them unadorned.

There is no taste like a vine-ripened tomato.

Tomatoes

But sometimes I like to roast them to intensify their essence and bring out more of their natural sweetness.

Baking halved Roma tomatoes in the oven with a few unpeeled garlic cloves is an excellent base for a good tomato soup.

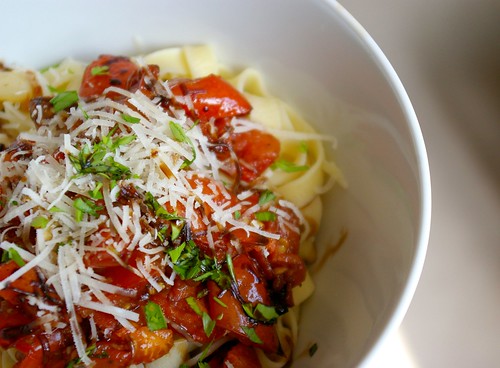
Cherry tomatoes, when roasted, shrink and wrinkle to softish pouches of concentrated tomato flavour. I’ve made simple pasta sauces like this, topped only with shaved Parmesan and a sprinkle of basil or parsley if I have them lying around.

Roasted Tomato Tart-round

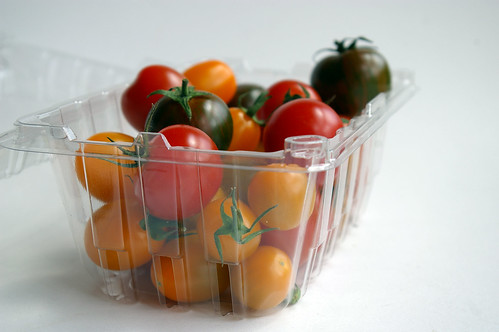
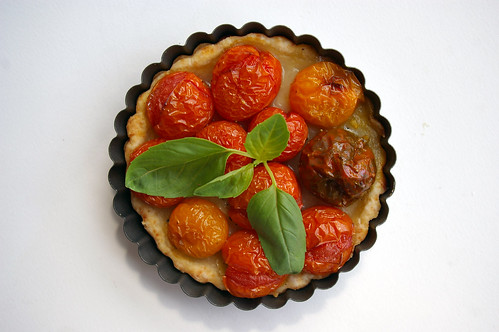
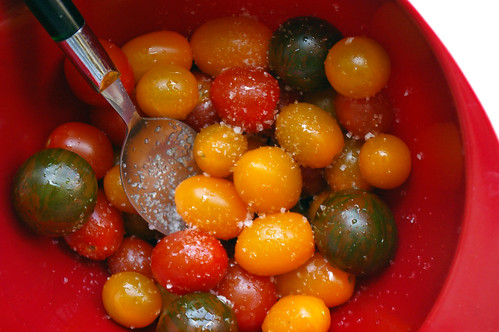
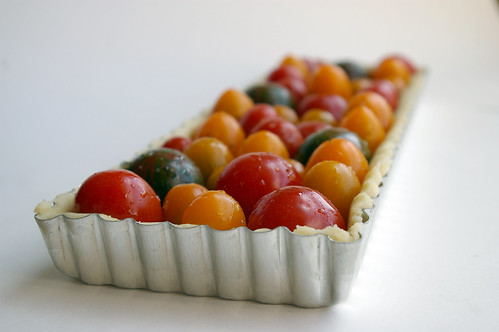
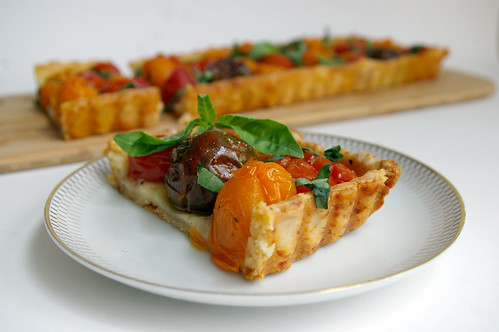
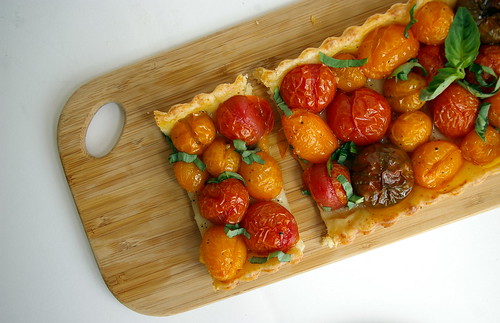
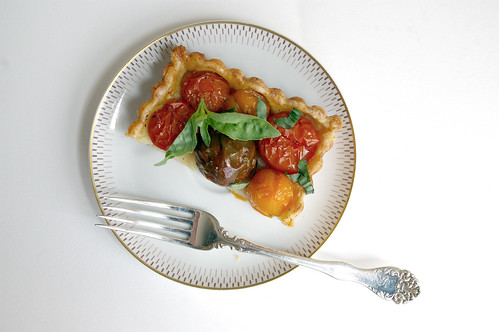
I thought recently — after seeing a clamshell package of multicoloured cherry tomatoes at the farmers market — that they would make a good savoury tart, particularly if paired with a hearty crust.

When I began imagining a roasted cherry tomato tart, I thought there was potential in adding a few handfuls of Parmesan cheese to the dough to bring out a nice nutty, rich taste when baked.

A little research led me to realize I wasn’t the first person to think of this, but I didn’t love any of the recipes I came across. I am by no means a pastry expert, but was willing to give myself a chance to experiment.

Using ideas from several different recipes, I decided to create a hybrid pastry that used cream instead of water and a cup of Parmesan cheese, finely grated and blitzed with the other ingredients in the food processor.

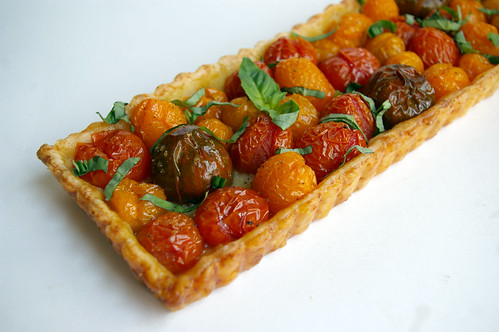
The dough was easy to work with and resulted in a golden crust that played nicely against the sweet, soft tomatoes.

(This would likely work just as well, though, with a regular pastry.)

Because cherry tomatoes are so juicy, there was a lot of liquid bubbling away as the tart was baking. (Truth be told, I was a bit nervous about just how much I could see as I peered through the oven door.) Some of it did cook off in the process, but there was definitely a thin layer of tomato liquor when I pulled the tart out. Some may call it soggy; I prefer to think of it as tomato-infused pastry. Either way, the base of the tart pastry was crisp and I liked the taste of it.

A sprinkle of basil gave it a nice fresh taste when added as the tart cooled slightly. (And yes, you’ll want to let it sit for a few minutes because cutting into the tomatoes will likely cause some to burst. Ouch.)

Chilled parmesan pastry

Pastry in tart dish

Tomatoes III

Tart pre-oven

Roasted Tomato Tart II

Tomato Tart and slice

Sliced Tomato Tart

Roasted Tomato Tart Sliced

Roasted Tomato Tart

  • 1½ cups (375 mL) flour
  • 7 tbsp (115 mL) butter, cold and cut into small cubes
  • ½ cup (125 mL) cream
  • 1 cup (250 mL) finely grated Parmesan
  • pinch salt
  • 1-1¼ lb. (500 to 625 grams) cherry or grape-sized tomatoes
  • 1 tbsp (15 mL) olive oil
  • 1 tsp (5 mL) salt
  • ½ tsp (2 mL) fresh ground pepper
  • 2 tbsp (25 mL) fresh basil, chiffonade (rolled like a cigar and cut into strips)

Add the flour and pinch of salt to the bowl of a food processor, then sprinkle the butter cubes on top. Pulse two or three times until the butter starts to break down, then add the Parmesan. Pulse until the mixture is crumbly and the butter is in pieces no larger than a pea.

Add the cream slowly while pulsing until the dough starts to come together. (It will bunch up and the food processor noise will change.)

Empty the contents onto a lightly floured surface and knead it a few times to pull the dough together.

Wrap in plastic and refrigerate for at least 30 minutes or as long as overnight.

Preheat oven to 325 F (160 C).

Toss the tomatoes in a bowl with the olive oil, 1 tsp salt and pepper. Set aside.

On a lightly floured surface, roll out the dough until it is about 1/3 inch to 1/4 inch (8 millimetres to 6 mm) thick. Press into tart tin (9 inch/23 cm round tin or a 14-inch/35 cm rectangular tin), stretching it as little as possible, and cut off excess. Arrange tomatoes in the tart tin.

Bake for an hour until tomatoes are soft and pastry is golden brown. Remove and let cool on a rack for 10 minutes. Roll basil leaves like a cigar and then slice them to make herb strips. Sprinkle over tart.

Serve while still warm.

Cook’s note: The amount of tomatoes will vary depending on how tall or fat they are and how well they fit together in the tart tin.

This story first appeared in the Real Life section in the Calgary Herald. For more delicious recipes, visit CalgaryHerald.com/life.

Continue Reading

White Bean Tartlets with Oven Roasted Tomatoes

This post is dedicated to my friend Elsbeth who is going to kick my butt for waiting two weeks to post. I could possibly be the most procrastinating-est blogger ever. It’s a curse.

So, Elsbeth, this one is for you.

Solo Tartlet

I had a little party on Friday two weeks ago to celebrate a blog milestone. The original plan was to have a few friends over for appies and wine to celebrate crossing the 100,000-views mark, but that didn’t work out because I ended up getting to that point faster than originally thought and the timing was off. (No, it was not procrastination related, for once.) Then I thought it would be cute to instead have people over for passing by 123,456 views.

So, that’s what it ended up being.

I sometimes get a bit of party anxiety, though. Will people have fun? Will there be enough food?

And, as usual, my fretting was all for naught. Besides having cheese, crackers, some salami and prosciutto, I also made two appetizers: prawns sauteed with chili, garlic and ginger served in wonton crisp cups and these White Bean Tartlets with Oven Roasted Tomatoes. And thankfully (with the addition of sending one care package home for a friend who couldn’t make it), all of the food was eaten! Frankly, that was the best part. Made me feel like everyone enjoyed the goodies. Plus, you know, less clean up.

(So, I’m making up for the lack of text here with bonus photos. Couldn’t narrow them down….)

Trio of tartlets III

I got the inspiration from one of my 8 million cookbooks, but adjusted the recipe quite a bit and figure that, at that point, it’s safe to call it my own. It was pleasantly garlicky and rich-tasting even though there was almost no fat involved. And, c’mon, they’re just so damn cute.

Thyme

Tomatoes and Thyme

Roasted Tomatoes with Thyme

White Beans pre-puree

Trio of Tartlets

Trio of tartlets II

White Bean Tartlets with Oven Roasted Tomatoes

  • 30 grape tomatoes
  • 30 tart shells or pastry to make 30 tarts
  • 3 tablespoons olive oil, divided
  • 4-5 sprigs of thyme
  • 1 teaspoon thyme leaves, minced
  • 3 cloves garlic, minced
  • 19 oz (540 mL) can white kidney beans
  • 1/2 cup white wine (can substitute stock or even water)
  • Salt and pepper to taste

Bake tart shells as indicated or blind bake homemade pastry until shells are completely cooked.

Preheat oven to 350. Put tomatoes in oven safe dish and toss with 2 tablespoons of olive oil. Sprinkle with a pinch or two of salt and add the sprigs of thyme. Roast in the oven for about 30 minutes until their skins have started to split. Set aside.

In a pot over medium heat, heat 1 tablespoon olive oil and minced garlic. Once the oil is hot and the garlic has started to soften, add the drained and rinsed beans and continue cooking until warmed through and the beans are starting to fall apart, stirring often. Add wine (or stock or water) and thyme leaves and cook until most of the liquid is gone. Remove from the heat. Dump the beans, garlic and thyme into a food processor and whiz until it forms a nice paste. If it appears to be a bit too dry, add some more wine/stock/water. Spoon into cooked pastry shells and top each one with a roasted tomato. At this point I also spooned any drippings from the roasted tomato pan onto the tartlets.

Continue Reading

Fettucine with Roasted Tomato Sauce

The actual title of this blog post would have been far too long:

Fettucine with Roasted Tomato Sauce and Balsamic Reduction, as well as testing out the new KitchenAid pasta attachment.

Roasted tomato sauce on fresh fettucine

It’s a bit of a double barreled post, really. Call it multi-tasking.

Actually, that’s a bit of a lie too. The actual, actual title of this post should have been:

Fettuccine with Roasted Eggplant and Tomato Sauce and Balsamic Reduction, as well as testing out the new KitchenAid pasta attachment.

But I’ve realized I really don’t like eggplant when I cook it and, in the end, did not end up eating any of it. You will notice its absence in the final photos, but had to include a photo of the palm-sized eggplants because they were just so darn cute.

Baby Eggplants

Which pretty much illustrates the fact that I make the worst impulse food buys known to man.

At any rate, a couple of months ago I was approached by a marketing company asking if I’d be interested in reviewing the KitchenAid pasta kit on my blog. As a huge pasta fan, I was definitely intrigued.

I’ve typically shied away from making it homemade, even though the boxed stuff pales in comparison to the tender noodles that come from real pasta.

The real issue here is my inability to knead properly. Unsure if that’s because I’m impatient, don’t have a feel for it, or just generally have no idea what I’m doing. But whether one of these reasons or a combination of all three, it basically adds up to me never quite reaching the smooth, elastic stage needed to make bread or pasta.

Full disclosure: I was sent the KitchenAid pasta kit, as well as the mixer required to run the attachments, by the marketing firm in order to review them. This is my unbiased review of the kit. I am not required to return the items (which, really, makes sense. I mean, what are they going to do with a used mixer, pasta roller and cutter?).

The mixer and kit arrived a few weeks after some back-and-forth emailing and I set aside an afternoon to give it a whirl.

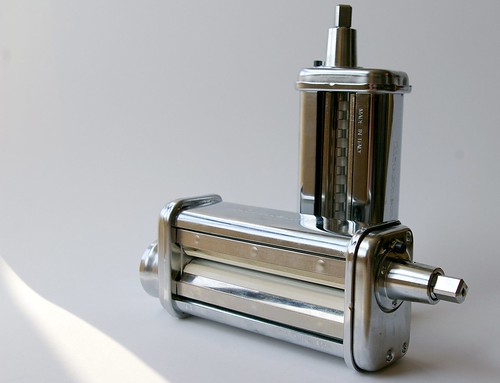
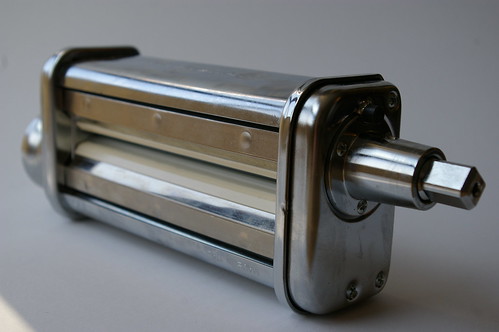
The kit itself includes two boxes of pasta dough mix (just add water), a pasta roller, fettucine cutter, cleaning brush and cooking utensils. The roller and cutter attach to the front of the stand mixer and are powered by the appliance.

Pasta Mixes

Roller and Cutter

Roller and Cutter

Cleaning brush

Making the dough was pretty simple. Add water, mix, produce crumbly dough and mush it together.

As always, I was nervous from the get-go that I had done something wrong. But I divided the dough into about eight pieces and then gave them each a quick knead before powering up the roller attachment and letting the dough slide through.

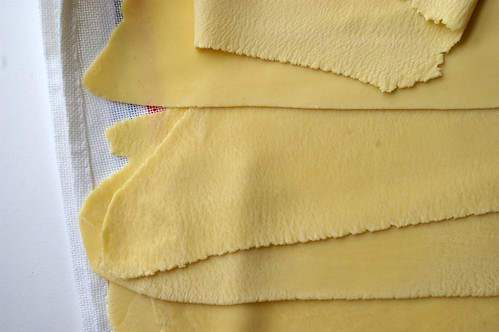
On its widest setting, the roller can actually be used to knead the dough. I sent one chunk through, then folded it in half and let it run through the rollers again. I did this about five or six times until the dough was shiny and elastic and stretched out into a long rectangle. Then I started on the next chunk of dough.

Pasta first run

Once that was all done. I then put the roller onto a thinner setting and ran them all through again. And then again on a thinner setting. And so on.

When it was thin enough, I exchanged the roller attachment for the fettucine cutter and watched as the flat sheets of pasta were cut into perfect (albeit extremely long) ribbons.

Fresh Fettucine

It was, all in all, astonishingly easy. And a bit hypnotic.

I liked that I could forego all the annoying kneading and with relative ease make a batch of homemade pasta. I liked the chew of the noodles I made and how quickly it cooked.

The next test, of course, will be to make my own actual dough.

While I loved the roller and cutter, I was initially not 100 per cent sure I would have been tempted to buy the entire kit. Most food lovers are already going to have their own slotted spoon and pasta server and probably would enjoy the challenge of making their own dough rather than using a boxed mix, I reasoned.

I would, however, definitely be tempted to buy the roller and cutter separately.

Roller

Fettucine cutter

Then after a bit of research, I found the kit is not a bad deal considering a pasta roller, motorized drive and a fettucine cutter is going to cost roughly the same as the KitchenAid’s kit, which comes with the utensils, dough mix and cleaning brush. If you already have the stand mixer, it’s not a bad way to go.

The pasta kit retails for about $180.

And here’s what I did with the noodles. The recipe is not so much a recipe as much as me just fiddling around, but, since it turned out so well, I’m going to recommend it anyway.

Roasted tomato sauce on fresh fettucine II

Fettucine with Roasted Tomato Sauce

  • 1 pound tomatoes, cut into 1 or 1/2″ chunks
  • 3 cloves garlic, whole, unpeeled
  • olive oil
  • balsamic vinegar
  • salt
  • pepper
  • pasta
  • parmesan
  • balsamic reduction

Set oven to 375. Chop tomatoes into roughly 1/2″ to 1″ pieces (depending on how chunky you want the sauce to be), place in baking dish, scatter in unpeeled garlic cloves, then drizzle with olive oil, balsamic and sprinkle on kosher or sea salt and pepper. Bake for about 30 to 45 minutes until tomatoes are starting to carmelize and break down.

Cook pasta according to directions or, if using fresh, cook in boiling, salted water for just a few minutes until al dente. (Depending on the thickness of noodle, this can take anywhere from about three minutes and up.)

Slip cloves of garlic out of their peels and then mush with fork into tomatoes. Scoop sauce onto cooked pasta, sprinkle with grated parmesan and fresh chopped parsley (if you have any). Drizzle lightly with extra virgin olive oil and balsamic reduction.

Continue Reading

Pasta Bolognese

I grew up in a family of six (four kids, two parents). I like to think this is why I’m completely incapable of making meals for just one or two people. It just never really occurs to me to halve a recipe. Or when I’m just creating something, it never looks to me like I’m making too much. Mostly, it’s not a problem. I, unlike most, like leftovers. I like them for breakfast or lunch or dinner. (There is nothing like pasta for breakfast. Mmmmm.) And, since I tend to cook big, I can usually feed myself for all three of those meals based on whatever I made for dinner the night before.

In the last year or so, though, I’ve finally come to appreciate my freezer. Sure, it was always a happy home to ice cream and the odd frozen pizza. Now I tend to freeze some leftovers for those crazy times when work is insane and there is a strange absence of groceries and I’m contemplating a dinner of peanut butter on crackers. And this Bolognese sauce is the perfect thing to have stashed away for dinner emergencies.

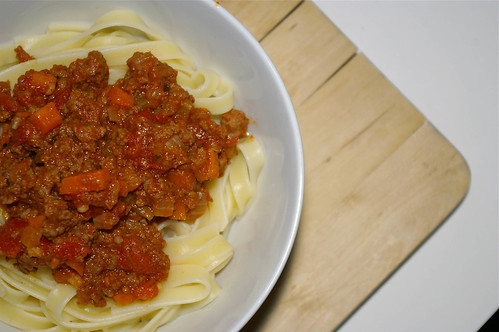
Ready to eat

I got it out of Real Simple magazine; the only magazine I’ve subscribed to since Chickadee and Owl when I was a kid.

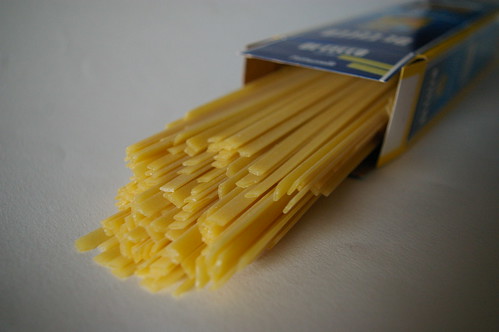
So, I used to make this with fettuccine and then one time when I went to buy pasta there was no De Cecco fettuccine. But there was fettuccelle. Sure, that’ll do. But it was so much better than that. It’s now my pasta of choice. It’s flat like fettuccine, but better. Thicker, I think. Or something. Sigh. Just better; let’s leave it at that.

Pasta

There is nothing more comforting than a big bowl of hot noodles (al dente, please!) with thick, rich sauce all chock full of tomatoes and beef that’s been simmering for an hour or so. So, I’m happy to make the whole batch of this, freeze half in ziplock bags and then eat the rest for a handful of meals. Then, the next time a craving comes, I still have my freezer stash.

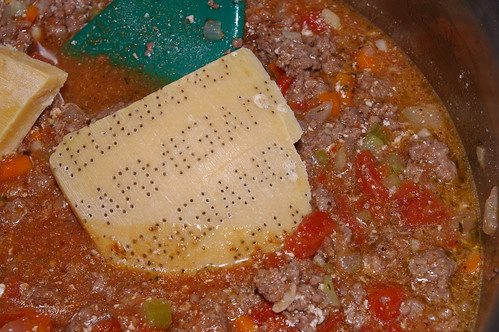
And let me offer this handy ‘recycling’ tip. Don’t throw away the heels of your parmesan wedges. Throw them in as the sauce simmers; they will add a nice richness. (When I’m down to the heel of the cheese, I throw them in a ziplock and into the freezer so they are ready to go when I make the sauce.)

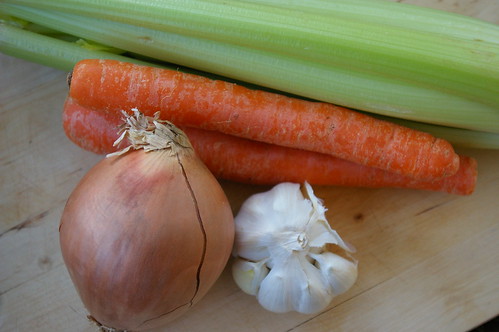
As usual, this is with my adaptations. (These are, for the most part, another carrot — yeah for more vegetables — and no pancetta. I have nothing against pancetta — mmmm bacon-y goodness — but I don’t typically have it on hand and can’t be bothered to go get some for this recipe as I generally have all the other ingredients. Oh, and I add the garlic later than they suggest. There is nothing worse than burnt garlic, so adding it with the celery and carrot seems a bit premature.)

Carrots, onions, celery and garlic

Parmesan heels

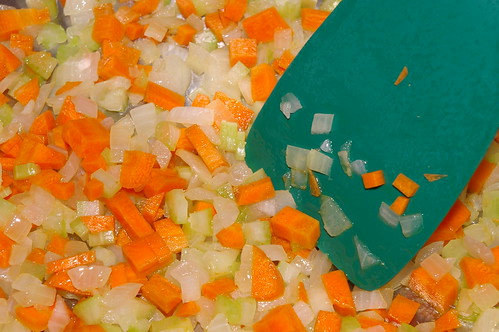
mirepoix

Beef, carrots, garlic, onions and celery

A good use for parmesan "heels"

Pasta Bolognese

Pasta Bolognese

  • 1  tablespoon  olive oil
  • 1 large yellow onion, diced
  • 2 stalks celery, diceed
  • 2 carrots, diced
  • 4 cloves garlic, minced
  • 1 1/2  pounds  lean ground beef
  • 1  cup  dry white wine
  • 1  cup  milk (I use 1 per cent)
  • 1 6-ounce can tomato paste
  • 1 14-ounce (398 mL) can diced tomatoes, undrained
  • 1/4  teaspoon  red pepper flakes
  • 1 tablespoon dried oregano
  • 2 1/2  teaspoons  kosher salt
  • 1/4  teaspoon  black pepper
  • 1/4  teaspoon  ground nutmeg
  • Parmesan heels (if you’ve got them)

In a Dutch oven or large, solid frying pan (I use one with straight sides), heat the oil. Add the onion and saute until they start to go transluscent, about three minutes. Add the celery and carrot and cook for five minutes more until they too start to soften. Add garlic and saute until you can smell it, about a minute. Add beef and cook until browned. Add wine, milk and the rest of the ingredients. (Don’t fret, the milk is going to look like it’s curdling a bit. It’s not.) Add the cheese heels and simmer for 45 minutes, stirring occasionally. Serve over hot, drained pasta with fresh Parmesan.

Continue Reading

Heirloom Tomatoes with Balsamic Reduction

I have virtually given up on tomatoes. The ones from the supermarket are bland, flavourless faux tomatoes and are hardly worth buying. Grape tomatoes are about the only ones I bother buying any more because they still seem to have some tomato-y taste.

As a kid, summers were spent with my grandparents on one of the Gulf Islands. They grew their own tomatoes and I would eat them off the vine, warm from the sun and bursting with that summery taste. I loved too the green, fresh smell that came when I brushed up against the dark green plants. Years later I bought a perfume from Demeter called Tomato that has somehow recreated that smell of the tomato vines. When I put it on, I’m transported back to my grandfather’s garden with its tall chicken-wire walls to keep the deer out.

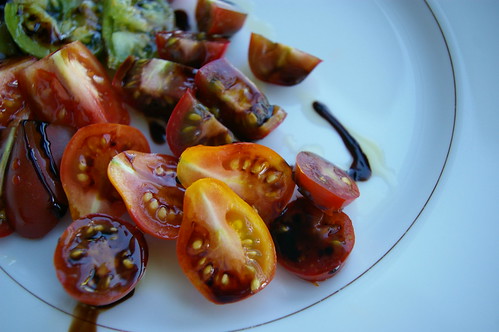
So, when I saw a package of Heirloom Tomatoes at the farmer’s market recently, I ignored the price tag and put them in my basket. It was an odd little collection of cherry tomatoes, green tomatoes, some purplish ones and pear-shaped ones.

Heirloom Tomatoes

When I got home, I started eating them right out of the cellophane package, some straight up, others split in half and sprinkled with a bit of sea salt.

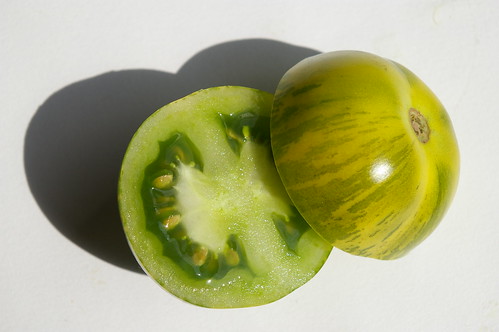
Most tasted like tomatoes, with the exception of the Green Zebra.

Heirloom Tomato

While I could have eaten them all just standing at the kitchen counter, I decided to make a very basic salad with just tomatoes, extra virgin olive oil and some reduced Balsamic vinegar.

I know I have already mentioned my love of all things vinegar, but reducing Balsamic gives it a sweeter, more syrupy consistency. Which makes it great for this type of salad because then you don’t need to make a full vinaigrette. It’s also great on sliced strawberries or on tomato tarts, among other things.

Making a Balsamic Reduction is super simple. Just pour a cup of the vinegar in a saucepan, put it on medium-high heat and let it reduce until it is thick and coats the back of a spoon. Some recipes suggest adding some sugar, but I have always liked my dressings tarter than not, so I don’t bother.

Drizzle over cut tomatoes and then add a bit of olive oil.

This would also be great on a more traditional Caprese salad with tomatoes, fresh mozzarella and basil.

Tomatoes with Balsamic Reduction

Continue Reading

Saifun Salad

I don’t know why I always forget how great T&T supermarket is.

Yesterday, I went grocery shopping. After 10 days away it was time to restock the fridge with vegetables and fresh herbs. I was really craving fresh herbs now that the temperature is starting to climb. (Mother Nature is, apparently, apologizing for the extra long winter by moving us straight into summer.) Safeway was out of basil, though, so after dropping a friend off at the airport this morning, I decided to quickly stop by T&T in the city’s northeast.

Let’s do a little comparison shopping, shall we?

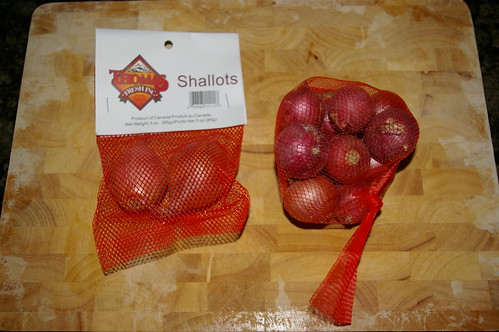
Two shallots at Safeway: $1.99

Bag of eight shallots at T&T: $1.49

Shallots

Packages of herbs at Safeway: $2.49

Bag of Thai basil about three sizes larger than Safeway’s: $2.64 (by weight)

Fresh herbs

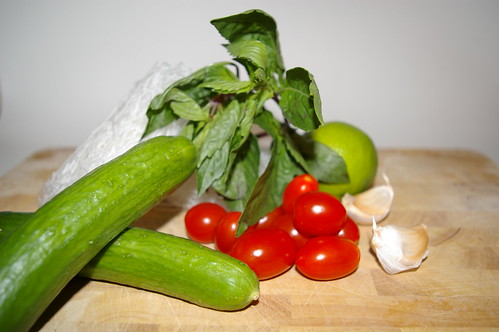
Okay, so I only needed a little bit of basil, but bonus basil means more room for creativity. Now, instead of one or two recipes that call for the stuff, I can make three or four. With three baby cucumbers sitting in my car (from my aforementioned friend who needed to ditch the last of her produce before heading on holidays), grape tomatoes at home and a package of mint also sitting in my fridge, I remembered this great little summer salad recipe that uses Saifun noodles.

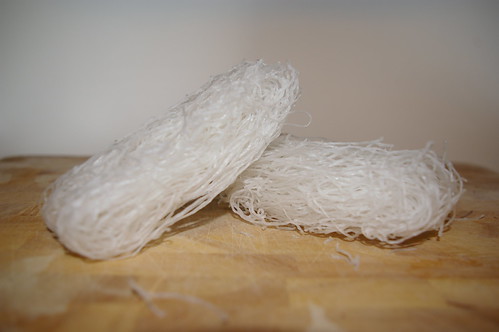
Saifun noodles — before the softening

Saifun noodles softening

These noodles — also known as mung bean noodles, bean threads or vermicelli — are the perfect summer food. They don’t need to be boiled, just reconstituted in a little hot water, which is easily done while chopping the rest of the ingredients. The noodles are light and when dressed with lime, rice vinegar, garlic and fresh herbs can be very refreshing. The hits of fresh herbs also make it super tasty.

For the record, Thai basil (also known as holy basil, apparently) does not taste the same as traditional Italian basil, so I wouldn’t suggest using it for your favourite tomato sauce or other Italian dishes. But if it’s a Thai, Vietnamese or southeast Asian recipe that calls for basil, you could definitely use Thai basil if you can find it. A lot of Asian grocers seem to carry it, so keep an eye out.

Thai basil

I originally found this recipe in the Edmonton Journal. My additions and changes are noted in italics. Also note that these noodles suck up the vinaigrette like string sponges, so, when in doubt, don’t skimp. Oh, and I like to use those baby cucumbers that seem to be cropping up everywhere these days; they’re less bitter than the long English cukes. Either way, I’d recommend scraping out the seeds because that ups the soggy factor if you’re not eating it all in one go (or, of course, serving it all in one go).

Saifun Salad ingredients

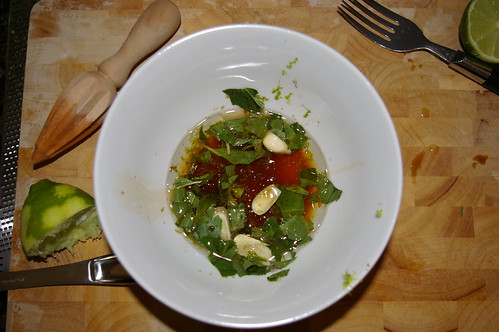
Saifun Salad dressing and kitchen mess

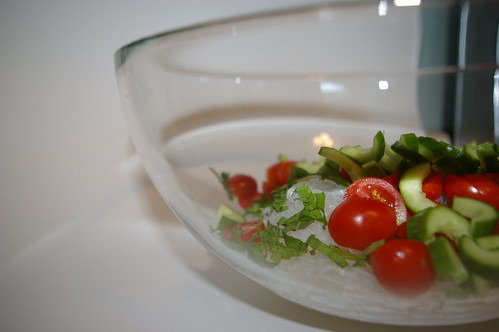
Saifun Salad before the dressing

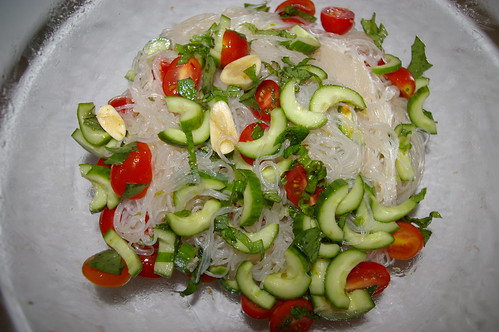
Saifun Salad with the dressing

Saifun Salad

  • 8 oz. (250 grams) saifun bean thread noodles
  • 1 cup grape tomatoes (I chop mine in half so they stretch further)
  • 1 small cucumber, diced
  • 2 tbsp. chopped fresh mint leaves
  • 2 or 3 green onions, minced
  • a few cilantro leaves, chopped (cilantro and I are not friends. I do not like it nor understand everyone’s obsession with it. If you like it, by all means add it; I do not.)

Dressing:

  • 1/4 cup rice vinegar
  • 3 tbsp. sugar
  • grated zest and juice of one lime
  • 2 tbsp. Thai basil, torn (Of course, if you can only find Italian, that’s fine.)
  • 2 garlic cloves, mashed (I mash them, throw them in the dressing, then fish them out just before eating so as to impart as much garlic flavour but without the burn of eating raw garlic.)
  • 1 tsp. red chile paste
  • 2 tsp. fish sauce
  • 2 tsp. soy sauce
  • 1/4 cup canola oil (I’m sure any vegetable oil will do. But I wouldn’t use olive oil, which I feel would overpower the light flavours of the salad.)
  • 1/2 tsp. sesame oil (I usually don’t add this because I find it overpowering.)

Soak the noodles in a bowl of warm water just until softened, about five minutes, then cook one minute in boiling water. (I simply cover them with boiling water and wait about five or six minutes for them to soften.) Drain and immediately rinse with cold water to stop the cooking. Cover and store in the fridge until ready to make the salad.

Whisk together the dressing ingredients. Taste to check for seasonings.

Place cold noodles in a large salad bowl. Add tomatoes, cucumber, onions and herbs. Top with dressing and toss well, then put the salad in the fridge for about 30 minutes before serving, so the noodles have a chance to soak up the flavours of the dressing.

Continue Reading