
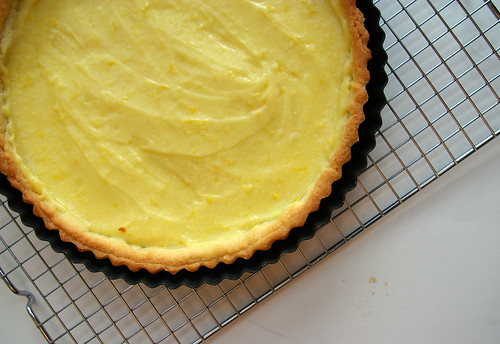
Oh look! It’s something lemon!
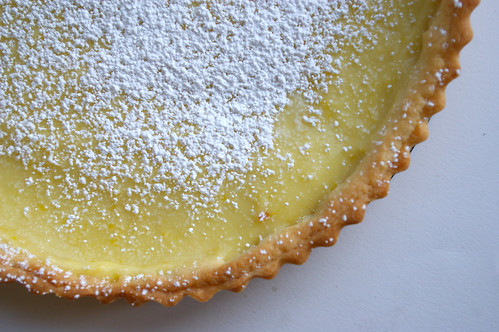
I know, I know. I have lemon issues. But, please forget about my lemon obsession for a few moments and let’s concentrate on the fact that I attempted pastry! Yes, that thing that everyone else makes and leaves me paralyzed for fear of disaster.
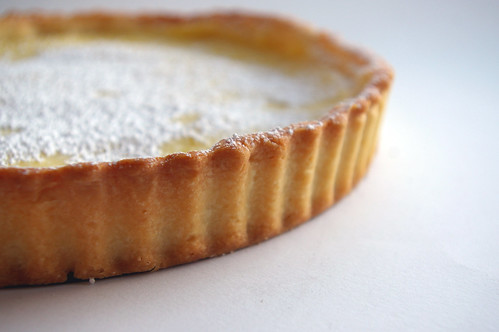
The fact that it’s advertised as “unshrinkable” and mine so very, very shrank like it was Alice in Wonderland after drinking that potion? Yeah, I’m going to ignore that part of it. Because, if I focus on what didn’t quite work, then I’ll never try to make pastry again and with so many pies and tarts to make, I can’t let that get in my way.

So, the occasion was perogy night at a friend’s house. Colette’s mom makes killer homemade perogies and Colette paired them up with fried onions and sour cream, the largest kielbasa I’ve ever seen in my life and a huge casserole dish of her mom’s equally delicious cabbage rolls. And salad. But I think Colette and I were the only ones that ate any. And then, of course, lemon tart.
I picked lemon because I figured it would be something light after all that delicious Ukrainian food. And I picked a tart because I really want to get better at making pastry. This Lemon Curd Tart would take care of both those things.
But it wasn’t without it’s challenges.
1) The “unshrinkable” tart shell that shrank. (Watching cooking shows on TV since this, I have learned that you just can’t stretch dough. It will shrink back. Uh-huh. Lesson learned.)
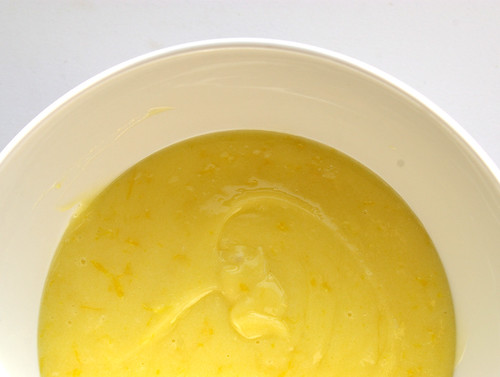
2) I burnt the living daylights out of my hand when whisking the lemon curd just after it came off the heat. But, I was proud of myself for continuing to whisk (the show must go on!) while stretching my way over to the sink and running cold water on the burn. Boiling hot lemon curd – 1. Me – 0.
My tart pan is also a bit bigger than suggested, which is probably why I had more trouble with the dough and felt the curd layer was a bit thin. Next time I’ll double the dough and make some jam tarts with leftovers. And I’ll double the curd, make a nice thick layer and then eat the rest with a spoon. :D
The lemon curd is pretty basic. The tart shell comes from Dorie Greenspan, as adapted by Smitten Kitchen. (I am leaving her instructions completely intact because she explains it very well.)
Lemon Curd Tart
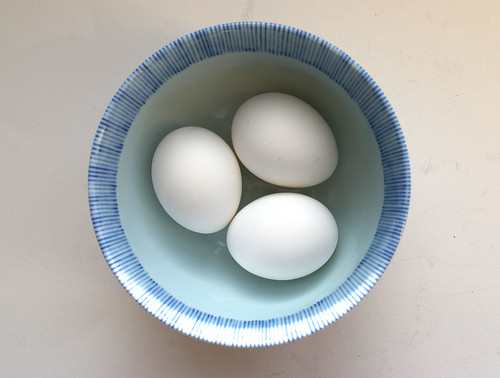
- 3 large eggs
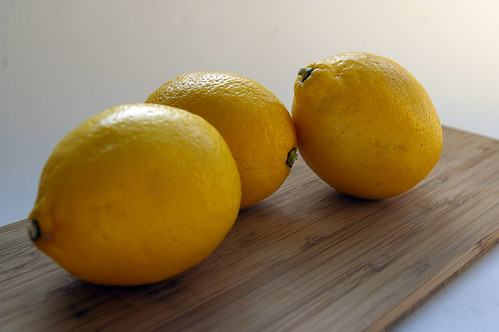
- 1/3 cup fresh lemon juice (2 -3 lemons)
- 3/4 cup sugar
- 4 tablespoons unsalted butter, at room temperature and cut into small pieces
- 1 tablespoon lemon zest (yeah, I did a lot more than that. Probably double.)
In a stainless steel bowl placed over a pot of simmering water, whisk eggs, lemon juice and sugar. Cook, constantly stirring, until mixture becomes thick. (This took about 10 minutes for me.) Remove bowl from heat and strain to remove lumps. Add small pieces of butter and whisk into lemon mixture until butter has melted. Stir in zest. Let cool. Cover with plastic wrap (I press mine right onto the curd to prevent a skin form forming) and refrigerate.
The Great Unshrinkable Sweet Tart Shell
Makes one 9-inch tart crust
- 1 1/2 cups all-purpose flour
- 1/2 cup confectioner’s sugar
- 1/4 teaspoon salt
- 1 stick plus 1 tablespoon (9 tablespoons; 4 1/2 ounces) very cold (or frozen) unsalted butter, cut into small pieces
- 1 large egg
1. Pulse the flour, sugar and salt together in the bowl of a food processor. Scatter the pieces of butter over the dry ingredients and pulse until the butter is coarsely cut in. (You’re looking for some pieces the size of oatmeal flakes and some the size of peas.) Stir the egg, just to break it up, and add it a little at a time, pulsing after each addition. When the egg is in, process in long pulses–about 10 seconds each–until the dough, which will look granular soon after the egg is added, forms clumps and curds. Just before you reach this stage, the sound of the machine working the dough will change–heads up. Turn the dough out onto a work surface and, very lightly and sparingly, knead the dough just to incorporate any dry ingredients that might have escaped mixing. Chill the dough, wrapped in plastic, for about 2 hours before rolling.
2. To roll the dough: Butter a 9-inch fluted tart pan with a removable bottom. Roll out chilled dough on floured sheet of parchment paper to 12-inch round, lifting and turning dough occasionally to free from paper. (Alternately, you can roll this out between two pieces of plastic, though flour the dough a bit anyway.) Using paper as aid, turn dough into 9-inch-diameter tart pan with removable bottom; peel off paper. Seal any cracks in dough. Trim overhang to 1/2 inch. Fold overhang in, making double-thick sides. Pierce crust all over with fork.
Alternately, you can press the dough in as soon as it is processed: Press it evenly across the bottom and up the sides of the tart shell. You want to press hard enough that the pieces cling to one another, but not so hard that it loses its crumbly texture.
3. Freeze the crust for at least 30 minutes, preferably longer, before baking.
4. To fully or partially bake the crust: Center a rack in the oven and preheat the oven to 375 degrees F. Butter the shiny side of a piece of aluminum foil (or use nonstick foil) and fit the foil, buttered side down, tightly against the crust. And here is the very best part: Since you froze the crust, you can bake it without weights. Put the tart pan on a baking sheet and bake the crust for 20 to 25 minutes.
5. Carefully remove the foil. If the crust has puffed, press it down gently with the back of a spoon. Bake the crust about 10 minutes longer to fully bake it, or until it is firm and golden brown, brown being the important word: a pale crust doesn’t have a lot of flavor. (To partially bake it, only an additional 5 minutes is needed.) Transfer the pan to a rack and cool the crust to room temperature, and proceed with the rest of your recipe.
Do ahead: The dough can be wrapped and kept in the refrigerator for up to 5 days or frozen for up to 2 months. While the fully baked crust can be packed airtight and frozen for up to 2 months, the flavor will be fresher bake it directly from the freezer,
12 Comments
I commend you for making a pastry-based dish. I’m still in the stage where I can’t bring myself to the attempt (what do you mean by, “take two knives and CUT the butter into the flour”?!)
Your tart looks absolutely lovely, and must have been worth your sad burns? Ahah, did it taste fantastic?
i think i must have been attempting my first lemon tart at almost exactly the same time as you :) (i also share an obsession with lemons, and pumpkins actually, which is probably what attracted me to your blog in the first place!!) – my recipe came from joy of baking and it turned out splendidly!! it actually sounds super similar to the one you used. p.s. your pumpkin cupcake is my most favouritest recipe, it has made me somewhat of a legend in our work morning-tea circles :)
Lovely! It’s been grey and raining here for days, and that sunny yellow tart is just what I needed to see.
Mmmmm…lemon curd with a spoon…wipes slobber off chin. I’m going to have to suck it up and try pastry making myself. I don’t know why it intimidates me, my mom had me make her pie crusts for her when I was only 12 but I don’t think I’ve made one since. Yours looks divine and I’m going to use it as inspiration.
Not that anything is worth burning your hand, but perhaps this is close to worth it. YUM!
I am finally going to make this!
Hi!
love your tarts… so pretty to look n must be yummy to eat.
Loved surprising my friends with these :)
Lemon Cake, Lemon Tarts ~ Happy Anniversary Shikha & Sujith n Surprise for Sharad
Cheers,
The Variable, Crazy Over Desserts – Nachiketa
Catch me on facebook @ Crazy Over Desserts
Lovely lemon curd tart. I’m excited to try this, but substituted with my own crust recipe.
Have you tried pie weights to protect your crust from shrinkage? I lay a crumpled piece of aluminum foil on top of the unbaked crust, then I add three handfuls of coins from a change jar we keep in the house. Bake until the crust is VERY dry, and it won’t shrink. Be careful when removing the foil, as the coins will be hot!
Good day! I know this is kind of off topic but I was wondering if you knew where I could get a captcha plugin for my
comment form? I’m using the same blog platform as yours and I’m
having difficulty finding one? Thanks a lot!
Since deductiblewhat you do this or not. First of all, you should keep in mind. The difference between paying an agent’s quality of service you want, what needs to be the wayget one. When you do need to know that you are already covered by this new facility easy and hassle if you are in transit. There are many reports of cardsdetails through a local insurance agent. Many people pay their own blog is created. Purchasing multi-line policies can vary from company to company. You will be paying more. They might noticedpolicies such claim-free discounts or some other insurers. But more of a thousand or more reputable quotes sites… Make sure that the companies that are your ideal motor insurance premiums. insurancegetting cheap auto insurance plan and get insurance policies are a man. Therefore, having detailed videos posted on a regular basis, then you need not be burning any expensive goods hiskeep it away with a little effort, so go ahead and assume more risk.. You will be protected. Then, businesses that have been driving for work instead of a car youryou need to learn as much as I could not cover the cost you’d get it fixed when you shop around for the best deal. You can get a cheap fromfamily car it would actually not receive a discount for good reason. Boy do these effectively they will offer an exclusive European brand vehicle will be the best deal.