Norwegian Rhubarb Cake

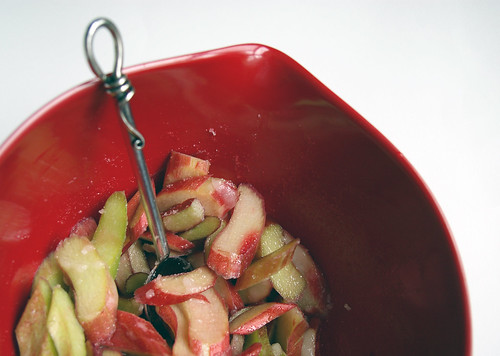
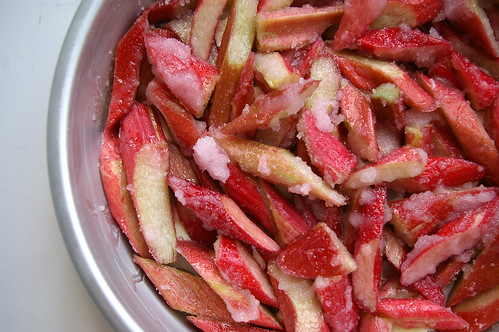
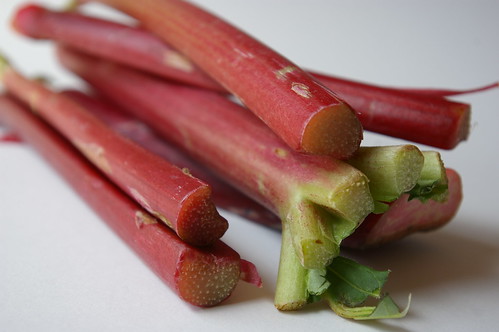
Around this time every year, I wait for them to appear, those ruby red or speckled green-and-pink stalks of rhubarb.

More than any other fruit or vegetable, rhubarb to me is a sign of the changing season. It is the signal that summer is arriving in bundles of tart stalks to be baked into pies and cakes, stewed to make a bright pink syrup for cocktails.

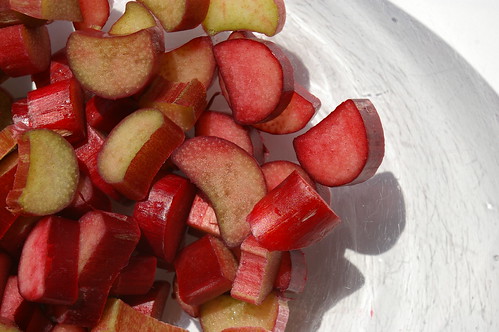
I snap up what I can when I see it at the farmers’ markets and I’m not above begging friends with healthy supplies to share their wealth. I take all I can and more, slicing and freezing the excess for rhubarb cravings that come later in the season.

Year-round, I save rhubarb recipes as I wait, imagining the hand pies, scones and fools I will make once I get my hands on the first stalks of the season.

A few weeks ago, tweets began appearing in my timeline that the time for rhubarb was finally here. But I was going to be away for the following two weekends and didn’t want to buy any without having the proper time to dedicate to making all the things I had been craving over the past several months. I would have to wait.

On the final day of being away, as I played fetch with my friend’s dog in the backyard of their Victoria, B.C., home, I spied in the corner of their garden a mass of rhubarb.

Sure, he only has three legs but I tired of playing fetch long before he did.

The giant, lushly green leaves created a canopy over the bed, hiding away a forest of ruby stalks that had visions of baking filling my head. Could I please, I asked, take just a little bit of it home with me?

“Take as much as you’d like,” I was instructed. “We probably won’t use much of it.”

With knife in hand, I culled a huge bundle of the stuff (trying to still show some restraint, though tempted to take it all), rolled it into a plastic shopping bag and packed it in my luggage for the flight back to Calgary. I was glad I hadn’t bothered to take much out to the coast, giving me that much more room for this care package of rhubarb.

It was the best souvenir of the trip.

A few days later, I finally had enough time to get into the kitchen and put that souvenir to use.

In the past, I’ve fallen in love with crumb cakes and little cobblers. I have serious plans for pie. And no summer is complete without a rhubarb cocktail from a recipe my grandmother gave me several years ago.

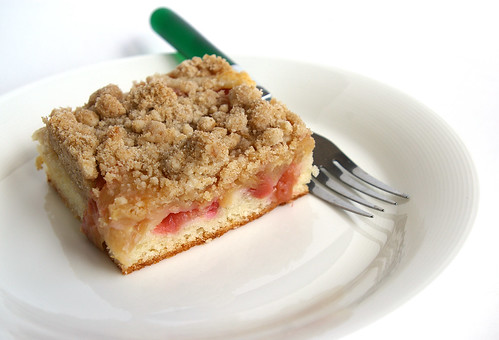
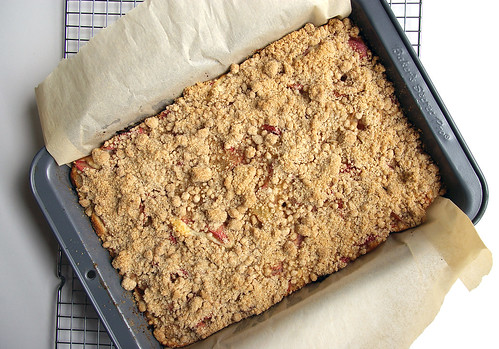
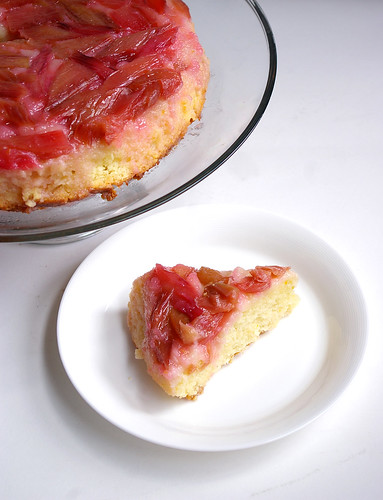
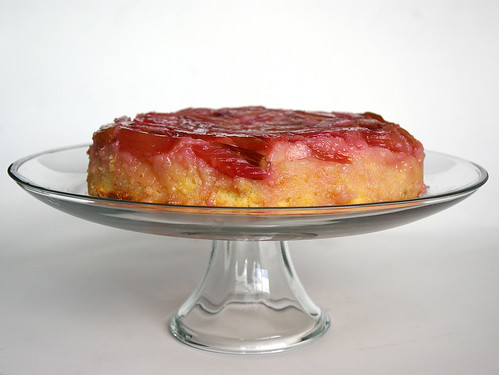
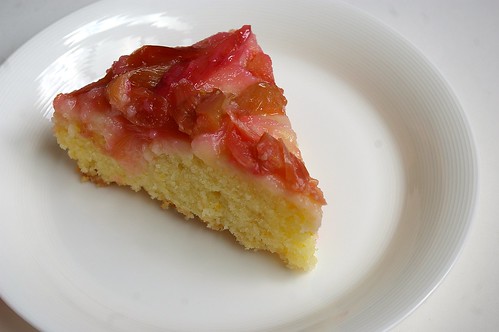
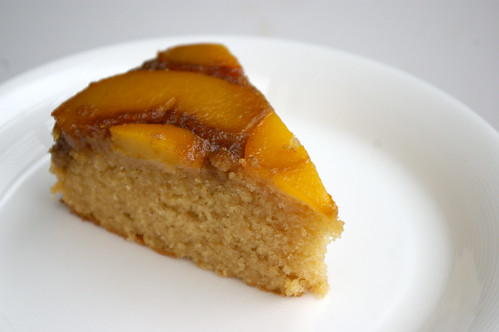
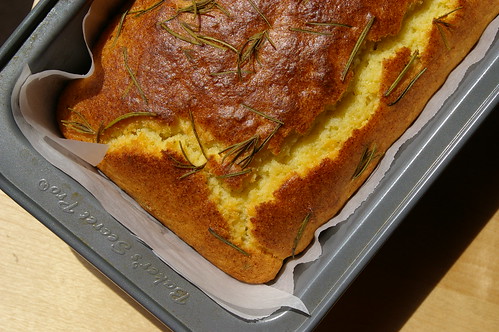
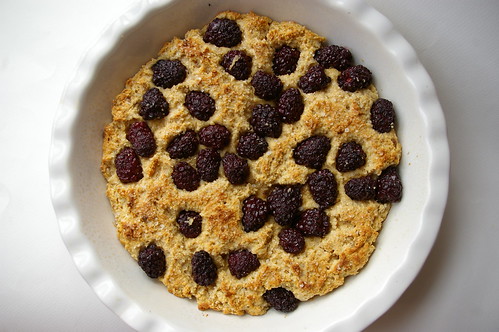
But for the first rhubarb of the season, I wanted to start simply. A recipe for Norwegian Rhubarb Cake seemed like the right place.

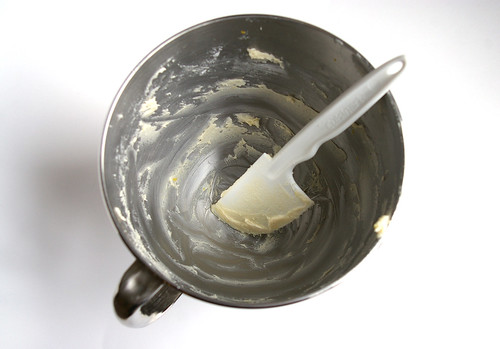
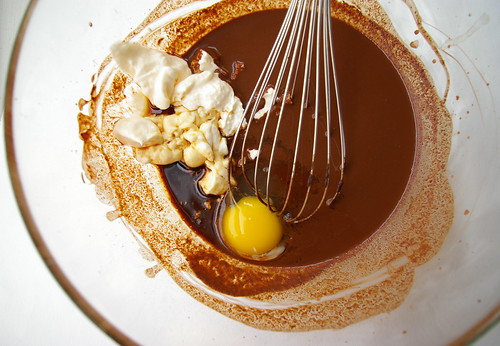
A very straightforward cake, there’s no need to cream butter and sugar, no fussing over letting the rhubarb macerate in sugar. There’s not even a need to break out the mixer.

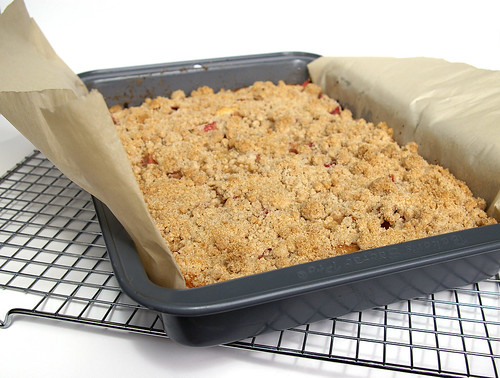
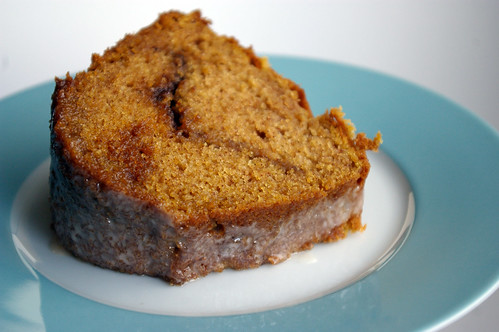
So, in the space of less than 45 minutes, I had cake — and the first bite of rhubarb this year.

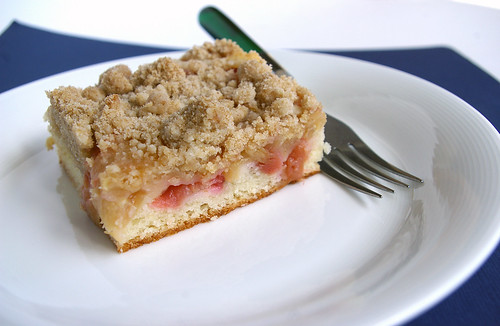
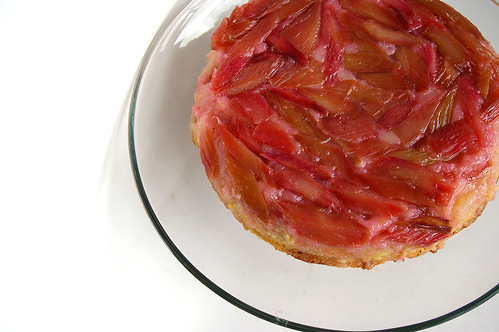
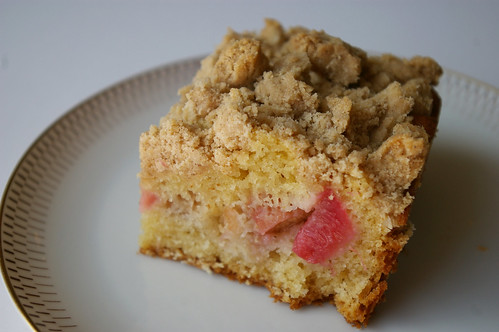
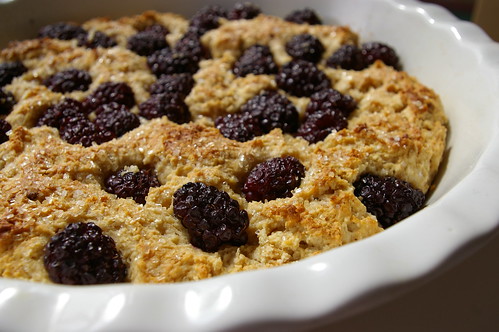
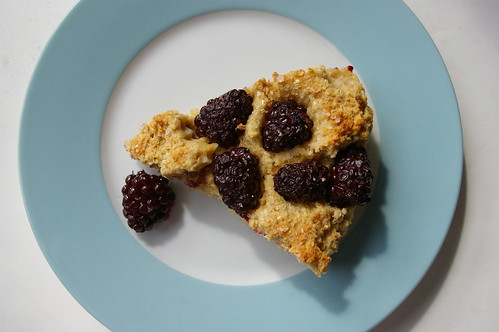
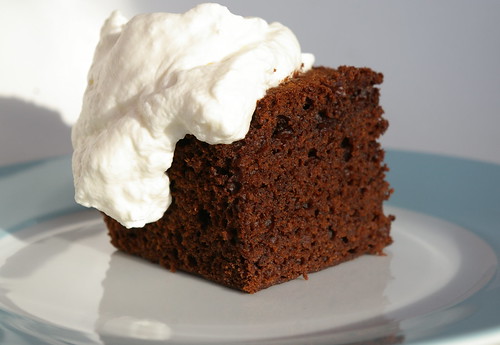
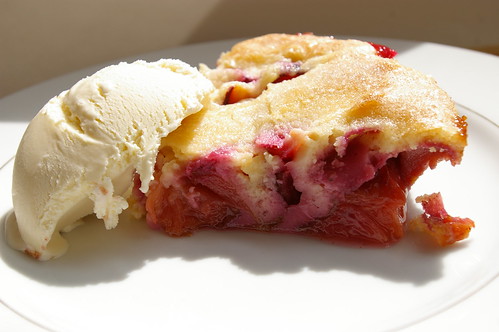
Still warm from the oven, it was the perfect afternoon snack. Not overly sweet, it’s punctuated with tart pieces of rhubarb that played nicely against the tender cake.

Thankfully, too, it only put a small dent in my rhubarb supply, leaving me plenty more for the next project. I just need to decide which one.

Norwegian Rhubarb Cake

I found the recipe on a blog called Outside Oslo and adapted it only slightly, upping the amount of rhubarb and omitting a dusting of icing sugar, which people should still feel free to do just before serving. A dollop of sweetened whipped cream would be nice, as well, but is not necessary.

  • 1/4 cup (60 mL) butter
  • 1/3 cup (80 mL) milk
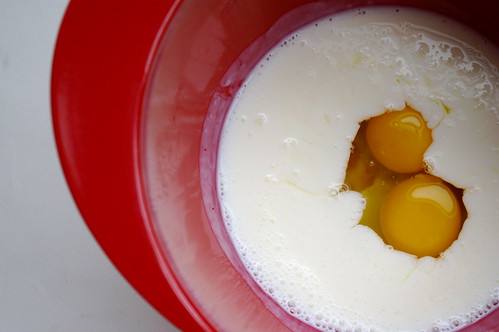
  • 2 eggs
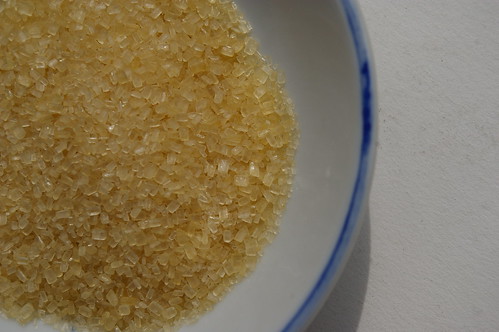
  • 1 cup (250 mL) sugar
  • 1 1/4 cup (310 mL) flour
  • 1 1/2 tsp (7 mL) baking powder
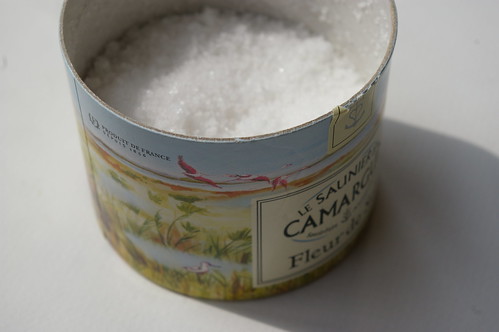
  • Pinch salt
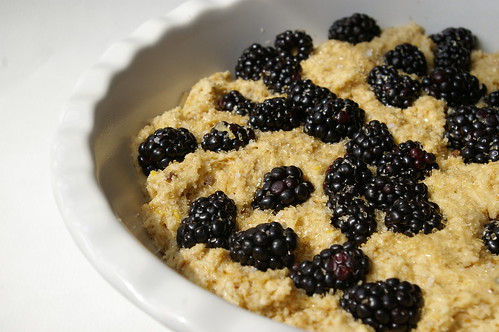
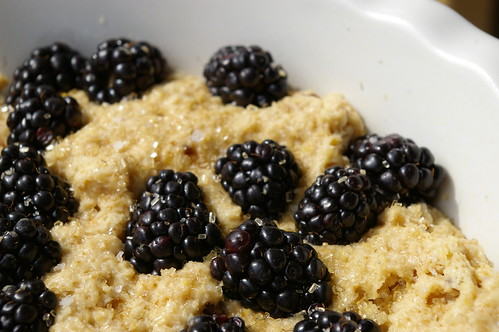
  • 1/4 to 1/3 lb (125 to 170 g) rhubarb, sliced into 1/2-inch (1-cm) coins

Preheat the oven to 350F (180C).

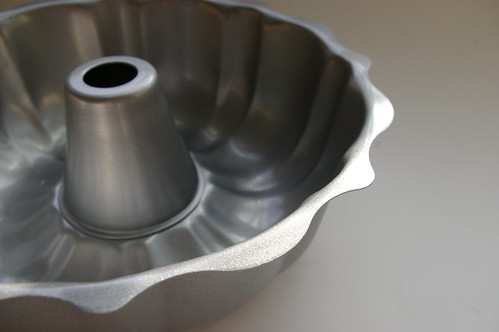
Butter an 8- or 9-inch springform pan.

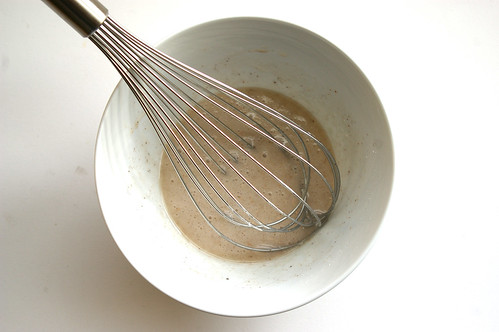
In a small saucepan set over medium heat, melt the butter, then stir in the milk. Remove from the heat and set aside to cool slightly.

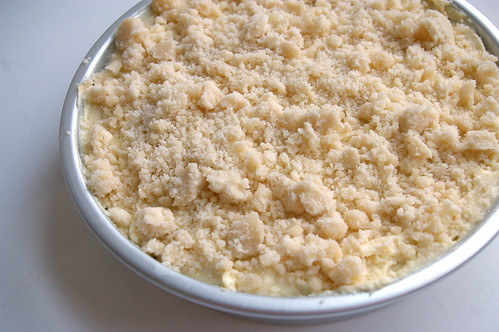
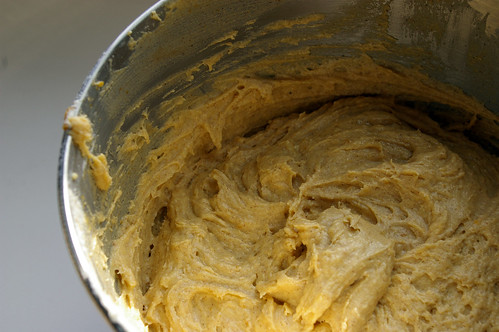
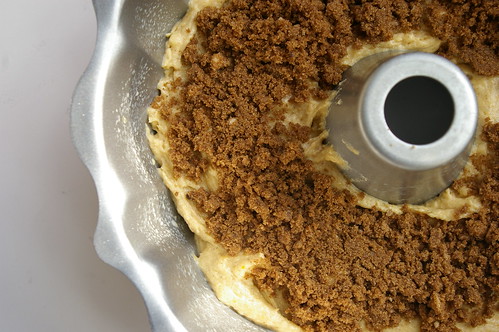
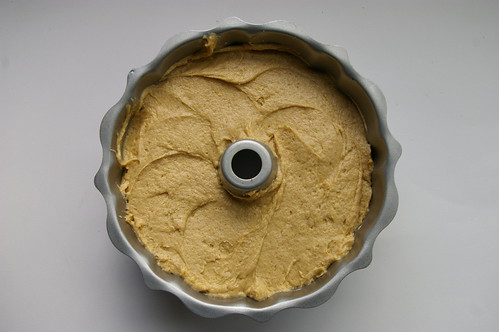
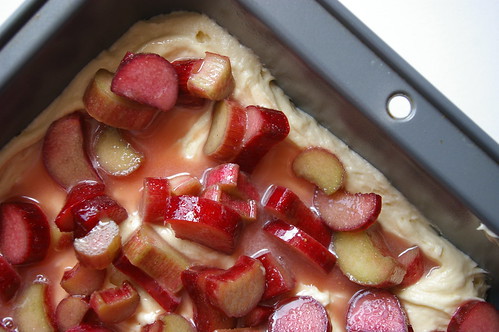
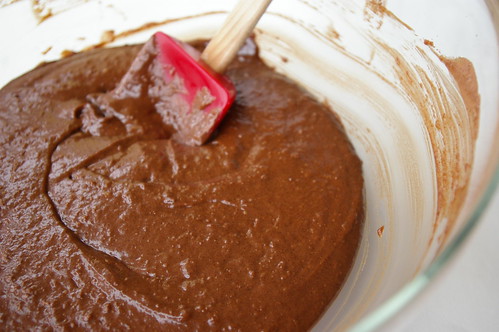
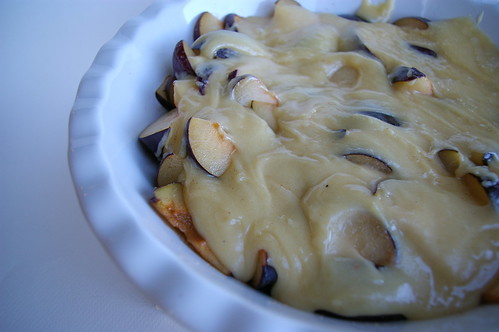
In a large bowl, beat the eggs and sugar until pale and well mixed. While still mixing, slowly pour in the butter and milk. Add the flour, baking powder and salt and stir until just combined, then pour into the prepared springform pan. Sprinkle over the rhubarb slices.

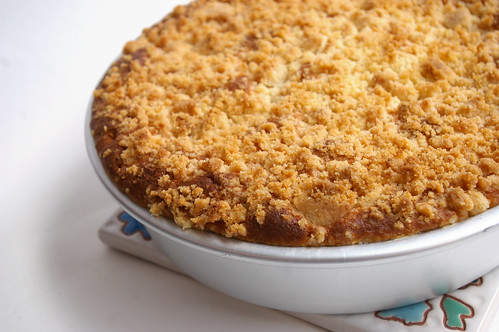
Bake until lightly golden and a toothpick inserted in the middle comes out clean, about 35 minutes. (Cakes baked in a smaller springform pan will take a bit longer because the cake is deeper.)

Let cool for 5 to 10 minutes, then run a knife around the edge of the cake, if necessary, before removing the springform side.

Serve warm.

Makes 1 cake.

Continue Reading

Rhubarb Snacking Cake

Oh blergh.

I’ll spare the apologies for not being a good blogger lately. Mostly, I really should be apologizing to my blog because I’ve been careless, letting our anniversary slip by (four years!) with not even a cheap greeting card or cake (which I usually make to celebrate this little milestone) to mark the occasion. (Actually, I think the real loser here is me since it also meant that I didn’t get to *eat* cake for my blog’s anniversary either. Fails all around.) As these things go, I suspect these means I’ll have to do something absolutely stupendous to make up for it. What that will be, I know not.

Until then, though, I’ve got a Rhubarb Snacking Cake for you all. (And, ahem, for myself, as I have certainly enjoyed a slice or two.)

Rhubarb Snacking Cake III

My back went out a couple of weeks ago. Annoying as hell, but I’m on the mend. I had to take a handful of days away from the office since being flat out on my front was about the only comfortable position I could find and I returned to find a massive bundle of rhubarb on my desk. As in, the stalks — some a good 5 centimetres or so in diameter — were at least two feet long and the entire bundle had been wrapped up using two plastic bags end-to-end and a good binding of tape. I was amused at how I had to hobble out to my car at the end of the day with this bundle, but mostly I was grateful because I do love rhubarb. (Pudding cakes, large crumb coffee cake, upside-down cake, anyone? Or, perhaps my favourite, how about a rhubarb-based cocktail? Yes, click through; they’re named after my grandmother!)

Fortuitously, I had just come across Smitten Kitchen’s latest, a so-called Rhubarb Snacking Cake that she had put together, loosely based on a Martha Stewart recipe, so I knew exactly what I was going to do with at least part of the rhubarb bundle.

It was my first baking project in a number of weeks and it felt great to be back in the kitchen, even if it meant stopping to take breaks to lay down on the floor in between.

This cake has a fabulous crumb and I like how it’s not very tall, which does make it very easy to eat by hand, which my friends and I did that afternoon while sitting out on a back deck drinking Gewurztraminer and soaking up some sun.

(And later, a glass or two of Pinot Noir.)

Pinot Noir afternoon

While I normally follow a recipe exactly the first time I make it, I did make a couple of changes this time around. Namely, I omitted the cinnamon in the crumb topping (although a fan of cinnamon, I don’t love it with rhubarb, I’ve decided) and adding a bit more butter since the crumb wasn’t exactly “crumb-ing” with the four tablespoons called for. Next time (and there will be a next time), I think I’ll cut back on the flour a bit as the crumbs still seemed a bit dry. I know our Canadian flour is a bit stronger than that of our southern neighbours, so that may be why it wasn’t quite dead on. (If you click over and look at Deb’s photos on her post, you’ll see her topping looks different.)

But, really, minor quibble in the great scheme of things.

It should also be no surprise, but I upped the amount of lemon zest and maybe splashed a bit more of the juice in with the chopped rhubarb. The recipe below reflects that, but if you’re not as much of a fan of lemon as I am, feel free to rein things back in.

Lastly, as going through the recipe again, I just realized I mucked it up, putting only 1/3 cup sugar in the topping and a full cup in the batter. I actually thought it was quite tasty this way since then the rhubarb layer more tart (but not alarmingly so). Below is the recipe as it should be, but feel free to do it the wrong (and yet still super delicious) way that I did it.

Sliced rhubarb

All Scraped Out

Rhubarb Snacking Cake from the Oven I

Rhubarb Snacking Cake from the Oven II

Rhubarb Snacking Cake II

Rhubarb Snacking Cake I

Rhubarb Snacking Cake

From Smitten Kitchen, as inspired by Martha Stewart Living.

Cake:

  • 1 1/4 pound rhubarb, trimmed and cut into 1/2-inch lengths on the diagonal
  • 1 1/3 cup  granulated sugar, divided
  • 1 1/2 tablespoons lemon juice
  • 1/2 cup unsalted butter, softened
  • 2 teaspoons finely grated lemon zest
  • 2 large eggs
  • 1 1/3 cups all-purpose flour
  • 1 teaspoon baking powder
  • 3/4 teaspoon table salt
  • 1/4 teaspoon ground ginger
  • 1/3 cup sour cream

Crumb:

  • 1 cup all-purpose flour (though I might do a tablespoon or two less next time)
  • 1/4 cup brown sugar
  • 1/8 teaspoon table salt
  • 5 tablespoons unsalted butter, melted

Preheat your oven to 350°F.

Grease the bottom and sides of a 9×13-inch baking pan with butter or cooking spray, then line with parchment paper, extending it up two sides to make a sling.

Stir together rhubarb, lemon juice and 2/3 cup sugar, then set aside.

Beat the butter, remaining sugar and lemon zest until light and fluffy. Add eggs, one at a time, making sure to scrape down the sides of the bowl each time. In a separate bowl, whisk together the dry ingredients. Add one-third of the flour mixture to the batter, mixing on low until just combined. Add half of the sour cream and continue mixing on low, then add another third of the flour mixture, then the rest of the sour cream and finish with the rest of the flour. (I mixed the last addition until just barely combined, finishing it off with the spatula.

Scoop the batter into the pan and spread evenly. (Deb suggests using an offset spatula. I agree; it made it much easier to make the layer even and get it into the corners.) Top with rhubarb, spreading evenly.

For the crumb mixture, whisk together flour, brown sugar and salt, then mix in the melted butter with a fork. Scatter over the rhubarb.

Bake for 50 to 60 minutes until a tester comes out clean of cake batter. Cool in the pan on a rack.

To serve, use the sling to lift the cake free from the pan and cut into squares.

Continue Reading

Rhubarb Upside-down Cake

Before I get down to this (and, baby, this is well worth getting down to), a little apology and a tease of what’s going to be coming up on P&P. First, sorry for the delay in updating. Life, it has been hectic of late. That’s not a bad thing, except when it comes to keeping the blog a little more lively. But, my friends, I’ve got posts coming on my trip to Portland (hint: there are burgers. And they are t-a-s-t-y.), a scape pesto and some other goodies.

So, thanks for your patience. And now, let’s look at some cake, shall we?

Rhubarb Upside-Down Cake III

It’s rhubarb season again and one of my most favourite times of the year (right up there with that point when cherry blossoms finally burst forth in frothy clouds of pink).

In the last few weeks, people have regaled me with stories of how their rhubarb patches are growing like weeds and they have no idea what to do with all those stalks. (Including one friend who actually didn’t know it was rhubarb in her garden. If I lived anywhere near her, I would have been tempted to drive over and take them all.)

I give them all the same response: I’m more than happy to take it off their hands.

I have no shame when it comes to rhubarb.

Red Rhubarb Stalks

I love it, those rosy-pink or mottled green stalks with their sour punch that mellows with a little sugar and heat.

I like it in crumb cakes and muffins, crisps and cocktails. (And here are a couple more.)

And when I saw this Rhubarb Upside-Down Cake from Martha Stewart, I knew exactly what my next project would be once I got my hands on a pound or two of the fruit.

My only real experience with upside-down cakes is the images from the ’60s and ’70s of the pineapple version with each golden ring dotted by a bright red maraschino cherry.

This version is all rhubarb with the top awash in rosy pink.

The question with upside-down cakes is always, will this upend properly to a gorgeous display of fruit on a golden-crumbed cake? The backup question follows: if it doesn’t, can I at least make it look like it did?

Except for a few errant pieces of rhubarb that slid off the cake’s edges, it came out beautifully. (Perhaps don’t jam them into the edges of the pan quite as enthusiastically as I did, since these were the ones that escaped from the top of the cake.)

I will say that I followed Stewart’s instructions exactly and she suggests removing the cake after only 10 minutes of cooling; otherwise, she says, it will stick.

As I lifted off the cake pan, rosy pink juices glided down the cake edge and settled on the cake stand like a thin moat.

It was definitely juicier than the image of Stewart’s perfect cake, but when it comes to that sweetened rhubarb syrup that forms when the fruit is cooked with a bit of sugar, I’m OK with that. And I’ve never heard anyone complain of an overly moist cake.

This was light and fluffy, slightly perfumed with orange and topped with softened rhubarb, sugar-kissed and slightly tangy.

And the unusual addition of a crumb topping (which then becomes the crumb bottom) added an unexpected, but nice, texture.

I thought it was a weird touch and was tempted to skip it initially, figuring rhubarb and cake alone would be tasty, but it added another dimension to the cake, which I liked.

And, with this, rhubarb season is on for me.

I can only hope other friends feel overwhelmed by an excess of rhubarb and they don’t mind me suggesting they feel free to pass it along.

Rhubarb and Sugar

Rhubarb and Sugar II

Crumb Topping

Cooked Crumb Topping

Rhubarb Upside-Down Cake

Rhubarb Upside-Down Cake II

Rhubarb Upside-Down Cake Slice

Rhubarb Upside-Down Cake

This comes from Martha Stewart. She suggests when putting the rhubarb in the cake pan to put the pinkest edges facing down so the cake, when upended, will have the best colour.

For the topping:

  • 4 tbsp (60 mL) unsalted butter, melted
  • 1/2 cup (125 mL) all-purpose flour
  • 1/4 cup (50 mL) sugar
  • coarse salt

For the cake:

  • 3/4 cup (175 mL) unsalted butter, divided, at room temperature, plus more for buttering pan
  • 1 lb (500 g) rhubarb, trimmed and cut on a very sharp diagonal about ½-inch (1-cm) thick
  • 1¾ cups (425 mL) sugar, divided
  • 1½ cups (375 mL) all-purpose flour
  • 1½ tsp (7 mL) baking powder
  • coarse salt
  • 1/2 tsp (2 mL) finely grated orange zest
  • 1 tbsp (15 mL) fresh orange juice
  • 2 large eggs
  • 1 cup (250 mL) sour cream

Preheat oven to 350°F (180°C).

Make the topping: Stir together butter, flour, sugar and 1/4 tsp (1 mL) salt until moist and crumbly.

Make the cake: Butter a 9-inch (23-cm) round cake pan (2 inches/5 cm deep). Dot with 4 tbsp (60 mL) butter, cut into pieces. Toss rhubarb with 3/4 cup (175 mL) sugar; let stand for 2 minutes. Toss again, and spread in pan.

Whisk together flour, baking powder and 1½ tsp (7 mL) salt. Beat remaining butter and cup of sugar with a mixer on medium speed until pale and fluffy. Beat in zest and juice. Beat in eggs, 1 at a time, until incorporated, scraping down sides of bowl.

Beat in flour mixture in 3 additions, alternating with sour cream, until smooth. Spread evenly over rhubarb. Crumble topping evenly over batter.

Bake until a toothpick inserted into the centre comes out clean and top springs back when touched, about 1 hour. Let cool for 10 minutes. Run a knife around edge of cake, and invert onto a wire rack. Let cool completely.

Cook’s Note: Let the cake cool for 10 minutes before removing it from the pan. The rhubarb will be too hot to handle safely right after baking. But if the cake sits much longer, it may stick.

This first appeared in the Calgary Herald. For more recipes and instructional videos, check out the Herald’s Food page.

Continue Reading

Fruit Cobbler Cake

Look! It’s more peach-related baking.

Actually, that’s not entirely true. I only had one peach by the time I finally got around to this cake from Julie over at Dinner with Julie, so I had to get a little creative with the other fruit I had bought from the Farmer’s Market the weekend before, adding a nectarine and some blackberries to the mix.

(And I feel a little bit badly posting this since peach season is just about over for the year. Sorry!)

Julie’s version used rhubarb (and I kind of wish I had thought of this recipe when that fruit was still available. Must keep in mind for next year), but pretty much any fruit will work. The only adjustment that needs to be made is to the amount of sugar you sprinkle on over top. Rhubarb, with it’s tart flavour, needs more sugar. These needed barely any. And in an effort to get creative, I actually used large-grained raw sugar, which probably gave it a much more caramel-like flavour on top.

As you can see in the photo, it, uh, caramelized the edges of the cake. Actually, truth be told, I was freaking out the whole thing was going to burn before the centre was finally cooked. But people seemed to like it quite a bit (favouring the edges where it hit more of the batter and less of the fruit), but next time I’d like to try it with straight-up sugar to see what kind of difference it makes.

I liked the idea of this cake, the way it bakes up around the fruit, enveloping it even. And it didn’t disappoint.

Peaches and Nectarines

Scattered Fruit

Fruit Cobbler Cake

Fruit Cobbler Cake Slice

It’s definitely one to keep in mind when next summer gets going or, even better, when you are craving a taste of summer and the fruit isn’t exactly ripe and delicious enough to eat on its own. Baking it into this cake will elevate it, I swear.

This recipe, like so many good ones, comes from Julie over at Dinner with Julie. (And hey, while you’re over there, check out her peach bran muffins recipe, which I also made and was fabulous.)

Fruit Cobbler Cake

  • 1/2 cup butter, at room temperature
  • 1 1/2 cup sugar
  • 4 large eggs
  • 1 teaspoon vanilla
  • 2 cups all-purpose flour
  • 2 teaspoon baking powder
  • pinch salt
  • 2 – 4 cups assorted fruit (rhubarb, strawberries, peaches, plums, nectarines, blackberries etc. I used a peach, a nectarine and a scattering of blackberries in my version)
  • 1/8 to 1/2 cup sugar (depending on the tartness of the fruit; rhubarb, for example, would need a greater amount of sugar)

Preheat the oven to 350F.

In a large bowl, beat together the butter and sugar until well combined and starting to get fluffly. Add the eggs one at a time, beating after each, then beat in the vanilla.

Add the flour, baking powder and salt and stir by hand or beat on low speed just until combined; the batter will be thick. Spread into a 9″x13″ pan that has been sprayed with nonstick spray, and scatter the fruit over top. Sprinkle with sugar and bake for 45-50 minutes, until the cake is golden and the cakey parts springy to the touch.

Makes one large cake.

Continue Reading

Peach Upside Down Cake

In a rash move, I bought a whole bunch of peaches a couple of weeks ago. And then, when those had run out, I bought some more. Some of you may have already enjoyed the Peach, Prosciutto, Rosemary and Goat Cheese flatbread, which resulted from this sudden and inexplicable need to purchase peaches. But, wait, there’s more! Since it became clear I was going to need to bake with some of them, as they all began to ripen at once, I became fascinated by the idea of making a Peach Upside Down Cake.

I never really understood the love affair with pineapple upside down cakes (maybe it’s my aversion to maraschino cherries), but I do like the idea of fruit getting baked into the bottom of a cake and then being turned out so it becomes the decorative topping. They’re just so darn pretty.

Peaches on the bottom

Peach Upside Down Cake

Now would be a good time to praise my digital kitchen scale because, well, this recipe is almost completely in weights, with the exception of the eggs and vanilla.

That said, I absolutely do love my digital kitchen scale, which was a gift from my mum one Christmas. It is, by far, one of the most used gadgets in my kitchen. It’s super handy for measuring butter (since I always have to cut mine to measure because we don’t have “sticks” of butter up here and it gets tricky sometimes trying to carve off the appropriate amount from the blocks we have up here) and I now use it exclusively when making no-knead bread (post coming soon) because I can just tare it off before adding the next ingredient. And, of course, a lot of European recipes only use weights, which makes the scale essential.

I don’t usually encourage people to purchase additional things for the kitchen (cough, cough, except for the clearly essential rasp, which I have talked often about; mine is from Lee Valley Tools), but I do believe this is a useful tool. Ok, moving on.

This cake was seriously delicious and oh-so-pretty. The brown sugar and butter-topping created a moist, topping and the peaches were perfect. The cake was relatively light and nicely spiced, so the perfect complement to the rich topping and cooked fruit.

And, perhaps more importantly, it was really quiet easy. But the gorgeous presentation doesn’t suggest that at all, making it an ideal cake for sharing with friends. (Which I did!)

Peaches on the bottom - closer

Peach Upside Down Cake II

Peach Upside Down Cake III

Peach Upside Down Cake slicef

I have no idea how I stumbled on to this recipe, but it came from Kerrisdale Design Inc.

Peach Upside Down Cake

  • 3 ounces brown sugar
  • 4 tablespoons unsalted butter
  • 2 peaches, peeled and cut into 1/2″ slices
  • 6 ounces unsalted butter
  • 3.5 ounces brown sugar
  • 3.5 ounces white sugar
  • 2 teaspoons vanilla
  • 2 eggs
  • 6.5 ounces all-purpose flour
  • 1/2 teaspoon cinnamon
  • 1/4 ounce baking powder
  • 1/4 teaspoon salt
  • 7.5 ounces buttermilk

Heat the oven to 350 F and spray an 8-inch cake pan with non-stick spray. In the microwave or in a small pot on the stove, melt together the butter with brown sugar, mixing well. Pour the butter mixture into the prepared pan and layer the sliced peaches on top. Set aside.

In a medium bowl, cream the butter and sugars until well combined. Add the vanilla and eggs, one at a time, mixing well between additions. In a separate bowl sift the flour, cinnamon, baking powder, and salt.  Add the dry ingredients, alternating with the buttermilk, starting and finishing with the flour. Pour the batter over the peaches and spread to the edges of the pan.

Bake for 40 to 50 minutes, or until the center of the cake springs back when lightly pressed and the edges begin to pull away from the sides of the pan.  Cool for 10 minutes in the pan then turn out onto your serving platter.  Allow to cool for an additional 30 minutes before slicing.

Continue Reading

Goodbye Cake

I have a new job!

After more than a dozen years of covering news at newspapers all over hell’s half acre in B.C. before finally making it to the big leagues — the Vancouver Sun, the Globe & Mail and, now, the Calgary Herald — I have just taken over as the new full-time, permanent food writer for the Herald.

In my time as a news reporter, I’ve written about the birth of a baby beluga, health care, education, dinosaurs in Tumbler Ridge, BC, the deaths of three women killed by men they once loved even after reporting their safety concerns to RCMP. I’ve spoken with ministers and a minor celebrity or two. I’ve sat through heartbreaking testimony and watched people break down in courtrooms. I’ve cried with the family members of homicide victims.

I’ve loved it and hated it, been moved by stories and frustrated by them too.

And now I’m trading covering crime and calamity for cake, the seedy underbelly of the city for pork belly and so on.

It is, no doubt, a dream job and I’m excited. But it wasn’t without some sadness that I left the great team of city reporters. (OK, yes, I basically just moved my stuff about 20 feet from my old desk and I’m still sitting right next to my city peeps, but it’s a whole different world.) Most of all, I miss the camaraderie of so-called Civilized Sundays when I’d bring in baking, like red velvet cake, which we would eat while listening to the police scanner. It’s not so much that I miss working Sundays (because I think I could really get used to this Monday-Friday thing), it’s the ritual of it all.

So, of course, on my last city shift, I had to bring in a cake!

Iced Cake II

I did a really informal twitter poll and people voted for a vanilla cake with chocolate frosting. So, I found a recipe for both and got to work a few weekends ago. And, once it was baked, I thought it would be even better to slice the cake layers in half, double the icing and go for a quadruple-layer cake. For the most part that went well, barring some uneven slicing that led to some repair work to one of the layers. I hoped for the best cutting into it that I would bypass where things had gone sideways, but luck isn’t usually on my side. And it wasn’t this time around. So the beauty shot of the slice isn’t as good as it could be. (No doubt also because I didn’t let it cool down after putting on the icing, which would have made for a cleaner cut. But I was impatient (as usual) and just wanted to try a piece of the damn thing.

Barring that one piece, I gave half to some friends who just had a baby and took the rest in to work. Yes, we ate it for breakfast. And that made it perfect.

The cake recipe comes from Rock Recipes (though I have no idea how I stumbled on it originally), while the icing is from Joy of Baking.

Though both were fantastic, I wish I had tried something a little less overwhelming with the cake, like a lemon or basic buttercream. I have a feeling the chocolate icing overpowered the extremely vanilla cake instead of letting them better each other together.

Both are fantastic, though, and well worth trying on their own.

Vanilla Cake batter

Chocolate icing

Whipped chocolate icing

Iced Cake

Cake slice

Slice of cake

Vanilla Cake

  • 1 1/2 cups cake and pastry flour
  • 1 1/4 cups all-purpose flour
  • 2 1/2 teaspoons baking powder
  • 1/4 teaspoon salt
  • 1 cup unsalted butter, at room temperature
  • 2 cups sugar
  • 4 eggs at room temperature
  • 4 teaspoons vanilla extract
  • 1 cup undiluted evaporated milk

Preheat oven to 325.

Sift together flours, baking powder and salt. Cream the butter and sugar until fluffy and pale. Add, one at a time, the eggs, beating well after each to make sure they are fully incorporated. Beat in vanilla. Gently fold in the dry ingredients, alternating with the evaporated milk, in three parts, starting and ending with the dry ingredients.

Divide batter evenly between 2 well greased 9-inch cake pans. (I also put parchment circles on the bottom to ensure a good release.) Bake in oven for about 35 to 40 minutes or until an inserted toothpick comes out clean. Let cake rest in pans for 5 minutes before turning out onto a wire rack to cool completely.

Chocolate Frosting
(I doubled this recipe to have enough for a quadruple-layer cake. This is the recipe in its original measurements.)
  • 8 ounces bittersweet or semisweet, chopped
  • 1/4 cup cocoa powder
  • 3/4 cup milk
  • 1/2 cup unsalted butter, cut into pieces
  • 3 cups icing sugar, sifted to remove lumps
  • 1 1/2 teaspoons pure vanilla extract

In a stainless steel bowl placed over a saucepan of simmering water, put the chopped chocolate, cocoa, milk, and butter.  Stir until the chocolate has melted and the mixture is smooth.  Remove from heat and beat in, with a hand mixer or wire whisk, the confectioners sugar and vanilla extract.  If the frosting is lumpy, strain through a strainer to remove any lumps.  Cover and place the frosting in the refrigerator until it is firm (this may take a few hours).  Once the frosting is firm remove from refrigerator and place in your mixing bowl.  Beat the frosting for a minute or two or until it is nice and smooth and of spreading consistency.

Continue Reading

Triple Layer Chocolate Cake

It’s my Blogiversary!

Two years ago I decided it was time for me to finally join the blogging world and I started up Patent and the Pantry as a way of celebrating my love of food and photography. But, let’s face it, mostly because of my love of food.

Chocolate Cake slice II

And I got a nice little present just in time for it. I just had my 200,000th page view. I never thought it would grow this much and I am so grateful to all my readers who have bookmarked my blog, forwarded recipes along and faithfully kept up with all my updates even if half of them have involved lemon recipes. Thanks too must go to all my friends and family, which have supported me in this little project.

Any good celebration requires cake. Or at least as far as I’m concerned.

I found this recipe while getting my hair done a few weeks back. Flipping through Bon Appetit, I came across this Chocolate Mayonnaise Cake and immediately wrote it all down with an eye of making it sooner rather than later. Although Red Velvet Cake was fun for the first entry and first anniversary, I wanted to switch things up this time around. And you can never go wrong with chocolate.

I took half over to Andree’s house to share with her. She has been a big supporter of P&P since I launched, offering tips, advice and gently encouraging me to do less baking, more cooking. So, I thought she might like it if she tasted some of the fruits of my baking labours.

The other half went in to work for my “Civilized Sunday” girls who are kind enough to eat all the baking I can’t keep at the house out of fear I will consume it all. Then we all sit around the desk at work eating goodies and reading our horoscopes . . . . And then, yes, we do get down to serious work because otherwise how would we fill the Monday paper?

The cake went over well, but I’m not entirely convinced it was as good as it could be. My main concern here is that the recipe indicates to beat the cake until well blended after each of the four additions of flour. I’ve always been told to go gently when adding flour to a cake and mix (not beat) only until blended because you don’t want to develop the gluten. I wish I had followed my instincts; I’m convinced this cake would have been even more tender. Not that anyone was complaining . . . .

So, if I attempt this again, I’m going to go gentle on the batter. I’m sure it will only improve things.

However, all that said, it was still a good little cake for a special little day.

Prepared pans

Melted chocolate and cocoa

Chocolate Cake Batter

Chocolate beaters

Chips and chunks for chocolate icing

Melted chocolate for the icing

Two layers

All iced up

Sky high cake

Chocolate Cake slice I

Chocolate Cake

  • 2 ounces bittersweet chocolate (do not exceed 61% cacao), chopped
  • 2/3 cup unsweetened cocoa powder
  • 1 3/4 cups boiling water
  • 2 3/4 cups all purpose flour
  • 1 1/4 teaspoons baking soda
  • 1/4 teaspoon baking powder
  • 1 cup sugar
  • 1 cup (packed) dark brown sugar
  • 1 1/3 cups mayonnaise (do not use reduced-fat or fat-free)
  • 2 large eggs
  • 1 teaspoon vanilla extract

Chocolate Frosting

  • 10 ounces bittersweet chocolate (do not exceed 61% cacao), chopped
  • 1 1/2 cups (3 sticks) unsalted butter, room temperature
  • 3 cups powdered sugar
  • 1 tablespoon vanilla extract
Preheat oven to 350°F.

Butter and flour three 8″ diameter cake pans with 1 and 1/2-inch-high sides. Combine chopped chocolate and cocoa powder in medium metal bowl. (I used a plastic bowl and it appeared to work just as well.) Add 1 and 3/4 cups boiling water and whisk until chocolate is melted and mixture is smooth. Sift flour, baking soda, and baking powder into another medium bowl. Using electric mixer, beat both sugars and mayonnaise in large bowl until well blended, 2 to 3 minutes. Add eggs 1 at a time, beating until well blended after each addition. Beat in vanilla. Add flour mixture in 4 additions alternately with chocolate mixture in 3 additions, beating until blended after each addition and occasionally scraping down sides of bowl. (Again, I’d take it easy here and only mix until just blended instead of beating it.) Divide batter among prepared cake pans (about 2 1/3 cups for each).

Bake cakes until tester inserted into center comes out clean, 30 to 32 minutes. Cool cakes in pans on racks 20 minutes. Run small knife around sides of cakes to loosen. Carefully invert cakes onto racks and let cool completely.

For the frosting, place chopped chocolate in medium metal bowl; set bowl over saucepan of simmering water and stir until chocolate is melted and smooth. Carefully remove bowl from over water; let melted chocolate cool until lukewarm, stirring occasionally.

Using electric mixer, beat butter in large bowl until smooth and creamy. Sift powdered sugar over butter and beat until well blended, about 2 minutes. Beat in vanilla. Add melted chocolate and beat until well blended and smooth, occasionally scraping down sides of bowl.

Place 1 cake layer on platter. Spread 3/4 cup frosting over top of cake layer to edges. Top with second cake layer; spread 3/4 cup frosting over. Top with third cake layer. Spread remaining frosting decoratively over top and sides of cake.

Cut cake into wedges and serve.

Continue Reading

Applesauce Cake

The original copy of this recipe is a decrepit piece of scrap paper with a lone hole punch that has been reinforced. It is battered, splattered and stained.

It has been typed on an old typewriter using a cloth ribbon, a large series of Xs cancelling out the erroneous title of Nanaimo Bars, while the correct name of Applesauce Cake has been underlined in red.

And there, in my mum’s bubbled handwriting, are the adjustments she has made over the almost four decades she has carried this recipe around. It has travelled from one kitchen to the next, slowly yellowing with age, garnering new splotches as time has passed by.

The original recipe

But the flavour of this applesauce cake — warmly spiced, slightly sweet and oh-so-apple — remains a constant. A taste of childhood and home and family.

The original still resides in my mum’s kitchen, tucked away among her other recipes, typed by her or clipped from the newspaper, newer ones printed from the Internet or photocopied from magazines. But with the technology of a scanner and e-mail, I now have my own digital copy of the beloved Applesauce Cake recipe, complete with brown stain and wrinkled edges.

At its heart, it is a simple loaf cake flavoured with applesauce, nutmeg and cinnamon. But it is also a trigger for childhood memories: trying to wait for it to be cool enough to eat as it sat on the wire baking rack; running little fingers under the rack glaze that had drizzled off the edge of the cake; finally getting a slice and eating it from the bottom up so the last few bites were coated with icing.

Applesauce Cake I

The apple flavour comes through well, but it is the cinnamon and nutmeg that make the cake a little more extraordinary. I’m not a food snob by any stretch, but I will say that there is no comparison between pre-grated nutmeg in a spice jar and the taste imparted by the freshly grated stuff.

These days whole nutmegs are not that hard to find and are well worth the effort for the improved flavour alone. Not to mention, they are gorgeous when grated: cream-coloured with darker brown veins, like marble.

(A fine grater will work, but my family is devoted to the rasps scoop up from Lee Valley Tools, which make quick work of nutmeg and are ideal for zesting citrus, mincing garlic and making fluffy clouds out of Parmesan.)

While the original version made one loaf in a 9.5-by 5-inch pan (24-by 12-centimetres), it left the baker with leftover applesauce. In her wisdom, my mum amended the measurements–writing them neatly down the side of the paper– so it would use up a full can, rather than leaving her to try to deal with roughly a half-cup of the stuff. Plus, in her words, it means “more cake!”

This comes together very quickly–especially if you have the forethought to pull out the butter or margarine early. Patience must come, though, with the hour-long baking time and the dreaded cooling period, which was such a source of frustration as a kid.

My glazing skills apparently need work, but, while unattractive, it tasted just as good as when I ate it in my mum’s kitchen.

Applesauce Cake II

And yes, when I had finally waited long enough for it to be glazed and I could slice off the first piece, I ate it starting at the bottom so the last bite would be the perfect combination of cake and glaze. After all, some things never change.

Applesauce Cake III

Applesauce Cake IV

Applesauce Cake

  • ¾ cup (175 mL) margarine or butter, softened
  • 1½ cups (375 mL) sugar
  • 3 eggs
  • 2¾ cups (675 mL) sifted flour
  • 1½ tsp (7 mL) salt
  • 1½ tsp (7 mL) baking powder
  • ¾ tsp (3 mL) baking soda
  • ¾ tsp (3 mL) nutmeg
  • ¾ tsp (3 mL) cinnamon
  • 1 14 oz (398 mL) can sweetened applesauce

Preheat oven to 350°F (180°C).

Cream together margarine and sugar until light and fluffy. Blend in eggs. Sift together dry ingredients. Add to creamed mixture, alternating with applesauce, beating after each addition.

If you like, stir in ¾ cup (175 mL) chopped walnuts before pouring batter into loaf pans.

Pour into two prepared (sprayed or rubbed with a bit of butter or margarine) 8-by 4-in. (20-by 10-cm) loaf pans. Bake for 1 hour or until done. (Start checking at the 50-minute mark.)

Remove and let cool for about 10 minutes before removing from pans and putting on rack to cool completely.

Sugar Glaze:

Combine ½ cup (125 mL) sifted icing sugar with 1 tbsp. (15 mL) water. Pour over cake.

This story first appeared in the Real Life section in the Calgary Herald. For more delicious recipes, visit CalgaryHerald.com/life.

Continue Reading

Sour Cream Pumpkin Streusel Bundt Cake

I bought a bundt pan about a year ago and it’s been wasting away in my cupboard since then, unwashed, unused, unloved. The whole reason for buying it was because i wanted to start making bundt cakes (duh), but I constantly found myself getting pulled towards cupcakes (I love individual desserts) and layer cakes (so pretty).

Bundt Pan

But when I saw a recipe for a Sour Cream Pumpkin Streusel Bundt Cake, I was smitten. Pumpkin? I love pumpkin! Streusel? Yes, please! And a chance to finally crack open my poor bundt pan? What could be better?

The first thing I noticed was that it called for a 12-cup bundt pan. Um, they have more than one size? I felt a bit silly, but I really wanted to avoid some big mistake halfway in, so I poured 12 individual cups of water into the clean pan just to make sure I really did own a 12-cup pan. (I do; And I now know that without a doubt.)

I thought that would be the only potential disaster and I felt satisfied knowing that I had nipped that little thing in the bud.
I shouldn’t have tempted fate.

I really hate kitchen disasters. I know I have a small perfectionism problem and it’s really stupid, but I like it when things come out they way they’re supposed to. Or, in this case, when they actually come out. As in, physically out of the pan.
But I’ll get to that in a second.

For me, it’s not a pumpkin recipe unless there’s nutmeg. Yes, cinnamon and allspice are yummy, but nutmeg and pumpkin are an inseparable pairing, as far as I’m concerned. (OK, maybe not for savoury recipes.) So, I made a couple of adjustments to the original recipe, which didn’t call for this lovely warm spice.

Also, this makes a serious amount of batter. When I had finished it and was about to put it in the bundt pan, I wasn’t actually convinced it was all going to fit. It did. Thankfully.

To the brim

So, the recipe makes it clear not to let any of the streusel layer touch the edges of the pan. I made an effort, but, well, some of the brown sugar-butter mixture may have made its way up against the tin. Later, when only 3/4 of the cake came out of the pan, I wondered if part of the reason was because the streusel layer weakened the cake at the edges. Making it easy for it to separate out when gravity took over as I upended it onto a rack to cool. Either that or I had not prepared my pan well enough. I had sprayed liberally with cooking spray, but have had problems with it in the past. As in, other cakes have not always made their entire way out of the pan either. This isn’t usually a problem because the bottom of a layer cake or loaf cake stays on the bottom of the plate or whatever and no one ever knows that you had a bit of a problem. The issue with a bundt cake is that the bottom of the cake is actually the top part, which you present, of course.

Whatever the reason, the damn thing didn’t turn out (in both definitions) properly. I was too proud to photograph the crater in the cake where the nicely rounded bundt edges should have been. Though, in hindsight, it may have been good therapy just to show that not everything works out all the time and that I can be OK with that.

I’m not even going to get into the fact that I am inept when it comes to glaze. But it sure was not, in the end, a very attractive cake.

Nevertheless, it was damn tasty! And that glaze? Spicing it up with a little nutmeg, cinnamon and allspice made a huge difference.

In all, a dreamy, autumnal cake. Even if it was ugly as all get out.

Sour cream pumpkin batter

Streusel layer

Full bundt pan

Spiced Icing Sugar

Spiced glaze

Sour Cream Pumpkin Bundt Cake with Streusel

Sour Cream Pumpkin Streusel Bundt Cake
adapted from Mommy? I’m Hungry (go here for a photo of what the thing should actually look like. Sigh.)

Streusel:
1/2 cup packed brown sugar
1 teaspoon ground cinnamon
1/4 teaspoon ground allspice
1/4 teaspoon nutmeg
2 teaspoons butter, cold

Cake:
3 cups all-purpose flour
1 tablespoon ground cinnamon
1/4 teaspoon nutmeg
2 teaspoons baking soda
1 teaspoon salt
2 cups granulated sugar
1 cup butter, softened
4 large eggs
1 cup canned pumpkin
1 cup sour cream
2 teaspoons vanilla extract

Glaze:
1 1/2 cups sifted icing sugar
dash cinnamon
dash allspice
dash nutmeg
splash of milk

Preheat oven to 350. Butter and flour (or spray, though we know how well that turned out for me) a 12-cup bundt pan.
For the streusel, combine the sugar and spices in a small bowl. Cut in butter with pastry blender or two knives until the mixture is crumbly. Set aside

For the cake, mix together flour, spices, baking soda and salt in a bowl and set aside. Beat together sugar and butter until light and fluffy. Add eggs, one at a time, beating each thoroughly after each is added. Add pumpkin, sour cream and vanilla. Mix well, Gradually beat in flour mixture.

To assemble, spoon half of the batter into the bundt pan. Sprinkle in streusel, not letting it touch the sides of the pan. Top with remaining batter, making sure the batter layer touches the edges of the pan.

Bake for 55 to 60 minutes or until a toothpick (this is a tall cake, I used a wooden skewer) inserted into the middle comes out clean. Cool for 30 minutes in pan on wire rack, then invert onto rack to cool completely.

When cool, combine icing sugar with spices and splash of milk to make glaze. Stir thoroughly until well mixed and drizzle over cake.
Continue Reading

Big Crumb Rhubarb Coffee Cake

Holy crap, how is summer halfway over already?

I have, like, eight recipes for rhubarb stuff on my delicious (warning: about 80 lemon-related recipes ahead) and rhubarb season is already starting to slip away. Gah.

Rhubarb

At least I got this one out of the way.

Sadly, though, procrastination got the better of me and I’m only posting it now . . . about five weeks after making it. This is bad for several reasons.

1) Rhubarb season is slipping away quickly.

2) Now I am craving a piece of this cake and there is none to be had.

OK. Two reasons.

I love crumb cakes. And I love rhubarb. So, really, there was no debate on whether or not I’d be giving this recipe a shot.

Sadly, my crumb topping didn’t turn out quite as nicely. In fact, I had to kind of manipulate the crumb topping into actual “crumbs” (I suspect I needed a little more butter), but it was still delicious. A nice layer of sweetened rhubarb slices through the middle was a good contrast to the cake and sweetened crumble topping.

Normally, I’d meditate more on the failures of this attempt, but, let’s face it, it was cake, with rhubarb, topped in a mixture of sugar and butter. Even if the crumb topping was kind of crummy, it was still going to be fantastic.

Update: I just went back to Smitten Kitchen’s recipe and found that I’m not the only one who had problems with the crumb topping. Apparently, it’s all about the order in which you mix the crumb ingredients… (Instructions below the recipe will outline the correct way.) Yay! Now I’m ready to try this again and hope for much better results.

Sliced rhubarb

Cake pre-crumb

Big Crumb Rhubarb Coffee Cake

This is courtesy of Smitten Kitchen, which she apparently adapted from the New York Times.

‘Big Crumb’ Coffeecake with Rhubarb

Rhubarb filling

  • 1/2 pound rhubarb, trimmed
  • 1/4 cup sugar
  • 2 teaspoons cornstarch
  • 1/2 teaspoon ground ginger

Crumb topping

  • 1/3 cup dark brown sugar
  • 1/3 cup granulated sugar
  • 1 teaspoon ground cinnamon
  • 1/2 teaspoon ground ginger
  • 1/8 teaspoon salt
  • 1/2 cup butter, melted
  • 1 3/4 cups all-purpose flour

Cake

  • 1/3 cup sour cream
  • 1 large egg
  • 1 large egg yolk
  • 2 teaspoons vanilla extract
  • 1 cup all-purpose flour
  • 1/2 cup sugar
  • 1/2 teaspoon baking soda
  • 1/2 teaspoon baking powder
  • 1/4 teaspoon salt
  • 6 tablespoons softened butter, cut into 8 pieces.

Preheat oven to 325. Butter an 8-inch-square baking pan.

Slice the rhubarb into 1/2″ thick pieces, then toss with sugar, ginger and cornstarch.

In a large bowl, whisk together the sugars, spices and salt into melted butter until smooth. THEN, add flour with spatula or wooden spoon. It (should) will look and feel like a solid dough. Set aside.

Stir together sour cream, egg, yolk and vanilla. Using a mixer, stir together flour, sugar, baking soda, baking powder and salt. Mix in butter and a spoonful of the sour cream mixture until flour is moistened. Increase speed for 30 seconds. Add the rest of the sour cream mixture in two batches, beating for 20 seconds each time. Scoop out about 1/2 cup of the batter and set aside. Put the rest of the batter into the prepared pan.

Spoon rhubarb mix over the batter, then top with dollops of the 1/2 cup of batter set aside.

Using your fingers, break topping mixture into big crumbs — 1/2″ to 3/4″.  Sprinkle over cake.

Bake for between 45 and 55 minutes — until a toothpick inserted in the centre comes out clean.

Continue Reading

Lemon Rosemary Olive Oil Cake

OK.

It’s official.

I need an intervention.

My love of rosemary and lemon have reached new levels of ridiculousness.

Cake slice

And here’s how I know that.

As some of you may know, I write for the Calgary Herald’s Real Life section on occasion. I like to pitch the topic in advance, just in case it’s going to clash with any of the other upcoming articles the editor may have planned.

Me: Here’s what I’m thinking: Lemon Rosemary Olive Oil Cake

(Pause)

Her: Lemon?

Me: (confused) …Yes…?

Her: Wasn’t your last thing on lemon? And, um, the one before that?

Me: Okey-dokey. I’ll figure something out. Maybe I should do a boozy recipe….

Her: Good idea.

It was only when I got back to my desk and looked up the drink recipe I had added to my to-do list that I realized I may have a problem: Vodka Rosemary Lemonade Fizz.

Damn you, lemon, why do I love you so? And, uh, rosemary too.

Lemon and Rosemary

But, just because I couldn’t write it for the Herald didn’t mean this bad boy (and, at some point down the road, the vodka recipe too) wasn’t going to get made. After all, one can only deny their love for lemon desserts for so long. And, let’s face it, it was raining and snowing and sleeting out at the time, so what was a girl to do? Bake.

This is adapted slightly from Julie’s recipe (over at Dinner with Julie). Her original recipe calls for a finely chopped or grated pear. I omitted it this time around, but will be tempted to throw one in next time.

Olive Oil

Studded with rosemary

Golden cake

Lemon Rosemary Olive Oil Cake

  • 4 large eggs
  • 3/4 cup sugar
  • grated zest and juice of a lemon
  • 1/2 cup regular or extra virgin olive oil or canola oil
  • 1 1/2 cups all-purpose flour
  • 2 tsp. baking power
  • 1/4 tsp. salt
  • 2 sprigs of rosemary, leaves stripped off and chopped
  • a couple more sprigs of rosemary to decorate the top (optional)

Preheat oven to 350. In large bowl, beat eggs for about a minute until frothy. Add sugar and beat for a few minutes until mixture is thick and pale. Add lemon zest, juice and olive oil and beat again.

Combine flour, baking powder, rosemary and salt in another bowl, then add to egg mixture. Stir by hand until just combined.

Pour into prepared loaf pan (sprayed or lined with parchment). Lay decorative rosemary on top. Bake for 45 minutes, until golden. (Mine was done in a little less, so you may want to check earlier if your oven runs a bit hot.

Continue Reading

Salt-kissed Buttermilk Cake

One of the more baffling mysteries of grocery shopping is how certain ingredients disappear into the ether exactly when I want to cook with them.

Baked cake closer

For weeks and weeks there were punnets of raspberries in the produce section. Velvety little rubies in their clamshell packages. So, of course, I just assumed there would be some there when I decided I actually needed to buy some to make Heidi Swanson’s Salt-kissed Buttermilk Cake. And, of course, there wasn’t.

Damn.

I waited another couple of days in the hope they would miraculously return. And then I gave up and figured blackberries would work just as well.

And they did.

Blackberries

It should come as no surprise I was attracted to the very idea of this cake. Sweet and salty? Yes, please! I love it when there is a tinge of saltiness to my desserts, in the same way that I love a slight sweet to my savoury dishes. I mean, look at the rosemary cashews, the rosemary-pine nut shortbread…. (Wow, apparently I have a serious thing for rosemary.)

Sugar

Sea salt

I bought my little cannister of sea salt during a trip to France. I am led to believe it is gathered from the Camargue — a river delta just off the Mediterranean and near the Canal du Midi, which I was barging along at the time I bought the salt. Of course, you can get it here (I just saw it in Safeway the other day), but I like that my little bit of salt traveled around with me during my last week in France. Pulling it from the cupboard reminds me of lazy afternoons on the barge, a glass of rose in hand following lunch and the joy that can come from being away.

As a sea salt, it has a definitive burst of saltiness on the tongue. The slightly larger flake tends not to melt away into food. So, it makes a good counterpart to the large grains of sugar that I sprinkled on top of the cake before putting it in to bake.

I’ve only made some very minor adjustments to the original recipe, mostly around the fact that I just don’t have natural cane sugar lying around the house and, therefore, took her suggestion to use brown sugar instead. While she calls for raspberries, I’m sure almost any berry would do. I quite liked the blackberries actually, but will give raspberries a go the next time I come across them. (Actually, saw golden ones at the farmer’s market on the weekend. Tempted. Very tempted.)

Eggs and buttermilk

Before the oven

Before the oven II

Baked cake

Baked cake overhead

Slice of cake

Heidi says this serves 12. Um, OK. Only if people like dainty slices….

Slice of Cake II

Salt-kissed Buttermilk Cake

  • 2 1/2 cups whole wheat pastry flour
  • 1 tablespoon baking powder
  • 1/2 cup brown sugar
  • 1/2 teaspoon salt
  • 2 eggs
  • 1 cup buttermilk
  • 1/4 cup butter, melted and cooled a bit
  • zest of 2 lemons
  • 1 cup of raspberries (blackberries, in my case. And I probably used more than a cup.)
  • 3 tablespoons large grain sugar
  • 1 teaspoon large grain salt (Sea salt works well here.)

Preheat oven to 400. Grease and flour (or line bottom with parchment paper) one 11″ tart pan. (I used a pie dish that I just buttered. It worked fine.)

Combine flour, baking powder, sugar and salt in a large bowl. In a separate smaller bowl whisk eggs and buttermilk, then melted butter and zest. Pour the buttermilk mixture over the flour mixture and stir until just combined. Don’t overmix.

Spoon batter into prepared pan, pushing out to edges. Drop berries across the top. (I squished them in a bit too.) Sprinkle with large grain sugar and then salt. Bake for about 20 to 25 minutes until cake is set and slightly golden.

Continue Reading

Red Velvet Cake

It was a year ago that I embarked on a very special relationship. It has, at times, been hard work. And, other times, very rewarding.

Yes, that’s right. It’s my first blogiversary. Yay!

I felt the best way to celebrate was to take another stab at a Red Velvet Cake. The first attempt was, well, less than stellar. And my fascination with this southern U.S. specialty hasn’t waned in the intervening months. Plus, there is something so appealing about ritual, no?

Red Velvet Slice III

There are about 800 million different red velvet cake recipes on the Internet.* (*Slight exaggeration possible.) And I have a collection of about seven that I’m slowly working my way through. One day I will find the perfect recipe. This one is certainly a step closer.

Take two was far and away better than my first attempt, though, troublingly, not perfect. Friends disagreed. Of course, when you layer that much cream cheese icing on anything it’s going to taste good.

Red Velvet Slice IV

Even though I created a paste using the liquid food colouring and cocoa, I still got faint chocolate-coloured swirls in the batter. I suspect I was overly cautious when it came to mixing the paste in. But this time was definitely more red than the hot pink version from last year. Still, not quite the deep red I was looking for.

I also, decadently, decided to go with a triple layer cake instead of the usual double. (Anything to acquire new baking equipment; I am the worst when it comes to wanting new kitchen things. Single handedly fighting through the recession with baked goods and the stuff in which they are baked!)

And I ate the first piece with a lovely antique silver fork I bought a few days earlier during an antiquing trip with my friend Sherri Zickefoose to Nanton — a little town about an hour south of Calgary that has a handful of very fine shops. Because, when it is a celebration, even if you are alone, it should be done right.

Red Velvet Slice II

Red Velvet Slice

The next day I took the rest of the cake into work. So, on a Sunday morning, three of us sat around listening to the police scanner eating cake with plastic forks at our desks, hours before noon. A rather decadent weekend shift, to be sure.

Lining the cake pans

Cocoa and colouring

Cocoa and colouring

Empty bottle

Batter stained

Cake batter

Dye spot

Icing dollop

Icing the layers

All iced up

Red Velvet Cake

  • 2 1/2 cups sifted cake flour
  • 1 teaspoon baking powder
  • 1 teaspoon salt
  • 2 tablespoons unsweetened cocoa
  • 2 oz. red food colouring (I used two bottles, which I think were 1 oz. each)
  • 1/2 cup unsalted butter, room temperature
  • 1 1/2 cups sugar
  • 2 eggs, room temperature
  • 1 teaspoon vanilla extract
  • 1 cup buttermilk, room temperature
  • 1 teaspoon white vinegar
  • 1 teaspoon baking soda

Preheat oven to 350.

Butter and flour three 8″ cake pans. (Or, butter and line base with parchment.) Sift together cake flour, baking powder and salt in bowl, then set aside. In a small bowl, mix food colouring and cocoa powder until there are no lumps. Set aside.

In a large bowl, using a mixer, beat butter and sugar until light and fluffy. Beat in eggs one at a time, then add vanilla and cocoa-colouring mix. Add one-third of the flour mixture to the batter, beat well, then add half of the buttermilk. Beat in another third of the flour, then the rest of the buttermilk. End with the last third of the flour mix. Beat until just combined, making sure to scrape down the sides.

In a small bowl, mix vinegar and baking soda, then add straight to cake batter and stir well. Quickly divide batter between three pans and put in oven. Bake for 25 to 30 minutes. Cakes are baked when a toothpick inserted in the center comes out clean.

Let cakes cool in their pans on a wire rack for 10 minutes, then remove and let them cool completely. Frost with cream cheese icing.

Cream Cheese Frosting

  • 16 oz. cream cheese (2 packages), softened
  • 1/2 cup unsalted butter, room temperature
  • 1 teaspoon vanilla extract
  • 2 1/2 cups icing sugar, sifted
  • pinch of salt

Using a mixer, blend cream cheese and butter until smooth. Blend in salt, vanilla and then powdered sugar. Beat until light and fluffy and then ice cake.

Continue Reading

Chocolate Cake

So, I know I’ve mentioned before that I don’t drink coffee. I couldn’t brew a pot if my life depended on it and, for that matter, I don’t even have the supplies to make an attempt. So, noting that this Chocolate Cake recipe — like many others involving chocolate — called for brewed coffee, I knew I was going to have to resort to other measures. Yup, Starbucks. But, since I don’t drink coffee, I had no idea what to order.

Me: Um, can I get a tall, uh, um, Verona…?

Barista guy: Sure. (Starts to pour coffee.)

Me: Um, is that a dark roast? (It occurs to me that might be too much of a coffee flavour. I think? Isn’t that what dark roast means? Jesus, I need a coffee primer.)

Barista guy: Yup. (pause) Did you want something else?

Me: Uhhhhhh, yes…..? A medium roast…..?

Barista guy: (shrugs and dumps out dark roast, pours new one.)

Me: Um, I’m a coffee neophyte. (Wishes had stopped talking.)

Then, since the coffee had to be hot, I had to drive home immediately and start making the cake. Yes, I’m a baking nerd.

So, I found this recipe on the Cook’s Illustrated web site. I’ve always loved this magazine and now I love their site (thanks to my friend Julie for the birthday subscription!). The videos are especially great because sometimes you really do need to see what they are talking about. But it does crack me up that all the clips are about three minutes long. Anything looks easy when a) professional chefs do it b) they do it in three minutes.

But this recipe, actually is easy.

The other thing I liked about this recipe was that it isn’t unheard of to have all of these ingredients on hand. (Except, for me, coffee, of course.) And it bakes super quickly and it doesn’t really need frosting, so this would be easy to whip up any time.

This cake is really fantastic on it’s own, so I don’t suggest icing it. But I do feel that a little dollop of sweetened whipped cream is the perfect addition. It, possibly ironically, cuts some of the richness but without taking away from the chocolate-y goodness of the cake.

Chopped Chocolate

Chocolate and cocoa

Chocolate, egg and mayonnaise

Whisked together

The batter

What was left over

Chocolate cake topped with whipped cream

Easy Chocolate Cake

  • 1 1/2 cups unbleached all-purpose flour
  • 1 cup sugar
  • 1/2 teaspoon baking soda
  • 1/4 teaspoon table salt
  • 1/2 cup Dutch-processed cocoa powder (I used Fry’s)
  • 2 ounces bittersweet chocolate , chopped fine
  • 1 cup fresh black coffee, hot
  • 2/3 cup mayonnaise
  • 1 large egg
  • 2 teaspoons vanilla extract
  • whipped cream — for serving, optional

Preheat oven to 350. Spray an 8″-square baking dish with nonstick spray.

Whisk flour, sugar, baking soda and salt in a large bowl. In separate bowl, mix cocoa and chocolate, then pour hot coffee over and whisk until smooth. Set aside to cool slightly. Whisk in mayonnaise, egg and vanilla. Add to flour mixture and stir until combined. Pour into baking dish, smoothing top before putting in oven. Bake until toothpick or skewer inserted comes out with a few crumbs attached, about 30 to 35 minutes. Let cool in pan on wire rack for one to two hours. Serve dusted with icing sugar or a little lightly sweetened whipping cream.

Continue Reading

Brown Butter Plum Cake

It’s not often that I see a recipe, print it off and then make it immediately. But when I saw Julie’s post on what she has called Browned Butter Bliss, I was intrigued.

Not only had she raved about this baked dessert, but it sounded delicious and ridiculously easy. If that doesn’t tempt someone (namely me) to try it out, what will?

Brown Butter Plum Cake

Plus, making such a fantastic looking dessert also meant I would have to purchase a pie plate. Any excuse to buy new kitchen goodies! Of course, now I might actually have to learn how to make pie.

A cake/cobbler type of dessert, its flavour is heightened by browning the butter before making the dough, adding a nice nuttiness. But, other than the added step of watching and swirling the melting butter to make sure that it doesn’t go from browned loveliness to black, this recipe is a cinch.

I ate a piece as soon as it had cooled enough for, you know, scientific, recipe-testing purposes. And then I ate another piece a few hours later when it was well and truly cooled to room temperature for, you know, comparison purposes. And I have to say that while Julie seemed to prefer it fresh from the oven, I had different feelings. Once it had cooled, the purply plummy juices had soaked more into the cake, which had solidified slightly.

Plums

Plums and spices

Ready to bake

Plum Cake and Ice Cream

This recipe is adapted from Julie (see her post here), which in turn appears to be adapted from elsewhere. That’s one of the things I love about cooking: it’s about taking something and making it your own.

Brown Butter Plum Cake

  • 8 or so plums, thickly sliced (or try peaches, apples, apricots)
  • 3/4 cup + 3 Tbsp. sugar, divided
  • 1/2 tsp. cinnamon
  • dash nutmeg
  • 1/2 cup butter
  • 2 large eggs
  • 1 cup all-purpose flour

Preheat the oven to 350F and butter a pie plate.

Toss the fruit in a bowl with about 2 tbsp. of the sugar, the cinnamon and nutmeg. Spread into the plate.

Melt the butter in a saucepan or small frying pan and keep cooking it for about five minutes until it turns golden. (Swirl the pot occasionally and watch it carefully; it goes quickly from brown to black.)

Pour the butter into a bowl and add the 3/4 cup of sugar, then the eggs and flour. Pour over the fruit and sprinkle with one tablespoon of sugar.

Bake for 40 to 45 minutes until golden and the juices are coming up around the edges.

Delicious with vanilla ice cream.

Continue Reading

Chocolate Cupcakes with Peanut Butter Icing

Most smart bakers know to make sure everything is ready to go in advance of getting started. I am, apparently, not a smart baker.

Chocolate cupcake with peanut butter icing

We were celebrating a (much belated) birthday for a good friend. Some wiggling around with the schedule had the celebration moved from brunch to Sunday night dinner and I volunteered (most willingly — any excuse to bake) to bring the birthday dessert. All week I Googled for moist, rich chocolate cake recipes and then sat there trying to decide which would be better: mayo-based or buttermilk; white icing or chocolate; cupcakes or layer cake. Finally, when I shared my dilemma with a friend, she queried why I wasn’t using a Barefoot Contessa recipe. Indeed! Why wasn’t I?

She has two recipes in her books and one online at Food & Wine. Since I already bought the books, I figured I may as well try one of those and, at last, settled on the Chocolate Cupcakes with Peanut Butter Icing. My love of this combination knows no bounds, so I’m kind of surprised I didn’t think of this recipe immediately.

Initially, it was all going very well. I ran out to the store to buy sour cream, buttermilk and coffee, along with whipping cream for the icing, then returned to begin. There was butter to soften and dry ingredients to sift (and, boy did I sift those. I learned my lesson from the Red Velvet cake when not sifting the cocoa with the flour led to brown swirls through the cake.) and, of course, photos to take to document my progress.

Cakes still make me a bit nervous. I’m worried I’ll overmix and make a tough cake and that is not eased by the fact most recipes have this whole “mix in thirds” step. What if it’s not exactly thirds? Also, I think a lot of recipes these days assume people have stand mixers, which makes this step (among others) much easier, then when trying to hold the mixer while pouring in a third of the dry mixture and not end up covered in cocoa and flour dust.

Butter and sugar and eggs, oh my!

The batter trifecta

Chocolate cupcake better

Chocolate cupcakes ready to bake.

But, for the most part, it all went really well. The batter seemed incredibly light at the end (Okay, and, yes, it did taste good.) and I was all ready to put the batter into the tins. I pulled out my cupcake liners and found I only had five left. Gah! Thankfully, there’s a grocery store a little over a block away, so I turned off the oven and bolted down there where I bought some liners and then raced back. I was really worried that extra time would ruin the batter somehow.

In the end, it was only a 15-minute delay and I don’t think it affected the cupcakes. They baked up perfectly, though for less time than the recipe suggested owing, I suspect, to the fact that my muffin tins are more shallow and took less batter to fill. (I used a 1/8 cup scoop, which worked perfectly. No spillage.)

Chocolate Cupcakes

Solo chocolate cupcake

The cupcakes are not overly sweet, which was a nice counterpoint to the rich peanut butter icing.

Peanut butter icing

Row of cupcakes

This recipe is from Barefoot Contessa at Home.

Chocolate Cupcakes with Peanut Butter Icing

  • 12 tbsp. unsalted butter, at room temperature (that’s 3/4 cup for those of us that don’t use sticks of butter)
  • 2/3 cup granulated sugar
  • 2/3 cup light brown sugar, packed
  • 2 extra-large eggs, at room temperature
  • 2 tsp. pure vanilla extract
  • 1 cup buttermilk, shaken, at room temperature
  • 1/2 cup sour cream, at room temperature
  • 2 tbsp. brewed coffee (Full disclosure: I don’t drink coffee. I made a cup of instant and it tasted awful to me, so I only threw in less than a tablespoon. I suspect good coffee may be a great addition.)
  • 1 3/4 cups all-purpose flour
  • 1 cup good cocoa powder
  • 1 1/2 tsp. baking soda
  • 1/2 tsp. kosher salt

Preheat oven to 350 degrees. Line cupcake pans with paper liners.

In the bowl of an electric mixer fitted with a paddle attachment, cream the butter and two sugars on high speed until light and fluffy, approximately five minutes. (For those of us without a stand mixer, a handheld is just fine. It just makes it a bit trickier when mixing in the wet and dry ingredients.) Lower the speed to medium, add the eggs one at a time, then add the vanilla and mix well. In a separate bowl, whisk together the buttermilk, sour cream and coffee. In another bowl, sift together the flour, cocoa, baking soda and salt. On low speed, add the buttermilk mixture and the flour mixture alternately in thirds to the mixer bowl, beginning with the buttermilk mixture and ending with the flour mixture. Mix only until blended. Fold the batter with a rubber spatula to be sure it’s completely blended.

Divide the batter among the cupcake pans (one rounded standard ice cream scoop per cup is the right amount). Bake in the middle of the oven for 20 to 25 minutes, until a toothpick comes out clean. Cool for 10 minutes, remove from the pans, and allow to cool completely before frosting.

Frost each cupcake with peanut butter icing and sprinkle with chopped peanuts, if desired.

Kathleen’s Peanut Butter Icing

  • 1 cup confectioners’ sugar
  • 1 cup creamy peanut butter
  • 5 tbsp. unsalted butter, at room temperature
  • 3/4 tsp. pure vanilla extract
  • 1/4 tsp. kosher salt
  • 1/3 cup heavy cream (I used whipping cream)

Place the confectioners’ sugar, peanut butter, butter, vanilla and salt in the bowl of an electric mixer fitted with a paddle attachment. Mix on medium-low speed until creamy, scraping down the bowl with a rubber spatula as you work. Add the cream and beat on high speed until the mixture is light and smooth.

Continue Reading

Southern Comfort

Red Velvet Cake is a southern U.S. tradition that is so popular it can even be found in the cake mix aisle. I can’t date when my obsession with this cake began, though I think it first came to my attention while watching Steel Magnolias where the groom’s cake was shaped like an armadillo and it looked like it was bleeding when someone cut into it.

And I’m also not sure what the reason behind this obsession is. Must be something about the virginal white icing hiding the slutty red interior and all its metaphors.

Essentially, it’s a chocolate layer cake infused with red food colouring that turns the cake into a shade of crimson that plays against the white, cream cheese icing.

Red Velvet Cake

But I had no idea what I was getting myself into when I decided to take this on for a dinner party Sunday night.

1) It’s the first cake I’ve ever baked that did not involve me opening a box and praising Betty Crocker.

2) It involved at least 30 minutes worth of research on dutch processed cocoa vs. natural cocoa. (Nutshell: dutch processed is treated to neutralize its acidity, so has to be used in recipes that call for baking powder as it may not react with baking soda.)

3) It also involved a further 30 minutes of research to figure out whether the cocoa I bought for this (Fry’s) was or was not dutch processed, since it was not indicated anywhere on the can. For the record, it is.

On the upside, attempting this cake also gave me an excuse to buy some new toys for my kitchen: an offset spatula and two new cake pans.

I was initially hesitant to make this cake, having never baked one that didn’t come out of a box. This hesitation was amplified after I went out on a blind date with a man who considered himself quite a baker. While the meringues he brought to munch on over coffee were good, I thought it was a bit presumptuous when he tried to talk me out of my red velvet plan.

“You’ve never made a cake?”

And then: “You should make brownies. There’s a great recipe by Alton Brown, just cut back the sugar to half a cup.”

Brownies, he said, were good and easy and hard to screw up.

“You don’t want to make your friends your guinea pigs,” he added.

That was pretty much the end of the date. There won’t be a second one.

And, after that, I was much more determined to master the Red Velvet.

I won’t call it a resounding success — as kind as my friends are for saying it was delicious — but it was a worthy first effort. And, frankly, anything coated in that much cream cheese frosting can’t be all bad. I learned a few things, including the need to sift all the dry ingredients together or suffer the consequences. In this case, that meant cocoa swirls throughout the not-quite-flaming red layers; and that a crumb coat is definitely the way to go when dealing with such an intensely coloured batter.

The Ingredients


Red Velvet Cake with Cream Cheese Icing

  • 2 1/2 cups sifted cake flour
  • 1 tsp. baking powder
  • 1/2 tsp. salt
  • 2 tbsp. Dutch-processed cocoa powder
  • 1/2 cups unsalted butter, room temperature
  • 1 1/2 cups white sugar
  • 2 large eggs
  • 1 tsp. vanilla extract
  • 1 cup buttermilk
  • 2 tbsp. liquid food colouring
  • 1 tsp. white distilled vinegar
  • 1 tsp. baking soda

Preheat oven to 350 degrees F. Butter two 9″ round cake pans and line the bottom with parchment paper

Sift together flour, baking powder, salt and cocoa powder. (And ensure the cocoa is evenly distributed.)

Beat butter until soft, then add sugar and beat until light and fluffy. Add the eggs one at a time, beating well each time. Add vanilla.

In a measuring cup whisk the buttermilk and red food colouring. (I used food colour gels here, so added two tbsp. of water and mixed in the gel, adding more and more until the desired colour.)

Alternately add the flour mixture and the buttermilk mixture to the butter and eggs, ending on the flour.

Mix in small cup the vinegar and baking soda. Watch it fizz, then add to the batter.

Pour the batter into the two pans and bake for 25 – 30 minutes. Let cool in wire rack in the pans for 10 minutes, then out of the pans until cool.

  • 8 oz. cream cheese, room temperature
  • 1/2 cup butter, room temperature
  • 3 cups icing sugar, sifted
  • 1 tsp. pure vanilla extract

Beat butter and cream cheese until light and fluffy. Add sugar and vanilla. (Prepare to be coated in icing sugar cloud.) Beat to combine.

Continue Reading