Guinness Brownies

I first heard about Guinness Brownies through another blog, but forgot to bookmark it and couldn’t remember where I had seen it. I had sent the link to a friend who’s a fan of beer-based baking, but then thought it would be nice to just make them for her instead. A quick Google search brought up myriad other blog posts, including the one I had seen originally, as well as some other variations. After cruising through a bunch, I realized most of them were riffs on one standard recipe — one I liked much more than the recipe I had first come across.

Guinness Brownies II

Now, normally, I like to leave recipes alone for the first attempt, figuring I need to give it a chance to wow me before I make changes. But most of the versions I found called for white chocolate, which I loathe. And I knew it would cook out and be undetectable in the final brownie, but I still wasn’t keen on buying white chocolate just for this recipe. One other blogger had subbed in milk chocolate chips, which seemed like a good idea to me. I think the object here is chocolate-y sweetness and milk chocolate can certainly achieve that, with the bonus of being an ingredient I can use in other things.

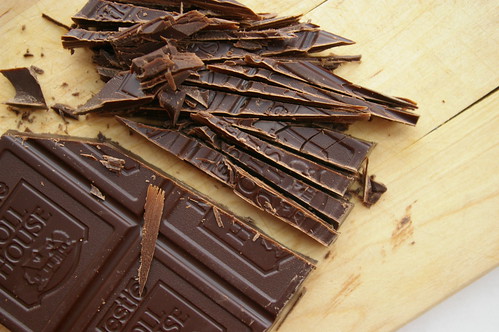
Random rant: why do they sell baking chocolate squares in packages of 6 ounces? Most of the recipes I’ve come across call for 8 ounces, which means buying two packages and then letting the remaining four ounces sitting around in the cupboard (where, yes, I am likely to forget I have them and then go buy more. I really need a more organized baking cupboard).

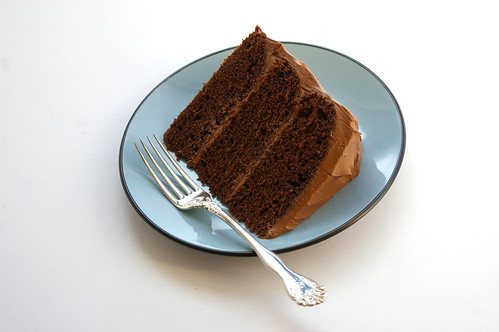
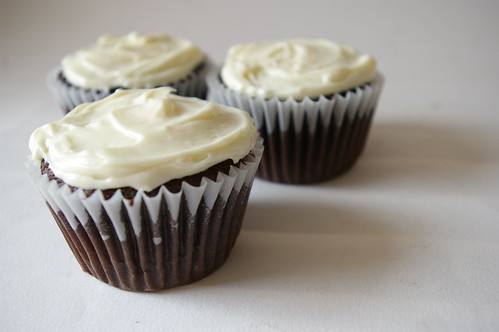
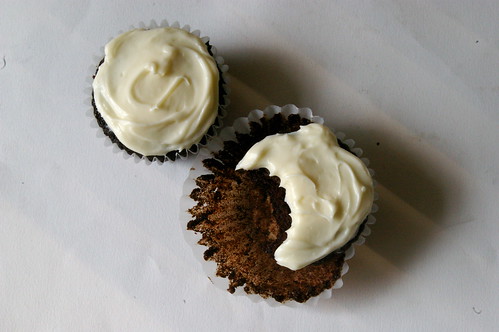
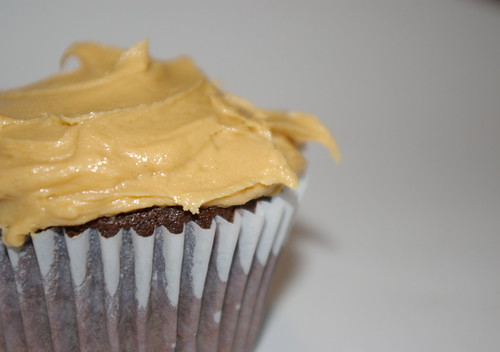
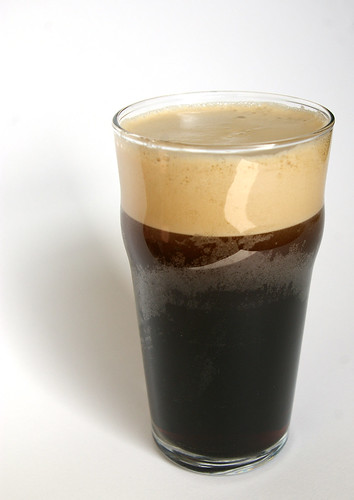
Cracking a beer at 11 a.m. felt a bit funny, though it’s not my first time. (Those Guinness Cupcakes are also an excellent recipe, if you’re looking for something else to do with the dark Irish beer.) And I was a bit nervous about cooking it down. I’m not a huge beer fan and was afraid reducing it and intensifying the flavour would make it stand out far too much in the final brownies. Plus, it did seem a bit weird to cook beer.

But what do I know?

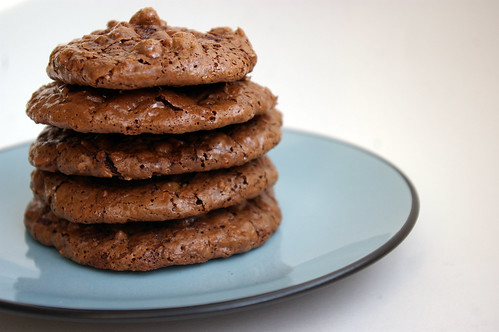
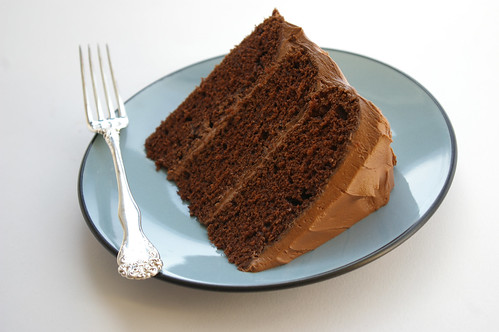
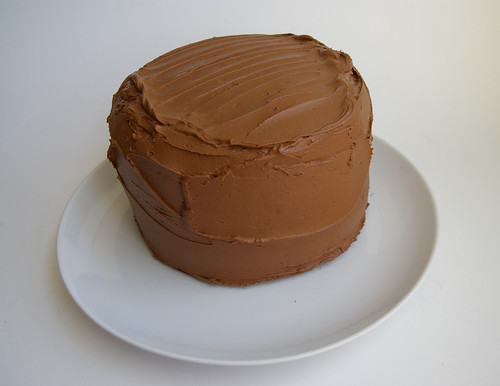
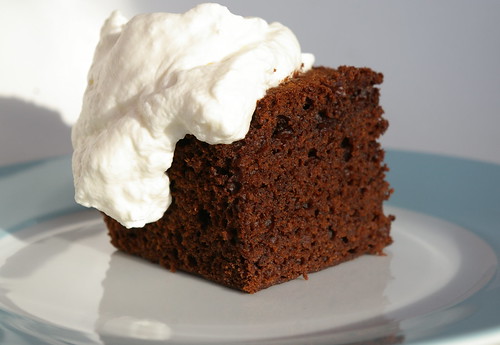
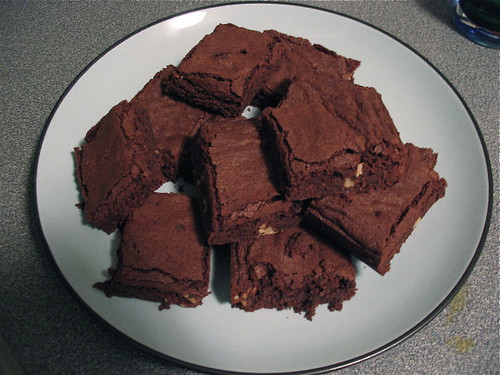
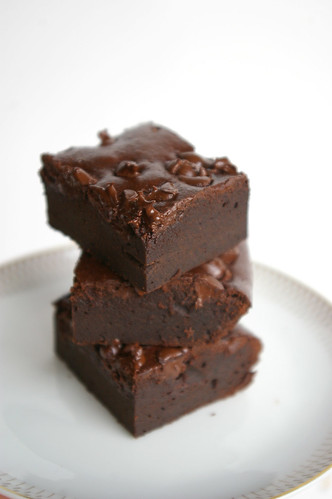
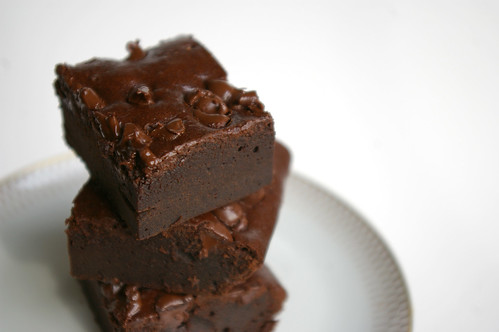
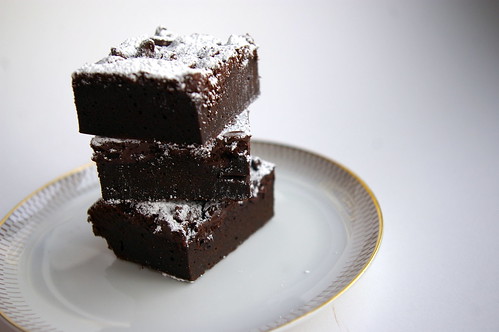
Not much apparently because these were fantastic. They were rich and dense, flavourful but not overly beer-y. A definite keeper.

Guinness

Guinness Brownie Batter

All Baked Up

Guinness Brownies I

Guinness Brownies III

Guinness Brownies

This is a hybrid recipe from a couple of sources, but I have to give Bitchin’ Camero a shout out because that is a seriously awesome blog name and Blondie’s Cakes for the smart idea of reducing the Guinness for additional flavour.

  • 1 cup all-purpose flour
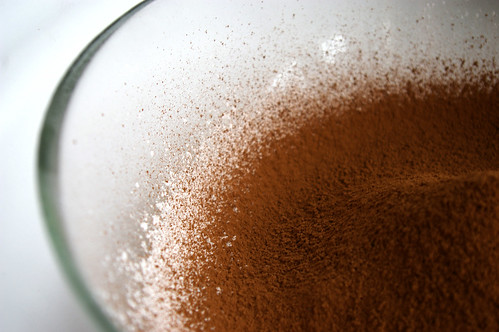
  • 3/4 cup unsweetened cocoa powder
  • 1/4 teaspoon salt
  • 6 tablespoons unsalted room temperature butter, cut into cubes
  • 8 ounces dark bittersweet chocolate, chopped (I used 6 ounces of bittersweet and 2 of 70 per cent dark chocolate)
  • 3/4 cup milk chocolate chips
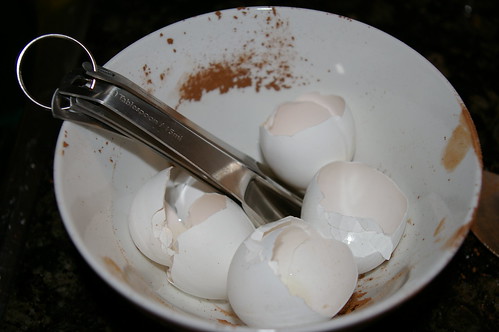
  • 4 large eggs, at room temperature
  • 1 cup granulated sugar
  • 2 bottles Guinness beer, reduced to 1 1/4 cups
  • 3/4 teaspoon vanilla
  • 1 cup semi-sweet chocolate chips
  • icing sugar for dusting (optional)

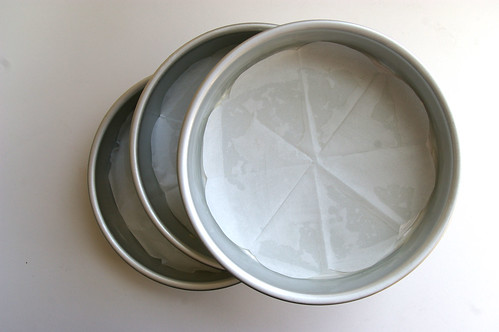
Preheat the oven to 375 degrees F. Line a 9 x 13-inch baking pan with parchment paper.

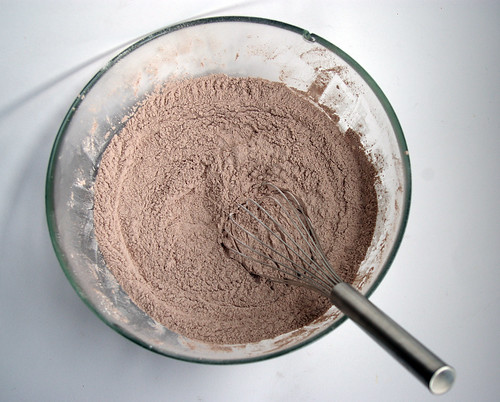
In a medium bowl, whisk together flour, cocoa powder, and salt until evenly combined. Set aside.

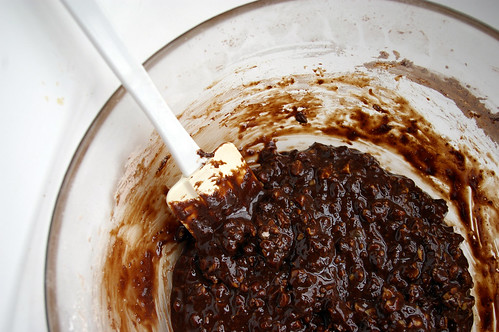
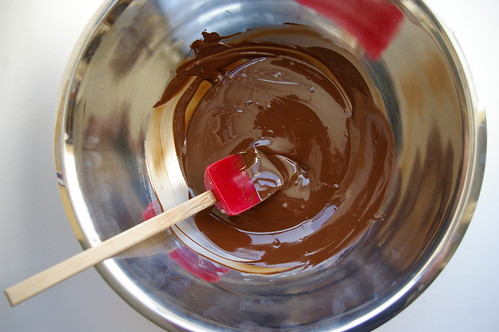
In a double boiler set over low heat, melt butter, bittersweet chocolate and milk chocolate chips. Remove from heat.

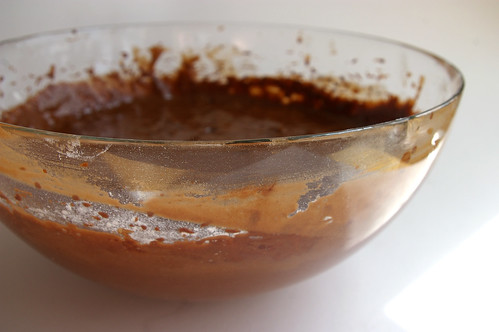
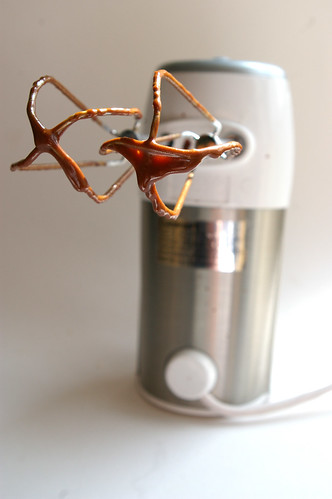
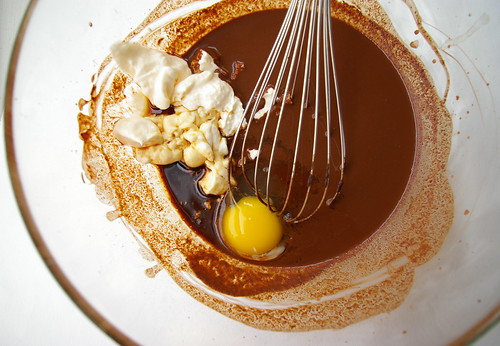
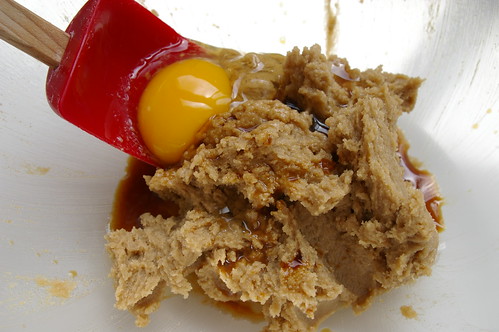
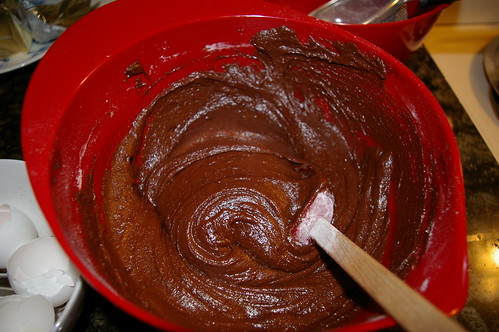
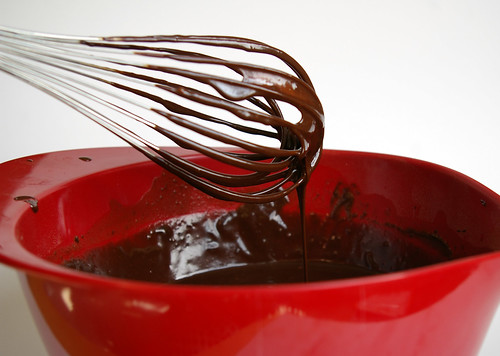
In a large mixing bowl, beat together eggs and sugar on high speed until light and fluffy. Pour in melted chocolate mixture and beat until combined.

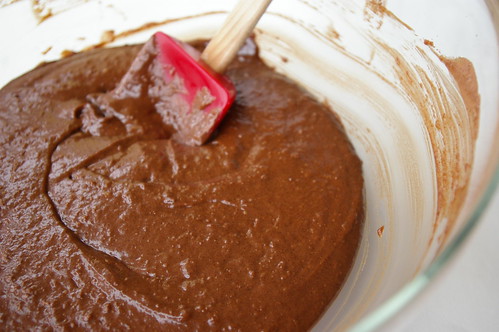
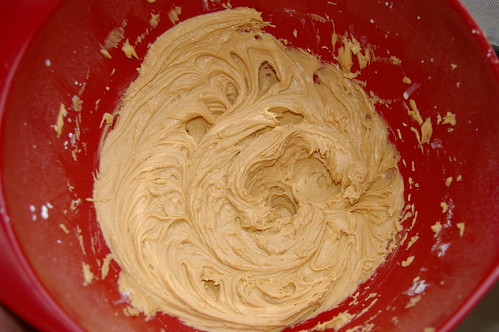
Add flour-cocoa mixture and beat until just combined. Whisk in cooled Guinness and vanilla. (It will take a few minutes for the beer to incorporate. I used more of a folding technique with the whisk for the first minute or two to keep everything from slopping everywhere.)

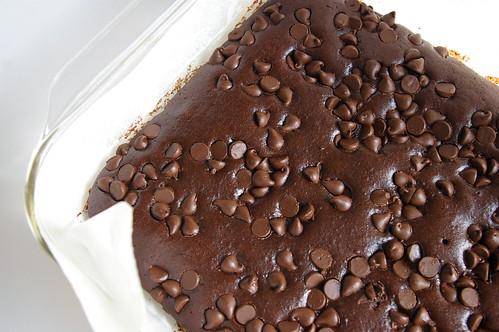
Pour into prepared pan. Scatter over semi-sweet chips.

Bake 25 to 30 minutes, until a toothpick inserted in the centre comes out clean. Note: mine only took 24 minutes; start checking at the 20-minute mark.

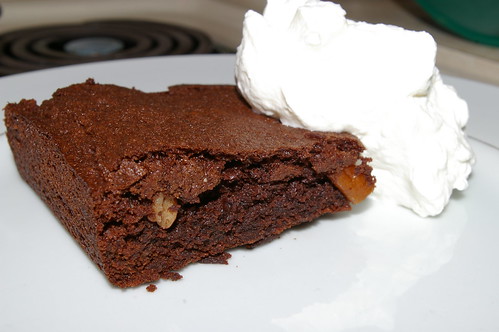
Let brownies cool. Dust with icing sugar if using and serve.

Continue Reading

Flourless Chocolate-Walnut Cookies

There is often debate among brownie fans on whether it is better to be fudge-y or cake-y. I have mostly stayed away from this because I’m not enough of a brownie enthusiast to really care one way more than the other.

Besides, the only thing that really matters when it comes to the brownie is the slightly crisped edges and the crackled top. For me, that is where the beauty of the brownie lies.

But, let’s face it, unless you have one of those special “all edge” pans with their labyrinthine shape, someone is getting stuck with the middle bits.

And that’s how I thought things would always be, until I tried these flourless chocolate-walnut cookies.

Flourless Chocolate Cookies

OK, they are not brownies. For someone like me, they are even better. They are cookies that taste like the crinkled surface layer of a brownie with its slight chew and crackle goodness, studded with chunks of walnuts.

To be honest, flourless chocolate cookies were not high on my list of things to bake when I stumbled across the recipe. But I came upon it after I had put some egg whites in the freezer, unsure what to do with them after using up the yolks.

I could have saved them for a pavlova, but figured it was worth trying out something new.

The list of ingredients was straightforward, if not a bit puzzling. I’ve never measured out three cups of icing sugar for a cookie recipe before.

Nor was I actually convinced that the airy ingredients would transform in the oven to some sort of cookie delight.

However, it did have a few things going for it: I already had egg whites ready to go and the recipe reminded me of a package of cookies I bought from a chain store grocery store once.

I served them to friends with a dollop of vanilla ice cream sandwiched between: a gourmet version of the childhood treat. It seemed worthwhile to see if these could compare. Or, as the case ended up being, improve on the store bakery version. The chocolate chew and nuts in a tender cookie package were so right. And they were light and not overly sweet. (Though, that was dangerous too, as it was easy to eat more than one or two and feel I still had room for another.) Mine did not get as shiny as I have seen in other people’s photos of the same type of cookies.

Normally I’d get a bit worried. Or envious.

Why do mine look different?

But after sampling one — OK, several — of the cookies, I realized I didn’t care what they looked like. They were fantastic.

I have since found myself trying to find recipes that use up only yolks so that I can take advantage of this cookie recipe again.

Toasted walnuts

Cocoa and Icing Sugar

Cocoa Sugar mix

Flourless chocolate cookie batter

Cookie dough puddles

Chewy goodness

Francois Payard’s Flourless Chocolate-Walnut Cookies

from New York magazine

  • 2¾ cups (675 mL) walnut halves
  • 3 cups (750 mL) confectioners/ icing sugar
  • 1/2 cup plus 3 tbsp (170 mL) unsweetened Dutch process cocoa powder
  • 1/4 tsp (1 mL) salt
  • 4 large egg whites, at room temperature
  • 1 tbsp (15 mL) pure vanilla extract

Preheat oven to 350°F (180°C). Spread the walnut halves on a large-rimmed baking sheet and toast in the oven for about 9 minutes, until they are golden and fragrant. Let cool slightly, then move the walnut halves to a work surface and coarsely chop them.

Position two racks in the upper and lower thirds of the oven and lower temperature to 320°F (160°C). Line two large-rimmed baking sheets with parchment paper.

In a large bowl, whisk (or use an electric mixer on low speed) the confectioners’ sugar with the cocoa powder and salt followed by the chopped walnuts. While whisking (or once you change the speed to medium), add the egg whites and vanilla extract and beat just until the batter is moistened. Do not overbeat or it will stiffen.

Spoon the batter onto the baking sheets in 12 evenly spaced mounds, and bake for 14 to 16 minutes, until the tops are glossy and lightly cracked; shift the pans from front to back and top to bottom halfway through to ensure even baking.

Slide the parchment paper (with the cookies) onto 2 wire racks. Let cookies cool completely, and store in an airtight container for up to 3 days.

This story first appeared in the Real Life section in the Calgary Herald. For more delicious recipes, visit CalgaryHerald.com/life.

Continue Reading

Triple Layer Chocolate Cake

It’s my Blogiversary!

Two years ago I decided it was time for me to finally join the blogging world and I started up Patent and the Pantry as a way of celebrating my love of food and photography. But, let’s face it, mostly because of my love of food.

Chocolate Cake slice II

And I got a nice little present just in time for it. I just had my 200,000th page view. I never thought it would grow this much and I am so grateful to all my readers who have bookmarked my blog, forwarded recipes along and faithfully kept up with all my updates even if half of them have involved lemon recipes. Thanks too must go to all my friends and family, which have supported me in this little project.

Any good celebration requires cake. Or at least as far as I’m concerned.

I found this recipe while getting my hair done a few weeks back. Flipping through Bon Appetit, I came across this Chocolate Mayonnaise Cake and immediately wrote it all down with an eye of making it sooner rather than later. Although Red Velvet Cake was fun for the first entry and first anniversary, I wanted to switch things up this time around. And you can never go wrong with chocolate.

I took half over to Andree’s house to share with her. She has been a big supporter of P&P since I launched, offering tips, advice and gently encouraging me to do less baking, more cooking. So, I thought she might like it if she tasted some of the fruits of my baking labours.

The other half went in to work for my “Civilized Sunday” girls who are kind enough to eat all the baking I can’t keep at the house out of fear I will consume it all. Then we all sit around the desk at work eating goodies and reading our horoscopes . . . . And then, yes, we do get down to serious work because otherwise how would we fill the Monday paper?

The cake went over well, but I’m not entirely convinced it was as good as it could be. My main concern here is that the recipe indicates to beat the cake until well blended after each of the four additions of flour. I’ve always been told to go gently when adding flour to a cake and mix (not beat) only until blended because you don’t want to develop the gluten. I wish I had followed my instincts; I’m convinced this cake would have been even more tender. Not that anyone was complaining . . . .

So, if I attempt this again, I’m going to go gentle on the batter. I’m sure it will only improve things.

However, all that said, it was still a good little cake for a special little day.

Prepared pans

Melted chocolate and cocoa

Chocolate Cake Batter

Chocolate beaters

Chips and chunks for chocolate icing

Melted chocolate for the icing

Two layers

All iced up

Sky high cake

Chocolate Cake slice I

Chocolate Cake

  • 2 ounces bittersweet chocolate (do not exceed 61% cacao), chopped
  • 2/3 cup unsweetened cocoa powder
  • 1 3/4 cups boiling water
  • 2 3/4 cups all purpose flour
  • 1 1/4 teaspoons baking soda
  • 1/4 teaspoon baking powder
  • 1 cup sugar
  • 1 cup (packed) dark brown sugar
  • 1 1/3 cups mayonnaise (do not use reduced-fat or fat-free)
  • 2 large eggs
  • 1 teaspoon vanilla extract

Chocolate Frosting

  • 10 ounces bittersweet chocolate (do not exceed 61% cacao), chopped
  • 1 1/2 cups (3 sticks) unsalted butter, room temperature
  • 3 cups powdered sugar
  • 1 tablespoon vanilla extract
Preheat oven to 350°F.

Butter and flour three 8″ diameter cake pans with 1 and 1/2-inch-high sides. Combine chopped chocolate and cocoa powder in medium metal bowl. (I used a plastic bowl and it appeared to work just as well.) Add 1 and 3/4 cups boiling water and whisk until chocolate is melted and mixture is smooth. Sift flour, baking soda, and baking powder into another medium bowl. Using electric mixer, beat both sugars and mayonnaise in large bowl until well blended, 2 to 3 minutes. Add eggs 1 at a time, beating until well blended after each addition. Beat in vanilla. Add flour mixture in 4 additions alternately with chocolate mixture in 3 additions, beating until blended after each addition and occasionally scraping down sides of bowl. (Again, I’d take it easy here and only mix until just blended instead of beating it.) Divide batter among prepared cake pans (about 2 1/3 cups for each).

Bake cakes until tester inserted into center comes out clean, 30 to 32 minutes. Cool cakes in pans on racks 20 minutes. Run small knife around sides of cakes to loosen. Carefully invert cakes onto racks and let cool completely.

For the frosting, place chopped chocolate in medium metal bowl; set bowl over saucepan of simmering water and stir until chocolate is melted and smooth. Carefully remove bowl from over water; let melted chocolate cool until lukewarm, stirring occasionally.

Using electric mixer, beat butter in large bowl until smooth and creamy. Sift powdered sugar over butter and beat until well blended, about 2 minutes. Beat in vanilla. Add melted chocolate and beat until well blended and smooth, occasionally scraping down sides of bowl.

Place 1 cake layer on platter. Spread 3/4 cup frosting over top of cake layer to edges. Top with second cake layer; spread 3/4 cup frosting over. Top with third cake layer. Spread remaining frosting decoratively over top and sides of cake.

Cut cake into wedges and serve.

Continue Reading

Guinness Chocolate Cupcakes

I don’t like beer.

I was absent the night in university when my friends went to the grungy student pub, bought a pitcher and sat down, determined to acquire a taste for the stuff.

No idea where I was–I like to think I was responsibly studying somewhere–but it seems my decision means I will never really love beer the way I might have if I had sat in that smoky room with them.

Around St. Patrick’s Day, food bloggers were raving about cupcakes that included a rather unexpected ingredient: Guinness. Given my distaste for beer, I passed those entries by.

Frankly, the only thing that intrigues me about Guinness is the hypnotic rolling where the head meets the dark liquid in the pint glass just after it’s been poured. But I kept thinking about the recipes.

Cupcakes in profile

I think I was intrigued because they were so boldly unusual. Beer and chocolate? Really? Would the taste of stout be overpowering?Would it mellow into the background to add a perhaps unidentifiable richness? Or would it just be a chocolate cupcake with a good storyline?

It should come as no surprise this recipe comes from a British chef — Nigella Lawson — considering the other culinary oddities that have sprung from the United Kingdom. I mean, consider the blood sausage.

Her version makes an entire cake, though, and I prefer the idea of cupcakes, I suppose, for their portability. It is also much easier to pass them along to friends than a slice of cake. Leaving an entire cake in my fridge is not an option.

And she has paired it with a cream cheese icing, which creates a sort of play on the stout itself, with its creamy white head balancing atop the velvet dark drink.

Three whole cupcakes

I don’t believe in skimping on the icing. The original cream cheese icing recipe suggested adding more whipping cream to thin it out, but I reined in the extra liquid to ensure I had a nicely thick, spreadable topping. As a result, I also didn’t have enough. Given that I ate two cupcakes before even making the icing (quality control–OK, that’s a lie, I was dying of curiosity) and I still had four cupcakes left at the end that went unadorned, I suggest doubling the icing recipe. That way, there will be more than enough to coat all of the cupcakes.

The original recipe called for a half cup of whipping cream. I only used two tablespoons. If you’d like a thinner icing, feel free to add more cream.

My first bite made me realize –again–that Nigella certainly knows her stuff. These cupcakes are rich and dark with only a hint of their secret ingredient –certainly not enough to turn me off the idea of eating several more. Combined with the icing, the Chocolate Guinness cupcakes were heavenly. The icing, perhaps ironically, cuts some of the darkly chocolate flavour.

Bitten

A friend graciously offered to buy the remaining five bottles of Guinness from me, knowing full well they would simply gather dust next to my wine rack. But, having given these a shot, I think I will hang on to them. After all, I think I’d like to make the cake version next. Apparently, all it took for me to like beer was to add chocolate.

Bitten and whole

Bitten profile

Chocolate Guinness Cupcakes

Excerpted from Feast by Nigella Lawson (Hyperion Books, $39.95, 2006)

  • 1 cup (250 mL) Guinness
  • 4 oz (1/2 cup or 125 mL) unsalted butter, cut into chunks
  • 3/4 cup (175 mL) unsweetened cocoa powder
  • 2 cups (500 mL) granulated sugar
  • 3/4 cup (175 mL) sour cream
  • 2 large eggs, room temperature
  • 1 tbsp (15 mL) vanilla extract
  • 2 cups (500 mL) all-purpose flour
  • 2½tsp (12 mL) baking soda

Icing

  • 8 oz (250 g) cream cheese
  • 1 cup (250 mL) icing sugar
  • 2 tbsp (25 mL) whipping cream

Preheat oven to 350°F (180°C). Line two 12-cup muffin pans with paper liners.

Pour the Guinness into a large saucepan, add butter and heat at medium-low until melted. Whisk in the cocoa powder and sugar, then remove from heat. In a small bowl, beat together the sour cream, eggs and vanilla. Pour into the slightly cooled Guinness-butter mixture. Whisk in the flour and baking soda.

Spoon batter into cupcake pan, so each liner is about three-quarters full. Bake for 15 to 18 minutes or until a tester comes out clean. Let cool in the pan, then remove to a rack to cool completely.

Once completely cooled, make the icing.

Beat cream cheese and icing sugar until smooth. Add the whipping cream and beat again until it is thoroughly mixed and spreadable. Add more cream if you want a thinner icing. Spread onto cooled cupcakes.

Makes 24 cupcakes.

This story first appeared in the Real Life section in the Calgary Herald. For more delicious recipes, visit CalgaryHerald.com/life.

Continue Reading

Chocolate Cake

So, I know I’ve mentioned before that I don’t drink coffee. I couldn’t brew a pot if my life depended on it and, for that matter, I don’t even have the supplies to make an attempt. So, noting that this Chocolate Cake recipe — like many others involving chocolate — called for brewed coffee, I knew I was going to have to resort to other measures. Yup, Starbucks. But, since I don’t drink coffee, I had no idea what to order.

Me: Um, can I get a tall, uh, um, Verona…?

Barista guy: Sure. (Starts to pour coffee.)

Me: Um, is that a dark roast? (It occurs to me that might be too much of a coffee flavour. I think? Isn’t that what dark roast means? Jesus, I need a coffee primer.)

Barista guy: Yup. (pause) Did you want something else?

Me: Uhhhhhh, yes…..? A medium roast…..?

Barista guy: (shrugs and dumps out dark roast, pours new one.)

Me: Um, I’m a coffee neophyte. (Wishes had stopped talking.)

Then, since the coffee had to be hot, I had to drive home immediately and start making the cake. Yes, I’m a baking nerd.

So, I found this recipe on the Cook’s Illustrated web site. I’ve always loved this magazine and now I love their site (thanks to my friend Julie for the birthday subscription!). The videos are especially great because sometimes you really do need to see what they are talking about. But it does crack me up that all the clips are about three minutes long. Anything looks easy when a) professional chefs do it b) they do it in three minutes.

But this recipe, actually is easy.

The other thing I liked about this recipe was that it isn’t unheard of to have all of these ingredients on hand. (Except, for me, coffee, of course.) And it bakes super quickly and it doesn’t really need frosting, so this would be easy to whip up any time.

This cake is really fantastic on it’s own, so I don’t suggest icing it. But I do feel that a little dollop of sweetened whipped cream is the perfect addition. It, possibly ironically, cuts some of the richness but without taking away from the chocolate-y goodness of the cake.

Chopped Chocolate

Chocolate and cocoa

Chocolate, egg and mayonnaise

Whisked together

The batter

What was left over

Chocolate cake topped with whipped cream

Easy Chocolate Cake

  • 1 1/2 cups unbleached all-purpose flour
  • 1 cup sugar
  • 1/2 teaspoon baking soda
  • 1/4 teaspoon table salt
  • 1/2 cup Dutch-processed cocoa powder (I used Fry’s)
  • 2 ounces bittersweet chocolate , chopped fine
  • 1 cup fresh black coffee, hot
  • 2/3 cup mayonnaise
  • 1 large egg
  • 2 teaspoons vanilla extract
  • whipped cream — for serving, optional

Preheat oven to 350. Spray an 8″-square baking dish with nonstick spray.

Whisk flour, sugar, baking soda and salt in a large bowl. In separate bowl, mix cocoa and chocolate, then pour hot coffee over and whisk until smooth. Set aside to cool slightly. Whisk in mayonnaise, egg and vanilla. Add to flour mixture and stir until combined. Pour into baking dish, smoothing top before putting in oven. Bake until toothpick or skewer inserted comes out with a few crumbs attached, about 30 to 35 minutes. Let cool in pan on wire rack for one to two hours. Serve dusted with icing sugar or a little lightly sweetened whipping cream.

Continue Reading

Chocolate Cupcakes with Peanut Butter Icing

Most smart bakers know to make sure everything is ready to go in advance of getting started. I am, apparently, not a smart baker.

Chocolate cupcake with peanut butter icing

We were celebrating a (much belated) birthday for a good friend. Some wiggling around with the schedule had the celebration moved from brunch to Sunday night dinner and I volunteered (most willingly — any excuse to bake) to bring the birthday dessert. All week I Googled for moist, rich chocolate cake recipes and then sat there trying to decide which would be better: mayo-based or buttermilk; white icing or chocolate; cupcakes or layer cake. Finally, when I shared my dilemma with a friend, she queried why I wasn’t using a Barefoot Contessa recipe. Indeed! Why wasn’t I?

She has two recipes in her books and one online at Food & Wine. Since I already bought the books, I figured I may as well try one of those and, at last, settled on the Chocolate Cupcakes with Peanut Butter Icing. My love of this combination knows no bounds, so I’m kind of surprised I didn’t think of this recipe immediately.

Initially, it was all going very well. I ran out to the store to buy sour cream, buttermilk and coffee, along with whipping cream for the icing, then returned to begin. There was butter to soften and dry ingredients to sift (and, boy did I sift those. I learned my lesson from the Red Velvet cake when not sifting the cocoa with the flour led to brown swirls through the cake.) and, of course, photos to take to document my progress.

Cakes still make me a bit nervous. I’m worried I’ll overmix and make a tough cake and that is not eased by the fact most recipes have this whole “mix in thirds” step. What if it’s not exactly thirds? Also, I think a lot of recipes these days assume people have stand mixers, which makes this step (among others) much easier, then when trying to hold the mixer while pouring in a third of the dry mixture and not end up covered in cocoa and flour dust.

Butter and sugar and eggs, oh my!

The batter trifecta

Chocolate cupcake better

Chocolate cupcakes ready to bake.

But, for the most part, it all went really well. The batter seemed incredibly light at the end (Okay, and, yes, it did taste good.) and I was all ready to put the batter into the tins. I pulled out my cupcake liners and found I only had five left. Gah! Thankfully, there’s a grocery store a little over a block away, so I turned off the oven and bolted down there where I bought some liners and then raced back. I was really worried that extra time would ruin the batter somehow.

In the end, it was only a 15-minute delay and I don’t think it affected the cupcakes. They baked up perfectly, though for less time than the recipe suggested owing, I suspect, to the fact that my muffin tins are more shallow and took less batter to fill. (I used a 1/8 cup scoop, which worked perfectly. No spillage.)

Chocolate Cupcakes

Solo chocolate cupcake

The cupcakes are not overly sweet, which was a nice counterpoint to the rich peanut butter icing.

Peanut butter icing

Row of cupcakes

This recipe is from Barefoot Contessa at Home.

Chocolate Cupcakes with Peanut Butter Icing

  • 12 tbsp. unsalted butter, at room temperature (that’s 3/4 cup for those of us that don’t use sticks of butter)
  • 2/3 cup granulated sugar
  • 2/3 cup light brown sugar, packed
  • 2 extra-large eggs, at room temperature
  • 2 tsp. pure vanilla extract
  • 1 cup buttermilk, shaken, at room temperature
  • 1/2 cup sour cream, at room temperature
  • 2 tbsp. brewed coffee (Full disclosure: I don’t drink coffee. I made a cup of instant and it tasted awful to me, so I only threw in less than a tablespoon. I suspect good coffee may be a great addition.)
  • 1 3/4 cups all-purpose flour
  • 1 cup good cocoa powder
  • 1 1/2 tsp. baking soda
  • 1/2 tsp. kosher salt

Preheat oven to 350 degrees. Line cupcake pans with paper liners.

In the bowl of an electric mixer fitted with a paddle attachment, cream the butter and two sugars on high speed until light and fluffy, approximately five minutes. (For those of us without a stand mixer, a handheld is just fine. It just makes it a bit trickier when mixing in the wet and dry ingredients.) Lower the speed to medium, add the eggs one at a time, then add the vanilla and mix well. In a separate bowl, whisk together the buttermilk, sour cream and coffee. In another bowl, sift together the flour, cocoa, baking soda and salt. On low speed, add the buttermilk mixture and the flour mixture alternately in thirds to the mixer bowl, beginning with the buttermilk mixture and ending with the flour mixture. Mix only until blended. Fold the batter with a rubber spatula to be sure it’s completely blended.

Divide the batter among the cupcake pans (one rounded standard ice cream scoop per cup is the right amount). Bake in the middle of the oven for 20 to 25 minutes, until a toothpick comes out clean. Cool for 10 minutes, remove from the pans, and allow to cool completely before frosting.

Frost each cupcake with peanut butter icing and sprinkle with chopped peanuts, if desired.

Kathleen’s Peanut Butter Icing

  • 1 cup confectioners’ sugar
  • 1 cup creamy peanut butter
  • 5 tbsp. unsalted butter, at room temperature
  • 3/4 tsp. pure vanilla extract
  • 1/4 tsp. kosher salt
  • 1/3 cup heavy cream (I used whipping cream)

Place the confectioners’ sugar, peanut butter, butter, vanilla and salt in the bowl of an electric mixer fitted with a paddle attachment. Mix on medium-low speed until creamy, scraping down the bowl with a rubber spatula as you work. Add the cream and beat on high speed until the mixture is light and smooth.

Continue Reading

Evil blog Brownies

I’m starting to think this blog could be very dangerous.

It used to be that when I had strange cravings for late-night sweets or snacks, I could resist them until the temptation passed. But on Thursday night, when an intense and undeniable craving for brownies overwhelmed me, I had a supposedly legitimate reason to fulfill it: I could make a blog entry out of it.

I fear I set a dangerous precedent that night.

Plate of Brownies

When I decided to make the Red Velvet Cake oh-so-many weeks ago, I bought a tin of cocoa — the only one I could find besides the generic grocery brand. Back at home, I discovered that at some point in recent history I had already purchased a tin of Fry’s Cocoa, presumably when I was on some kick to make something chocolate-y and then never followed through. I buried the tin in my baking cupboard — which is, let’s face it, not the most organized space — and completely forgot about it. Until I came home with the second tin.

Brownies seemed like a logical thing to do with an overwhelming supply of cocoa. And, as the snow fell outside (in May for goodness sake), I thought a little baking may be in order.

The best part about the recipe (compliments of the back of the Fry’s Cocoa tin — why research if you don’t have to?) is that I didn’t have to wait for butter to soften as the recipe calls for it to be melted. Virtually instantaneous satisfaction could be achieved!

A little sugar, some vanilla and flour, thoroughly sifted cocoa, eggs and I was good to go. I also had in my cupboard some halved pecans, which I ended up breaking into smaller pieces and throwing into the batter for a little contrast. I didn’t even bother breaking out my hand mixer for this and barely worked out my arm mixing everything together because it took so little effort.

The batter

The aftermath

I should have read the recipe all the way through, however, because by the time I got to the fact that four eggs were going into the batter I realized I probably should have halved it. Instead of a nice little pan of brownies, I ended up with a 9″ x 13″ tray of them.

I was too lazy to wander out in the snow for the vanilla ice cream the brownies so badly wanted to be paired with. But, lo, what is this in my fridge? The quarter-cup dregs of whipping cream? Hello freshly-whipped- cream puffed into a little cloud to sit atop my fudgey brownie.

Brownie and whipped cream

As it was, I didn’t end up having to eat the entire pan myself. I was unexpectedly back at work on my day off the next day and my plans to make cookies for an event that night were dashed. But showing up with a plate of brownies was definitely the next best thing.

Fry’s Fudgey Brownies

  • 1 1/3 cups all-purpose flour
  • 1 tsp. baking powder
  • 1/2 tsp. salt
  • 1 cup butter
  • 1 cup Fry’s Cocoa (but, presumably, other cocoas would also work)
  • 2 cups sugar
  • 4 eggs
  • 1 1/2 tsp. vanilla
  • 1 cup chopped nuts (optional, obviously)

Stir together flour, baking powder and salt in a small bowl. Melt butter in a large saucepan. Remove from heat. Stir in cocoa. Blend in sugar, eggs and vanilla. Blend in dry ingredients and nuts. Pour batter into greased 13x9x2″ rectangular baking pan. Bake in preheated 350 oven for 30 to 35 minutes or until done. Cool.

Continue Reading