A day at SAIT’s culinary bootcamp

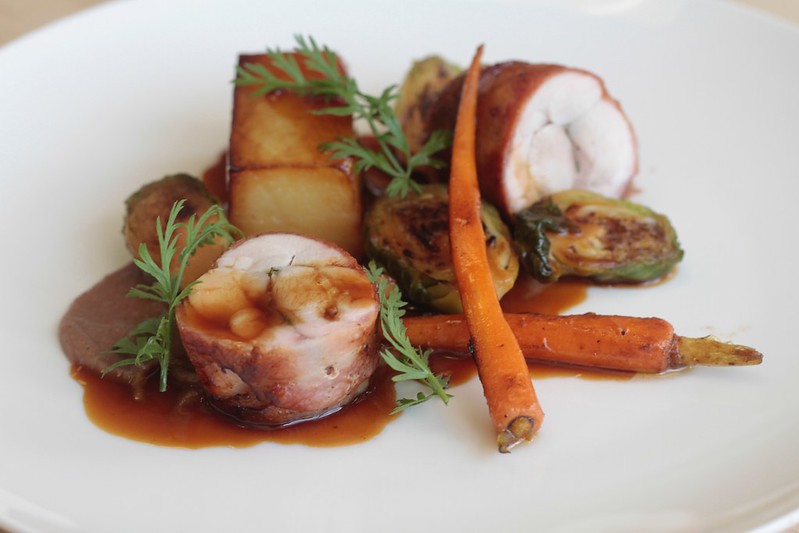
We are 10 minutes from lunch service when chef informs us the rabbit legs currently roasting in the oven will need 10 more minutes to finish, on top of the additional 10 we will need to pan fry them to get the bacon they are wrapped in crispy, as well as the time we need slice them and carefully plate them next to Pont Neuf potatoes, caramelized Brussels sprouts and thin, sweet carrots.

We are officially in the weeds.

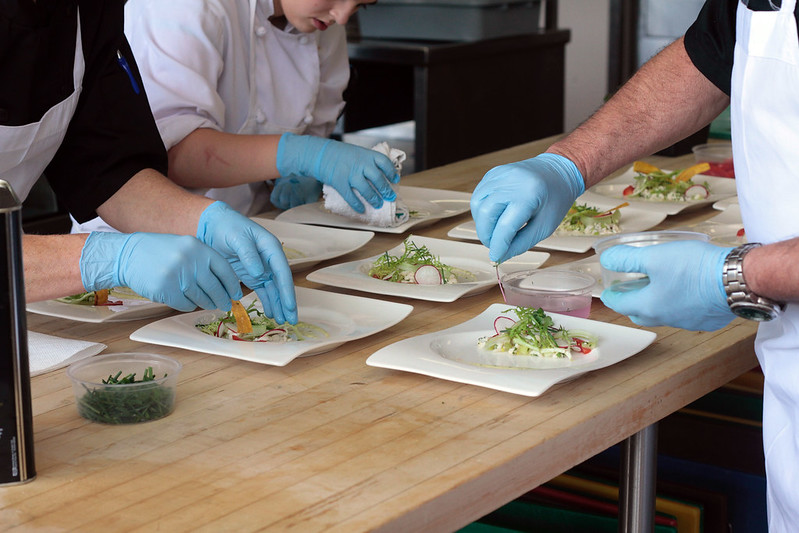
Rewind three hours and we are a group of seven people sitting in one of the classrooms just off the massive kitchen that serves as the training ground for many of SAIT’s culinary programs. School is out for the semester, but the kitchen is open to us, the students of a four-day, intensive culinary bootcamp set to put us through the paces of working in a restaurant kitchen. For eight meals, those who have signed up for the course will rotate through appetizers, main dishes and desserts, preparing two dishes per day to chef’s standards. We will then dine on the three-course meal we have prepared in the oddly empty Highwood Dining room.

Ladles

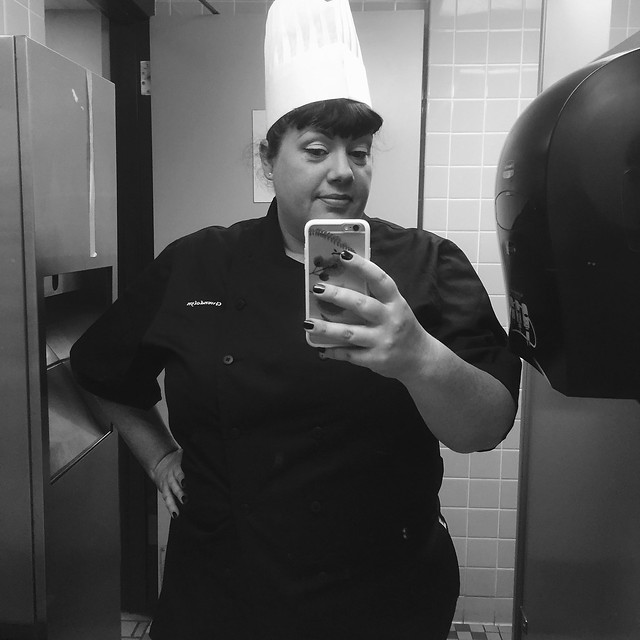
At the invitation of SAIT, I am here to try out the program for one day. In the morning, dressed in my chef’s jacket and hat and oddly appropriate shoes — how very un-gwendolyn — I am excited and eager to get into the kitchen. By the end of the day, I am exhausted and have renewed my appreciation for the hard work chefs put in. I also leave, though, knowing some new skills — even if it’s unlikely I will never again butcher a rabbit. (Not that I was very good at it in the course either.)

Chef Jacket Selfie

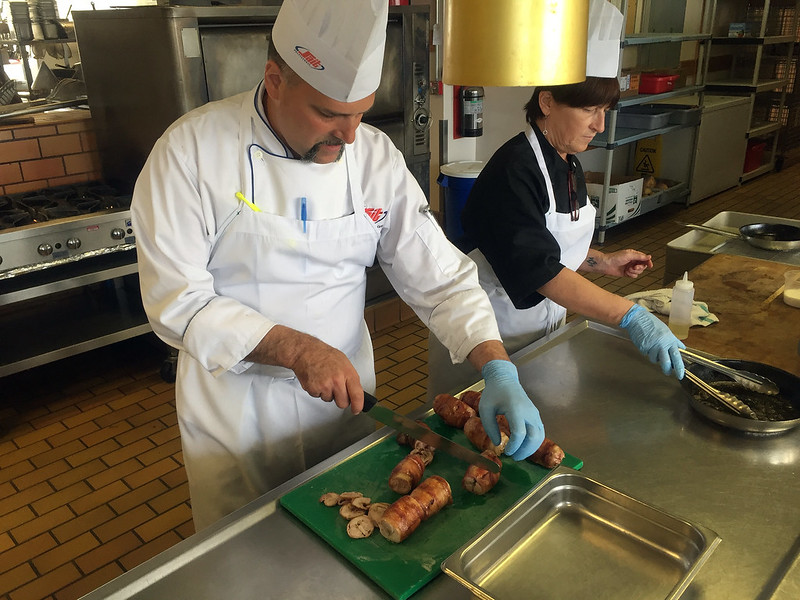
A new program for SAIT, the culinary bootcamp is aimed at those with a solid base of cooking skills, those who have taken other continuing education-type courses on campus and are looking for something a little more challenging. The seven of us are treated similarly to the professional cooking students; we’re shown where things, are told our menu and given recipes, but are then mostly left to our own devices under the watchful eye of Michael Mandato, the chef instructor who oversaw the bootcamp.

One of the chefs on SAIT’s enviable team of cooking instructors, Michael came to Calgary after working in hotels all over North America. His New York accent, though, makes it clear where he was raised. He makes no bones about what his expectations are from us and it becomes clear early on that those are high.

This, I think at one point, is why I am likely not cut out to be a chef.

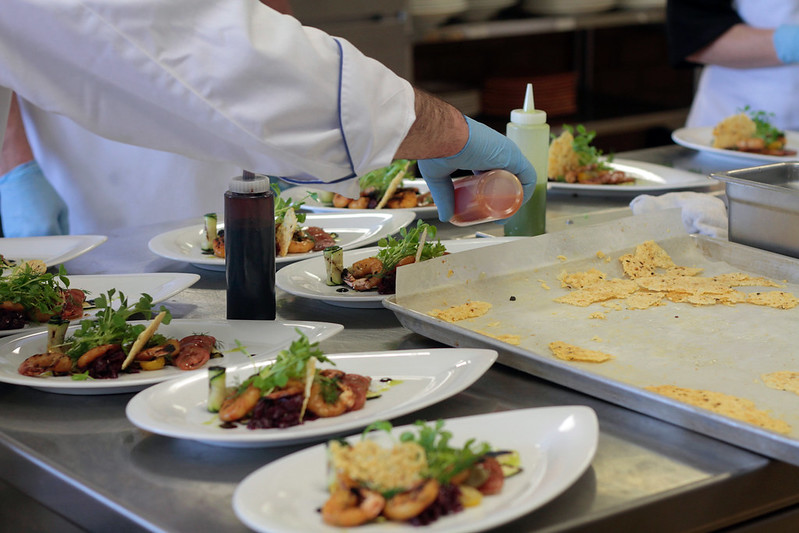
But that’s the point of the boot camp. This is not an easy-going, lunch-and-learn type of class. This is getting put through the paces of what it’s like to work in a restaurant (though thankfully not for any paying customers), with all the prep and scramble and cooking and trying to nail down timing, working backward from when your plate is supposed to hit the table. This is home ec on steriods.

I ask to join the entree team since I figure — correctly — it will be the most challenging part of the meal. Along with two other women, we are tasked with butchering rabbits and preparing the legs to be wrapped in bacon, roasted and then pan-fried, making a madeira sauce and Pont Neuf potatoes (fat, squat french fries, essentially). That’s just for lunch. For dinner, we will need to make a root vegetable gratin, a tamarind duck breast and some spiced fruit chutney for the side. And, because this is restaurant-type situation, we also need to do prep for the team taking over entrees the next day — that means searing off short ribs and wrapping and labelling them for a chill overnight in the cooler.

The rabbits — one of the first tasks — are my undoing. As in, I have no idea what I’m doing and have to repeatedly ask for help from a patient Mandato and one of my teammates, a home economics teacher well versed in skills that have escaped me.

This, I have no doubt, is partly why we are in the weeds, still waiting for our dish to come out of the oven to pan fry, to slice, to serve when the clock has technically already run out.

Slicing the rabbit leg

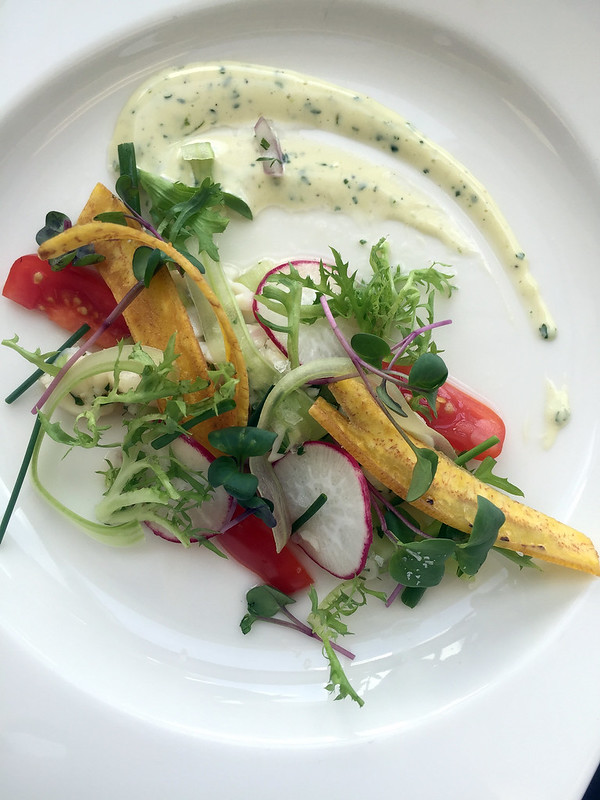
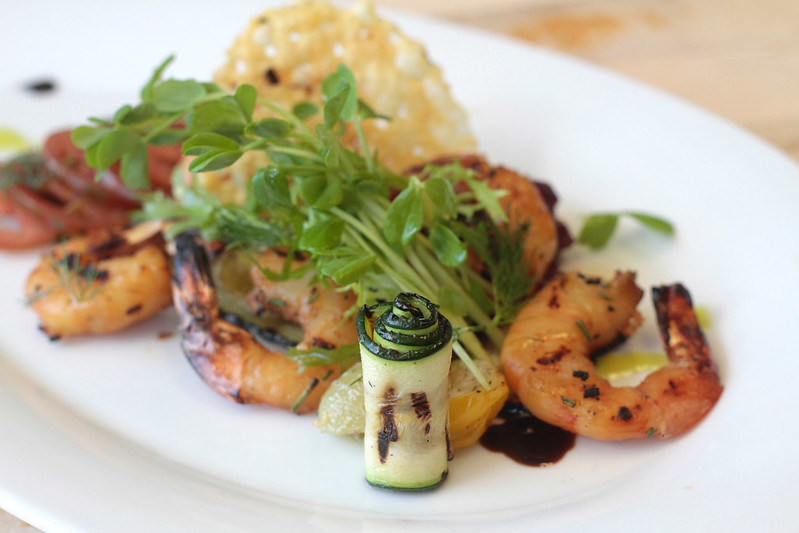
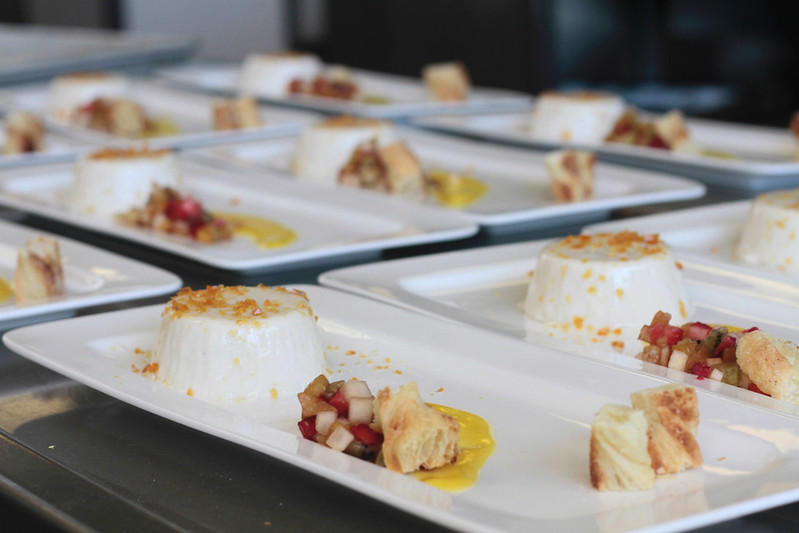
In a flurry, with the three of us — and a chef who I suspect would definitely be marking us down if we were in his class — working together quickly, the dish gets plated and we head into the Highwood Dining Room for a luxurious three-course lunch prepared by the bootcamp teams. A scallop ceviche starts the meal that is then capped off with a chocolate mousse.

Plating II

Ceviche appetizer

Rabbit with carrots and Pont Neuf Potatoes

It feels indulgent to sit down after racing around and I’m impressed with what we’ve all managed to pull together. Mandato praises and offers critiques on the dishes so we can learn where we can make improvements and it isn’t long before we’re back in the kitchen for round 2.

This time, at least, we are getting the hang of things. We know where the ingredients are, where the utensils and pots are located. There is now a rhythm to our team and we are quicker to jump in and offer to do things or help when it looks like one of us needs some assistance. The duck entree with its tamarind sauce, chutney and (ridiculously decadent and delicious) root vegetable gratin (can you decipher that this was the piece I worked on?) come together much more smoothly. (Though, as I am about to add all the different vegetables to the pot of boiling water at once, Mandato with a knowing nod and slightly cheeky smile asks if I am making sure only one type of root vegetable is going in at a time. “Yes, chef!” I say, though we both know he’s caught me from making an error that would lead to a mushy gratin.)

Plating

Grilled shrimp appetizer

Plated coconut panna cotta

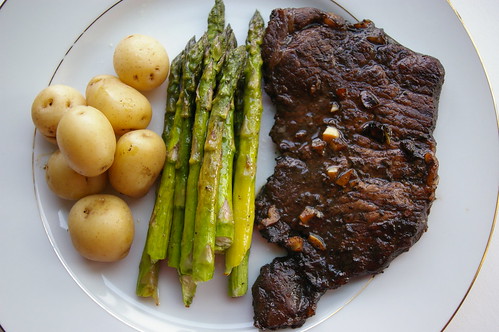
And as we sit down for dinner, I survey the dish, pleased that I contributed to this plate, this meal that we are all enjoying with a glass of wine.

My feet ache, my bangs are aswirl from the heat of the kitchen and being trapped under the chef’s hat and I fear someone will need to roll me to my car I’m so tired, but I have a sense of accomplishment that wipes that all away. It’s been a long time since I was a student — and I’m not likely to sign up for the two-year program — but this taste of professional cooking, this challenge of being in a massive kitchen and needing to worry about timing and plating and helping my fellow cooks, that was delicious.

For more information about the SAIT bootcamps (there’s a pastry one!), visit SAIT. The next round will run May 30 to June 2, 2017.

Thank you to SAIT for allowing me to join the class.

Continue Reading

Potato Pizza with Rosemary

I love the French word for potato: pomme de terre.

Apple of the earth.

It’s so evocative. It speaks of wholesomeness and simplicity. The dusty rows in farmer’s fields, the pockmarked tubers hidden under clumps of dirt and the round potatoes that tumble out when finally unearthed.
Also, it’s a damn tasty vegetable.

Potato Pizza with Rosemary I

My love of potatoes goes back to childhood. At one time I even had a potato scrapbook. I’m not kidding.

In the ’80s, the potato farmers in the U.S. had a big ad campaign to try to convince Americans that potatoes were vegetables. One was a photo of a big baker potato with a big daub of green paint on it, next to a jar of paint and dripping brush. Underneath was a caption that read something like, “What do we have to do to show it’s a vegetable?”

And, while the scrapbook has disappeared from my life, my love of potatoes remains.

I was so excited a couple of weeks ago to spy a massive (read: too big for a single person) bag of multi-coloured baby potatoes at Costco. I rooted through to find one that had a high proportion of purple potatoes. These things rock. I love their vibrant colour! Am tempted to boil and squash up the next batch for a little violet-coloured mash….

Purple Potato

So, I knew they would be perfect for this potato pizza. This recipe would have Atkins rolling over in his grave. A carb base, topped with carbs. Mmmm!

But, damn it, sometimes a girl just needs her potatoes.

Pizza dough rising

Sliced potatoes

Pizza for the oven

Potato Pizza with Rosemary II

Potato Pizza with Rosemary III

I apologize. I have no idea where this recipe came from originally. Something I found years ago, cut and paste into a plain document and then printed…. Even then, it’s been slightly adapted, of course.

Potato Pizza with Rosemary

  • 1 1/2 cups all-purpose flour
  • 1/2 teaspoon salt
  • 1/2 teaspoon sugar
  • 1/2 cup cold water
  • 1/2 teaspoon instant dry yeast
  • Olive oil for bowl and pan
  • thinly sliced potatoes (2 or 3 large potatoes, 10 or more baby potatoes)
  • 1/4 onion, cut in half and thinly sliced
  • 4 tablespoons extra virgin olive oil
  • 2 tablespoons fresh rosemary, chopped
  • sea salt for sprinkling

Combine flour, salt, sugar and yeast in a bowl, then slowly add water. Mix with spoon until ingredients start to come together, then using dough hook on a mixer, knead/mix for another 10 minutes until the dough is smooth and elastic.

Place in oiled bowl and let rise for two or more hours. (Note: mine didn’t rise quite as much. Unsure why, but ended up with pretty thin crust as a result.)

Using a mandoline or a knife, thinly slice potatoes. (The recipe then calls for the potatoes to be soaked in several changes of water. I didn’t do this because I was worried what would happen to the purple potatoes. Still tasted fine to me, so….?) Combine potatoes with pinch or two of salt, rosemary and 1 tablespoon of extra virgin olive oil.

Preheat the oven to 425. Spread thin layer of olive oil on rimmed baking sheet. Stretch dough out on pan until it reaches the edges. Evenly layer potatoes over dough, then drizzle on three tablespoons olive oil, along with sea salt and chopped rosemary.

Bake about 20 minutes until bottom is golden. Let cool slightly before cutting, then serve. Also good at room temperature.

Continue Reading

Penne alla Vodka

I don’t cook much with alcohol.

Vodka

Sure, there’s been the odd wine reduction sauce, a shot or two of brandy to a roasted tomato soup to round out the taste or a splash of sherry in my chicken tetrazzini. But the goal in these recipes is to add that hint of flavour, to enhance the other ingredients, not to dominate the dish.

So, I was a bit intrigued the first time I heard about Penne alla Vodka. There was no way the liquor was taking a back seat in this recipe; it’s in the name, after all. But how would the drink I associate with martinis and Caesars work over a plate of steaming pasta?

Vodka II

Let me be frank: it worked like a charm. So charming, in fact, I made it twice in one week–the sign of any good recipe, as far as I’m concerned.

I was a bit worried at first, because the instructions call for the vodka to be poured over the hot drained pasta instead of letting the alcohol cook out in the tomato part of the sauce. I feared it would be like eating a Bloody Mary for dinner with a scraping of Parmesan over it.

The tomato sauce

But a strange sort of alchemy happens once the butter starts to melt over the hot pasta and mingle with the boozy vodka.The flavours smooth together. (Because, yes, for experimentation purposes I did try a piece of penne with just the butter and vodka. You know, for scientific reasons and certainly not because I was getting hungry and curious.)

Adding the butter

Dumping in the tomato mixture, delicately perfumed with garlic and scattered with bits of soft, slightly caramelized onions, transformed some very basic pantry ingredients into a rich, guilty-pleasure type dish.

It should be said here that I like it saucy–as in, the pieces of penne should merely act as sauce conveyors. Spiked on the end of my fork, the pasta is swept around the bowl to pick up the last bits of onion and tomato, the last dribble of rich sauce.

And this sauce is dangerously good — enough to make you want to lick the bowl when no one else is looking. Ahem, not that I’m condoning that. So, I’ve adjusted the recipe slightly to al-low for my preference for more sauce. Feel free to add more pasta if desired.

Before the mixing

Unexpectedly, this is fantastic cold the next day. Perhaps it’s be-cause vodka is best when straight from the freezer? I ended up eating most of the leftovers straight from the fridge rather than waiting for the workplace microwave to be freed up. After all, with a dish like this, who would want to delay taking a bite?

Penne alla Vodka

The original Nigella Lawson recipe calls for garlic-flavoured olive oil. I don’t tend to keep that around, so I’ve adjusted accordingly. Of course, if you do have it, just go ahead and use it and skip the part about sauteing garlic in the first step.

Penne alla Vodka

  • 1 large onion, diced
  • 2 tablespoons (25 ml) olive oil
  • 2 garlic cloves, roughly chopped
  • Salt
  • 2 tablespoons (25 ml) whipping cream
  • 1 28-oz (796-ml) can diced tomatoes
  • 1 lb (500 g) penne
  • ½ cup (125 ml) vodka
  • 4 tablespoons (60 ml) unsalted butter
  • Parmesan

Add olive oil to large frying pan and bring up to medium-low heat. add garlic and saute for one or two minutes to flavour the oil. don’t let the garlic burn.

Remove the garlic and add the onion, along with a pinch or two of salt. Cook the onion, stirring occasionally until soft and just starting to caramelize. add the can of tomatoes and let simmer so the liquid has reduced. (this took about 10 minutes when i made it, so i put the pasta on to boil as the sauce was cooking.) when the sauce has thickened, remove from heat and stir in whipping cream.

Add pasta to salted, boiling water and cook as instructed until the noodles are al dente. drain and return the pasta to the pot. pour vodka over pasta and add butter and another pinch or two of salt. stir until the butter has melted, then add the tomato mixture. toss all together until coated evenly, then check for seasonings. add more salt if necessary.

Serve with fresh parmesan serves 5.

This story first appeared in the Real Life section in the Calgary Herald. For more delicious recipes, visit CalgaryHerald.com/life.

Continue Reading

Pasta Bolognese

I grew up in a family of six (four kids, two parents). I like to think this is why I’m completely incapable of making meals for just one or two people. It just never really occurs to me to halve a recipe. Or when I’m just creating something, it never looks to me like I’m making too much. Mostly, it’s not a problem. I, unlike most, like leftovers. I like them for breakfast or lunch or dinner. (There is nothing like pasta for breakfast. Mmmmm.) And, since I tend to cook big, I can usually feed myself for all three of those meals based on whatever I made for dinner the night before.

In the last year or so, though, I’ve finally come to appreciate my freezer. Sure, it was always a happy home to ice cream and the odd frozen pizza. Now I tend to freeze some leftovers for those crazy times when work is insane and there is a strange absence of groceries and I’m contemplating a dinner of peanut butter on crackers. And this Bolognese sauce is the perfect thing to have stashed away for dinner emergencies.

Ready to eat

I got it out of Real Simple magazine; the only magazine I’ve subscribed to since Chickadee and Owl when I was a kid.

So, I used to make this with fettuccine and then one time when I went to buy pasta there was no De Cecco fettuccine. But there was fettuccelle. Sure, that’ll do. But it was so much better than that. It’s now my pasta of choice. It’s flat like fettuccine, but better. Thicker, I think. Or something. Sigh. Just better; let’s leave it at that.

Pasta

There is nothing more comforting than a big bowl of hot noodles (al dente, please!) with thick, rich sauce all chock full of tomatoes and beef that’s been simmering for an hour or so. So, I’m happy to make the whole batch of this, freeze half in ziplock bags and then eat the rest for a handful of meals. Then, the next time a craving comes, I still have my freezer stash.

And let me offer this handy ‘recycling’ tip. Don’t throw away the heels of your parmesan wedges. Throw them in as the sauce simmers; they will add a nice richness. (When I’m down to the heel of the cheese, I throw them in a ziplock and into the freezer so they are ready to go when I make the sauce.)

As usual, this is with my adaptations. (These are, for the most part, another carrot — yeah for more vegetables — and no pancetta. I have nothing against pancetta — mmmm bacon-y goodness — but I don’t typically have it on hand and can’t be bothered to go get some for this recipe as I generally have all the other ingredients. Oh, and I add the garlic later than they suggest. There is nothing worse than burnt garlic, so adding it with the celery and carrot seems a bit premature.)

Carrots, onions, celery and garlic

Parmesan heels

mirepoix

Beef, carrots, garlic, onions and celery

A good use for parmesan "heels"

Pasta Bolognese

Pasta Bolognese

  • 1  tablespoon  olive oil
  • 1 large yellow onion, diced
  • 2 stalks celery, diceed
  • 2 carrots, diced
  • 4 cloves garlic, minced
  • 1 1/2  pounds  lean ground beef
  • 1  cup  dry white wine
  • 1  cup  milk (I use 1 per cent)
  • 1 6-ounce can tomato paste
  • 1 14-ounce (398 mL) can diced tomatoes, undrained
  • 1/4  teaspoon  red pepper flakes
  • 1 tablespoon dried oregano
  • 2 1/2  teaspoons  kosher salt
  • 1/4  teaspoon  black pepper
  • 1/4  teaspoon  ground nutmeg
  • Parmesan heels (if you’ve got them)

In a Dutch oven or large, solid frying pan (I use one with straight sides), heat the oil. Add the onion and saute until they start to go transluscent, about three minutes. Add the celery and carrot and cook for five minutes more until they too start to soften. Add garlic and saute until you can smell it, about a minute. Add beef and cook until browned. Add wine, milk and the rest of the ingredients. (Don’t fret, the milk is going to look like it’s curdling a bit. It’s not.) Add the cheese heels and simmer for 45 minutes, stirring occasionally. Serve over hot, drained pasta with fresh Parmesan.

Continue Reading

Butternut Squash in Coconut Milk

Are you ever shopping and see something you think you need only to find when you get home that you already have, say, five of those already? No? Well, you’re smarter than me then.

A couple of months ago I saw coconut milk on sale, so I picked up a few cans. I like my curries and Thai Seafood Chowder and this great peanut sauce (which I should do a blog entry on; note to self) and so coconut milk is a good staple for me to have around. Unfortunately, I got home to find that I already had about four cans of it in the cupboard. Huh. Now I had eight cans.

On the upside, it means that I have the goods on hand when I see recipes like this one and want to give it a shot.

I’ve been on a butternut squash kick lately. Having never really eating squash for most of my life, I’ve found myself embracing it. It began with an acorn squash I randomly bought a few months ago. (It was so cute, and then it dawned on me that I’d actually have to do something with it.) I simply roasted it and then had it with a roasted chicken breast. Simple perfection. And there are apparently a lot of things you can do with squash. So goes my continuing education.

Butternut Squash

I liked the idea of this recipe. Soft, comforting squash with the exoticism of Thai flavours. And it was good, but if I can make one recommendation, I would suggest using this as a side dish. I’m sure this is the original intent of the recipe, but I made it on a whim and helped myself to a big bowlful. It was a bit rich to just eat on its own.

(I also should have reduced the sauce a bit more. Next time.)

Pre-simmering

Butternut Squash in Coconut Milk

This recipe comes from Closet Cooking, but has, as usual, been slightly adapted.

Butternut Squash in Coconut Milk

  • 1 tablespoon vegetable oil
  • 1 teaspoon garlic, minced
  • 1 teaspoon ginger, grated
  • 2 cups butternut squash, peeled and cut into 1″ cubes)
  • 1/2 cup coconut milk
  • 1 tablespoon sugar
  • 1 tablespoon fish sauce
  • 1/2 teaspoon chili sauce (such as sambal olek)

Heat oil in a pan. Add garlic and ginger and saute for about a minute until fragrant. Add chili sauce and saute for another 30 seconds, then add coconut milk, sugar, lime juice, fish sauce and squash. Cover and simmer until squash is tender, about 30 minutes. Remove squash and let coconut milk mixture continue to cook until it is reduced. Pour over cooked squash.

Continue Reading

Thai Seafood Chowder

Holy overdue blog update, Batman. Where have the last four weeks gone?

Oh yeah, into the fog that was subzero December, followed by a crazy flight home for the holidays and then nesting at the parents’ house as the snow never stopped falling and then back at work for a brutal one-week crime wave.

Phew.

I barely even know what I’ve been eating lately, but just before the haze set in, I made this lovely Thai Seafood Chowder. I’ve made this a few times now and have kept adjusting the recipe so that I’m really happy with it. This time, however, I had no luck finding ingredients. Lemongrass? Nowhere to be found. A fresh red chili? Vanished from the produce aisles. But I was so determined to make this, I picked up one of those squeeze tubes of lemongrass paste as a last resort and figured it wouldn’t hurt to use a few of the chili flakes from my seemingly never-ending supply. (As a person with a low heat tolerance, it is a bit baffling that I have one of those Costco-sized spice containers of dried chili flakes. I mean, really, I think I add those to my pasta bolognese and the occasional Thai or Vietnamese recipe. What was I thinking?) (Also, I’m sure my family wonders if I was switched at birth as the rest of the clan love spicy food. Strange. That said, I look a lot like my mum, so that’s very unlikely.)

I’m now devoted to the idea of the lemongrass squeeze tube. I love the flavour of lemongrass, but just find it much too woody for my liking (even if I only use the inner stalk and cut it quite fine). I usually just ended up picking it out while eating, which was rather indelicate and a bit annoying. But this paste is so, well, paste-like. It just blended in with the rest of the ingredients, offering up all the lovely flavour and none of the inconvenience.

So, I throw some rice into my lovely rice cooker just before I start making this because it really is best served over a scoop of rice (any kind will do). (What is my obsession with brackets in this post?) I love my rice cooker; I have no idea how to make rice on the stove. Pity, really, as I’m sure it’s a useful skill. But I really got addicted to them when I lived in Japan. The teachers’ housing I stayed in had one and it just became part of my routine most nights to throw some rice in and let the cooker get to it while I made whatever else to go with it. Mine is a Zojirushi (which I like to say), mostly because I wanted a *Japanese* rice cooker. I think I was still having some separation anxiety from that country when I got back. It took me at least a week to stop bowing to people.

This works really well as a weekday dinner because it takes almost no time at all.

(I should add here that, by definition, this isn’t exactly a chowder as it doesn’t contain traditional ingredients, such as bacon or flour. However, it’s too thin to be called a stew, as far as I’m concerned. And it just doesn’t feel like a soup to me.)

Snapper and Prawns

Shallots, chili flakes and garlic

Thai Seafood Chowder

Thai Seafood Chowder

  • 1 tablespoon vegetable oil
  • 2 shallots, thinly sliced
  • 2 cloves garlic, minced
  • 1 lemongrass stalk, finely chopped (or 1 tablespoon lemongrass paste — this stuff rocks, by the way)
  • 2 cups chicken stock
  • 1 can (398mL) coconut milk
  • 1/4 teaspoon chili flakes (or a minced fresh chili if you can find one)
  • 2 tablespoons rice vinegar
  • 1 tablespoon fish sauce
  • 1 tablespoon brown sugar
  • zest and juice of one lime
  • 3/4 pound snapper or other firm fish, cut into 1″ chunks
  • 1/2 pound prawns
  • 2 tablespoons basil, chiffonade

Heat oil in a pot over medium heat. Add shallots and saute until slightly transluscent, add garlic and chili flakes (or fresh, diced chili) and saute for another minute. Add stock, coconut milk, lemongrass, vinegar, fish sauce, sugar and lime zest and juice. Simmer for 10 minutes.

Add seafood and cook two to three minutes until prawns have turned pink and fish is cooked through. (This really takes almost no time at all, so I caution you against overcooking.) Add basil and serve.

Continue Reading

Roasted Tomato Soup

Sometimes, my apartment is the place where tomatoes go to die. I buy them, forget about them, and the slowly grow old, wrinkling away in their clamshell package until I’m utterly baffled about what I can do with them.

And then I had a brainwave (triggered in no small part by a recipe I saw over at 101 Cookbooks and then combined with an article from one issue out of my random collection of Cook’s Illustrated): why not roast them and make them into a soup? Then it doesn’t matter if they’re wrinkled. Or if they are wintry supermarket tomatoes that have virtually no flavour. Roasting will take care of both problems, especially the lack of flavour aspect as their summery, tomato flavour will intensify in the oven. Throw a couple of garlic cloves in with the tomatoes while they roast and add a hint of buttery, roasted garlic flavour to the soup.

Roasted Tomato Soup

The first time I made this, there was a tomato emergency. The collection I had was rapidly going south and was going to have to be tossed soon if I didn’t figure out something to do with them. Of course, since I was just playing around in the kitchen, I didn’t bother documenting the process.

The soup was full of flavour and velvety smooth. It was definitely a keeper.

A civilized lunch

The second time I made the soup, it was almost as good, but I’m going to suggest not using as much stock as I did this round. The first soup, which only had about two cups of stock, had a much more intense tomato flavour, which is what made the soup so great. The second one, I used three cups of stock. The tomato flavour was duller and I won’t be doing that again.

Tomatoes

Roasted Tomatoes and Garlic

Diced Onion

Soup in blender from above

In the blender

Soup from the side

Roasted Tomato Soup

  • Six or seven tomatoes, cut in half or quarters depending on their size
  • 2 tablespoons olive oil, divided
  • one onion, diced
  • four cloves garlic, unpeeled
  • 1/4 cup brandy, optional
  • 1 tablespoon sugar
  • 2 cups chicken or vegetable stock
  • 1/4 cup cream, milk or half-and-half
  • Salt and pepper

Preheat the oven to 375. Cut tomatoes in halves or quarters, depending on their size, and lay cut side up in a roasting pan. Throw in unpeeled garlic cloves amongst the tomatoes. Drizzle everything with one tablespoon of olive oil and sprinkle with kosher or sea salt and fresh ground pepper. Roast for 30 to 45 minutes until the tomatoes and garlic have started to caramelize.

Heat the remaining tablespoon of olive oil in a saucepan on medium heat, then add the diced onion and saute until transluscent — about four or five minutes. Add brandy, if using, and cook for another minute or two. Add sugar, then stock. Bring to low boil.

Remove paper skins from garlic, then add the tomatoes and garlic into the pot with the stock. Let cook for a few minutes. Pour everything into blender and whiz until velvety smooth. Add cream or milk and whiz for another minute. Taste for seasonings. (Since there is salt on the tomatoes and in the stock, I advise waiting until the end before seasoning because you may not need to add anything.)

Continue Reading

Risotto with Roasted Butternut Squash

Last week I worked a couple of night shifts.

I used to have a position where I worked nights for a month at a time, every three months. That was too much for me. Over the course of the weeks, I’d start to feel more and more ghost-like, spending my days alone and my nights with only a handful of colleagues; the final hour I was pretty much alone and I would slink out into the dark night, drive home and stay awake until three in the morning before finally crawling into bed.

But I don’t mind the odd night shift, actually. Sleeping in? A sunny day to one’s self? A few hours to bake and cook and photograph and eat? Sounds good to me. (Especially in these days of waning winter light, when full sun has been minimized to just a few short hours in the early afternoon.)

Plus, who doesn’t love the idea of waking up and having Risotto with Roasted Butternut Squash for breakfast?

Risotto with Roasted Butternut Squash

That morning, searching around for something to eat, I realized I had better use up some butternut squash that was otherwise going to have to be imminently pitched. Roasting it was the only reasonable answer. And, as I dumped the cubes into a roasting dish and drizzled it with olive oil and sprinkled on salt and pepper, I remembered a Barefoot Contessa recipe for a risotto with roasted squash.

In pulling out my recipe book, however, I realized I was missing some key ingredients, including shallots and pancetta. I’m sure these things make her version even better, but this bastardized version made me swoon when I sat down less than an hour later with a big bowlful and the contented feeling that comes from hot food and knowing work is still hours away.

Luckily, I did have a small box of saffron — another of my myriad food impulse purchases that had not been cracked open. Saffron, those delicate threads, so scarlet, so fragile. I remember growing up, seeing the same type of small, clear plastic box in my mum’s cupboards. But I have no recollection of her ever using it. The red threads impart a lovely orange-yellow colour to the risotto and also their own flavour, which I can’t really attempt to explain. Still, while I made this with saffron, if you don’t have it, I wouldn’t panic.

This made enough to feed two adults generously, likely four as a side dish. Or, one of me over the course of several meals.

Roasted butternut squash

Saffron

Getting the risotto started

Final steps

Risotto with Roasted Butternut Squash

  • 1 small butternut squash (1 pound)
  • 2 tablespoons olive oil, divided
  • salt and pepper
  • 1/2 onion, diced
  • 3/4 cup arborio rice
  • pinch saffron (optional)
  • 1/2 cup white wine
  • 3 cups chicken stock
  • 2 tablespoons butter
  • 1/2 cup freshly grated parmesan

Preheat oven to 400. Peel the butternut squash, halve it and remove seeds. Cut into 3/4″ cubes. Place squash in roasting dish or on sheet pan, toss with olive oil, 1 teaspoon salt and 1/2 teaspoon pepper. Roast until tender and golden in spots, about 25 minutes. Toss once to ensure even roasting.Meanwhile, heat the chicken stock in a small covered saucepan. Leave it on low heat to simmer.

In saucepan, heat 1 tablespoon olive oil, add diced onion and saute until translucent. Put chicken stock in microwave safe bowl or measuring cup and heat. (Time will vary on the microwave; start with two minutes. This can also be done by warming the stock on the stove, but I find the microwave system saves me another pot to wash. If the stock cools too much, just microwave it again.)

Add rice to onion and oil mixture and stir until the grains are coated. Add the wine and let it reduce slightly. Add one cup of stock, along with the saffron, if using. Simmer, stirring occasionally, until the stock is absorbed — about five to 10 minutes. When the stock is almost gone, add the next cup. Repeat with the last cup of stock. When the liquid is all absorbed, remove pot from heat, stir in butter and cheese. Toss in roasted squash. Add salt and fresh pepper to taste.

Continue Reading

Balsamic Steaks

I love vinegar.

As a child, when I used to visit my grandparents on the weekends by taking a ferry to one of the Gulf Islands, I used to take packages of white vinegar from the on-board cafeteria and suck on them during the 50-minute boat ride. Yes, it kind of makes me shudder now. I have always preferred Salt & Vinegar chips to any other flavour. And I swear I’m addicted to dipping focaccia in olive oil swirled with deep purple-black Balsamic vinegar.

I love steak too.

So, it only seemed natural to marry the two together in some divine marinated bliss.

The marinade ingredients

I think I first came across the idea several years ago when I found a recipe online for steaks marinated in, among other ingredients, Balsamic vinegar, garlic and olive oil. But it involved searing on the stove and then finishing in the oven and, after making it once, I decided that was a bit of a hassle that didn’t interest me. And then, last week, I impulsively bought some steaks. (Honestly, I love them, but do find them a bit baffling.)

I’m sure part of the temptation was because the label on them gave some instructions on how to cook them (which is the part I find most baffling. I have no idea what this stems from; it all seems straight forward when I’m watching TV chefs do it). Anyway, I came home and realized I would now have to actually DO something with them. So I popped them in a freezer bag with olive oil, Balsamic and several cloves of chopped garlic. Then I put them on the counter to marinate and started making the lemon custard cakes. But, by the time those babies were in the oven, I was no longer interested in dinner. (Full disclosure: one of those became my dinner that night.)

Best lazy move ever.

They marinated for 24 hours before I could finally throw them on a piping hot grill pan (a city-girl-with-no-balcony-and-no-barbecue’s best friend). A few minutes on each side and a wee rest under a tin foil blanket and dinner was ready. (Yes, there were side dishes, but, the steak was the star of the show.) Medium-rare goodness with a garlicky-sweet-vinegar undertone.

It was so good I made it again a week later.

There is no official recipe here. Gauge measurements based on how much steak you have. This is a rough estimate for the two steaks I made. And, yes, I love garlic. You may want to ease up (or add more).

The marinade

Balsamic steak

Balsamic Steaks

  • 1/2 cup olive oil (don’t bother with extra virgin here; all that lovely grassy flavour will evaporate in the smoke)
  • 1/3 cup Balsamic vinegar
  • 4 cloves garlic, chopped (I don’t completely mince them because burnt garlic is disgusting and this way, bits that cling to the steak still taste good.)
  • freshly ground pepper

Mix all the ingredients in a freezer bag. Add the steaks and let it marinate. One hour is probably the minimum, 24 hours is fantastic.

Heat a grill pan/normal pan/barbecue/hibachi etc. until it is sizzling hot. Add steaks. Cook to your preference. I add the salt after cooking, so it doesn’t draw out any of the steak’s moisture. Let the steaks rest for several minutes after pulling them off the heat, so the juices can redistribute. Otherwise, if you cut into it immediately, they’ll all drain out and the steak will be dry.

Good with baby potatoes, which can sop up all the luscious vinegar-steak juices.

Continue Reading

Berry Scones

I’m behind on my blogging due to many reasons, including the fact that I am unsure what I’ve even been subsisting on for the last two weeks. (Well, that’s not completely true; I had about four days’ worth of mustard-butter broccoli pasta to get through.) And I guess I was also hesitating to post these scones for several reasons, not the least of which is that they were only mostly successful. I mean, who wants to read a cooking blog by someone who keeps making mistakes? It doesn’t scream confidence.

Finished scone

That’s not to say these Berry Scones weren’t light and flaky and fully of raspberry deliciousness. It’s just that I really should have moved the oven rack up about two levels so the bottoms didn’t bake (um, brown) quite as quickly as they ended up doing. However, perhaps we can all use this as a lesson about making sure your oven rack is in the middle of the oven when it comes to baking and not being lazy about moving it when you discover it’s a bit low.

So, this really all began because I had this extra buttermilk lying around and I really didn’t want to waste it. And I was on a bit of a scone kick because I do believe that practice makes perfect. Oh, and because I believe in full disclosure, it was also a bit because I had just bought my first set of biscuit cutters — a lovely batch of three varying sizes that nest inside each other. So, really, a buttermilk scone made perfect sense. And, bless the Internet, I found a nice recipe.

All went surprisingly well, though it did get a bit messy because I broke apart the frozen raspberries as I wanted them to be a little more well distributed. I now have a pink-stained rolling pin, but it was worth it. I’d much rather have raspberries in every bite than just one or two in an entire scone.

Thankfully, because they were pretty tall and flaky, it was easy to just cut the less-than-desirable bottoms off and continue to enjoy.

In future, I would add more lemon zest because I love all things lemon and I feel it would have perked these up even more, adding to the summery flavour.

Cutting in the butter

Adding the zest

Scone dough

Scone cutouts

Solo scone

Berry Scones

  • 4 3/4 cups flour
  • 1 cup, 1 tbsp. unsalted butter
  • 1 tbsp. baking powder
  • 3/4 tsp. baking soda
  • 1/2 cup sugar
  • 3/4 cup fruit (fresh or dried)
  • 1 1/2 cups buttermilk
  • 1 tsp. lemon zest

Preheat oven to 400. Mix together flour, baking powder, baking soda, salt and sugar. Using a food processor, a pastry blender or two knives, cut the butter into the flour until it looks like coarse oatmeal. Add the lemon zest and fruit and mix to combine. Add all of the buttermilk at once, then stir just until the dough comes together. Topple out onto floured counter and form into a ball before rolling out until it’s about an inch thick. Cut out using cutters or into rustic triangles using a knife.

Bake for 25-30 minutes, though I would start checking sooner.

Eat. Especially if you can find devonshire cream somewhere.

Continue Reading