Coronation Grape Focaccia with Rosemary

A friend of mine has diagnosed me with a case of the ‘overwhelms’ and that’s a pretty accurate summary of where things are at right now. I’ll have book news (OMG!) in a blog post later this week, work is hectic and the last few months have been filled with lots of amazing and lots of truly heartbreaking things. For each of those there are drafts of blog posts that I haven’t been able to bring myself to finish writing and post.

But one bright spot has been that my Writer Girls — a collection of my closest friends from my early days at the University of Victoria — were in town a couple of weeks ago for a visit and we spent three glorious days eating, drinking, laughing and catching up. There is no better way to recharge than to spend time with people who know you almost better than you know yourself. And, better than that, have far better memory-retention skills and can recall, at a moment’s notice, all the hilariously dumb things you’ve done or said in the last 20 years. And trust me, there are a lot of them.

On the final day, between ferrying the girls back to the airport to catch their flights back home, we decided an afternoon snack was in order and my friend Julie wandered off to the local grocery store in search of cheese and crackers. She returned with those, along with a huge box of dusky dark purple Coronation grapes. Beyond their stunning colour, they have this beautiful slightly sweet, slightly pungent taste. They were perfect with cheese.

And then all of my girls were gone and I was left with the remainder of the grapes.

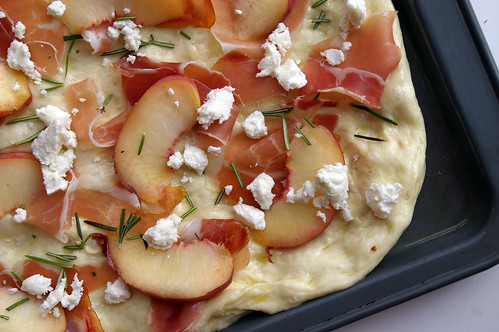
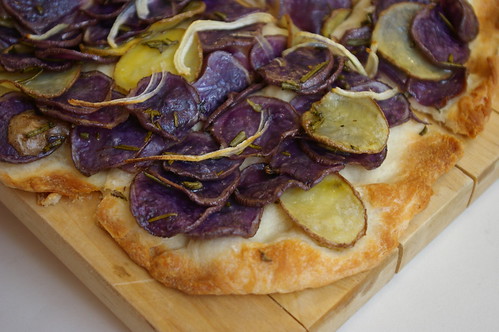
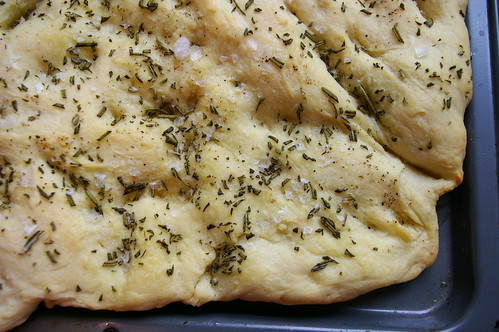
And for some unknown reason, I remembered seeing a recipe for a focaccia topped with Concord grapes and sprigs of rosemary and that’s all I could think about. Salty-sweet, with the grapes roasted and warm and all that lovely woodsy rosemary strewn over the whole thing.

In Italian, it’s known as Schiacciata con L’uva and it’s a truly autumnal bit of baking linked to the grape harvest in Tuscany. So, Concord or Coronation grapes are perfect for this focaccia since this is exactly when they are in season. Mostly you read about this being made with Concords. (The Coronation was developed here in Canada and seems more popular on this side of the border.) The benefit of using Coronations, though, is that they are seedless (yay!) and, judging from some of the recipes I found online, not having to de-seed grapes saves a lot of time and mess. Since I’m generally prone to getting food all over what I’m wearing, having an option to at least reduce the chance of staining myself purple is a good thing.

These grapes are delicious on their own — especially cold from the fridge and most definitely when served with some nice crackers and cheese. But roasting them into a focaccia that has been sprinkled with raw sugar, flaked salt and rosemary tranforms them to something so much more. They get a bit jammy, their skins wrinkle and their dark purple juice stains the bread around them. Their complex flavour plays well with the herbal hit of rosemary and, well, it’s all on focaccia, so what more could one ask for? Other than having my Writer Girls here for one more weekend to eat some with me.

Since we’re planning on next meeting up in Italy next fall, though, there’s a very good chance I’ll be able to make it for them then.

Coronation Grape and Rosemary Focaccia

I adapted this from a few different sources, mostly amping up the amount of grapes and rosemary — you know, the good parts.

  • 1 cup warm water (between 105 and 110F)
  • 2 tablespoons milk
  • 1 1/2 teaspoons sugar
  • 1 1/2 teaspoons active dry yeast
  • 2 3/4 cups all-purpose flour
  • 1 teaspoon salt
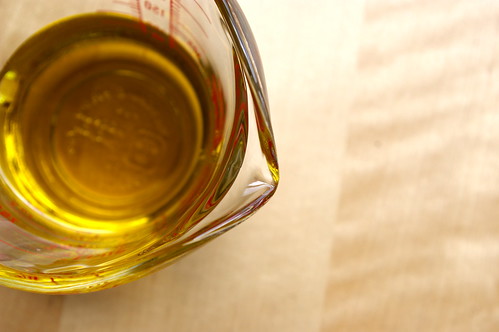
  • 5 to 6 tablespoons olive oil, divided
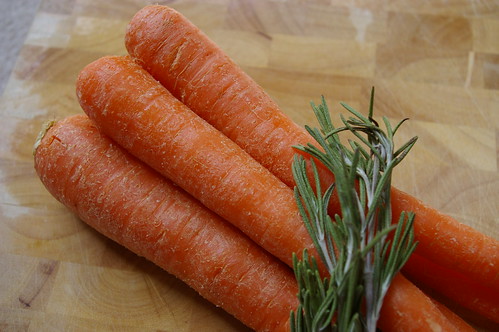
  • 1 1/2 cups Coronation grapes
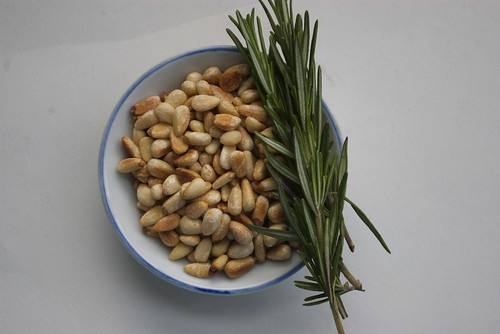
  • 1 tablespoon rosemary leaves
  • 1 tablespoon raw sugar
  • 2 big pinches flaked sea salt

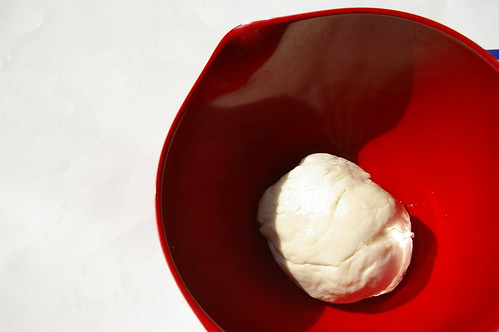
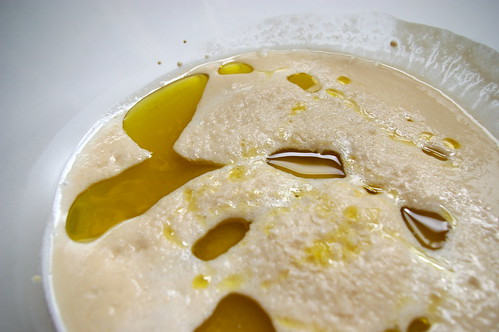
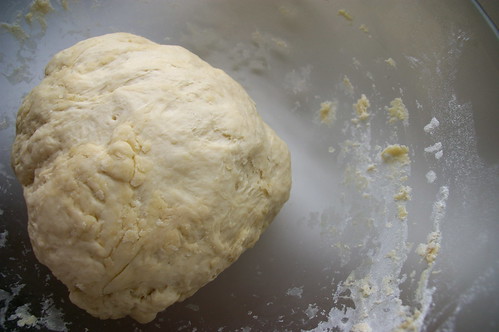
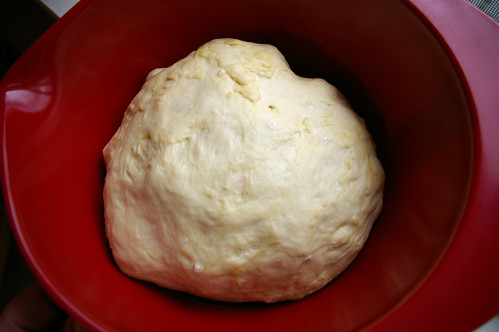
In the bowl of a stand mixer fitted with a dough hook, combine the water, milk, sugar and yeast and let sit until the yeast has bloomed and is creamy looking. Add the flour, salt and 2 tablespoons of the olive oil and mix on low speed until combined and then turn the speed up to medium and knead the dough until it forms a smooth ball, about 8 minutes.

Add 1 tablespoon of oil to a large bowl and use your fingers to spread the oil around the bowl. Transfer the ball of dough to the oiled bowl and turn to coat the dough all over. Cover and let rise in a warm place until doubled in size, about 1 to 1 1/2 hours.

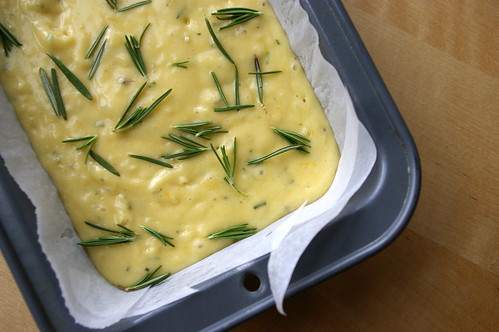
Line a baking sheet with a piece of parchment paper that hangs over the edges. (I’ve found this is the best way to make sure the focaccia doesn’t stick to the pan or the parchment.) Pour on 1 tablespoon of olive oil and spread all over the parchment that covers the pan. (There’s no need to oil the overhang.) Tip the risen dough onto the prepared baking sheet and, using the tips of your fingers, stretch the dough to fill it, dimpling the surface as you go. If the dough resists, wait a few minutes and then continue. It will fill the baking sheet with a little patience. Drizzle another tablespoon or two of olive oil over the dough, letting it fill the dimples. Cover loosely with plastic wrap and let it rise again for about 30 minutes.

As it rises, preheat the oven to 450F.

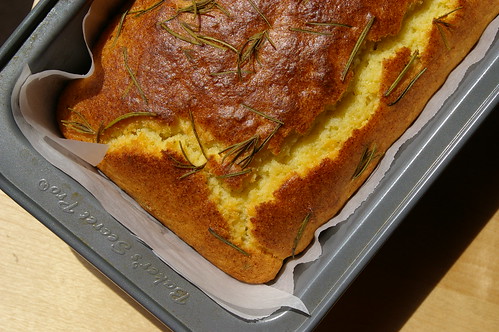
Just before baking, scatter over the grapes, rosemary, raw sugar and flaked salt, pressing them in to the dough slightly. Bake until golden and cooked through, about 15 minutes.

Serve warm or at room temperature (if it lasts long enough to cool to room temperature).


Continue Reading

Peach, Prosciutto, Rosemary and Goat Cheese Flatbread

I bought a few peaches from the farmer’s market a few weeks ago, thinking they would be a great and simple addition to bagged lunches for work. And when they were perfectly ripe, they were fantastic. Sweet and juicy and just oh-so-peachy tasting. Then I got home from work one night and just wanted a salad. But, you know, not just a salad. And then a brainwave: what if I took the final sweet peach and combined it with some goat cheese, prosciutto and pecans.

Peach

Good god, that was a fine salad. Dressed in a light vinaigrette made with blood orange vinegar. I ate it with a few pieces of crusty baguette and it was a fantastic dinner.

It should come as no surprise that I made it again a week later when I had another group of peaches ripe and at hand.

But later, I thought I would like to try combining the bread and the salad by creating a flatbread that used the peach-prosciutto-goat cheese combination. This time with a little rosemary added in.

Is it cheating if I used some pizza dough I bought at the local Italian market? I’m going to say no. I can make dough, but when you’re at the market anyway and they have perfectly risen balls of dough for a little more than a toonie, I figure there’s no harm in taking shortcuts once in a while.

Got home, stretched it out on a baking sheet covered in a thin layer of olive oil and then just topped it with slices of peach, chopped rosemary, some ragged pieces of torn prosciutto and blobs of goat cheese. Into the oven and baked until golden, which took probably only 10 to 15 minutes, and it was good to eat.

It was delicious, though next time I may omit the goat cheese which, frankly, felt a bit like gilding the lily.

So this is less a recipe as much as a suggestion but one worth trying.

Flabread pre-oven

Peach, prosciutto, rosemary flatbread

Peach, Prosciutto, Rosemary and Goat Cheese Flatbread

  • ball of pizza dough or homemade focaccia/pizza dough, enough to cover a baking sheet
  • olive oil to lightly coat baking sheet – 1 to 2 tablespoons
  • one peach
  • 5 slices prosciutto, torn or cut into smaller pieces
  • 1 tablespoon rosemary, roughly chopped
  • 2 – 3 ounces goat cheese, crumbled OPTIONAL

Set oven to 500F. Stretch out dough on lightly oiled baking sheet. Top with sliced peaches, prosciutto, rosemary and goat cheese.

Bake until dough is golden, about 10 to 15 minutes.

Continue Reading

Lemon Rosemary Olive Oil Cake

OK.

It’s official.

I need an intervention.

My love of rosemary and lemon have reached new levels of ridiculousness.

Cake slice

And here’s how I know that.

As some of you may know, I write for the Calgary Herald’s Real Life section on occasion. I like to pitch the topic in advance, just in case it’s going to clash with any of the other upcoming articles the editor may have planned.

Me: Here’s what I’m thinking: Lemon Rosemary Olive Oil Cake

(Pause)

Her: Lemon?

Me: (confused) …Yes…?

Her: Wasn’t your last thing on lemon? And, um, the one before that?

Me: Okey-dokey. I’ll figure something out. Maybe I should do a boozy recipe….

Her: Good idea.

It was only when I got back to my desk and looked up the drink recipe I had added to my to-do list that I realized I may have a problem: Vodka Rosemary Lemonade Fizz.

Damn you, lemon, why do I love you so? And, uh, rosemary too.

Lemon and Rosemary

But, just because I couldn’t write it for the Herald didn’t mean this bad boy (and, at some point down the road, the vodka recipe too) wasn’t going to get made. After all, one can only deny their love for lemon desserts for so long. And, let’s face it, it was raining and snowing and sleeting out at the time, so what was a girl to do? Bake.

This is adapted slightly from Julie’s recipe (over at Dinner with Julie). Her original recipe calls for a finely chopped or grated pear. I omitted it this time around, but will be tempted to throw one in next time.

Olive Oil

Studded with rosemary

Golden cake

Lemon Rosemary Olive Oil Cake

  • 4 large eggs
  • 3/4 cup sugar
  • grated zest and juice of a lemon
  • 1/2 cup regular or extra virgin olive oil or canola oil
  • 1 1/2 cups all-purpose flour
  • 2 tsp. baking power
  • 1/4 tsp. salt
  • 2 sprigs of rosemary, leaves stripped off and chopped
  • a couple more sprigs of rosemary to decorate the top (optional)

Preheat oven to 350. In large bowl, beat eggs for about a minute until frothy. Add sugar and beat for a few minutes until mixture is thick and pale. Add lemon zest, juice and olive oil and beat again.

Combine flour, baking powder, rosemary and salt in another bowl, then add to egg mixture. Stir by hand until just combined.

Pour into prepared loaf pan (sprayed or lined with parchment). Lay decorative rosemary on top. Bake for 45 minutes, until golden. (Mine was done in a little less, so you may want to check earlier if your oven runs a bit hot.

Continue Reading

Potato Pizza with Rosemary

I love the French word for potato: pomme de terre.

Apple of the earth.

It’s so evocative. It speaks of wholesomeness and simplicity. The dusty rows in farmer’s fields, the pockmarked tubers hidden under clumps of dirt and the round potatoes that tumble out when finally unearthed.
Also, it’s a damn tasty vegetable.

Potato Pizza with Rosemary I

My love of potatoes goes back to childhood. At one time I even had a potato scrapbook. I’m not kidding.

In the ’80s, the potato farmers in the U.S. had a big ad campaign to try to convince Americans that potatoes were vegetables. One was a photo of a big baker potato with a big daub of green paint on it, next to a jar of paint and dripping brush. Underneath was a caption that read something like, “What do we have to do to show it’s a vegetable?”

And, while the scrapbook has disappeared from my life, my love of potatoes remains.

I was so excited a couple of weeks ago to spy a massive (read: too big for a single person) bag of multi-coloured baby potatoes at Costco. I rooted through to find one that had a high proportion of purple potatoes. These things rock. I love their vibrant colour! Am tempted to boil and squash up the next batch for a little violet-coloured mash….

Purple Potato

So, I knew they would be perfect for this potato pizza. This recipe would have Atkins rolling over in his grave. A carb base, topped with carbs. Mmmm!

But, damn it, sometimes a girl just needs her potatoes.

Pizza dough rising

Sliced potatoes

Pizza for the oven

Potato Pizza with Rosemary II

Potato Pizza with Rosemary III

I apologize. I have no idea where this recipe came from originally. Something I found years ago, cut and paste into a plain document and then printed…. Even then, it’s been slightly adapted, of course.

Potato Pizza with Rosemary

  • 1 1/2 cups all-purpose flour
  • 1/2 teaspoon salt
  • 1/2 teaspoon sugar
  • 1/2 cup cold water
  • 1/2 teaspoon instant dry yeast
  • Olive oil for bowl and pan
  • thinly sliced potatoes (2 or 3 large potatoes, 10 or more baby potatoes)
  • 1/4 onion, cut in half and thinly sliced
  • 4 tablespoons extra virgin olive oil
  • 2 tablespoons fresh rosemary, chopped
  • sea salt for sprinkling

Combine flour, salt, sugar and yeast in a bowl, then slowly add water. Mix with spoon until ingredients start to come together, then using dough hook on a mixer, knead/mix for another 10 minutes until the dough is smooth and elastic.

Place in oiled bowl and let rise for two or more hours. (Note: mine didn’t rise quite as much. Unsure why, but ended up with pretty thin crust as a result.)

Using a mandoline or a knife, thinly slice potatoes. (The recipe then calls for the potatoes to be soaked in several changes of water. I didn’t do this because I was worried what would happen to the purple potatoes. Still tasted fine to me, so….?) Combine potatoes with pinch or two of salt, rosemary and 1 tablespoon of extra virgin olive oil.

Preheat the oven to 425. Spread thin layer of olive oil on rimmed baking sheet. Stretch dough out on pan until it reaches the edges. Evenly layer potatoes over dough, then drizzle on three tablespoons olive oil, along with sea salt and chopped rosemary.

Bake about 20 minutes until bottom is golden. Let cool slightly before cutting, then serve. Also good at room temperature.

Continue Reading

Pine Nut Rosemary Shortbread

I only have one cookie cutter. It’s shaped like a dog bone. I bought it for a book club function — we bring foods that can be linked back to the book; this time it was The Curious Incident of the Dog in the Night and I was going to make dog-bone cookies. And then I didn’t.

So, when I was overtaken by the impulse to make Pine Nut Rosemary Shortbread, I realized they were going to be dog-bone shaped.

Or so I thought.

It’s no wonder I was drawn to this recipe. Rosemary? Sugar? It was going to be like the Barefoot Contessa’s Rosemary Cashews, but in cookie form. What could be better? And, there is no doubt, this recipe was a winner.

The stars of the show

But it wasn’t without its problems. Shortbread and I don’t get along. Once again, the dough absolutely shattered into pea-sized bits when I added the flour. I squished it into a ball and then two flat disks before putting it in the fridge, but when it came to rolling it out, it was a no go. Instead, I squished it back into logs and sliced it. I definitely liked the thicker slices better and would not hesitate to make them again this way. But, next time, I will take my mum’s advice and let the butter get so warm it’s almost sloppy before attempting this recipe. Apparently, I am too impatient when it comes to letting the butter get to room temperature and it was likely too cold when I started.

So, there were no dog-bone shaped shortbread cookies. Perhaps next time. Or perhaps not. It doesn’t matter, frankly, what shape these are, just as long as they get made.

This recipe comes from Heidi over at 101 Cookbooks. I’ve made a few changes, namely doubling the rosemary and using all-purpose flour. I am considering making this next time with brown sugar, just to see what that would be like.

Chopped ingredients for shortbread

Butter and lemon zest

Chilled dough

Sliced and ready

Pine Nut Rosemary Shortbread

Pine Nut Rosemary Shortbread

  • 2 cups all-purpose flour
  • 1 teaspoon fine-grain sea salt
  • 1 cup unsalted butter, at room temperature (seriously)
  • 2/3 cup sugar
  • zest of one lemon
  • 2/3 cup pine nuts, toasted and loosely chopped
  • 2 teaspoons fresh rosemary, finely chopped

Mix flour and salt in a small bowl, using whisk to combine.

Cream butter until light and fluffy. Add sugar and lemon zest, then beat again. Add flour mixture, nuts and rosemary and mix until the dough goes just past the crumbly stage and begins to clump together (Heidi’s words, not mine, obviously, because mine never got past this stage). Turn dough out onto lightly floured work surface and knead once or twice to bring it together. Divide into two balls and flatted into disks about one inch thick. Wrap in plastic wrap and refrigerate for 15 minutes. My way: squish into logs about one inch in diameter. Roll in plastic wrap and then refrigerate.

Preheat the oven to 350. Line a baking sheet with parchment. If you went with the log method, slice into 1/4 inch rounds and place on baking sheet. (Some of mine were thicker than this and I liked them better.)  If you have a disk, roll out on lightly floured surface to 1/4 inch thickness. Cut with cookie cutters and place on baking sheet. Either way, bake for about 10 minutes or until slightly golden.

Continue Reading

In pursuit of focaccia perfection

There is a restaurant in Victoria that I am almost incapable of avoiding during any visit to that lovely little city. Pagliacci’s was the scene of more than a few fun nights out with friends while we procrastinated on assignments from UVic and has subsequently become a place that speaks to me of good memories along with good food. I am positively addicted to their dish called the Prawn Broker (spinach pasta, prawns and cashews in a coconut-curry sauce) and will admit with no hesitation that I always order the full size — which is far too big for one sitting — so that I can enjoy just a little bit more later. (Side note: Every few weeks I search the Internet in the apparently feeble hope that the recipe will magically appear. Future blogging may include attempts to recreate the thing myself. Success is not guaranteed.)

But, while the Prawn Broker is my main dish of choice, I could very easily live on the baskets of focaccia set on the table shortly after ordering. Chewy, thickly crusted, salty. I have no idea what magic lies in that recipe which leads to such bready perfection. I can only presume part of the reason is a thick dousing of olive oil. But there are no apparent herbs or crystals of salt to hint at what else goes into this recipe.

My pursuit of focaccia perfection began about a year ago when I bought (finally!) a handheld mixer. (Friends were unsurprisingly baffled when I made cookies without a mixer, using my own arm strength to cream butter and sugar together.) To my delight, it came with two dough hooks, which opened up the world of bread baking. Okay, so, it’s a pretty limited world at this point, but nevertheless. Since then, I’ve tried to make focaccia a few times, but found it lacking. Where i wanted dense and chewy, these attempts were light and, at one point, crumbly (don’t try to make bread with all-purpose flour, apparently). The top was delicious, owing mostly to a liberal sprinkling of flaky Maldon salt, chopped rosemary and a few generous glugs of olive oil that filled in the divots I had dimpled across the surface of the pale dough. But it wasn’t the best ever.

Baking bread, I fear, is one of those arts that is being lost in my generation. The reason I never made bread before was that, frankly, kneading baffles me. I never seem to get the dough to come together and never seem to have the patience to keep going. Growing up, my mum often made homemade bread and I would “help” but eventually she would take over the kneading. (This is why the dough hooks were such a welcome addition to my mixer.) But also lost is the knowledge on how to affect the outcome of recipes.

I was sharing the focaccia dilemma with my friend Shelley one afternoon when she asked me a few questions about the recipe and I mentioned that it called for the dough to rise three times. Well, she said, that explained why it was so light. Fewer chances to rise = denser dough. Of course, now that she has said that, it makes perfect sense. But since I didn’t know much about baking bread, it didn’t occur to me to play around with the recipe. Of course, now that i *do* know, I’m making it a mission to make the best focaccia possible.

This time I tried a different recipe, but modified it slightly by not letting it rise a second time in the hope it would produce a chewier end result. It definitely did. But it’s still not as good as the bread from Pagliacci’s and I felt the focaccia overall could have used some more flavour. The top was pretty good, though, owing I’m sure to the generous amount of salt, olive oil and chopped rosemary.

And so, the pursuit continues.

Yeast, water, sugar and olive oil

Just mixed dough

Rising dough

Ready for the oven

Fresh from the oven

Here is the latest attempt. It comes from the fabulous Rebar Modern Food Cookbook, which, as previously mentioned, I bought only for a salad dressing recipe. In this case, however, I didn’t let it rise a second time and I didn’t bother with the garlic, as I find it very hard to keep it from burning. There are few tastes worse than burnt garlic. This is the recipe as printed.

Rosemary Garlic Foccacia

  • 1 3/4 cups warm water
  • 1 tbsp. traditional baking yeast
  • 1/2 tsp. sugar
  • 2 tsp. salt
  • 1/4 cup olive oil
  • 4 cups unbleached flour

Topping

  • 4-6 garlic cloves, minced
  • 4 tbsp. olive oil
  • 2 tsp. coarse salt
  • 2 tbsp. chopped rosemary
  • cracked black pepper

In a large mixing bowl, combine the warm water, yeast and sugar. Let the mixture sit until it foams. Stir in salt and olive oil, then start adding flour, one cup at a time, beating well with a wooden spoon. (Yeah, I used my mixer here.) When you can no longer stir, turn the dough out on a floured surface and knead in the remaining flour. Knead the dough until smooth and elastic, sprinkling just enough flour on the counter to prevent sticking.

Form the dough into a ball and place a large, lightly oiled bowl. Cover with a clean, damp cloth and set the bowl in a warm, draft-free spot. Let rise until doubled in bulk (1 – 1 1/2 hours). Punch the dough down and let it rise again until doubled.

Pre-heat the oven to 350F. Place the dough on a well-oiled 12″x16″ baking sheet with 1/2″ sides. Gently stretch the dough to roughly fit the dimensions of the pan. Drizzle the surface with olive oil and spread the minced garlic over the entire area. Sprinkle chopped rosemary evenly on top, followed by coarse salt. Finish with cracked pepper. Using your fingertips, gently poke indentations over the entire surface. It should appear dimpled and rustic-looking. Let rise again for about 15 minutes, or just until it puffs up slightly.

Place the loaf in the center rack of the oven. Bake for 20 minutes, rotating the pan halfway through. The garlic should be lightly golden. Be careful not to over bake. Serve warm.

Continue Reading

Carrot-Rosemary Scones

I love scones. I like sweet ones with devonshire cream and jam. I like savoury ones with a little butter.

But scones don’t seem to feel quite the same way about me.

Or maybe they sense fear.

Ready to eat

One of the last times I remember making scones was when I was living in a small town in southern Japan. While I was the only foreigner in my community of 10,000, I was eagerly welcomed by many of the locals, including my next door neighbour who preferred to be called Susan. She was married to one of the teachers at the high school where I also taught and they had a young son. (We lived in a rather unattractive triplex — is that what a set of three townhouse-type homes is called, if a duplex means two? — that was teachers’ housing, along with the school’s vice-principal.) She was a very sweet woman who often had me over for dinner and hosted a pretty large (when one considers the relatively tiny size of her living room) dinner party when my then-boyfriend, mum and little sister came over to visit. At any rate, she signed us up for a cooking lesson with a women from the U.S. Naval base, stationed in nearby Sasebo. The subject was, of course, scones.

So, here I was, the lonely foreigner amongst a group of Japanese housewives learning to bake scones from some southern U.S. navy wife. Truly one of the stranger experiences.

Susan and I followed all of the directions faithfully, or so I believed. But our lovely little scones were nothing more than dough rocks by the time they came out of the oven. The instructor was convinced we had done something wrong (and I guess we must have), but I was so confident we had followed the recipe exactly.

I didn’t bother to attempt scones again for several years. Mostly, I suspect, because it’s one thing to bake cookies for a crowd and quite another to show up at work with a pile of scones. And also likely because deep down I harboured some anxiety that I would put in all that effort and still come out with flavoured rocks.

And then I saw a recipe for Carrot and Rosemary Scones.

I love rosemary. And carrots. And dijon mustard. And garlic. And parmesan cheese. The fact that all of these things were combined into a flaky scone was enough to jolt me out of my scone slump.

But it wasn’t going to be a breeze.

When I first attempted these, I found the mixture unbearably dry, but was nervous to add more liquid since I know making a light and fluffy scone requires some delicate baking chemistry. In the end, I did add some more cream, but it was still quite a dry dough. Once baked, the scones were still quite flat and not very brown. That’s not to say they weren’t tasty; they were. But not scone perfection.

The next time I called my mum (to whom I turn for all baking advice, her being a stellar baker and, I suspect, slightly amused by my ongoing need for guidance) and she said to not fear the addition of even more cream as the lack of liquid may have contributed to the rather flat outcome of the first attempt. Take two on the scones was slightly more successful — they were, at least, a little more golden and the dough had come together more easily — but only just. They were still flattish, though.

I sent the recipe along to my mum in advance of a visit out to Vancouver so that we could have a hands-on attempt together. (Baking, I feel, is best learned by participating at the side of an expert.) Not only did we almost double the amount of liquid, but, in the end, they still didn’t rise as much as other scone recipes. We eventually concluded the weight of the carrots was likely the culprit.

On the next attempt, I used my food processor to cut in the butter (justifying it as that I had to pull it out for grating the carrots anyway) and then added much more cream (a mixture of whipping and half-and-half because I wanted to use up the heavier cream) than originally called for. I also accidentally forgot the parmesan. So, I’m unsure which, if either, of those decisions played a role in the outcome, but these scones were beautiful.

They rose! They were tasty! They were flaky!

They still didn’t rise as much as other scone recipes; I blame it on the carrots.

carrots and rosemary

rosemary goes in to the dough

grated carrots

cutouts

ready to bake

Ready to eat II

While this recipe originally comes from Clotilde at Chocolate and Zucchini, I have made some adjustments. Below is the recipe as I make it.

Carrot and Rosemary Scones

  • 2 cups all-purpose flour
  • 1 1/4 tsp. baking powder
  • 1 1/4 tsp. salt
  • 9 tbsp. chilled, unsalted butter (this is a little more than 1/2 cup if that helps)
  • 1 1/2 cups grated carrots
  • 2 tbsp. fresh rosemary, chopped
  • 2 cloves garlic, peeled and finely minced (I use my handy rasp for this.)
  • 2 tbsp. Dijon mustard
  • 3/4 cup cream (whipping, half-and-half or a mixture of the two, it doesn’t really matter.)
  • 1 cup grated parmesan (I’d go with optional for this because they were so tasty even without the cheese)

Preheat the oven to 350. In a mixing bowl, combine the flour, baking powder and salt. Add the butter and rub it into the flour mixture with your fingers or using a pastry blender or in a food processor, if you have one. It should resemble coarse crumbs when it’s blended enough. Add the carrots, rosemary and cheese if you’re using it.

Mix together the mustard, cream and garlic (I find this distributes the garlic better, but you can also add it when you mix in the carrots) and then add to the dry ingredients. Mix together gently until the dough comes together and then empty out onto floured counter. Pat together into a ball and then roll out until the dough is about a half-inch thick. Cut out using biscuit cutter or whatever is handy. (I used a narrow drinking glass and that worked fine.)

The original recipe calls for 20 minutes in the oven. Mine baked for 17 before they were nice and golden. Cool on a rack. And then try to keep yourself from eating too many.

Continue Reading

Rosemary Cashews

I was doing my taxes tonight — one day before the deadline, which must be a record for me — which is apropos of nothing other than my mind was wandering away from my CPP contributions and more towards what else I could be doing if I wasn’t being forced to do paperwork … even if that paperwork would lead to an extra couple of hundred dollars in my bank account.

Last week I bought a package of rosemary and some bulk cashews thinking I might find some time to put together one of my favourite snack recipes. Somehow over the course of the past several days things got pretty busy, but I couldn’t keep putting it off for fear the lovely green needles of rosemary would blacken and wither in my crisper. So, as I signed off on my tax return, I decided it was time to whip up a little bonus.

The Ingredients

Rosemary Cashews have rapidly become my go-to hostess gift since I began making them a few years ago. They have been to book club and video nights, served as work snacks and traveled all the way to Malta as a small, homemade gift for friends hosting me there. (They were such a hit, we made a bastardized version for Canadian Thanksgiving, in which my friends invited 10 for turkey dinner by the pool.)

I love the play of salty and sweet and the hit of heat, combined with the herby woodiness of the rosemary. Plus they’re ridiculously easy to make.

With all due respect to Ina Garten — my cooking guru, the Barefoot Contessa — I generally not-quite-double the coating to ensure the cashews are thoroughly covered. (Hey, the nuts are just the carriers of the rosemary and sugar, in this girl’s eyes. And yes, this may make them a little bit more slippery, but isn’t that why cocktail napkins were invented?)

I also generally use salted butter because that’s what I have sitting around and can’t be bothered to invest in unsalted just for one or two recipes. As a result I cut back on the salt. Oh, and I’m kind of a wimp when it comes to heat, so I don’t add all the cayenne she calls for.

Rosemary Cashews

Here is the recipe is as it stands in her cookbook, Barefoot Contessa in Paris.

Rosemary Cashews

  • 1 pound roasted, unsalted cashews
  • 2 tbsp. minced fresh rosemary leaves
  • 1/2 tsp. cayenne pepper
  • 2 tsp. light brown sugar
  • 1 tbsp. kosher salt
  • 1 tbsp. unsalted butter, melted.

Preheat the oven to 350 degrees. Spread the cashews out on a sheet pan. Toast in the oven until warm, about five minutes. (Full disclosure here: I cheat at this part and just use a dry frying pan on low heat to heat up the nuts.)

In a large bowl, combine the rosemary, cayenne, sugar, salt and butter. Thoroughly toss the warm cashews with the spiced butter and serve warm. (Though, let’s be honest here, they are just fine at room temperature too.)

Continue Reading