Leftovers

In the last few months, I’ve shot photos for meals and food adventures here and there that haven’t made it in to any posts. Julie and I were joking that we should just do posts of these leftovers with no real preamble, just letting the photos speak for themselves.

So, yup, that’s what this is.

Enjoy!

Pasta Carbonara

Pasta Carbonara. (Recipe over here)

Pasta with tomatoes, peppers and wilted spinach

Penne with cherry tomatoes, roasted peppers and wilted spinach in a cream sauce.

Japa Dog

Oroshi dog, topped with freshly grated daikon from Japa Dog in Vancouver. My favourite part was chatting with the staff in Japanese.

Shio Ramen

Shio ramen from Hokkaido Ramen Santouka. Check out Andree’s review for more.

Charcuterie

Charcuterie from Cassis.

Steak and potatoes

Steak and potatoes from Cassis.

Strawberry Tart

Strawberry tart from Cassis.

Shrimp Po' Boy

Shrimp po’ boy from Big & Little’s in Chicago.

Lights at the Publican

Lights at Publican in Chicago.

Cinnamon Bun

Pecan sticky bun from Publican in Chicago.

Digging in

Digging in to the Pecan sticky bun at Publican in Chicago.

Kimchi Fried Rice

Kimchi fried rice for brunch at the Publican in Chicago.

Continue Reading

Welsh Scones

Growing up, I had a thing for the Royal family.

I had coffee table books all about Princess Diana, her wedding to Charles, her boys, William and Harry, along with a video of Andrew and Sarah Ferguson’s wedding.

I was one of those girly-girls with a penchant for dressing up, wanting to wear twirly skirts (that whirled out when I spun in circles; I called them turn-y skirts), put on lipstick. I always wanted a tiara.

So, although the inundation of countdowns and articles and television specials and photo galleries leading up to the wedding between Prince William of Wales and Kate (I’m sorry, Catherine) Middleton has been a bit much, my inner eight-year-old girl is kind of loving it. What will the dress look like? What diamond-encrusted tiara will adorn her lovely dark locks? What will the bridesmaids wear? Will they have turn-y skirts?

Outside of the fantasy world, I don’t envy Kate. I’m happy for her and William because they do some genuinely in love, something so clearly missing in the relationship between his parents (though I couldn’t see that as a child). But I wonder too at what she’s giving up for that love. Yes, there are jewels and gorgeous clothes, first-class trips, brushes with celebrity. And there is the paparazzi, the pomp, the expectations, the constantly public life.

No matter, I will be indulging that inner child and tuning in to the wedding.

In honour of that, I’ll be eating scones (and drinking some champagne, of course — though not at 3 a.m. I’m not so devoted that I will wake up that early. That’s why I have a PVR.) as Kate walks down the aisle.

"Welsh Cake" scone

I could eat any version of scones, but I decided to create a recipe that would combine a basic scone with a Welsh cake (which share some similarities with scones, though they are fried instead of baked). My stepfather, who is of Welsh descent, often made these as a Sunday treat when we were kids. (A tradition, thankfully, that continues when I visit my parents.) They have a distinctive flavour that comes from nutmeg and currants. Basically, I wanted to use those flavours. Not just because I love them, but it’s just so fitting.

Afternoon Tea

He is Prince William of Wales, of course. And the couple will start their life as newlyweds in Anglesey, an island off the northwest coast of Wales.

I have to give credit where it’s due, so I will say that Nigella Lawson has changed the way I make scones. Her trick of grating frozen butter is just . . . perfection. I cannot recommend it enough. No matter what scone recipe I use these days, I always, always, always use this technique. Please, try it, I implore you.

This is based on her strawberry shortcake recipe, but has been adjusted.

Butter curls

Egg in Cream

Rolled and Cut

"Welsh Cake" Scones

Welsh Scones

  • 1½ cups flour
  • ½ teaspoon salt
  • 1 tablespoon baking powder
  • 1/4 cup sugar
  • 1/2 cup currants
  • 1/2 teaspoon nutmeg (I may go with a tad more next time)
  • 1/2 cup unsalted butter, frozen
  • 1 large egg
  • ½ cup half-and-half or whipping cream (you may need slightly more)
  • 2 tablespoons whipping cream
  • 2 tablespoons sugar (regular or natural cane sugar), optional

Preheat the oven to 425°F.

Mix together the flour, salt, baking powder, sugar, currants and nutmeg in a bowl. Grate the frozen butter into the dry ingredients and use your fingertips to lightly toss all together. Whisk the egg into the half-and-half cream and pour into the flour mixture a little at a time, using a fork to mix. (I often need another tablespoon or two; I chalk it up to that dry Calgary weather.)

Turn the dough out onto a lightly floured surface, then roll gently to about ¾-inch thick. Dip a cutter in flour and cut out as many scones as possible. (Small ones are cute, but sometimes you just want a large scone with lots of room for Devonshire cream and jam.) Work the scraps back together, re-roll and cut more. (Nigella suggests using a 3-inch/6½-cm round cutter to make 8; I used a smaller one and got about 14.) Place on a baking sheet, brush the tops with the 2 tablespoons whipping cream and sprinkle with the remaining sugar, if desired. I used natural cane sugar, which has larger grains.

Bake until golden. Between 10 and 15 minutes for larger scones. Cutting them smaller? Check earlier. Mine took about 9 minutes. Remove to wire rack to cool.

Eat with copious amounts of jam and Devonshire cream. Or butter and jam. Or just jam.

Continue Reading

Pyrohy or Perogies

It started with an innocent tweet asking for suggestions on what to do with some leftover mashed potatoes. (A phenomenon I don’t think I’ve ever encountered. I’d just eat them straight-up with a little butter, but I digress.) I threw out the idea of fish cakes and a few others also had ideas.

And somehow from there Cheryl started talking about pyrhohy and the next thing I knew I had managed to scam an invite over for a lesson on how to make them at home. (Call them what you want, but I’m going to go with pyrohy here because that’s what Cheryl calls them and since she was kind — and patient — enough to teach me how to make them, I’m going to defer to her expertise.)

Pyrohy recipe

Anyway, I’ve long loved pyrohy though my only experience was the frozen kind from the grocery store. My first experience with homemade pyrohy was when my friend Colette had a group of us over for a Ukrainian dinner, serving up homemade cheese-and-potato dumplings and cabbage rolls made by her mom in Saskatchewan. They were fantastic and we all ate a lot that night. (There was kielbasa too and I provided a lemon tart, so we were all pretty stuffed at the end.)

Then an even larger group of us went to a fall supper at St. Stephen Protomartyr Ukrainian Cultural Centre where we supported the Knights of Columbus in their fundraiser by enjoying more homemade pyrohy, cabbage rolls, little meatballs in a dill and mushroom sauce and fried chicken. And then there was dessert . . . .

All this to say, it’s been a pretty pyrohy-filled fall. And that’s not a complaint.

So, a few Sundays ago, I drove over to Cheryl’s, met her two adorable kids and then got set up in the kitchen, along with Andree who had also been invited over for the lesson. There, in Cheryl’s beautifully lit kitchen (oh the photos I could take if I had that set up!), we became an odd little assembly line of workers. Cheryl showed us what to do and we tried to replicate it, occasionally with some success. And then we went home with two baking sheets full of pyrhohy ready to freeze or eat immediately.

So I did.

And they were delicious. (Due, I’m sure, in no small part to the onion I diced and gently fried in a generous dollop of butter.)

And, um, there are no photos of what they look like cooked because it was dark by then and the next time I ate them it was also dark and, well, now they’re all gone. Guess I’m going to have to make some more.

Pictures are after the recipe because they are a bit of a play-by-play of how to make pyrohy, so that made more sense.

Thank you again to Cheryl for the lesson!

Cheryl’s Pyrohy Dough

  • 5 cups flour
  • 1/2 teaspoon salt
  • 1 egg
  • 1/2 cup oil
  • 2 cups hot water

Mix together the flour and salt in a large boil. Whisk together the egg and oil, then add to the flour, mixing to combine. Add the hot water and mix again to form shaggy dough. Let rest for 15 minutes before using.

While letting the dough rest, begin forming the filling into small balls. This will make it much easier when it comes to filling the pyrohy.

To make the pyrohy, take a portion of dough and roll it into a log (like you did as a kid while using playdough), then cut into portions and roll those into balls. Using a rolling pin, lightly roll out the dough balls into ovals.

Place the filling in the centre of the dough oval and pull it over so the two halves meet each other. Gently pinch the dough sides together, trying to ensure no air is trapped inside. You can use your finger, curved slightly, to shape the pyrohy into their distinctive half-moons.

(I’m going to be honest here, I don’t think I’m explaining it well, but the pictures should help. Or you can check out Cheryl’s own post on making pyrohy here.)

We made straight-up mashed potato, mashed potato with bacon (put the bacon inside the mashed potato to keep it from perforating the pyrohy dough and causing a giant mess when you boil them) and sauerkraut. But, really, what you put inside is limited only (and forgive me for being this cheesy) by your imagination. Ricotta and a bit of fruit? Yes, that would be good. Mushrooms mixed in with potato? Of course. And so on.

Pyrohy dough

Pyrohy dough II

Bacon-potato filling

Shaping the filling

Filling

Preparing the dough

All the pyrohy bits and pieces

Shaping the dough

Ready to eat

Continue Reading

Sautéed Chard over Polenta with Fried Eggs

I came into a plethora of eggs over the weekend.

Farm fresh eggs

I was at work on Sunday when a colleague came up to me.

Him: You like X, right?

Me: Oh yes, that’s how I get through the day sometimes. (In my best, most sarcastic and slightly confused voice.)

Him: Uh, OK. Well, I have some and I wondered if you wanted to buy some.

Pause.

Me: Wait, did you say eggs?

Him: What did you think I said?

Me: Um…..

Anyway, he had a few dozen from this totally organic, self-sustaining farm outside of Calgary called Thompson Small Farm. I’ve been searching for really good eggs since I moved here from Vancouver. I’ve found the ones here, even from area farms, to be pretty anemic looking and I’ve craved those with those golden-orange yolks that are so beautiful. So, the thought of finding those was enough to tempt me to buy two dozen. Plus, well, he said one of them was blue-green and that was just a bonus.

So, for the next two days I dreamed up things to make with these pretty eggs in their multicoloured shells. And I realized I wanted to do something that would really showcase the egg itself. Somewhere in my food-related Internet travels, I came across a post where someone had topped polenta with cooked greens and a poached egg. Since I have come to love chard mostly owing to this, I thought it would be cool to do a riff on that idea.

Polenta and chard with egg

For the most part, I made this up as I went along, taking inspiration from the chickpeas and chard entry. But I did a lot of research on poaching eggs (vinegar, no vinegar, swirl, boiling water, stainless steel etc. Who knew there were so many variations?), so that I would be fully prepared when it came time to make them. On the drive home, though, I realized I just wanted to do something fast and, in all honesty, I really didn’t want to dirty another dish. I figured frying the egg in the pan where I had just sautéed the chard would add even more flavour.

I have about three different grinds of cornmeal as I keep thinking I have the wrong one for polenta. In the end, I used the instant stuff. What? It was in my cupboard already and I’m desperately trying to clear space. Plus, that stuff is INSTANT and that makes for a very, very quick dinner. I followed the instructions and then just doctored it up with a bit of cream (er, yes, well, it was already in the fridge . . . .) and some butter and a nice pinch of flaked salt.

This was quick, easy and delicious. I loved the soft polenta, garlicky chard and the ever-so-slightly oozing egg yolk all combined into one. Maybe next time I will try poaching the eggs, but, in a pinch, this was just fine.

Chard

Egg

Blue eggshell

Chopped chard stems

Polenta and chard with egg II

I’d call these more guidelines than a recipe, so adjust as you see fit.

Sautéed Chard over Polenta with Fried Eggs

  • 1 bunch chard
  • 2 cloves garlic, minced
  • 1 tablespoon olive oil
  • 1/4 cup white wine (or water or chicken stock)
  • 2 eggs
  • butter
  • cooked polenta
  • salt and pepper to taste

Cook polenta according to directions, adding some butter/cream/salt/pepper/cheese or whatever else you desire.

Remove the stems from the chard, then dice finely. Chop leaves into thin strips and set aside. In a large frying pan, heat up olive oil over medium heat. Add stems and a pinch of salt. Saute until they start to soften, about five minutes. Add the garlic and cook for about a minute, until it gets fragrant. Add wine (or water or chicken stock) and then the strips of chard leaves. Stir, then top with a lid and cook for about five minutes until the leaves are wilted. Scrape out pan and add a small knob of butter to melt. When bubbling add eggs and fry to desired doneness.

Dollop polenta onto plate, top with chard and fried egg.

Continue Reading

Pasta Carbonara

I have had great need of comfort food lately.

And for me that often means cheese and cream and pasta. Emphasis on cream. Sure, throw bacon in there too. So, no, this is not going to be low-fat or healthy or in any way, shape or form good for you, unless you have a severe bacon deficiency. (And wouldn’t that be wonderful?)

This is a totally bastardized version of Pasta Carbonara. Yes, I sometimes make the real stuff. No, this isn’t it. Yes, it’s still good.

Pasta Carbonara

I’ve loved pasta carbonara since I was a kid when my grandfather would make it for me.

I like the contrast of the salty bacon and the slightly sweet onions and the smooth creaminess bundled with the slight chew of a wide, flat pasta. (Why do I always delay so long in writing blog posts. I’m killing myself right now, having eaten the last of this for lunch.)

You may notice that I put a pound of bacon in the ingredient list. I cook up a pound but can guarantee nothing near that actually makes it into the dish. A lot of bacon snacking goes on. I consider it part of the cooking process.

Oh, and I cook it in the oven. This may seem like a weird extra step, but it means I’m not standing around watching it cook in the pan (read: I can go mess around on the computer) and it makes relatively quick work when doing an entire package of the stuff.

Since I make enough for a family of six, I typically have a lot of leftovers. Let me offer you one tip when it comes to reheating: add a bit of milk or cream to the bowl/tupperware container. It will help steam and revitalize the noodles and sauce instead of frying it.

So, now that I’m drooling, I’m not going to keep waxing poetic on how good this is. Trust me. Make it. And don’t feel guilty about it. Sometimes life needs a bit of cream and bacon and pasta.

Diced onion

Bacon

Cream and Onions

In the pan

Pasta Carbonara

  • 500 gram package of pasta (linguine, spaghetti, fettucine)
  • 1 pound bacon
  • 1 tablespoon olive oil
  • 1 yellow onion, diced
  • 1 cup whipping cream
  • 1/4 cup Parmesan cheese (plus more for sprinkling)
  • salt
  • pepper

Feel free to cook the bacon as you prefer. Though, seriously, give this method a try.

Preheat oven to 400. Place bacon on cookie sheet/on rack over cookie sheet/on broiler pan (heck, I’ve even used a casserole dish; it just takes extra draining after). Cook bacon for 15 to 20 minutes or until crisp. (Err on the side of crisp because it will soften in the cream sauce later. Limp bacon will get limper. *Shudder*) Set on paper towels to drain, then set aside to cool. When cool enough to handle, cut into smaller pieces. I usually do them a centimetre or two wide.

Heat olive oil in a pan over medium heat, add onion and a pinch of salt. Saute onion until transluscent, but not brown. Add whipping cream and cook until it has reduced by about a third. It should be super thick and rich. (I usually have a little extra cream or half-and-half around just in case it reduces too much.)

While the cream is reducing, cook pasta according to the packages directions. Drain.

Mix together the cream sauce and the pasta, adding in the Parmesan cheese and tossing until mixed. Add bacon and toss again. Season to taste. (Wait until the end to season because the bacon and cheese are salty and you don’t want to oversalt it.) Serve with fresh cracked pepper and more Parmesan, if desired.

Continue Reading

Vichyssoise

What do you get when you bring together four food bloggers and the idea to all cook something from Julia Child’s Mastering the Art of French Cooking? A helluva lot of delicious food and many full bellies. Not that any of us were complaining, that’s for sure.

It was all Julie’s idea. In honour of the move Julie & Julia coming out, she invited over myself, Cheryl of Backseat Gourmet, Pierre of Kitchenscraps and Gail of The Pink Peppercorn, along with everyone’s significant others. Our only task was to bring one dish out of Child’s cookbook. Since I had to work that day, there seemed to be only one logical choice: a chilled soup. That way I could make it the day before and just let it sit in the fridge at work without doing any harm and no need to reheat. The fact that it turned out to be about -29C that day made my choice seem to be a bit ridiculous. After all, who wants to eat cold soup when it’s stupidly freezing out? But, after a first course of delicious French cheeses and Julie’s homemade Raincoast Crisps (along with a glass or two of bubbly), we had all warmed up enough that it didn’t seem so bad.

Soup on the table

There is something a bit daunting too about cooking for other food lovers, particularly two who have cookbooks out and are serious players on the local (and beyond) food scene. But, I’m happy to say, this soup is stupidly good.

“Potato milkshake!” Pierre declared.

Leek and Potato

Vichyssoise

And he’s not wrong. It was a rich, thick, creamy soup (I’m sure in no small part to the 3/4 cup of whipping cream that went into it!) that was intensely flavoured. I definitely could have eaten more the bowl I had, but I’m glad I didn’t because there was more courses to come.

The other thing that happens when you bring together four food bloggers is that the actual eating doesn’t take place until after all the photographing. We were all jammed into Julie’s kitchen snapping away for a good 15 minutes or so; what the significant others were doing during that time, I know not.

Bloggers

(For the record, yes, I shot the soup earlier in the day at work because the light was better. I really need to get better at flash photography.)

And it was a fine spread that needed to be documented. Boeuf Bourguignon with mashed potatoes, ratatouille, Pommes Parisien (read: cooked in delicous oil and butter) and a work-of-art Moussaka that had us all holding our breath as it was unmolded.

Unmolding

Moussaka

Potatoes

The Spread

And that was just dinner. For dessert, Cheryl outdid herself with Reine de Saba (a chocolate cake, though that is an understatement) and a Grand Marnier Souffle that I sous-chefed with her (thanks Cheryl!)

Grand Marnier Souffle

The food was fantastic; I stuffed myself silly and felt like I needed to roll myself out to the car after. The next time we do one of these, I’m wearing stretchy pants.

All done

Most of all, though, it was great to meet some great new people and hang out with some old (as in known for longer, for the record) friends.

Conversation

This is the original recipe from Julia Child’s Mastering the Art of French Cooking.

Vichyssoise
[Cold Leek and Potato Soup]

  • 3 cups peeled, sliced potatoes
  • 3 cups sliced white of leek
  • 1 1/2 quarts of white stock, chicken stock or canned chicken broth
  • salt, to taste
  • 1/2 to 1 cup whipping cream
  • 2 to 3 tablespoons minced chives

Simmer the vegetables in stock for about 40 to 50 minutes until tender. Puree in a blender or through a food mill. Stir in the cream. Season to taste, oversalting very slightly as the salt loses savor in a cold dish. Chill. Serve in chilled soup cups and decorated wtih minced chives.

The recipe says it serves 6 to 8. We stretched it to nine with no great effect. But, then again, we had about 10 other things to eat….

Continue Reading

In search of the perfect burger

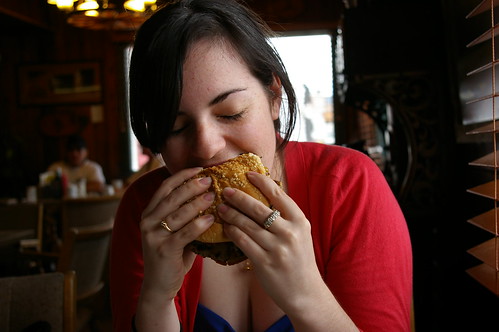
In the moments that followed the first bite, as the flavour of beef and bacon and cheese filled our mouths, we knew this was one of our more brilliant plans.

Mmmmm

Of course, it didn’t start out that way.

It started out as a tongue-in-cheek joke, a nod to our mutual love of burgers. But as my sister’s trip from the coast to Cowtown neared, it morphed into a serious scheme.

The burger tour of southern Alberta was born.

You see, a truly great burger is more than the sum of its parts.

A solid, but not too filling, bun provides the backbone. It needs to hold the burger together, soak up the juices from beef and sauce, but not be too tall, too bread-y or so flimsy it becomes an annoyance.

Sauces–relish, mustard, ketchup, special or otherwise– should add to the flavour and not overpower the patty taste.

Lettuce and tomato are optional. Onion is not.

The burger should just fit into your hands and be bitten through without feeling you have to dislocate your jaw.

It should be messy. Bonus points for burgers that cause juices to trickle down your hands.

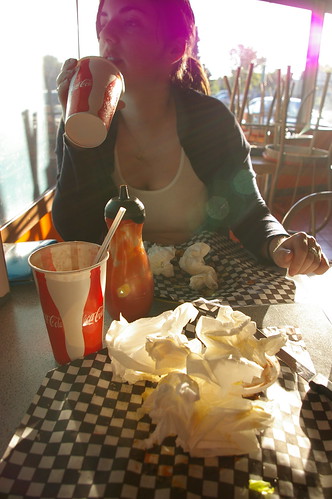
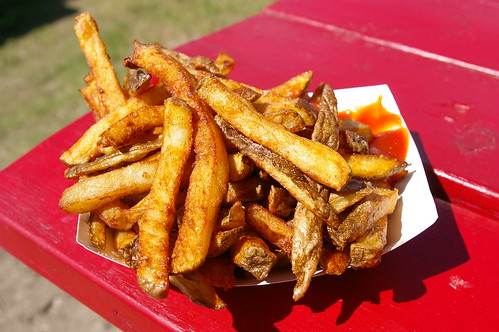
(The trick, I would come to learn, is to turn your plate so the burger drippings fall onto your french fries.)

Establishing a plan took several e-mail exchanges and thorough research.

A cruise through the Chowhound online forums, suggestions from friends and even a photo posted on Flickr  — a photo-sharing website — gave us our plan of attack: five burger joints in four days.

There were tentative discussions about beef detox after that point.

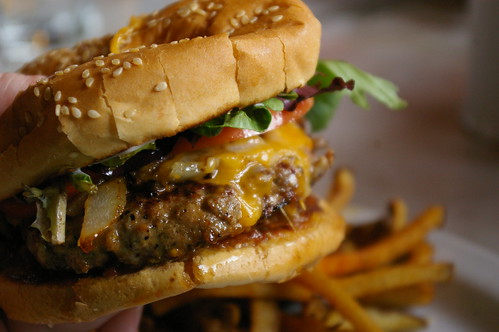
And so, to the journey. From Calgary International Airport, we made our way to the first tour stop: Boogie’s Burgers on Edmonton Trail.

The little sister was off to the races with a double patty burger, adorned with cheese, bacon and pickles. (And a bacon, banana, peanut butter milkshake to wash it all down; if I hadn’t been around when she was born, I would swear she was adopted.)I wanted a slower pace and went with a single with bacon and cheese.

The burgers were the size of my outstretched hand, with a tangy red sauce. The buns were fresh-tasting, with a slightly crisp crust that gave nicely when bitten into. Thick slices of bacon and melted cheddar cheese rounded out the burgers. And they passed the requisite messy test with me having to go through several paper napkins.

Boogie's Burger

The aftermath

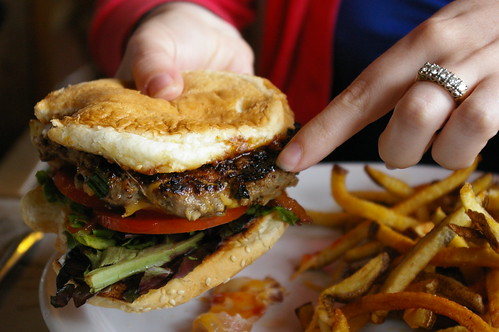
We were off to a good start. Day 2 took us down Highway 22 to Turner Valley for a stop at the Chuckwagon Cafe. Charmed by the red barn exterior and the slightly kitschy decor inside, we were eager to see what this little restaurant had to offer.

Chuckwagon Cafe

We both ordered the House Burger, minus the mushrooms, featuring a six-ounce patty of beef raised on a Longview farm with no hormones or steroids, topped with fried onions, bacon and marble cheese.

Chuckwagon Cafe's House Burger

Chuckwagon Cafe Burger

After the plates were set down, the first five minutes were punctuated solely with the sounds of beef contentment, echoed by little more than groans of acknowledgment.

Mmmm. Uh-huh. Mmmm. Seriously.

The thick patty was juicy and flavourful, had nice charred bits and was well-spiced and complemented by the homemade relish.

Charred bits

For the next hour as we drove further south on Cowboy Trail–she marvelled at the expansive Prairie sky while we sang along with bubble gum pop songs –there were moments when we stopped to talk about those burgers again.

In High River, we pulled up to a little red-roofed burger shack whose reputation is well known. The Hitchin’ Post is a local favourite and the steady line of traffic in and out of the dirt parking lot surrounding the tiny takeout restaurant spoke volumes.

Hitchin' Post

Cheeseburgers topped with a full slice of onion and sitting atop yellow mustard and relish were ordered up and washed down with orange soda. The burgers were about the size of my palm and tasty, but more akin to a burger from a fair. It filled the burger need, but not in the way that would keep us talking about them for days after.

Hitchin' Post cheeseburger

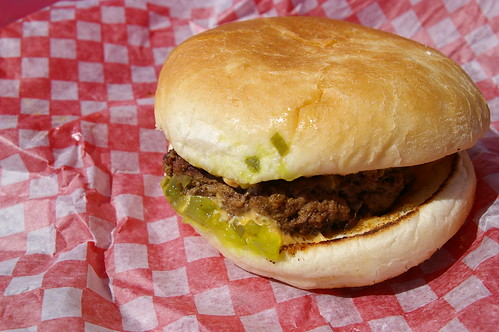
By 11 a. m. the next morning, we were ready for round four: Rocky’s Burger Bus –literally, an old red bus jammed into the city’s southeast industrial area just off Blackfoot Trail, with a few picnic tables in behind.

Rocky's Burger Bus

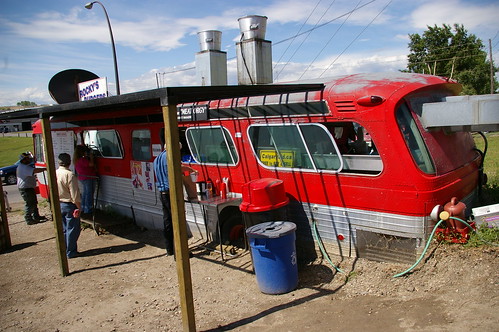
The cheeseburgers were adorned with little more than a generous helping of mustard and relish and a piece of processed cheese. But the thick wedge of beef was the star attraction of this meat-centric burger. It was juicy and tender, likely because the patties are shaped by hand. And it was hot off the grill, which was deliciously unexpected.

Burger Bus I

Rocky's fries

The final stop on the tour was at downtown steak house Saltlik, where friends joined us to try the double-fisted bacon cheeseburger. This was not just a turn of phrase. A thick patty topped with bacon, cheddar, a healthy tomato slice, lettuce and red onion, all jammed into a tall bun–two hands were definitely necessary.

But, as we entered a virtual beef coma at the end of day four, there was no debate about who served the best burger. Even now, weeks later, I think about the Chuckwagon Cafe and how easy it would be to climb into my car and head south.

The sister has already marked it as a must-do for the next tour.

This story first appeared in the Real Life section in the Calgary Herald. For more delicious recipes, visit CalgaryHerald.com/life.


Continue Reading

Heirloom Tomatoes with Balsamic Reduction

I have virtually given up on tomatoes. The ones from the supermarket are bland, flavourless faux tomatoes and are hardly worth buying. Grape tomatoes are about the only ones I bother buying any more because they still seem to have some tomato-y taste.

As a kid, summers were spent with my grandparents on one of the Gulf Islands. They grew their own tomatoes and I would eat them off the vine, warm from the sun and bursting with that summery taste. I loved too the green, fresh smell that came when I brushed up against the dark green plants. Years later I bought a perfume from Demeter called Tomato that has somehow recreated that smell of the tomato vines. When I put it on, I’m transported back to my grandfather’s garden with its tall chicken-wire walls to keep the deer out.

So, when I saw a package of Heirloom Tomatoes at the farmer’s market recently, I ignored the price tag and put them in my basket. It was an odd little collection of cherry tomatoes, green tomatoes, some purplish ones and pear-shaped ones.

Heirloom Tomatoes

When I got home, I started eating them right out of the cellophane package, some straight up, others split in half and sprinkled with a bit of sea salt.

Most tasted like tomatoes, with the exception of the Green Zebra.

Heirloom Tomato

While I could have eaten them all just standing at the kitchen counter, I decided to make a very basic salad with just tomatoes, extra virgin olive oil and some reduced Balsamic vinegar.

I know I have already mentioned my love of all things vinegar, but reducing Balsamic gives it a sweeter, more syrupy consistency. Which makes it great for this type of salad because then you don’t need to make a full vinaigrette. It’s also great on sliced strawberries or on tomato tarts, among other things.

Making a Balsamic Reduction is super simple. Just pour a cup of the vinegar in a saucepan, put it on medium-high heat and let it reduce until it is thick and coats the back of a spoon. Some recipes suggest adding some sugar, but I have always liked my dressings tarter than not, so I don’t bother.

Drizzle over cut tomatoes and then add a bit of olive oil.

This would also be great on a more traditional Caprese salad with tomatoes, fresh mozzarella and basil.

Tomatoes with Balsamic Reduction

Continue Reading