S’mores Brownies

It could have been summer a week or so ago, even if the last couple of days have felt more like the spring we should be in. Still, I’ll take it. Everything is already green and lush; even the lilacs are already blooming — something I’m not sure has ever happened this early in the year since I moved here.

Inevitably that means gathering around backyard fire pits and camping . And those things mean s’mores.

S'Mores Brownies ingredients

Except when there’s a fire ban on.

Or, if you’re unlucky enough to not have a yard. <Raises hand.> Or perhaps don’t love camping. <Raises other hand.>

Marshmallow top I

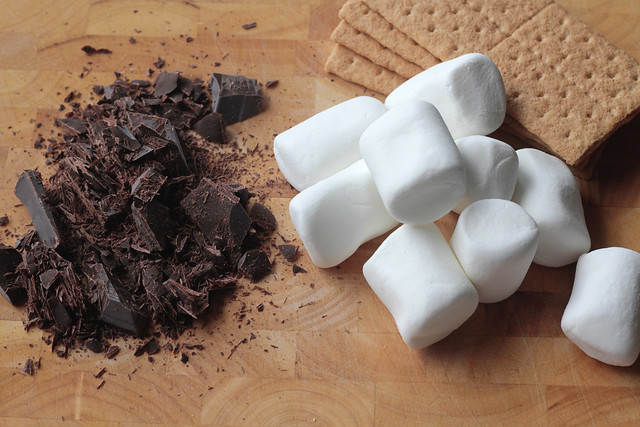
There’s a simple way around this, provided the weather isn’t so hot you’re left wilted over a piece of furniture: put some marshmallows on a baking sheet lined with parchment paper and broil them for a minute or two, until golden and melty — or your preferred level of roasted-ness (I like a dark shade of golden myself, which can be tricky over a crackling fire but easy to monitor under the steady heat of a broiler.) — before squishing them between two graham crackers and a slab of chocolate.

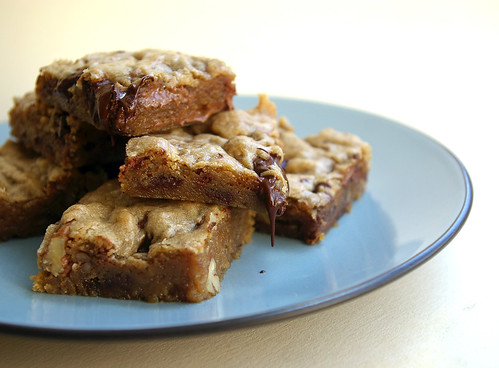
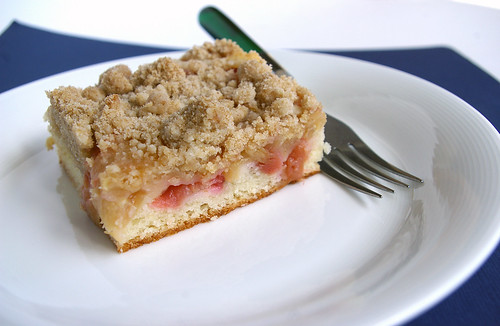
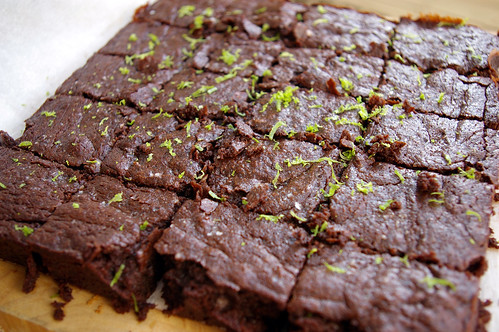
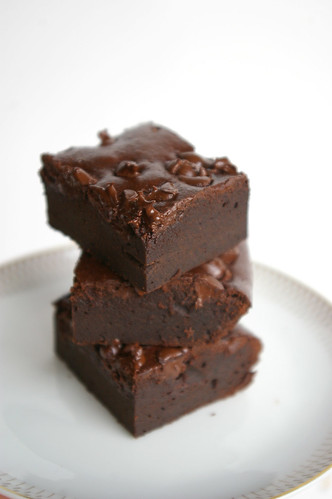
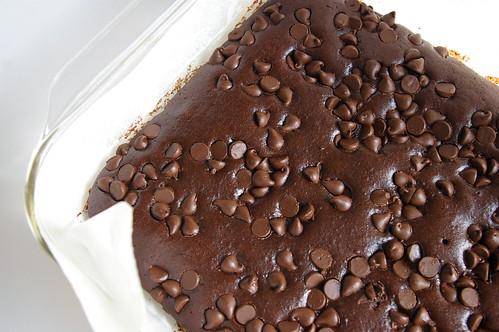
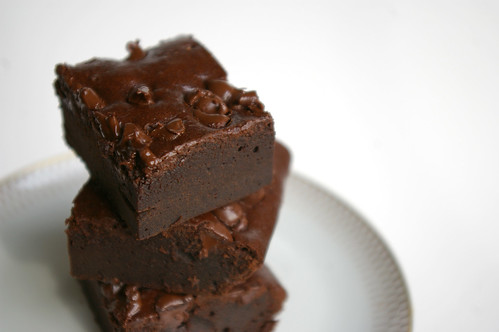
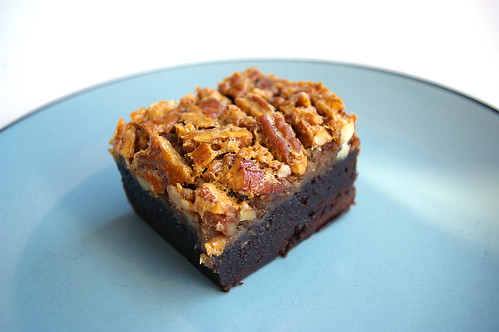
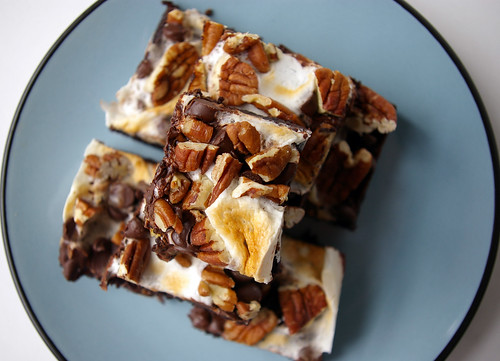
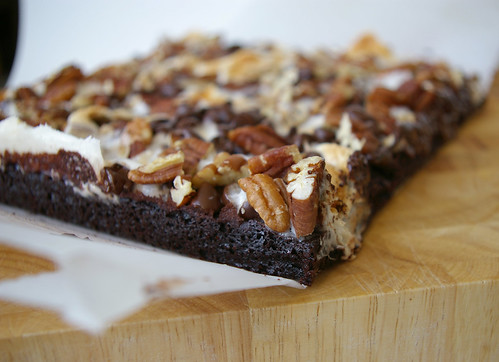
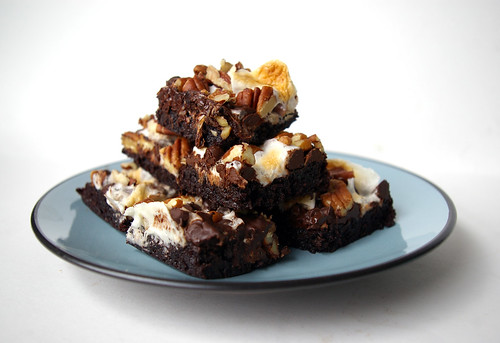
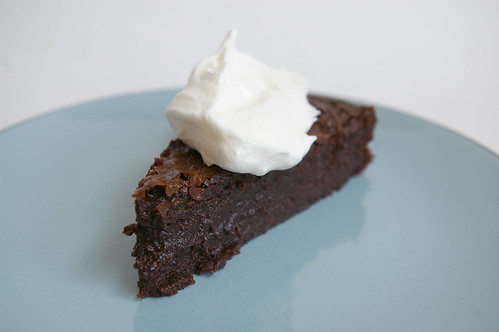
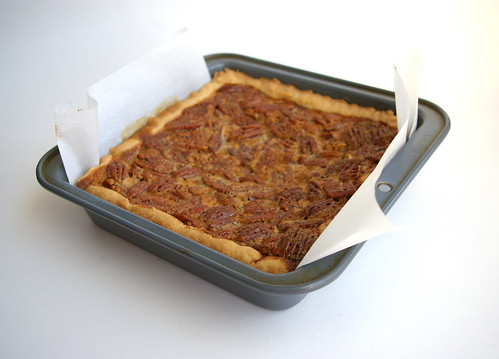
However, there’s a more portable and far more decadent way of eating something evocative of a s’more. Behold the S’mores Brownies.

S'Mores Brownies I

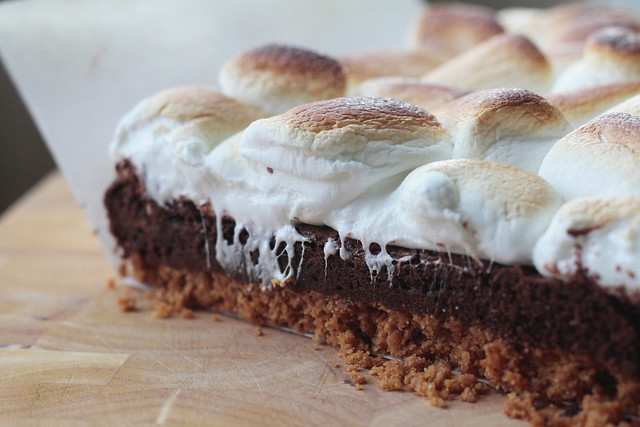
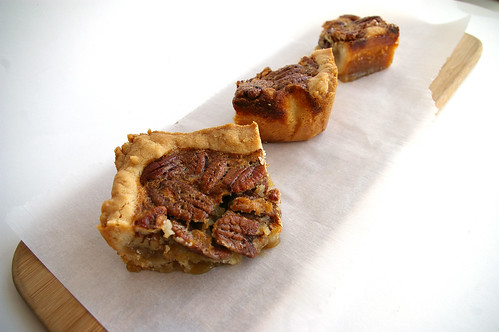
The backbone is the same, of course. Combining graham crackers, chocolate and marshmallows into a tasty sweet. In this form, however, the graham crackers are amped up by being turned into a graham cracker crust (enriched with butter and sugar, naturally), the chocolate becomes a thick layer of fudgy brownie and the marshmallows, well, they stay pretty much the same other than you get at least two of them per brownie instead of one lonely one per s’more.

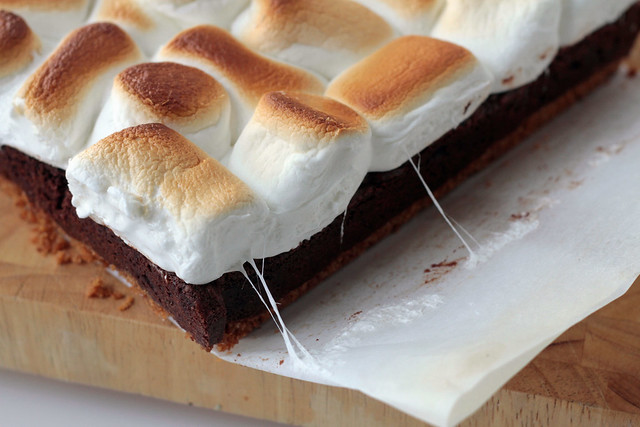
Just like the originals, these are gooey and sticky as all get out, so prepare accordingly.

Sticky

Of course, this version of a s’more does require washing dishes after, so that may be a point in favour of their original counterparts.

Then again, you can still easily make and eat them when the weather isn’t cooperating.

 
Marshmallow top II

Marshmallow top III

S'mores Brownies II


S’mores Brownies

Adapted from The Kitchn. And by that I mean that I made the method a little more streamlined (read: lazier).

For the crust:

  • 6 tablespoons butter, melted and cooled
  • 1 1/2 cups graham cracker crumbs (about 10 full crackers)
  • 2 tablespoons sugar
  • 1/4 teaspoon salt

For the brownies:

  • 1/2 cup butter
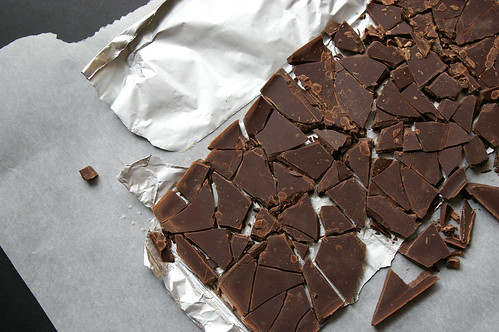
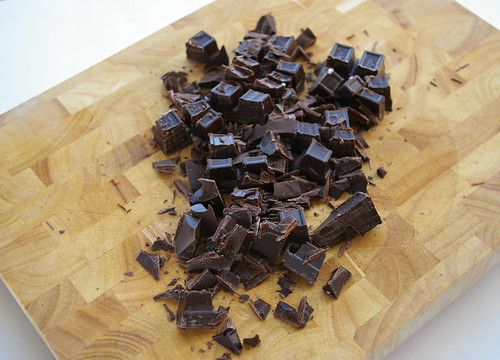
  • 7 ounces bittersweet chocolate
  • 1/4 teaspoon salt
  • 2 large eggs
  • 1/2 cup sugar
  • 1/2 cup brown sugar
  • 1 teaspoon vanilla
  • 1 cup flour
  • 10 ounces large marshmallows (most of a large bag)

Preheat the oven to 325°F.

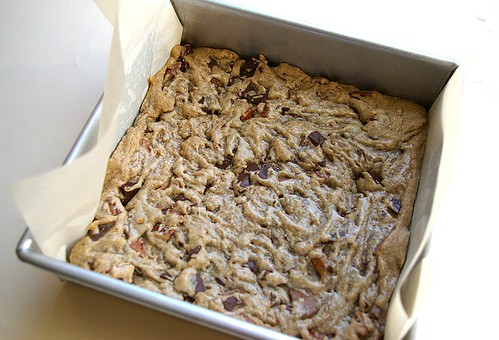
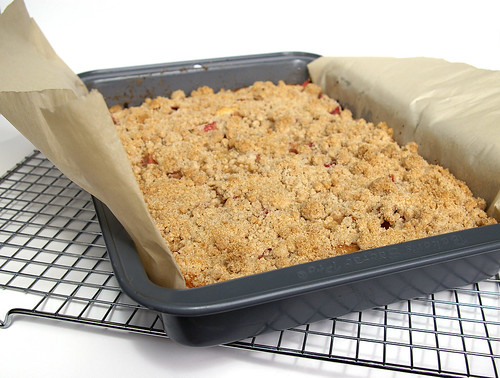
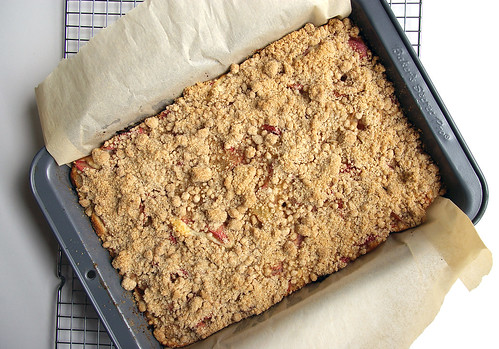
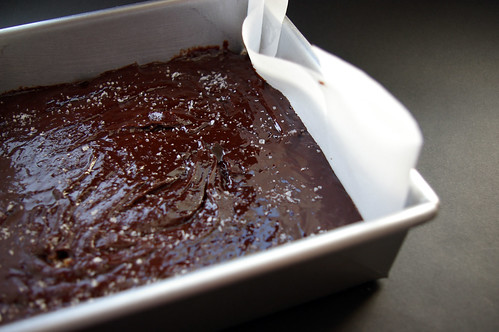
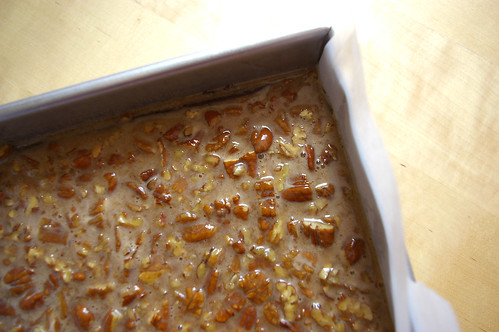
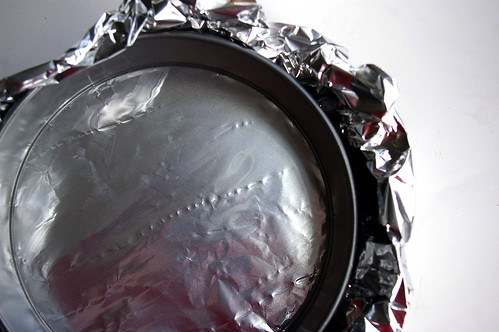
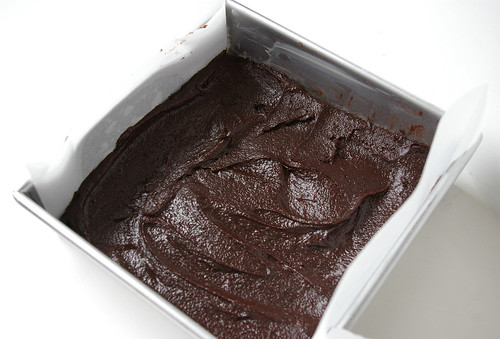
Butter an 8×8-inch pan and line with parchment with a slight overhang, like a sling, then butter the parchment that’s inside the pan.

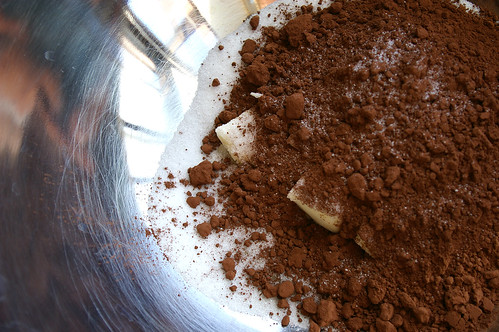
In a bowl, mix together the graham cracker crumbs, sugar and salt. Pour over the melted butter and then stir until well combined. Pour into the prepared pan and press firmly along the bottom. (You really want to tamp it down here; I used the bottom of a small metal measuring cup.) Bake the crumb mixture for 20 minutes, until the edges are starting to get golden. Remove from the oven.

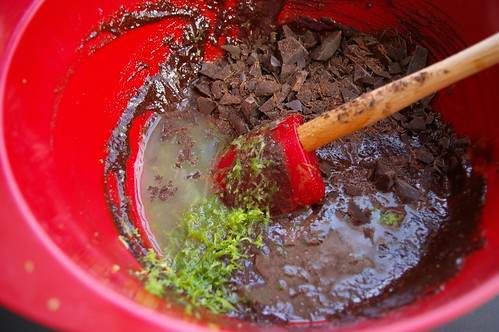
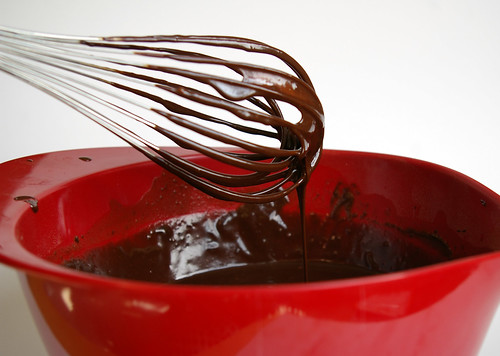
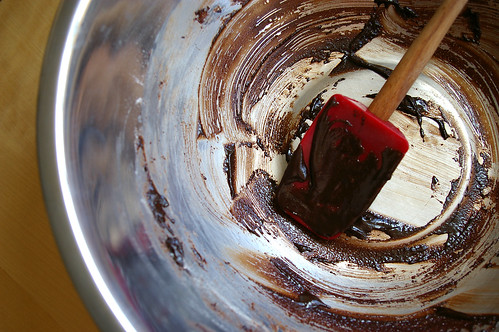
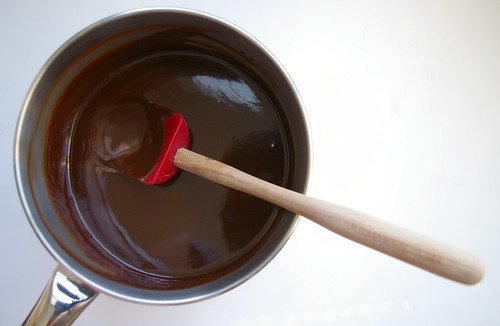
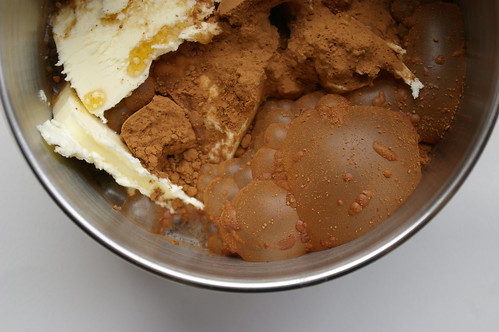
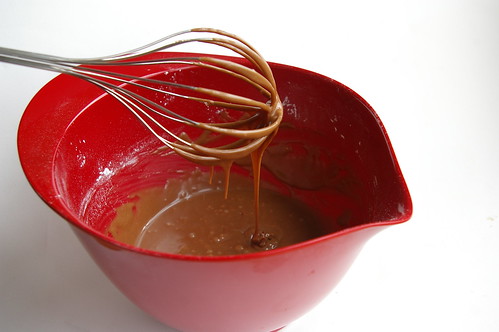
While it bakes, start preparing the brownie layer. In a medium saucepan set over low heat, slowly melt the butter and chocolate together, stirring often. Stir in the salt. Remove from the heat and let cool completely.

Once the crust is baked and out of the oven, raise the oven temperature to 350°F.

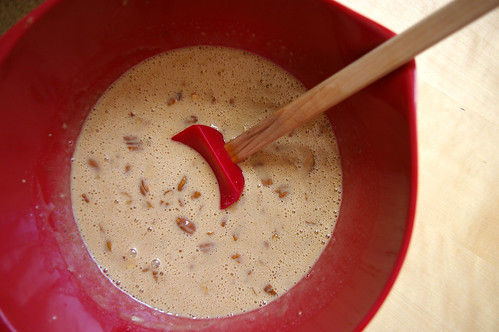
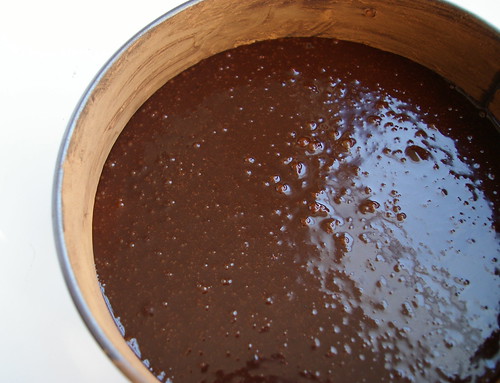
In a large bowl, whisk the eggs until slightly paler in colour. Add the two sugars and whisk again for several minutes, until the mixture is well incorporated. Whisk in the vanilla. Pour in the chocolate mixture and stir gently until just combined. Add the flour and use a spatula to fold it together, mixing gently and only until no white flour can be seen.

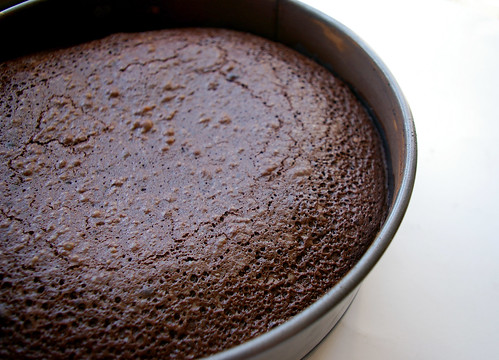
Pour the brownie batter over the cooked graham cracker crust and return the pan to the oven. Let it bake for 22 to 25 minutes, until no longer raw-looking in the centre when check with a toothpick. (It will still look fudgy and not come out entirely clean, but it will look cooked.)

In a stand mixer fitted with a paddle attachment, beat the eggs and sugars until fluffy, 2 to 3 minutes. Beat in the vanilla extract. Gently mix in the melted chocolate. Fold in the flour.

Evenly pour the brownie batter over the cooked graham cracker crust. Transfer the pan to the oven and cook for 23 to 25 minutes. Remove the pan from the oven.

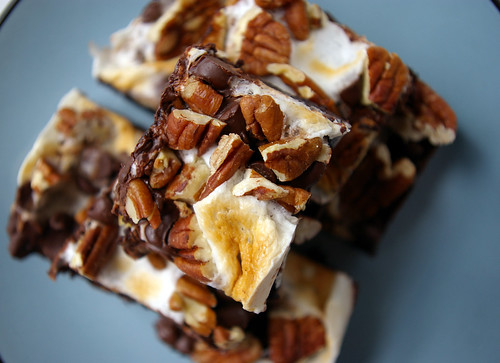
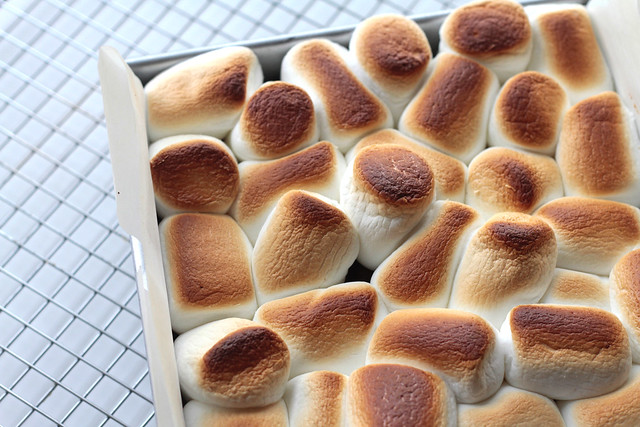
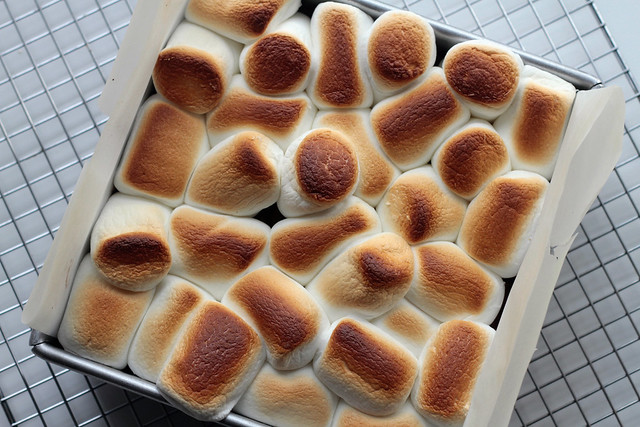
Set the oven to broil and arrange the marshmallows over the cooked brownie layer. Cover the brownies well, but don’t pack them in too tightly. They will spread a bit in the oven. Set the pan back into the oven under the broiler and watch carefully to make sure they roast to your preferred level of doneness. Turn the pan frequently to ensure even broiling. This can take anywhere from 1 1/2 to 2 minutes for golden, a minute or two longer for a brown, bruleed topping.

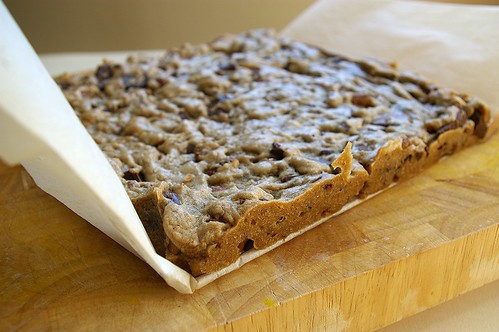
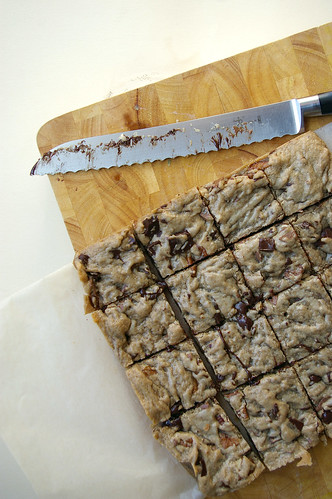
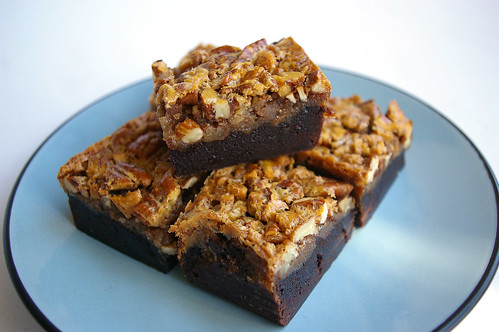
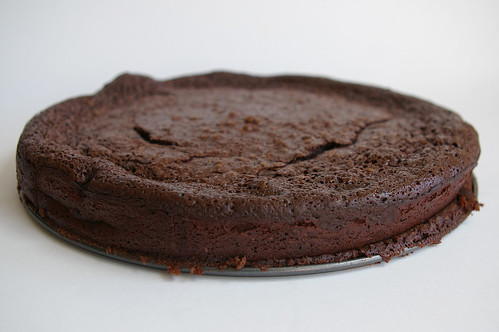
Remove when the marshmallows are golden (or darker, depending on your preference) and let cool completely. Use the parchment sling to remove the brownies from the pan and slice. The marshmallows will be incredibly gooey, so keep a glass of hot water and a cloth at hand to wipe down the knife between slices.

Makes 8 to 16 brownies, depending on how they’re sliced.

Continue Reading

Coronation Grape Focaccia with Rosemary

A friend of mine has diagnosed me with a case of the ‘overwhelms’ and that’s a pretty accurate summary of where things are at right now. I’ll have book news (OMG!) in a blog post later this week, work is hectic and the last few months have been filled with lots of amazing and lots of truly heartbreaking things. For each of those there are drafts of blog posts that I haven’t been able to bring myself to finish writing and post.

But one bright spot has been that my Writer Girls — a collection of my closest friends from my early days at the University of Victoria — were in town a couple of weeks ago for a visit and we spent three glorious days eating, drinking, laughing and catching up. There is no better way to recharge than to spend time with people who know you almost better than you know yourself. And, better than that, have far better memory-retention skills and can recall, at a moment’s notice, all the hilariously dumb things you’ve done or said in the last 20 years. And trust me, there are a lot of them.

On the final day, between ferrying the girls back to the airport to catch their flights back home, we decided an afternoon snack was in order and my friend Julie wandered off to the local grocery store in search of cheese and crackers. She returned with those, along with a huge box of dusky dark purple Coronation grapes. Beyond their stunning colour, they have this beautiful slightly sweet, slightly pungent taste. They were perfect with cheese.

And then all of my girls were gone and I was left with the remainder of the grapes.

And for some unknown reason, I remembered seeing a recipe for a focaccia topped with Concord grapes and sprigs of rosemary and that’s all I could think about. Salty-sweet, with the grapes roasted and warm and all that lovely woodsy rosemary strewn over the whole thing.

In Italian, it’s known as Schiacciata con L’uva and it’s a truly autumnal bit of baking linked to the grape harvest in Tuscany. So, Concord or Coronation grapes are perfect for this focaccia since this is exactly when they are in season. Mostly you read about this being made with Concords. (The Coronation was developed here in Canada and seems more popular on this side of the border.) The benefit of using Coronations, though, is that they are seedless (yay!) and, judging from some of the recipes I found online, not having to de-seed grapes saves a lot of time and mess. Since I’m generally prone to getting food all over what I’m wearing, having an option to at least reduce the chance of staining myself purple is a good thing.

These grapes are delicious on their own — especially cold from the fridge and most definitely when served with some nice crackers and cheese. But roasting them into a focaccia that has been sprinkled with raw sugar, flaked salt and rosemary tranforms them to something so much more. They get a bit jammy, their skins wrinkle and their dark purple juice stains the bread around them. Their complex flavour plays well with the herbal hit of rosemary and, well, it’s all on focaccia, so what more could one ask for? Other than having my Writer Girls here for one more weekend to eat some with me.

Since we’re planning on next meeting up in Italy next fall, though, there’s a very good chance I’ll be able to make it for them then.

Coronation Grape and Rosemary Focaccia

I adapted this from a few different sources, mostly amping up the amount of grapes and rosemary — you know, the good parts.

  • 1 cup warm water (between 105 and 110F)
  • 2 tablespoons milk
  • 1 1/2 teaspoons sugar
  • 1 1/2 teaspoons active dry yeast
  • 2 3/4 cups all-purpose flour
  • 1 teaspoon salt
  • 5 to 6 tablespoons olive oil, divided
  • 1 1/2 cups Coronation grapes
  • 1 tablespoon rosemary leaves
  • 1 tablespoon raw sugar
  • 2 big pinches flaked sea salt

In the bowl of a stand mixer fitted with a dough hook, combine the water, milk, sugar and yeast and let sit until the yeast has bloomed and is creamy looking. Add the flour, salt and 2 tablespoons of the olive oil and mix on low speed until combined and then turn the speed up to medium and knead the dough until it forms a smooth ball, about 8 minutes.

Add 1 tablespoon of oil to a large bowl and use your fingers to spread the oil around the bowl. Transfer the ball of dough to the oiled bowl and turn to coat the dough all over. Cover and let rise in a warm place until doubled in size, about 1 to 1 1/2 hours.

Line a baking sheet with a piece of parchment paper that hangs over the edges. (I’ve found this is the best way to make sure the focaccia doesn’t stick to the pan or the parchment.) Pour on 1 tablespoon of olive oil and spread all over the parchment that covers the pan. (There’s no need to oil the overhang.) Tip the risen dough onto the prepared baking sheet and, using the tips of your fingers, stretch the dough to fill it, dimpling the surface as you go. If the dough resists, wait a few minutes and then continue. It will fill the baking sheet with a little patience. Drizzle another tablespoon or two of olive oil over the dough, letting it fill the dimples. Cover loosely with plastic wrap and let it rise again for about 30 minutes.

As it rises, preheat the oven to 450F.

Just before baking, scatter over the grapes, rosemary, raw sugar and flaked salt, pressing them in to the dough slightly. Bake until golden and cooked through, about 15 minutes.

Serve warm or at room temperature (if it lasts long enough to cool to room temperature).


Continue Reading

Candied Ginger Scones

I keep butter in my freezer at all times for scone baking emergencies.

They used to intimidate me; one bad batch – which would have been flattered to be called hockey pucks – had me thinking I would never make a successful scone.

Learning Nigella Lawson’s trick of grating frozen butter into the flour was a game changer and now I find them to be one of the easiest, and fastest, things to bake when suddenly craving something sweet to eat with a bit of jam or butter.

Candied Ginger Scones I

They are also one of the most adaptable things to bake: lemon zest and glaze for a spring scone, chocolate or spices for fall, cheese and herbs for a savoury version.

This also makes them perfect for bits and pieces one may find in their baking cupboard.

So, when I discovered a handful of candied ginger leftover from a cupcake project and an uncracked jar of Devonshire cream at the back of the fridge (who impulse buys Devonshire cream? Me, apparently.), it was clearly time to make some scones.

Even if it was 11 at night.

After quickly whisking together the dry ingredients, grate in the frozen butter. This creates the perfect little nuggets of butter easily incorporated in the rest of the dough. When they hit the heat of the oven, they melt, creating the flaky layers that make scones so tender and light.

Sometimes I will cut out my scones, in circles or squares, using biscuit cutters or an upended glass. But other times, I like to just pat the dough into a circle and cut it into wedges for something a bit more rustic . . . and fewer things to wash.

Candied Ginger Scones II

Candied Ginger Scones

  • 2 cups (500 mL) flour
  • 1/3 cup (80 mL) sugar
  • 1 tbsp (15 mL) baking powder
  • ¼ tsp (1 mL) salt
  • ¼ to ½ cup (60 to 125 mL) candied ginger, chopped
  • ½ cup (125 mL) butter, frozen
  • ¾ cup (180 mL) cream, plus more for brushing the scone tops.
  • 1 egg

 
Preheat oven to 400F (200C).

In a large bowl, mix together flour, sugar, baking powder, salt and chopped ginger. Using the large holes on a box grater, grate the frozen butter into the dry ingredients. With your fingertips, gently toss the flour and butter until thoroughly combined. In a small bowl, mix together egg and cream. Pour into the butter-flour mix and stir until just combined. (Sometimes an extra tablespoon or two of cream is necessary, but the mixture should not be very wet.)

Turn the dough out onto a clean surface and squish together, patting it into a circle about an inch (2.5-cm) thick.

Cut the circle into eight wedges and place on a parchment-lined baking sheet, leaving space between them to grow.

Brush lightly with cream.

Bake for 12 to 15 minutes until golden.


Continue Reading

Lemon Polenta Cookies

To glaze or not to glaze? That was, in the end, the question.

And, with apologies to Shakespeare, it was a far tastier one.

Lemon Polenta Cookies II

It started with some Lemon Polenta Cookies and an overachieving lemon that gave off copious amounts of juice – far more than necessary for the recipe. It developed when I remembered once seeing a recipe for a different lemon cookie featuring a glazed top — all smooth and pale white, just hinting at the lemon flavour. And it culminated with me mixing up just a bit of a glaze, enough to use up the last of the juice – waste not, want not, after all – and drizzle some of it over a handful of cookies to see which were tastier.

I was first attracted to this recipe after discovering, to my dismay, that I have three packages of finely ground cornmeal in my cupboard – the product of forgetting I have some, buying more and then forgetting again. I had been through a cornbread phase, followed by an actual made-from-scratch polenta phase. And then those bags were forgotten about until a fit of not-quite-spring cleaning.

(Truly, if there is a zombie apocalypse, please come to my apartment. My overly stocked cupboards should keep us fed for the first few months.)

The idea of adding cornmeal to a cookie was intriguing. The result didn’t disappoint.

The addition of cornmeal gives them a slight heartiness, a nuttiness and a nice texture, even though they’re still soft and chewy in the centre.

The zest and lemon juice add lots of bright flavour and the whole recipe comes together quickly.

Unadorned, they were lovely. But there was all that leftover, freshly squeezed and strained juice just asking to be made into a glaze.

So, a glaze I made, drizzling it thickly over the cookies and letting it coat the nubbly surface.

Friends were divided on which they preferred.

As one said, when there is a chance to glaze, the answer is always to glaze.

Another disagreed, noting the plain version of the cookie had a crunchier top, which was preferable.

I ate both – possibly a few times – and still remain completely divided.

Surely, the only solution is to try yourself and see which you prefer.

Lemon Polenta Cookies I

Lemon Polenta Cookies

  • ½ cup (125 mL) finely ground cornmeal
  • 1 ½ cups (375 mL) all-purpose flour
  • ½ t (2 mL) salt
  • ¾ cup (175 mL) butter, softened
  • 1 cup (250 mL) sugar
  • zest of 1 lemon
  • 2 tbsp (30 mL) lemon juice
  • 1 egg

Preheat oven to 350.

In a bowl, whisk together the cornmeal, flour and salt. Set aside.

Using a mixer, beat together the butter and sugar until light and fluffy. Add the lemon zest and juice, mixing until incorporated. Beat in the egg.

Add the cornmeal mixture and mix on low speed until just incorporated, about 1 minute or less.

Scoop tablespoon-sized balls of dough onto cookie sheets, allowing room for them to spread a bit.

Bake until just golden at the edges, between 14 and 18 minutes, depending on the size of the dough balls.

Makes 18 to 20 cookies.


Optional Glaze

  • ¼ cup (60 mL) icing sugar
  • 1 tbsp (15 mL) lemon juice

In a small bowl, mix together the sugar and lemon juice until completely incorporated. Drizzle over cookies.

This should be enough to glaze about half the cookies.


Continue Reading

Bourbon Blondies

I like a good bourbon cocktail.

An Old Fashioned, a Sour, a Mint Julep.

But when I pull out my bottle of bourbon at home, more often than not it’s because I’m adding it to something I’m baking.

There are the Bourbon Pecan Pie Brownies, the Vanilla Cupcakes with Bourbon Buttercream and these, the Bourbon Blondies.

Bourbon Blondies II

Since first unveiling a plate of these boozy bars at a friend’s house a few summers ago, they have become my go-to dessert for potlucks and parties. They’ve been packed along to ski weekends and made an appearance at a party kicking off 2013. They remain one of my most requested baked goods within my circle of friends.

Though maybe not after I reveal just how easy they are to make and everyone just starts whipping up their own batches.

I don’t remember when or how I first stumbled upon a recipe for blondies. They don’t seem quite as well-known on this side of the border as they are south of it.

So, when I put out a plate of them, I’m often asked just what they are exactly. And the answer is they’re kind of like a brownie, but minus the cocoa, which makes a brownie, well, brown.

Perhaps a more accurate description is they’re kind of bar-like cookies.

The beauty of them lies in both how easy they are to make and their adaptability.

Like brownies, you melt the butter, which makes them great for impulse baking, as opposed to most cakes and cookies, which require room temperature butter.

The addition of bourbon puts a spin on things – no pun intended. The alcohol will mostly cook off – and the amount for the entire pan is a mere two ounces, or the equivalent of one of my favourite cocktails – but the flavour remains.

Bourbon Blondie batter

Bourbon Blondies baked

Bourbon Blondies out of the pan

Sliced

Bourbon Blondies I

Bourbon Blondies

To keep these kid-friendly or if bourbon isn’t your thing, simply omit the alcohol and the additional 1 tablespoon of flour. Use whatever additions feel good; I typically use chocolate chips and pecans, but have tried other nuts and even dried fruits, such as cranberries. For the bourbon, I use whatever I have on hand or, occasionally, whiskey instead.

  • 1/2 cup (125 mL) butter, melted
  • 1 cup (250 mL) brown sugar
  • 1 egg
  • 1 tsp (5 mL) vanilla
  • 1/4 cup (60 mL) bourbon or whiskey
  • pinch salt
  • 1 cup plus 1 tbsp (250 plus 15 mL) all-purpose flour
  • 1/2 cup (125 mL) chocolate chips
  • 1/2 cup (125 mL) chopped pecans

Preheat oven to 350F (180C).

Butter an 8×8-inch (20x20cm) pan and line with parchment paper that has extra to hang over the sides like a sling. (This makes for easy removal and slicing.)

In a bowl, mix together the melted butter and sugar. Beat in the egg, then vanilla. Stir in the bourbon or whiskey and mix until combined. Add the salt and then gently stir in the flour. Add the chocolate chips and pecans and stir until just combined.

Scrape into the lined pan and pat down the rather thick batter so it creates a layer that reaches the edges of the pan.

Bake for 20 to 25 minutes or until the middle has set.

Remove and cool on a rack before removing from the pan and slicing.

Continue Reading

Easy Butterscotch Sauce

When it comes to ice cream sundaes, there has never been any waffling for me. You can keep your hot fudge, I’ll take butterscotch (or caramel – since there doesn’t seem to be a difference in the ice cream world), please and thank you.

Butterscotch Sauce II

It’s not that I don’t like chocolate at other times. But there’s something about the combination of vanilla ice cream and the buttery richness of a warm butterscotch sauce that pleases me immensely.

It was a good thing I didn’t have a recipe for making it at home.

And then I did.

And that was a good and bad thing.

I stumbled onto a recipe for “Ridiculously Easy Butterscotch Sauce” on Smitten Kitchen one day and gave it a shot.

It’s nothing more complicated than melting some butter and then boiling it with cream and brown sugar and then rounding it out with a bit of vanilla and a pinch or two of flaky salt – which has a milder flavour to emphasize the salty-sweet flavours of a tasty butterscotch without being overtly salty.

It comes together frighteningly – I may even dare to say, dangerously – quickly. Even if you give it several minutes to cool down so it’s thicker and doesn’t melt your ice cream on contact.

And in 10 minutes, I was doing just that.

I did get a bit frustrated the first few times I made this, as mine never looked quite as thick as it did in Smitten Kitchen’s photos. But after scrolling down through the comments one day, I noticed a discussion about having it reach a certain temperature.

I’ve since learned (through trial, error and a bit of impatience) that it’s the 220 F (104 C) mark that seems to make the difference. And also that it has to boil for a lot longer than I would have guessed.

Some other things I’ve learned: don’t be like me and absent-mindedly use your finger to get that little drop off the end of the whisk or thermometer. And don’t be afraid to double the batch; you will thank yourself later.

It should last in the fridge for several days. But, to be honest, mine never sticks around that long.

Butterscotch Sauce


Easy Butterscotch Sauce

Adapted from Smitten Kitchen

  • 1/4 cup (50 mL) butter
  • 1/2 cup (125 mL) packed brown sugar
  • 1/2 cup (125 mL) whipping cream pinch flaky salt, plus more to taste
  • 1 tsp (5 mL) vanilla extract, or more to taste

In a pot over medium heat, melt the butter. Add the sugar, cream and salt and whisk until blended. Bring to a boil and cook for several minutes, whisking often. It will boil up, so watch carefully. Cook until it reaches a temperature of about 220°F (104°C), give or take a degree or two. Remove from heat and stir in 1 tsp of vanilla.

Let it cool slightly and taste, adding more vanilla or another pinch of salt to suit your tastes.

Store in the refrigerator. Reheat gently on the stove or in the microwave to make it pourable.

Makes about 3/4 cup.

This article first appeared in the Calgary Herald. For more recipe ideas, check out CalgaryHerald.com/food.

Continue Reading

Rhubarb Snacking Cake

Oh blergh.

I’ll spare the apologies for not being a good blogger lately. Mostly, I really should be apologizing to my blog because I’ve been careless, letting our anniversary slip by (four years!) with not even a cheap greeting card or cake (which I usually make to celebrate this little milestone) to mark the occasion. (Actually, I think the real loser here is me since it also meant that I didn’t get to *eat* cake for my blog’s anniversary either. Fails all around.) As these things go, I suspect these means I’ll have to do something absolutely stupendous to make up for it. What that will be, I know not.

Until then, though, I’ve got a Rhubarb Snacking Cake for you all. (And, ahem, for myself, as I have certainly enjoyed a slice or two.)

Rhubarb Snacking Cake III

My back went out a couple of weeks ago. Annoying as hell, but I’m on the mend. I had to take a handful of days away from the office since being flat out on my front was about the only comfortable position I could find and I returned to find a massive bundle of rhubarb on my desk. As in, the stalks — some a good 5 centimetres or so in diameter — were at least two feet long and the entire bundle had been wrapped up using two plastic bags end-to-end and a good binding of tape. I was amused at how I had to hobble out to my car at the end of the day with this bundle, but mostly I was grateful because I do love rhubarb. (Pudding cakes, large crumb coffee cake, upside-down cake, anyone? Or, perhaps my favourite, how about a rhubarb-based cocktail? Yes, click through; they’re named after my grandmother!)

Fortuitously, I had just come across Smitten Kitchen’s latest, a so-called Rhubarb Snacking Cake that she had put together, loosely based on a Martha Stewart recipe, so I knew exactly what I was going to do with at least part of the rhubarb bundle.

It was my first baking project in a number of weeks and it felt great to be back in the kitchen, even if it meant stopping to take breaks to lay down on the floor in between.

This cake has a fabulous crumb and I like how it’s not very tall, which does make it very easy to eat by hand, which my friends and I did that afternoon while sitting out on a back deck drinking Gewurztraminer and soaking up some sun.

(And later, a glass or two of Pinot Noir.)

Pinot Noir afternoon

While I normally follow a recipe exactly the first time I make it, I did make a couple of changes this time around. Namely, I omitted the cinnamon in the crumb topping (although a fan of cinnamon, I don’t love it with rhubarb, I’ve decided) and adding a bit more butter since the crumb wasn’t exactly “crumb-ing” with the four tablespoons called for. Next time (and there will be a next time), I think I’ll cut back on the flour a bit as the crumbs still seemed a bit dry. I know our Canadian flour is a bit stronger than that of our southern neighbours, so that may be why it wasn’t quite dead on. (If you click over and look at Deb’s photos on her post, you’ll see her topping looks different.)

But, really, minor quibble in the great scheme of things.

It should also be no surprise, but I upped the amount of lemon zest and maybe splashed a bit more of the juice in with the chopped rhubarb. The recipe below reflects that, but if you’re not as much of a fan of lemon as I am, feel free to rein things back in.

Lastly, as going through the recipe again, I just realized I mucked it up, putting only 1/3 cup sugar in the topping and a full cup in the batter. I actually thought it was quite tasty this way since then the rhubarb layer more tart (but not alarmingly so). Below is the recipe as it should be, but feel free to do it the wrong (and yet still super delicious) way that I did it.

Sliced rhubarb

All Scraped Out

Rhubarb Snacking Cake from the Oven I

Rhubarb Snacking Cake from the Oven II

Rhubarb Snacking Cake II

Rhubarb Snacking Cake I

Rhubarb Snacking Cake

From Smitten Kitchen, as inspired by Martha Stewart Living.

Cake:

  • 1 1/4 pound rhubarb, trimmed and cut into 1/2-inch lengths on the diagonal
  • 1 1/3 cup  granulated sugar, divided
  • 1 1/2 tablespoons lemon juice
  • 1/2 cup unsalted butter, softened
  • 2 teaspoons finely grated lemon zest
  • 2 large eggs
  • 1 1/3 cups all-purpose flour
  • 1 teaspoon baking powder
  • 3/4 teaspoon table salt
  • 1/4 teaspoon ground ginger
  • 1/3 cup sour cream

Crumb:

  • 1 cup all-purpose flour (though I might do a tablespoon or two less next time)
  • 1/4 cup brown sugar
  • 1/8 teaspoon table salt
  • 5 tablespoons unsalted butter, melted

Preheat your oven to 350°F.

Grease the bottom and sides of a 9×13-inch baking pan with butter or cooking spray, then line with parchment paper, extending it up two sides to make a sling.

Stir together rhubarb, lemon juice and 2/3 cup sugar, then set aside.

Beat the butter, remaining sugar and lemon zest until light and fluffy. Add eggs, one at a time, making sure to scrape down the sides of the bowl each time. In a separate bowl, whisk together the dry ingredients. Add one-third of the flour mixture to the batter, mixing on low until just combined. Add half of the sour cream and continue mixing on low, then add another third of the flour mixture, then the rest of the sour cream and finish with the rest of the flour. (I mixed the last addition until just barely combined, finishing it off with the spatula.

Scoop the batter into the pan and spread evenly. (Deb suggests using an offset spatula. I agree; it made it much easier to make the layer even and get it into the corners.) Top with rhubarb, spreading evenly.

For the crumb mixture, whisk together flour, brown sugar and salt, then mix in the melted butter with a fork. Scatter over the rhubarb.

Bake for 50 to 60 minutes until a tester comes out clean of cake batter. Cool in the pan on a rack.

To serve, use the sling to lift the cake free from the pan and cut into squares.

Continue Reading

Brownies with Sea Salt and Lime

Oh, hello!

Thanks for joining me here on my inaugural post on my NEW blog. While I should be a little ashamed (and I am a bit, to be honest) that it took me this long to get my own domain and I certainly should be (and am) irked that waiting this long meant a lot more hiccups in making ye olde switch from my WordPress version to this one, I’m just tickled that I finally broke down and did it. I own real estate! Internet real estate!

(Side note: I guess this is a good time to say that you may want to update your bookmarks.)

I’m still trying to work out some design kinks. Those classes in HTML that I took in my undergrad (read: a long time ago) haven’t really kept up with the times. But I figured it would be better to just get this thing live and try to fix as I went along rather than wait until it was perfect and have you all give up on ever seeing me post again. (Thanks to the kind person on Twitter who gently nudged me into getting things rolling again.) (Related: if anyone has a quick fix to get the blog’s tagline all on one line and to get the “What It’s All about” over to the left side of the page, I’d be totally grateful.)

And just a few weeks shy of my four-year (four year!) anniversary. Four amazing, heartwrenching, uh, fattening years. But tasty ones too. Of course, I’ll wax a little more poetic when I actually get there. After all, it’s not an anniversary without some cake. Or not in my world, at least.

So, stay tuned for that.

Today, though, I’ve got some really, really, really good brownies.

With lime.

And flakes of sea salt.

Like the margarita of brownies.

Brownies with Lime and Sea Salt

But, you know, without the booze. (Unlike these and these. Oh yeah.)

I had bookmarked them a while ago from the Kitchn, which is a fabulous resource for recipes and kitchen tips. And then kind of forgot about them — surprising considering my love of all things citrus.

But as I was getting ready for (après) ski weekend a few weeks ago, they popped back into my head. (Après) ski weekend is becoming an awesome tradition. We rent a house right at Kicking Horse, pack up lots of goodies to eat (and maybe a couple of bottles of wine, ahem) and then hang out for the weekend. The others ski and board, but the mountain is a bit advanced for me, so I just do the après part. All the hot tubbing, snacking, reading and laughing, none of the actual hurtling down a mountain. Good times!

These brownies totally delivered on all my expectations. They were darkly rich, slightly sweet with the tang of lime and kiss of sea salt.

The most unexpectedly amazing part of these were the chunks of unsweetened chocolate that you stir in before baking. After, they’re these little pockets of chocolate-y goodness and they taste as if they are dark or semi-sweet chocolate. The addition just takes these brownies over the edge.

Well, that and the lime, of course.

We didn’t manage to eat them all over the weekend. (No judgment; I had also packed some Bourbon Blondies and, of course, the Dark Chocolate Chunk Cookies. Plus, everyone brought lots of other delicious dishes for dinner and the world’s supply of chips. Did I mention it’s a very good weekend?) So I took the rest in to work where they were gobbled up.

And now that I know how good they are, I certainly won’t be waiting until the next (apres) ski weekend to make another batch.
Lime and Salt

Brown, green and red

A sprinkle of salt

Brownie with Lime and Sea Salt

Brownies with Sea Salt and Lime

Adapted ever so slightly from The Kitchn.

  • 1/2 cup + 2 tablespoons unsalted butter
  • 4 ounces bittersweet chocolate, chopped coarsely
  • 1 cup sugar
  • 3/4 cup all purpose flour
  • 1/4 cup Dutch process cocoa powder
  • 2 large eggs, lightly beaten
  • 1 teaspoon vanilla
  • 1/4 teaspoon kosher salt
  • 1 lime, juiced and zested
  • zest of 1 lime
  • 2 ounces unsweetened chocolate, finely chopped
  • 3/4 teaspoon flaky sea salt

Preheat oven to 325F and line an 8×8-inch baking pan with parchment paper, leaving the paper extra-long and hanging over two sides.

In a medium saucepan, melt the butter and bittersweet chocolate over medium-low heat. Stir until smooth.

Remove pan from the heat and add the sugar, flour, cocoa powder, eggs, vanilla and kosher salt. Mix until combined. Then add lime juice and zest, as well as the finely chopped unsweetened chocolate. Stir to combine and pour into prepared pan. Sprinkle the sea salt on the top.

Bake for 30 to 35 minutes or until a tester comes out moist. It will not be perfectly clean, but it shouldn’t be sticky either. Allow pan to cool on a wire rack for 15 minutes before removing brownies from pan. To remove the brownies, run a knife around the sides of the pan to help release the brownies, then lift out the parchment paper. Place the brownies on the paper back on the wire rack. Cool completely and cut into 2 inch squares.

Continue Reading

Vanilla Panna Cotta with Strawberries

Last January, I made several resolutions that I hoped to fulfil through the course of the year. A flood in my apartment, which led to several walls being torn out and weeks and weeks of workmen Humpty Dumpty-ing my home back together again killed any drive I had to enact the “entertain at least once a month” resolution. Or any of the myriad food-related resolutions I had, since my kitchen was barely navigable from all the belongings normally hidden away in the storage room.

And so, in the end, I fulfilled none.

This year, I’ve kept my resolutions equally simple:

  • Write more actual letters to people
  • Read more classics
  • Travel somewhere new
  • Drink more water
  • Make panna cotta
  • Join a new class
  • Increase my intake of fruit and vegetables

And so far, I’m off to an unexpectedly good start.

I’m partway through Jane Austen’s Northanger Abbey and have Wuthering Heights by Emily Bronte on standby; I’ll be travelling to Morocco this fall; and I made panna cotta.

Panna cotta with strawberries II

This was a holdover from last year’s resolutions and I’m surprised it has taken me this long to finally cross it off my list. (Although, I do think part of my hesitation stemmed from knowing this is a very dangerous recipe to master.)

Panna cotta – literally “cooked cream” in Italian – is nothing more than sweetened cream (or a combination of cream, milk, buttermilk or yogurt) infused with any one of myriad flavours.

It’s infinitely adaptable; I’ve had everything from simple vanilla versions to ones flavoured with orange blossom water, topped with fruits or coulis or left unadorned to let the light flavour come through.

It’s silky, soothingly smooth and can be the perfect end to most meals.

And it is ridiculously easy. The hardest part of making this recipe was wading through the hundreds of versions that popped up after a straightforward Google search.

But, for the first time attempting it at home, I wanted something uncomplicated.

Nothing more than cream, vanilla, sugar and gelatin, topped with a few macerated strawberries for colour and flavour.

This version from food blogger and author David Lebovitz fit the bill.

Even making the panna cotta felt soothing: from scraping out the fragrant flecks of vanilla from their pods and stirring them into the cream that was gently heating on the stove, to pouring the liquid into ramekins and putting them to bed in the fridge for the night.

Only attempting to unmould them proved tricky. (If no one is worried about spectacular presentation – and who would be after taking one bite of this dessert? – I probably wouldn’t worry about bothering next time and would simply serve them in clear glasses or pretty coloured ramekins instead.)

But any frustrations stemming from their unwillingness to slide out on the first attempt evaporated with the first bite of panna cotta.

Sweet, light, brightened by diced strawberry and speckled with vanilla, it was everything I had hoped for.

If the rest of my resolutions turn out to be this easy, I just might get through all of them this year.

Unmolded panna cotta

Strawberry

Vanilla Beans

Panna cotta with strawberries I

Panna cotta with strawberries III

Vanilla Panna Cotta with Strawberries

This version is slightly adapted from David Lebovitz – namely the addition of macerated strawberries – who in turn adapted it from Judy Witts’s Secrets From My Tuscan Kitchen. You can find gelatin, which is typically sold in boxes of packets, in the baking section of most grocery stores.

  • 4 cups (1 L) whipping cream (or half-and-half)
  • 1/2 cup (125 mL) sugar
  • 1 vanilla bean, split lengthwise (or 2 tsp/10 mL vanilla extract)
  • 2 packets powdered gelatin (about 4 ½ tsp/22 mL)
  • 6 tbsp (100 mL) cold water
  • 2 cups (500 mL) strawberries, diced
  • 1-2 tbsp (15 to 25 mL) sugar (depending on the sweetness of the strawberries)

Heat the cream and sugar in a pot on the stove or in the microwave until the sugar is dissolved. Remove from the heat. Scrape the seeds from the vanilla bean and add them and the pod to the cream. Cover and let infuse for 30 minutes. Remove the pod and rewarm the mixture before continuing.

Lightly oil eight custard cups with a neutral-tasting oil, such as vegetable or safflower.

In a medium-sized bowl, sprinkle the gelatin over the cold water and let stand 5 to 10 minutes.

Pour the warm panna cotta mixture over the gelatin and stir until the gelatin is completely dissolved.

Divide between the prepared cups, then chill until firm (at least two hours). Just before serving, mix together diced strawberries and sugar and let sit while unmolding the panna cotta.

To serve, run a sharp knife around the edge of each panna cotta and dip the ramekin in a dish of hot water to loosen. Unmould onto a serving plate and top with strawberry mixture.

Serves 8.

This first appeared in the Calgary Herald. For more recipe ideas and food stories, check out the Herald’s food page.

Continue Reading

Guinness Brownies

I first heard about Guinness Brownies through another blog, but forgot to bookmark it and couldn’t remember where I had seen it. I had sent the link to a friend who’s a fan of beer-based baking, but then thought it would be nice to just make them for her instead. A quick Google search brought up myriad other blog posts, including the one I had seen originally, as well as some other variations. After cruising through a bunch, I realized most of them were riffs on one standard recipe — one I liked much more than the recipe I had first come across.

Guinness Brownies II

Now, normally, I like to leave recipes alone for the first attempt, figuring I need to give it a chance to wow me before I make changes. But most of the versions I found called for white chocolate, which I loathe. And I knew it would cook out and be undetectable in the final brownie, but I still wasn’t keen on buying white chocolate just for this recipe. One other blogger had subbed in milk chocolate chips, which seemed like a good idea to me. I think the object here is chocolate-y sweetness and milk chocolate can certainly achieve that, with the bonus of being an ingredient I can use in other things.

Random rant: why do they sell baking chocolate squares in packages of 6 ounces? Most of the recipes I’ve come across call for 8 ounces, which means buying two packages and then letting the remaining four ounces sitting around in the cupboard (where, yes, I am likely to forget I have them and then go buy more. I really need a more organized baking cupboard).

Cracking a beer at 11 a.m. felt a bit funny, though it’s not my first time. (Those Guinness Cupcakes are also an excellent recipe, if you’re looking for something else to do with the dark Irish beer.) And I was a bit nervous about cooking it down. I’m not a huge beer fan and was afraid reducing it and intensifying the flavour would make it stand out far too much in the final brownies. Plus, it did seem a bit weird to cook beer.

But what do I know?

Not much apparently because these were fantastic. They were rich and dense, flavourful but not overly beer-y. A definite keeper.

Guinness

Guinness Brownie Batter

All Baked Up

Guinness Brownies I

Guinness Brownies III

Guinness Brownies

This is a hybrid recipe from a couple of sources, but I have to give Bitchin’ Camero a shout out because that is a seriously awesome blog name and Blondie’s Cakes for the smart idea of reducing the Guinness for additional flavour.

  • 1 cup all-purpose flour
  • 3/4 cup unsweetened cocoa powder
  • 1/4 teaspoon salt
  • 6 tablespoons unsalted room temperature butter, cut into cubes
  • 8 ounces dark bittersweet chocolate, chopped (I used 6 ounces of bittersweet and 2 of 70 per cent dark chocolate)
  • 3/4 cup milk chocolate chips
  • 4 large eggs, at room temperature
  • 1 cup granulated sugar
  • 2 bottles Guinness beer, reduced to 1 1/4 cups
  • 3/4 teaspoon vanilla
  • 1 cup semi-sweet chocolate chips
  • icing sugar for dusting (optional)

Preheat the oven to 375 degrees F. Line a 9 x 13-inch baking pan with parchment paper.

In a medium bowl, whisk together flour, cocoa powder, and salt until evenly combined. Set aside.

In a double boiler set over low heat, melt butter, bittersweet chocolate and milk chocolate chips. Remove from heat.

In a large mixing bowl, beat together eggs and sugar on high speed until light and fluffy. Pour in melted chocolate mixture and beat until combined.

Add flour-cocoa mixture and beat until just combined. Whisk in cooled Guinness and vanilla. (It will take a few minutes for the beer to incorporate. I used more of a folding technique with the whisk for the first minute or two to keep everything from slopping everywhere.)

Pour into prepared pan. Scatter over semi-sweet chips.

Bake 25 to 30 minutes, until a toothpick inserted in the centre comes out clean. Note: mine only took 24 minutes; start checking at the 20-minute mark.

Let brownies cool. Dust with icing sugar if using and serve.

Continue Reading

Bourbon Pecan Pie Brownies

The first time I had pecan pie was when I was 16 and visiting a friend in England for a month during summer holidays. There were visits to Stonehenge and London, trips on the train to Bath, but a lot of the time was spent hanging out in Bristol with her boyfriend and his friend, with whom I struck up a short summer romance.

It was not to last, but part of our brief courtship included an invitation to dinner at his family’s house. Details have likely been repressed due to all that teenage awkwardness, but one thing is clear in my mind: his mom made pecan pie.

It was delicious.

Since then I’ve been drawn to variations on the pecan pie. (Not, to be clear, in any way related to yearning for the boy who ended things in a long-distance call just a few weeks after I returned to Canada, but because I like the idea of this pie, the rich pecans and sweet goo filling.)

(And, as an aside, you can read a bit more about my short-lived summer romance in another pecan pie-related post here.)

But I can rarely get excited about making pastry.

And then I came across a recipe for Bourbon Pecan Pie Brownies.

Stacked and side view

Where a crust would be, instead a fudgy, chewy brownie and a pecan pie topping kicked up with some bourbon.

Seemed to me like two very fine things coming together to make an even finer thing.

I found it on a blog, but the recipe originated (and had been adapted from) an NBC Sunday Night Football Cookbook, the idea of which totally charms me.

I used to use the same brownie recipe every time I felt like a chocolate fix, until I found a recipe for Rocky Road Brownies, which used no leavening. The resulting brownies were dense and fudgy and a revelation.

They are, unsurprisingly, rich — two sweet desserts combined into one. And the bourbon retains some of heady kick, so be warned.

The original recipe says it makes 16 bars; I’d suggest cutting smaller.

After all, you can always eat two.

Cocoa, butter and sugar

Scraped Clean

Chopped pecans

Top layer batter

Top layer on

Solo brownie

Stack of brownies

Bourbon Pecan Pie Brownies

The original recipe calls for the two layers to bake in the oven for 30 to 35 minutes to set the pecan pie layer. Don’t be afraid to go longer; mine were in for 45 minutes before the centre had set.

For the brownies:

  • 1/2 cup (125 mL) flour
  • 1/4 tsp (1 mL) salt
  • 3/4 cup (175 mL) cocoa powder
  • 1 ¼ cup (300 mL) sugar
  • 1/2 cup (125 mL) butter
  • 1 tsp (5 mL) vanilla extract
  • 2 eggs

Preheat oven to 325F (160C). In a small bowl, beat together eggs and vanilla, then set aside. In a double boiler set over boiling water, combine butter, cocoa, sugar and salt. Mix as the butter melts until everything is combined. Remove from heat and whisk in egg and vanilla mixture.

Add flour and stir until combined. Pour into 8 by 8-inch (20 by 20 cm) baking dish. Bake for 20 to 25 minutes. Let cool completely.

For the pecan pie layer:

  • 1/2 cup (125 mL) packed brown sugar
  • 1/2 cup (125 mL) corn syrup
  • 2 eggs
  • 1 tbsp (15 mL) vanilla extract
  • 1/4 tsp (1 mL) cinnamon
  • 1/4 cup (50 mL) butter, melted
  • 2 tbsp (25 mL) bourbon
  • 2 cups (500 mL) chopped pecans

Beat together corn syrup and sugar until smooth. Add eggs, vanilla and cinnamon, and beat. Add butter and bourbon and beat again until thoroughly combined. Stir in pecans and pour the mixture over the brownie layer. Bake for 30 to 35 minutes.

Let cool completely, then refrigerate for at least two hours before serving.

This article first appeared in the Calgary Herald. For more food-related articles and recipes, check out the Herald’s food page.

Continue Reading

Dark Chocolate Chunk Cookies

What’s the sign of a good recipe?

When you make it twice in one week. (And kind of wish you had the ingredients to make it again as you’re blogging about it.)

My friends, this is that kind of recipe.

And it’s for chocolate chunk cookies.

Milk and dark chocolate chunk cookies

I didn’t think there was anything revolutionary about chocolate chip cookie recipes. (Barring, of course, the New York Times one that pretty much everyone has tried, except me. One day, I will try this. It’s the same day I have a fridge large enough to store a bowl of cookie dough for a minimum of 24 hours. One day.) I was mistaken.

These are chewy delights of soft cookie with melty bits of dark chocolate. They are cookie perfection.

Dark chocolate chunk cookies I

I just really wanted to make some cookies one night last week, but had not put any thought into what kind. I innocently tweeted out I had a hankering to bake and my friend Robyn suggested I make these cookies from Anna Olson. I was intrigued by the addition corn starch, which Olson says gives the cookies a chewy centre.

And, perhaps more importantly, I knew I had all the required ingredients, including an assortment of dark chocolate bars that I wasn’t quite sure what to do with. One of the ones I ended up using was a more traditional thin, flattish bar, while the other was about a 1/2-inch thick.

I used my awesome cookie scoop to portion out the dough, which made these nice rounded, perfectly portioned balls of dough. What surprised me when they baked, though, is that there really wasn’t very much spread. They remain nicely thick and I’m sure that contributes to the chew.

I ate a couple that night, then took some in for work where people devoured them.

So, when it came to attending my first tailgate on Saturday (I know, I know, but I’m from Vancouver; we’re not really tailgate people), I knew exactly what I wanted to bring. And not just because I really wanted to eat some myself. But, yeah, that was part of it.

This time, I used two flat, thin bars of 70 per cent dark chocolate. I broke them into smaller pieces with my meat tenderizer. Let me tell you, that was oddly satisfying. And the end result was really nice. The pieces melted into strata of cookie and oozing chocolate. It was heavenly.

And for that, this is my new go-to cookie recipe.

Smashed chocolate

Dark chocolate chunk cookie dough

Scooped dough

Dark chocolate chunk cookies I

Milk and dark chocolate chunk cookies

Dark chocolate chunk cookies

Milk and dark chocolate chunk cookies

Dark Chocolate Chunk Cookies

This is, essentially, exactly as Anna Olson dictates, but I’ve made a few changes to the instructions and called for dark chocolate instead of bittersweet.

  • 3/4 cup unsalted butter, softened
  • 1 cup brown sugar
  • 1/4 cup granulated sugar
  • 1 egg
  • 2 teaspoons vanilla extract
  • 2 cups all-purpose flour
  • 2 teaspoons cornstarch
  • 1 teaspoon baking soda
  • 1/2 teaspoon salt
  • 8 ounces dark chocolate, cut or broken into chunks

Preheat oven to 350F.

Cream butter and both sugars until smooth. Add egg and vanilla and blend in.

In a separate bowl, whisk together flour, cornstarch, baking soda and salt. Add to butter mixture and mix until just blended. Fold in chunks of chocolate.

Line baking sheet with parchment paper. Drop cookie dough by spoonful onto the lined sheet and bake until just golden brown around the edges, between 8 and 10 minutes.

Continue Reading

Vanilla Cupcakes with Bourbon Buttercream

It was my friend Dan Clapson’s birthday the other day.

As part of what turned out to be a long weekend’s worth of celebrating (for him, not me), on the Monday evening we had Monday Night Supper Club (head here for some play-by-plays of these weekly events) at Stanley Park. Dan laid out some ground rules for the potluck. OK, one rule: everything had to be shaped like a cake.

Since Dan seemed to be a very lucky birthday boy who got everything he hoped for over the weekend, who was I to deny this particular wish? So, leading up to the big day I was pondering ideas. And I was drawing blanks. I really just wanted to make cupcakes. What? I know my strengths.

Vanilla Cupcake with Bourbon Buttercream

And for some reason, I kept thinking about creating with some sort of bourbon-flavoured icing.

I thought it was pretty original, but a quick Google search showed recipes are out there. And that is a good thing because it gave me a great jumping off point.

It’s tasty stuff, I can’t lie. But it’s also incredibly boozy despite the fact there is very little booze in it. Three tablespoons, about 1 1/2 shots. And only half of that made it onto the cupcakes (it’s enough icing for 24 cupcakes, not 12; the remainder is sitting in my fridge and I’m still trying to figure out what to do with it. Make more cupcakes seems the most logical answer.), so, really, it was 3/4 of a shot for the entire batch. You’re certainly not going to get drunk on them, that’s for sure.

People got pretty creative with the picnic potluck, including Chelsea who brought a sushi cake, complete with sweet potato “candles.”

Sushi "Cake"

Adria Britton with the very popular pizza pull-apart bread bundt.

Pull-Apart Pizza Bundt

Jamie Penno brought a savoury bacon-and-cheese cake.
Savoury Bacon and Cheese Cake

And Dan brought a potato salad “cake,” which was an intriguing take if not completely successful. Points for creativity!
Potato Salad "Cake"

I felt a bit non-creative for bringing straight up cupcakes, but I’m pretty sure the bourbon icing made up for that.

Vanilla Cupcakes with Bourbon Buttercream I

Vanilla Cupcakes with Bourbon Buttercream II

Dan and his Birthday Cupcake

And it was a lovely night to be in the park. Perfect way to end a lazy long weekend.

Stanley Park

Vanilla Cupcakes
This is straight from Martha Stewart’s recipe for yellow cupcakes (though I rewrote the instructions a bit). They are yellow, but I prefer to focus on their flavour.

  • 1 1/2 cups all-purpose flour (spooned and leveled)
  • 1 1/2 teaspoons baking powder
  • 1/2 teaspoon salt
  • 1/2 cup milk
  • 1 teaspoon pure vanilla extract
  • 1/2 cup (1 stick) unsalted butter, room temperature
  • 3/4 cup sugar
  • 2 large eggs

Preheat oven to 350F.

Line a muffin tin with liners.

In a bowl, whisk together the dry ingredients: flour, baking powder and salt. Set aside.

In measuring cup or bowl, mix milk and vanilla.

In a large bowl, beat butter and sugar until light and fluffy. Add eggs one at a time, beating well each time. Turn mixer down to low, then add half of the dry ingredients, followed by the milk and vanilla and then the rest of the dry ingredients. Mix until just combined.

Divide evenly among muffin cups.

Place tin on rimmed cookie sheet and bake until a toothpick comes out clean. (Martha suggests 20 to 25 minutes; mine were done by 18, so don’t be afraid to check early.) Cool cupcakes in the tin for 5 minutes and then remove to a rack and cool completely before frosting.

Top with bourbon buttercream.

Bourbon Buttercream
And I adapted this one from My Recipes.

  • 1/2 cup butter
  • 1 pound icing sugar
  • 3 tablespoons bourbon
  • 3 tablespoons milk
  • 1 teaspoon vanilla

Beat butter until creamy. Add half of the icing sugar and beat, followed by the milk and bourbon and vanilla. Mix until blended. Add the remaining sugar and beat until thick and smooth.

Continue Reading

Chocolate Lime Cheesecake

The problem with getting behind in blogging is you start to forget why you made something in the first place.

OK, that might not be a problem others have. This may be particular to me.

Chocolate Lime Cheesecake Slice I

I think I came up with the idea of making a Chocolate Lime Cheesecake while flipping through cookbooks one night and remembering this had been on my to-do list for eons. I’m almost sure I had pulled Nigella Lawson’s Nigella Bites from my (overstuffed) shelf looking for one of her salad recipes when I re-stumbled across this one. And it occurred to me, since it was a long weekend and I was going to be working on the stat holiday, that I should bake this up and bring it in to the rest of the Calgary Herald crew working on the holiday Monday just like I used to when I was over in the city section. (Back then, I worked Sundays every week and I often baked and brought in goodies for what became known as Civilized Sundays, which would see us sitting around at 10 a.m. eating cake and listening to the police scanner. And reading our horoscopes.)

Then, and I do remember this correctly, I told the people who I knew would be also working that I was going to bake a cheesecake, which actually made me do it.

And, man, am I glad I did.

Nigella, my friends, she knows her stuff.

You know I love lime. It’s no surprise I also like chocolate. These two together are a very nice, very unexpected treat.

It may seem a bit fussy, but I followed all the instructions, including baking it in a water bath, which is a relatively common suggestion for baking cheesecake (a gentler way that theoretically keeps the top from cracking but always seemed like an unnecessary additional step). And I think it is indeed worth it. And the trick of snapping the aluminum foil into the springform pan (which sounds more confusing than it actually is) really does protect the crust and cake from any water.

Aluminum foil-wrapped pan

However, I must also add that I bought extra-wide aluminum foil thanks to the suggestion of my friend, Colette, who knew such a thing existed. Thanks Col! That way there was no panic about making sure the various pieces were secure enough. I would recommend this as a great way of alleviating any concern over seepage.

Seepage. What an odd thing to be mentioning on a food blog.

And, goodness, this is a very scattered post, isn’t it?

To summarize: this cheesecake is tasty. I enjoyed it. So did my friends. Make it. Don’t wait as long as I did to do so.

End.

Chocolate Lime Cheesecake I

Chocolate Lime Cheesecake II

Chocolate Lime Cheesecake Slice I

Chocolate Lime Cheesecake Slice I

Chocolate Lime Cheesecake

Straight from Nigella Lawson’s Nigella Bites.

  • 7 ounces chocolate wafer cookies
  • 1/3 cup unsalted butter, melted
  • 1 1/2 pound cream cheese (recommended: Philadelphia)
  • 1 cup sugar
  • 4 whole eggs
  • 2 egg yolks
  • 4 limes, juiced or 3/4 cup

Special equipment: springform pan

Preheat oven to 350 F.

Place a large overlapping piece of aluminum foil over the bottom of the springform pan, and then insert pan ring over it. Fold the foil extra foil up and around the pan and place the whole thing on a second piece of foil, also folding it and pressing it securely around the pan, having a water tight covering.

In a food processor, process cookies until they are crumb-like, add melted butter and continue to process. Pour crumb mixture into springform pan and press with your fingers to line the pan. Place the pan in the refrigerator to set while you prepare the cheesecake.

Place a kettle of water on for water bath. In a food processor beat the cream cheese until smooth, add the sugar, eggs, egg yolks, and lime juice.

Take crumbed pan from the refrigerator and place it in a roasting pan. Pour the cheesecake mixture into the crumb pan, and then carefully pour the hot kettle of water into the roasting pan so the water reaches 1/2 way up the pan so the water does not splash into cheese cake.

Place roasting pan in oven for 1 hour, checking after 50 minutes. It should feel set, but still wobbly in the center. Take the roasting pan out of the oven, carefully remove the springform pan from the roasting pan and place it on a rack. Peel off the outer layer of foil, and tear away the side bits of the first layer of foil and leave the pan to cool. Once the cake comes to room temperature, place it in the refrigerator for 20 minutes before serving. Transfer to the plate you’re going to serve it on, a plate without a lip, or a cake stand. Unclip the springform pan and remove the outer part. Carefully lift the cheesecake removing the metal bottom. The aluminum foil can stay on the cake. Serve chilled.

Continue Reading

Rhubarb Upside-down Cake

Before I get down to this (and, baby, this is well worth getting down to), a little apology and a tease of what’s going to be coming up on P&P. First, sorry for the delay in updating. Life, it has been hectic of late. That’s not a bad thing, except when it comes to keeping the blog a little more lively. But, my friends, I’ve got posts coming on my trip to Portland (hint: there are burgers. And they are t-a-s-t-y.), a scape pesto and some other goodies.

So, thanks for your patience. And now, let’s look at some cake, shall we?

Rhubarb Upside-Down Cake III

It’s rhubarb season again and one of my most favourite times of the year (right up there with that point when cherry blossoms finally burst forth in frothy clouds of pink).

In the last few weeks, people have regaled me with stories of how their rhubarb patches are growing like weeds and they have no idea what to do with all those stalks. (Including one friend who actually didn’t know it was rhubarb in her garden. If I lived anywhere near her, I would have been tempted to drive over and take them all.)

I give them all the same response: I’m more than happy to take it off their hands.

I have no shame when it comes to rhubarb.

Red Rhubarb Stalks

I love it, those rosy-pink or mottled green stalks with their sour punch that mellows with a little sugar and heat.

I like it in crumb cakes and muffins, crisps and cocktails. (And here are a couple more.)

And when I saw this Rhubarb Upside-Down Cake from Martha Stewart, I knew exactly what my next project would be once I got my hands on a pound or two of the fruit.

My only real experience with upside-down cakes is the images from the ’60s and ’70s of the pineapple version with each golden ring dotted by a bright red maraschino cherry.

This version is all rhubarb with the top awash in rosy pink.

The question with upside-down cakes is always, will this upend properly to a gorgeous display of fruit on a golden-crumbed cake? The backup question follows: if it doesn’t, can I at least make it look like it did?

Except for a few errant pieces of rhubarb that slid off the cake’s edges, it came out beautifully. (Perhaps don’t jam them into the edges of the pan quite as enthusiastically as I did, since these were the ones that escaped from the top of the cake.)

I will say that I followed Stewart’s instructions exactly and she suggests removing the cake after only 10 minutes of cooling; otherwise, she says, it will stick.

As I lifted off the cake pan, rosy pink juices glided down the cake edge and settled on the cake stand like a thin moat.

It was definitely juicier than the image of Stewart’s perfect cake, but when it comes to that sweetened rhubarb syrup that forms when the fruit is cooked with a bit of sugar, I’m OK with that. And I’ve never heard anyone complain of an overly moist cake.

This was light and fluffy, slightly perfumed with orange and topped with softened rhubarb, sugar-kissed and slightly tangy.

And the unusual addition of a crumb topping (which then becomes the crumb bottom) added an unexpected, but nice, texture.

I thought it was a weird touch and was tempted to skip it initially, figuring rhubarb and cake alone would be tasty, but it added another dimension to the cake, which I liked.

And, with this, rhubarb season is on for me.

I can only hope other friends feel overwhelmed by an excess of rhubarb and they don’t mind me suggesting they feel free to pass it along.

Rhubarb and Sugar

Rhubarb and Sugar II

Crumb Topping

Cooked Crumb Topping

Rhubarb Upside-Down Cake

Rhubarb Upside-Down Cake II

Rhubarb Upside-Down Cake Slice

Rhubarb Upside-Down Cake

This comes from Martha Stewart. She suggests when putting the rhubarb in the cake pan to put the pinkest edges facing down so the cake, when upended, will have the best colour.

For the topping:

  • 4 tbsp (60 mL) unsalted butter, melted
  • 1/2 cup (125 mL) all-purpose flour
  • 1/4 cup (50 mL) sugar
  • coarse salt

For the cake:

  • 3/4 cup (175 mL) unsalted butter, divided, at room temperature, plus more for buttering pan
  • 1 lb (500 g) rhubarb, trimmed and cut on a very sharp diagonal about ½-inch (1-cm) thick
  • 1¾ cups (425 mL) sugar, divided
  • 1½ cups (375 mL) all-purpose flour
  • 1½ tsp (7 mL) baking powder
  • coarse salt
  • 1/2 tsp (2 mL) finely grated orange zest
  • 1 tbsp (15 mL) fresh orange juice
  • 2 large eggs
  • 1 cup (250 mL) sour cream

Preheat oven to 350°F (180°C).

Make the topping: Stir together butter, flour, sugar and 1/4 tsp (1 mL) salt until moist and crumbly.

Make the cake: Butter a 9-inch (23-cm) round cake pan (2 inches/5 cm deep). Dot with 4 tbsp (60 mL) butter, cut into pieces. Toss rhubarb with 3/4 cup (175 mL) sugar; let stand for 2 minutes. Toss again, and spread in pan.

Whisk together flour, baking powder and 1½ tsp (7 mL) salt. Beat remaining butter and cup of sugar with a mixer on medium speed until pale and fluffy. Beat in zest and juice. Beat in eggs, 1 at a time, until incorporated, scraping down sides of bowl.

Beat in flour mixture in 3 additions, alternating with sour cream, until smooth. Spread evenly over rhubarb. Crumble topping evenly over batter.

Bake until a toothpick inserted into the centre comes out clean and top springs back when touched, about 1 hour. Let cool for 10 minutes. Run a knife around edge of cake, and invert onto a wire rack. Let cool completely.

Cook’s Note: Let the cake cool for 10 minutes before removing it from the pan. The rhubarb will be too hot to handle safely right after baking. But if the cake sits much longer, it may stick.

This first appeared in the Calgary Herald. For more recipes and instructional videos, check out the Herald’s Food page.

Continue Reading

Rocky Road Brownies

A couple of months ago I went on a ski trip with a number of friends to Golden. OK, for me it was an apres ski trip, where I excelled in drinking margaritas, attempting my first shot ski (I’ll let you google that; no wait, now it sounds dirty: it’s a ski with shot glasses attached so four people are doing shots at once.) (EDIT: I stand mistaken. This is a five-shot shot ski. Thanks Tait!), hot tubbing, cooking (for which I volunteered) and participating in much general merriment.

My friend Dawn and I created a meal plan and bought all the groceries to make things easier for everyone attending (and then we divided the cost amongst all the people on the trip). While we had a solid plan, we did wind around the grocery store aisles trying to figure out if we were missing anything. Somehow along the way we decided it would be awesome to get some marshmallows for hot chocolate. And, for some unknown reason, this culminated in purchasing a 1-kilogram (yeah, that’s 2.2 pounds) bag of baby marshmallows. When, at the end of the weekend, we were dividing up the remaining groceries, I somehow was gifted the marshmallows, which, of course, we never opened.

Initially, my instinct was to make browned-butter Rice Krispie treats. Um, then things got busy and I was eating a lot of last-minute meals and that generally translated into eating the entire box of cereal I had bought to make the marshmallow treats. Fail.

And then I starting thinking about some S’mores brownies my friend Andree made. So I started googling and at some point I stumbled across these Rocky Road Brownies. (Why they are related to TLC, I know not.) What I can tell you? They are AMAZING.

Rocky Road Brownies IV

Deep, dark, fudgy base, topped with melted smears of sweet marshmallow and the salty crunch of pecans.

Just look at that.

Rocky Road Brownies II

Let me put it this way: I usually eat one piece of whatever I’ve baked and then give the rest away. This time? I ate two pieces, gave some away, but held another two back for later. And when those were gone I’m not afraid to say that I was a wee bit sad. Thankfully (or not), I’ve got about 2 pounds of those marshmallows left.

Clearly, I’m making these again.
Melted Chocolate

Deep dark brownie batter

Rocky Road Brownies I

Rocky Road Brownies III

Rocky Road Brownies V

(The original recipe calls for walnuts, but I like pecans, so that’s what I keep around. Also, I didn’t have buttermilk and didn’t want to buy some just for this, so I used 1/4 cup of whole milk with a bit of lemon juice squeezed in.)

Rocky Road Brownies

  • 1/2 cup butter
  • 1/2 cup unsweetened cocoa powder
  • 1 cup sugar
  • 1/2 cup all-purpose flour
  • 1/4 cup buttermilk
  • 1 egg
  • 1 teaspoon vanilla
  • 1 cup miniature marshmallows
  • 1 cup coarsely chopped pecans
  • 1 cup semi-sweet chocolate chips

Preheat oven to 350. Butter an 8-inch square pan. (If you have parchment paper, I like to make a sling by lining the pan with a piece of parchment large enough to create overhang outside of the pan.)

In a pot over low heat, combine butter and cocoa, stirring constantly until smooth. Remove from heat and stir in sugar, flour, buttermilk, egg and vanilla. Mix until smooth. Spread evenly in the pan. Bake 25 minutes or until center feels dry. Do not overbake. Remove from oven, sprinkle with marshmallows, pecans and chocolate chips. Return to oven 3 to 5 minutes or just until topping is slightly melted.

Cool in pan on wire rack. Cut into squares.

Continue Reading

Welsh Scones

Growing up, I had a thing for the Royal family.

I had coffee table books all about Princess Diana, her wedding to Charles, her boys, William and Harry, along with a video of Andrew and Sarah Ferguson’s wedding.

I was one of those girly-girls with a penchant for dressing up, wanting to wear twirly skirts (that whirled out when I spun in circles; I called them turn-y skirts), put on lipstick. I always wanted a tiara.

So, although the inundation of countdowns and articles and television specials and photo galleries leading up to the wedding between Prince William of Wales and Kate (I’m sorry, Catherine) Middleton has been a bit much, my inner eight-year-old girl is kind of loving it. What will the dress look like? What diamond-encrusted tiara will adorn her lovely dark locks? What will the bridesmaids wear? Will they have turn-y skirts?

Outside of the fantasy world, I don’t envy Kate. I’m happy for her and William because they do some genuinely in love, something so clearly missing in the relationship between his parents (though I couldn’t see that as a child). But I wonder too at what she’s giving up for that love. Yes, there are jewels and gorgeous clothes, first-class trips, brushes with celebrity. And there is the paparazzi, the pomp, the expectations, the constantly public life.

No matter, I will be indulging that inner child and tuning in to the wedding.

In honour of that, I’ll be eating scones (and drinking some champagne, of course — though not at 3 a.m. I’m not so devoted that I will wake up that early. That’s why I have a PVR.) as Kate walks down the aisle.

"Welsh Cake" scone

I could eat any version of scones, but I decided to create a recipe that would combine a basic scone with a Welsh cake (which share some similarities with scones, though they are fried instead of baked). My stepfather, who is of Welsh descent, often made these as a Sunday treat when we were kids. (A tradition, thankfully, that continues when I visit my parents.) They have a distinctive flavour that comes from nutmeg and currants. Basically, I wanted to use those flavours. Not just because I love them, but it’s just so fitting.

Afternoon Tea

He is Prince William of Wales, of course. And the couple will start their life as newlyweds in Anglesey, an island off the northwest coast of Wales.

I have to give credit where it’s due, so I will say that Nigella Lawson has changed the way I make scones. Her trick of grating frozen butter is just . . . perfection. I cannot recommend it enough. No matter what scone recipe I use these days, I always, always, always use this technique. Please, try it, I implore you.

This is based on her strawberry shortcake recipe, but has been adjusted.

Butter curls

Egg in Cream

Rolled and Cut

"Welsh Cake" Scones

Welsh Scones

  • 1½ cups flour
  • ½ teaspoon salt
  • 1 tablespoon baking powder
  • 1/4 cup sugar
  • 1/2 cup currants
  • 1/2 teaspoon nutmeg (I may go with a tad more next time)
  • 1/2 cup unsalted butter, frozen
  • 1 large egg
  • ½ cup half-and-half or whipping cream (you may need slightly more)
  • 2 tablespoons whipping cream
  • 2 tablespoons sugar (regular or natural cane sugar), optional

Preheat the oven to 425°F.

Mix together the flour, salt, baking powder, sugar, currants and nutmeg in a bowl. Grate the frozen butter into the dry ingredients and use your fingertips to lightly toss all together. Whisk the egg into the half-and-half cream and pour into the flour mixture a little at a time, using a fork to mix. (I often need another tablespoon or two; I chalk it up to that dry Calgary weather.)

Turn the dough out onto a lightly floured surface, then roll gently to about ¾-inch thick. Dip a cutter in flour and cut out as many scones as possible. (Small ones are cute, but sometimes you just want a large scone with lots of room for Devonshire cream and jam.) Work the scraps back together, re-roll and cut more. (Nigella suggests using a 3-inch/6½-cm round cutter to make 8; I used a smaller one and got about 14.) Place on a baking sheet, brush the tops with the 2 tablespoons whipping cream and sprinkle with the remaining sugar, if desired. I used natural cane sugar, which has larger grains.

Bake until golden. Between 10 and 15 minutes for larger scones. Cutting them smaller? Check earlier. Mine took about 9 minutes. Remove to wire rack to cool.

Eat with copious amounts of jam and Devonshire cream. Or butter and jam. Or just jam.

Continue Reading

Flourless Chocolate Cake

A milestone slipped past last week.

I took note of it, but said nothing because there was no point in celebrating unless there was cake.

Slice of Cake III

Actually, the original plan was to make a salted caramel tart but, once again, pastry bested me. One day, pastry. One day! Truth be told, it was flaky as all get out and tasted great, but uneven rolling led to some parts being more cooked than others and there were slumping and shrinking issues. My theory is that I’m actually not putting enough weight in when pre-baking and then taking the beans out too quickly. It worked much better with the second shell, which didn’t slump as much, but the unevenness of the baked pastry was a little more than this mostly-perfectionist could handle.

No matter, there was a back-up plan. Albeit one that would have to wait until post-milestone.

See, it’s my blog’s third birthday.

Three years.

Craziness.

I remember first broaching the idea with some friends after we had been out at the pub. We were outside, in the frigid cold, saying goodnight when I just sort of threw it out there. “I’m thinking of starting a food blog.”

And since then there have been many baking projects and, thankfully, many happy eaters. (A special thanks must go to the Civilized Sunday crew at the Herald who willingly — and, occassionally, expectantly — ate what I brought to work on the weekend shift. Cake for breakfast? Yeah, that was a good tradition.

There have been amazing times  and incredibly tough times.

So, I’m interested to see what the next year (and more) will bring.

For the last three years, I’ve kicked off the start of a new blogging year with cake. First, there was the inaugural Red Velvet Cake (wee bit embarrassed by the photos back then, but moving along), followed by a much-better version for my first blogiversary and then a triple layer chocolate cake last year.

This year is only slightly different. It’s still cake, but it’s a decadent and rich, truffle-like Flourless Chocolate Cake.

Slice of Cake II

At least in this case, unlike the pastry situation, slumping is expected.

This cake is deeply, darkly rich, ironically lightened by a topping of whipping and sour creams, beaten with icing sugar. (Or, if you think you have tons because there’s always about six bags in the cupboard where they appear to multiply like bunnies until the day you need some and then there isn’t any, a little bit of berry sugar will do the trick.) And it is Oh. So. Good.

I actually heard about it over Twitter from the gang at Real Simple one day. Made it a few days later for friends and was still thinking about it months later and how I really needed to make it again. That’s the sign of a good cake, I figure. (Original recipe here. Though I haven’t really made any changes.)

Baking like this is so lovely. I especially love adding the chopped chocolate to the hot butter-and-cream mixture and then stirring, stirring, stirring as it changes from a curdled-looking mass to silky smooth melted chocolate. And how it comes out of the oven all puffy and light looking before collapsing into a deeply dark slump of rich chocolate cake. The slight tang in the dollop of the whipped cream takes it to a whole new level.

I ate one slice and gave the rest away to friends. Now, as it nears bedtime, I wish I had saved myself just another sliver. Ah well. Reason to make it again soon.

This recipe is fantastic, but I would add a pinch or two of salt. I really feel that a tiny bit of salt in sweet things rounds them out. In this case, I didn’t quite have enough unsalted butter, so about half of the butter was salted. I think it worked perfectly and I may do this from now on. Only have unsalted? Just add a pinch or two of regular table salt.

Chopped Chocolate

Melted Chocolate

Batter in Pan

Puffed out of the oven

Slumped cake

Cake Slice I

Flourless Chocolate Cake

  • 1 cup unsalted butter, cut into pieces, plus more for the pan
  • 1/4 cup unsweetened cocoa powder, plus more for the pan
  • 1 1/4 cups whipping (heavy) cream, divided
  • 8 ounces bittersweet chocolate, chopped
  • 5 large eggs
  • 1 cup granulated sugar
  • 1/2 cup sour cream
  • 1/4 cup icing sugar, plus more for dusting
Heat oven to 350° F. Butter a 9-inch springform pan and dust with cocoa powder.
In a medium saucepan, heat the butter with ¼ cup of the whipping cream over medium-low heat until the butter is melted. Add the chocolate and stir until melted and smooth; remove from heat.
In a medium bowl, whisk together the eggs, granulated sugar, and cocoa powder; whisk in the chocolate mixture.
Transfer the batter to the prepared pan and bake until puffed and set, 35 to 40 minutes. Let cool in the pan for 1 hour. Run a knife around the edge of the cake before unmolding.
Using an electric mixer, beat the remaining 1 cup of whipping cream with the sour cream and icing sugar until soft peaks form. Dust the cake with confectioners’ sugar and serve with the whipped cream.
Continue Reading

Pecan Pie Bars

Going through my delicious bookmarks, I clicked a few links for things I wanted to make this week. And then I was mildly surprised to see that about half were from Family Kitchen on Babble.

Including this one for Pecan Pie Bars.

Pecan Pie Bars III

I’ve only had a few pecan pies in my time. Probably the most memorable was one I was served by the parents of a boy I was dating for a couple of weeks in England. He was the friend of my friend’s boyfriend, so he hung out with us while I was visiting her in the summer between Grade 11 and Grade 12. Saw the sights of England, drank a lot of Buck’s Fizz, spent a week in the Welsh town of Aberdovey and got a temporary boyfriend (who broke it off shortly after I returned to Vancouver, though not after sending me one or two care packages filled with mix tapes. He made me a friendship bracelet too. Ah, young romance.)

As part of our extremely short courtship, he invited me to his parents’ house for dinner. I don’t remember much about that meal, though I’m sure it was chock-full of awkwardness, except that his mother made pecan pie.

Anyway, I’ve never attempted making one (that damn fear of pastry), but when I saw this recipe for Pecan Pie Bars, I was totally smitten. Who doesn’t love a shortbread crust?

The trick with shortbread, I’ve learned, is to wait and let the butter get really gloppy before getting started. I let my butter sit out for 36 hours, I think, so it was perfect for this recipe. But before I got started, I finally took a moment to fix my KitchenAid mixer, which had too large a gap between the mixing implements and the bottom of the bowl, which meant I was constantly scraping down and around the base of the bowl to make sure everything was getting mixed together. Bless the Kitchn for their oh-so-helpful tutorial on how to make that adjustment. It took about three seconds and has greatly improved things.

Just after they went into the oven, I got a text from a friend saying she had unexpectedly come into two tickets to the Heritage Classic. Did I want to go? Although no one would call me a huge hockey fan, I do like to go to games when opportunities present themselves to me. And the thought of attending this game was kind of appealing, despite the negative temperatures.

Heritage Classic
The view from our seats as the sun set.

I thought the bars would be done in plenty of time, but they were still incredibly jiggly in the centre when I went to pull them out (albeit a bit early since my oven sometimes runs a bit hot). I gave them five more minutes. And then another five. And then another three. And then I had to leave. The centre was still not set, but I had high hopes it would solidify more as it cooled and then after a night in the fridge.

It was not to be.

When I cut into the bars the next day, the edges were fine, if not slightly (and deliciously) gooey. The centre fell completely apart in a liquid mess of pecans and sticky goo. Not going to lie, I ate part of it with a spoon, but that’s why there are only photos of edge pieces.

The sauce also bubbled up over the top of the crust in some places, sneaking under to the bottom of the pan. This was kind of a lovely accident, really because it baked into the crust.

I will definitely make these again, this time letting them bake a little bit more.

Pecans and crust

Pecans, crust and filling

Pecan Pie Bars

Pecan Pie Bars II

Find the original post on Babble here.

Pecan Pie Bars

for the crust:

  • 1 1/2 stick unsalted butter at room temperature
  • 1/2 cup sugar
  • 1/2 teaspoon salt
  • 1 1/2 cup unbleached flour

for the filling:

  • 1 cup corn syrup
  • 3/4 cup granulated sugar
  • 1/4 cup light brown sugar
  • 3 tablespoons melted butter
  • 3 eggs, lightly beaten
  • 1/2 teaspoon salt
  • 1 teaspoon pure vanilla extract
  • 2 tablespoons flour
  • 1/4 teaspoon cider vinegar
  • 2 cups pecans

Preheat oven to 325.

For the crust: In a medium bowl, cream together butter, sugar, and salt. Add in flour and mix until just incorporated. Press into the bottom and up the sides of an 8-inch square pan. The crust should come up at least two inches on the sides.

For the filling: In a large bowl, whisk together corn syrup, sugars, melted butter, eggs, salt, vanilla, flour, and vinegar. Spread pecans out in the bottom of the crust. Pour sugar mixture over the top. Bake for 40-50 minutes, or until the center is just set.

Cool completely and cut into squares.

Continue Reading

Coca-cola Cupcakes with Glaze

I’m not going to tell you how exactly how long this has been sitting in the vault. But I’ll give you a hint; I made these for someone who had given up drinking coca-cola for Lent. Yeah, I should probably join some sort of 12-step program for procrastinators.

But I digress . . . .

So, I thought it would be hilarious to make Coca-cola Cupcakes with Glaze for a friend. Only after I brought them to her did I realize that maybe her giving up Coke for Lent probably meant any consumption of the cola and that in my effort to be funny I might actually be undoing her commitment. She assured me that she had only given up drinking Coke and that she saw the humour in the cupcakes. I continued to feel guilt through much of Lent.

Coca-cola

Glazed Cupcakes II

I can’t actually remember how or when I stumbled on this recipe in Nigella Lawson’s How to Be a Domestic Goddess, but I had marked it with a Post-it note at some point and then I think I just connected the dots later. It’s only one of about 12 recipes that have little tags marking them as “to-make,” so I guess I should get going on that.

One of the things I love about Nigella’s recipes are some of them call for simply melting the butter instead of waiting it to come to room temperature. For someone like me, who sometimes wants to make things relatively on impulse (read: impatient), this means I still can. No waiting.

And it was kind of fun to make these. Not only because of the odd mix of ingredients but also because the reaction between the cocoa and Coke was a bit hypnotic. Giant bubbles, that pretty much sums it up.

Cocoa bubbles

I was a little freaked out by how thin the batter was, but they bake up beautifully. They’re so . . . light. I don’t know how else to describe them. They certainly don’t taste like Coke, but it’s still charming to say that’s the not-so-secret ingredient.

The original recipe is for a full cake and, although Nigella suggests you can make cupcakes, she doesn’t give a baking time. I guessed at 15 minutes and when I checked them they were perfectly done. However, she says it will make 12 cupcakes and it made 16 for me (An ongoing problem for me is I always end up with more cupcakes than the recipe specifies. Unsure if I make them smaller or if my muffin tin is smaller? Ok, “problem” isn’t really the right word.)

So, if your batter fits perfectly in 12, I’d bank on it taking a few more minutes.

Coca-cola cupcake batter

Coca-cola Cupcakes

Coca-cola Glaze

Glazed cupcakes

Coca-cola Cupcakes with Glaze

  • 200 g plain flour
  • 250 g sugar
  • 1/2 teaspoon baking soda
  • 1/4 teaspoon salt
  • 1 large egg
  • 125 mL buttermilk
  • 1 teaspoon vanilla
  • 125 g unsalted butter
  • 2 tablespoons cocoa powder
  • 175 mL Coca-cola

Preheat the oven to 350F.

In a large bowl, combine the flour, sugar, baking soda and salt. Beat the egg, buttermilk and vanilla in in a measuring jug. In a heavy-based saucepan, melt the butter, cocoa and Coca-cola, heating it gently. Pour into the dry ingredients, stir well with a wooden spoon, and then add the liquid ingredients from the jug, beating until it is well blended.

Pour into a muffin tin that has been greased or lined with papers and bake for 15 minutes (or more, see above) until a tester comes out clean.

Glaze

  • 225 g icing sugar
  • 2 tablespoons butter
  • 3 tablespoons Coca-cola
  • 1 tablespoon cocoa powder
  • 1/2 teaspoon vanilla

Sieve the icing sugar and set aside. In a heavy-based saucepan, combine the butter, Coca-Cola and cocoa and stir over a low heat until the butter has melted. Remove from the heat, add the vanilla, and spoon in the sieved icing sugar, beating as you do, until you’ve got a good, spreadable, but still runny, icing.

Pour over the cupcakes while they are still warm, and leave to cool.

Continue Reading