
It was a year ago that I embarked on a very special relationship. It has, at times, been hard work. And, other times, very rewarding.
Yes, that’s right. It’s my first blogiversary. Yay!
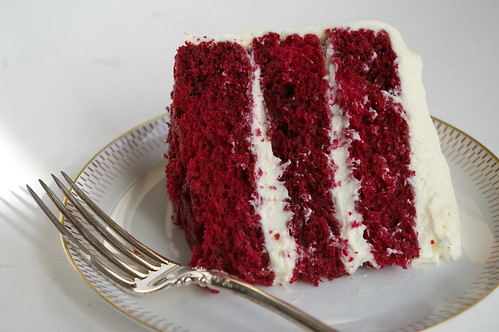
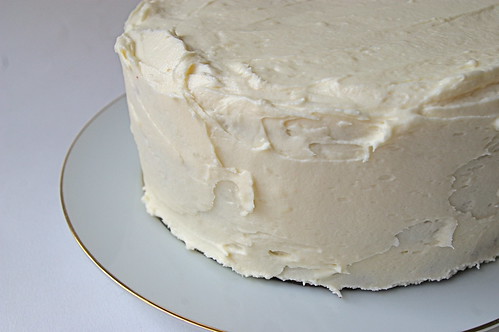
I felt the best way to celebrate was to take another stab at a Red Velvet Cake. The first attempt was, well, less than stellar. And my fascination with this southern U.S. specialty hasn’t waned in the intervening months. Plus, there is something so appealing about ritual, no?

There are about 800 million different red velvet cake recipes on the Internet.* (*Slight exaggeration possible.) And I have a collection of about seven that I’m slowly working my way through. One day I will find the perfect recipe. This one is certainly a step closer.
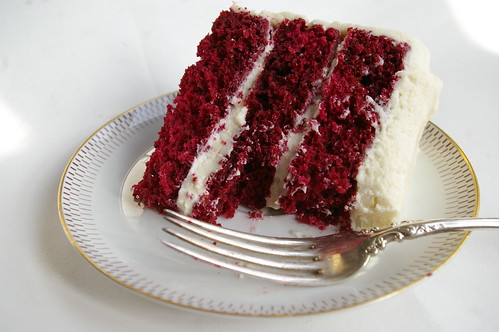
Take two was far and away better than my first attempt, though, troublingly, not perfect. Friends disagreed. Of course, when you layer that much cream cheese icing on anything it’s going to taste good.
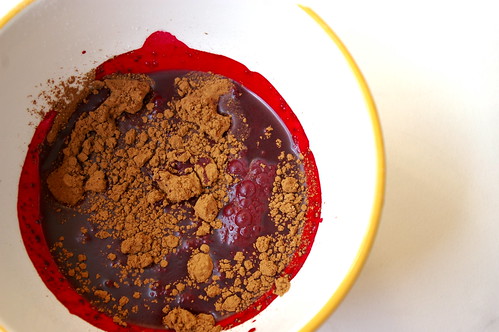
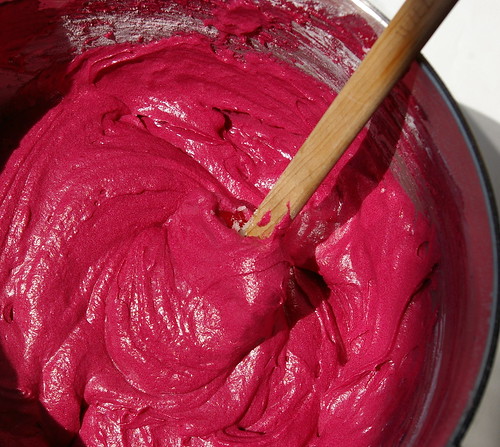
Even though I created a paste using the liquid food colouring and cocoa, I still got faint chocolate-coloured swirls in the batter. I suspect I was overly cautious when it came to mixing the paste in. But this time was definitely more red than the hot pink version from last year. Still, not quite the deep red I was looking for.
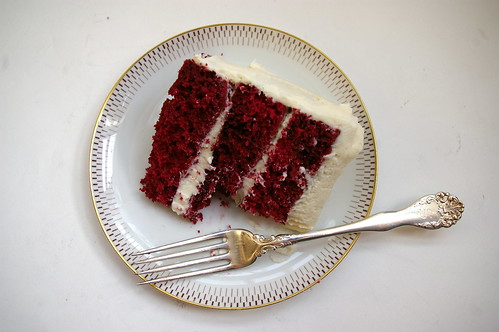
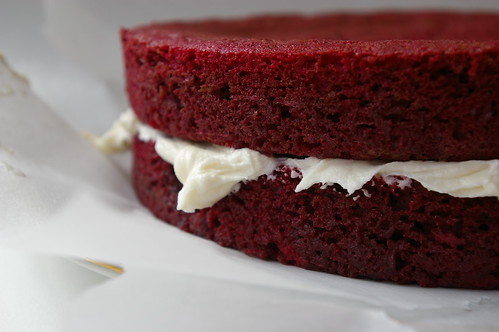
I also, decadently, decided to go with a triple layer cake instead of the usual double. (Anything to acquire new baking equipment; I am the worst when it comes to wanting new kitchen things. Single handedly fighting through the recession with baked goods and the stuff in which they are baked!)
And I ate the first piece with a lovely antique silver fork I bought a few days earlier during an antiquing trip with my friend Sherri Zickefoose to Nanton — a little town about an hour south of Calgary that has a handful of very fine shops. Because, when it is a celebration, even if you are alone, it should be done right.
The next day I took the rest of the cake into work. So, on a Sunday morning, three of us sat around listening to the police scanner eating cake with plastic forks at our desks, hours before noon. A rather decadent weekend shift, to be sure.


Red Velvet Cake
- 2 1/2 cups sifted cake flour
- 1 teaspoon baking powder
- 1 teaspoon salt
- 2 tablespoons unsweetened cocoa
- 2 oz. red food colouring (I used two bottles, which I think were 1 oz. each)
- 1/2 cup unsalted butter, room temperature
- 1 1/2 cups sugar
- 2 eggs, room temperature
- 1 teaspoon vanilla extract
- 1 cup buttermilk, room temperature
- 1 teaspoon white vinegar
- 1 teaspoon baking soda
Preheat oven to 350.
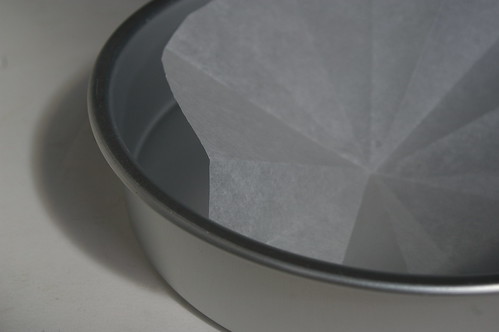
Butter and flour three 8″ cake pans. (Or, butter and line base with parchment.) Sift together cake flour, baking powder and salt in bowl, then set aside. In a small bowl, mix food colouring and cocoa powder until there are no lumps. Set aside.
In a large bowl, using a mixer, beat butter and sugar until light and fluffy. Beat in eggs one at a time, then add vanilla and cocoa-colouring mix. Add one-third of the flour mixture to the batter, beat well, then add half of the buttermilk. Beat in another third of the flour, then the rest of the buttermilk. End with the last third of the flour mix. Beat until just combined, making sure to scrape down the sides.
In a small bowl, mix vinegar and baking soda, then add straight to cake batter and stir well. Quickly divide batter between three pans and put in oven. Bake for 25 to 30 minutes. Cakes are baked when a toothpick inserted in the center comes out clean.
Let cakes cool in their pans on a wire rack for 10 minutes, then remove and let them cool completely. Frost with cream cheese icing.
Cream Cheese Frosting
- 16 oz. cream cheese (2 packages), softened
- 1/2 cup unsalted butter, room temperature
- 1 teaspoon vanilla extract
- 2 1/2 cups icing sugar, sifted
- pinch of salt
Using a mixer, blend cream cheese and butter until smooth. Blend in salt, vanilla and then powdered sugar. Beat until light and fluffy and then ice cake.
27 Comments
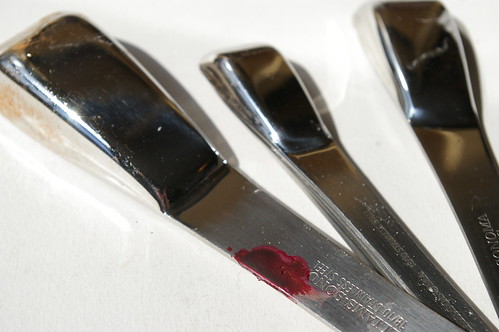
Happy Blogiversary! Your photography on this is amazing! (I especially like the measuring spoons shot…)
I don’t think you have a thing to worry about, that cake looks scrumptious! Great pics too! happy Blogiversary to you!
FELICIDADES! I just fell in love with your blog and the beautiful photography. And I love red velvet cakes too – I tried the cupcake version last week… Have a look:)
http://www.ilovemuffins.es/blog
all the best from Spain
Jenny*
Congratulations! You are 1! And what a goegeous, apt post :-)
I love your blog. Just found it on Foodgawker. What beautiful photos! The cake looks absolutely delicious. Congrats on nailing it and on your one year anniversary!
very good your blog i like
7 recipes to go through! I hope you find the perfect one because that’s the best feeling. The cake looks so good. Happy blogiversary!
FELICIDADES! I fell in love with your blog and beautiful photography. And I love red velvet cakes too – I tried the cupcake version last week. Have a look@my blog:)
All the best from Spain
Jenny*
I love red velvet cake (and cupcakes) but haven’t ventured into making my own … I fear that I’d eat it all in one sitting (not too far from the truth). Your cake looks just perfect!
Yay yay yay! Happy blog birthday! Mine is tomorrow! This cake looks deeeeeelicious!
(seen on TasteSpotting)
I would’ve sat and listened to the police scanner with you guys if it meant getting a piece of that! Still jealous of your beeyewteeful photos. :-)
Beautiful cake! Happy 1st Blogoversary! Here’s to many more!
you make sundays beautiful
Happy First Blogiversary! What a beautiful post to celebrate with. I particularly love the shot with the empty bottle of red coloring. Beautiful.
Oooh yum! Found you via Tastespotting. Happy blogiversary! Mine’s coming up pretty soon, I think you’ve inspired me to bake something fabulous for the occasion :)
Happy Blog Anniversary!! :) We love Red Velvet here in the South!! :)
Congrats on your first year in the blogisphere! You’ve always had a way with words and now you’re proving your prowess in the pantry (and with photography!)
I think I might have to move to Calgary so I can beg for leftovers every once in a while!
Hello, I’m sorry to tell you but this whole post has been lifted and posted on another. Perhaps you know and are okay about it but thought you should know in case you didn’t. Sorry.
Your cake looks great and I love your photos! Happy Blogiverary!
~ingrid
For those that really liked this post, try visiting the original at: http://patentandthepantry.wordpress.com/
If this was copied on purpose, shame on you. If it was an accident, then make it right by pointing to the original and making an apology.
Happy 1 year!! Your cake looks phenomenal. I still don’t get the appeal of the red food colouring though! I’d prefer more chocolate and less red dye. But yours is the best I’ve seen in ages! (Esp. with cream cheese frosting – yum!)
Hi! Happy “blogivesary!” Have you ever thought of using gel coloring? I used it to make the now-famous tie-dye cake, and it’s WONDERFUL! The company I bought it from even has a deep red color “burgundy” and another called “maroon.” (Though on the monitor I cannot honestly tell the difference between the two colors on their color chart.) Just do a websearch for “gel food colors” and I am sure you will find someone who sells it. I got small (.75 ounces) bottles for $1.69 each at…umm, bakerstools.com, I think, and I have made 2 tie-dye cakes so far from them, using a teaspoon per color, totaling 6 ounces, and the cakes were as vibrant as a brand-new tie-dye shirt! I think the next size up is 4.5 ounces for like $5, 9 ounces for about $5.50 and then 13 ounces for about $9.50; after that it’s by the gallon for, I dunno, about…well, lots and lots more than I wanna spend. *lol*
Great looking cake, great photos too. Some day I will try to do this… **
Did you buy the red food colouring “without taste”? There actually is a difference and it may be what is affecting your taste.
Looks very yummy, nice crumb.
And congrats on a year!
Thanks Kim and Cheryl for those tips.
I did try gel colours the first time around but think I had no idea what I was doing. Will definitely keep that in mind.
Also, I had no idea there was such a thing as “no taste” food colouring. Will snatch some up if I come across it.
ummm looks delicious. I’ll have to try it.